| Skip Navigation Links | |
| Exit Print View | |

|
Sun Blade X3-2B (formerly Sun Blade X6270 M3) Installation Guide |
| Skip Navigation Links | |
| Exit Print View | |

|
Sun Blade X3-2B (formerly Sun Blade X6270 M3) Installation Guide |
Sun Blade X3-2B Model Name Change
Getting the Latest Firmware and Software
About the Installation Procedure
About Server Features and Components
Server Module Front Panel and Indicators
Preparing to Install the Server Module
Attach the 3-Cable Dongle to the Server Module
Attach a VGA Monitor to the Dongle Video Connector
Attach a Keyboard and Mouse to the Dongle or Server Module
Attach a Serial Device to the Dongle
Determining the Oracle ILOM SP IP Address
Logging In to Server Module SP Oracle ILOM
Accessing the Server Module Console Through Oracle ILOM
Setting Up Software and Firmware
Accessing Oracle System Assistant
Set Up Software and Firmware (Oracle System Assistant)
Setting Up an Operating System and Drivers
Preparing the Storage Drives to Install an Operating System
Prepare the Storage Drives (Oracle System Assistant)
Make a Virtual Drive Bootable (LSI WebBIOS Utility)
Configuring the Preinstalled Oracle Solaris OS
Oracle Solaris OS Documentation
Configure Preinstalled Oracle Solaris 11
Configuring Preinstalled Oracle VM Software
Oracle VM Server Configuration Worksheet
Configure the Preinstalled Oracle VM Server
Getting Started With Oracle VM
Configuring the Preinstalled Oracle Linux OS
Oracle Linux Configuration Worksheet
Configure the Preinstalled Oracle Linux OS
Register and Update Your Oracle Linux OS
Troubleshoot Installation Issues
Powering Off the Server for Graceful Shutdown
Powering Off the Server for Immediate Shutdown
Troubleshooting Server Power States
Technical Support Information Worksheet
Locating the System Serial Number
Getting Server Firmware and Software
Firmware and Software Access Options
Available Software Release Packages
Before You Begin
Perform all steps and fulfill all requirements in Preparing to Install the Server Module.
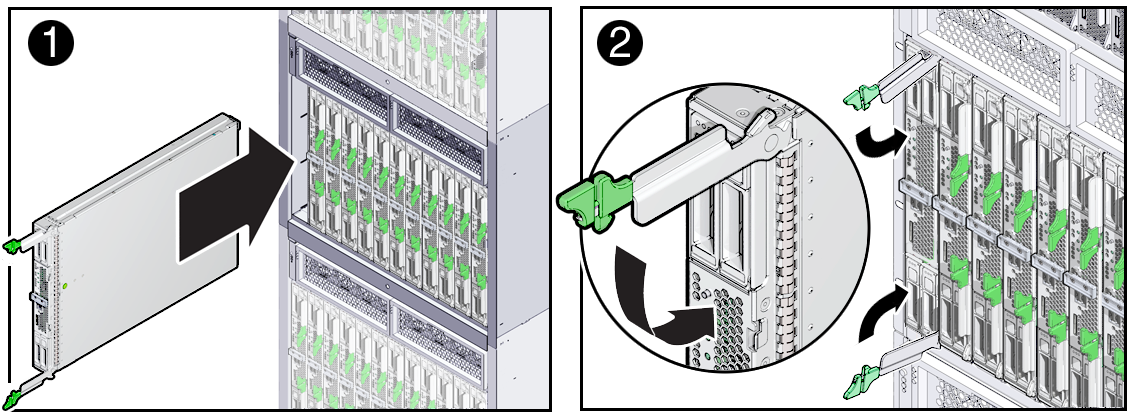
Pinch together the ends of the ejector arm handle to unlock it, rotate the lever out to the open position, and eject the filler panel.
Keep the filler panel for later use.
See Rear Panel Features for the location of the rear cover.
 | Caution - Drop hazard - Server modules can weigh up to 22 lbs (10 kg). Use two hands to install or remove the server module from the chassis. |
The server module is now locked in the chassis.

After you install a server module into a powered-on chassis, the server module SP automatically boots using standby power from the chassis power supplies. The server module front panel indicators illuminate as follows:
After you plug in the server module, all four server module LEDs blink three times. This indicates that the blade has been powered on and the SP boot process has begun.
The green OK/Power LED blinks rapidly. This indicates that the SP is booting (0.125 seconds on, 0.125 seconds off).
After the SP completes its boot cycle, the green OK/Power LED blinks briefly once every 3 seconds indicating that the server module is in standby power mode.
Tip - For front panel LED information, see Server Module Front Panel and Indicators. For additional information about server module indicators, server module removal, power procedures, and front panel cable connections, refer to the Sun Blade X3-2B (formerly Sun Blade X6270 M3) Service Manual.
Next Steps