| Skip Navigation Links | |
| Exit Print View | |

|
Using the Oracle Business Process Manager Worklist Manager for User Activities Java CAPS Documentation |
| Skip Navigation Links | |
| Exit Print View | |

|
Using the Oracle Business Process Manager Worklist Manager for User Activities Java CAPS Documentation |
Using the Oracle Business Process Manager Worklist Manager for User Activities
Creating the Worklist Manager Database
To Create the Worklist Manager Database
Oracle Directory Server Enterprise Edition
Configuring Secure Sockets Layer
LDAP and UNIX Java CAPS Environments
Creating a Web Service Definition
Creating the Business Processes
Associating the Partner with Activities
Creating the Main Business Process
Configuring User Activities Inside While Loops
Creating a Task Assignment Expression
Defining Task Assignment Conditions
Assigning Users to the Activity
Exposing User Activity Values to Visual Page Designer Pages
Define Email Notifications for Tasks
Configuring the WorkList Manager
Creating the Worklist Manager External System
Defining WLM Configuration Properties
Customizing Flex Attribute Labels
Defining email Notification Properties
Configuring an OpenLDAP Connection
Configuring an Oracle Internet Directory Connection
Configuring an Oracle Directory Server Enterprise Edition Connection
The web-based Worklist Manager allows you to view and manage your list of tasks. The list contains your own tasks, as well as the tasks of any subordinates assigned to you. You can manage your tasks and the tasks of your subordinates, or you can escalate a task assigned to you.
From the Worklist Manager, you can manage your tasks and the tasks of your reports. The checkout and checkin features provide version control, and are necessary to ensure that more than one person is not working on the same task. You must check out a task before you can make any changes.
http://hostname:port/wlm_application_name
where
hostname is the system on which the Repository is running.
port is the port number to access the Repository. This is the HTTP property (the default value is 18001).
wlm_application_name is the configurable name of the Worklist Manager application. This property is defined in the WLMConnector External System Configuration settings of the Worklist Manager External System properties.
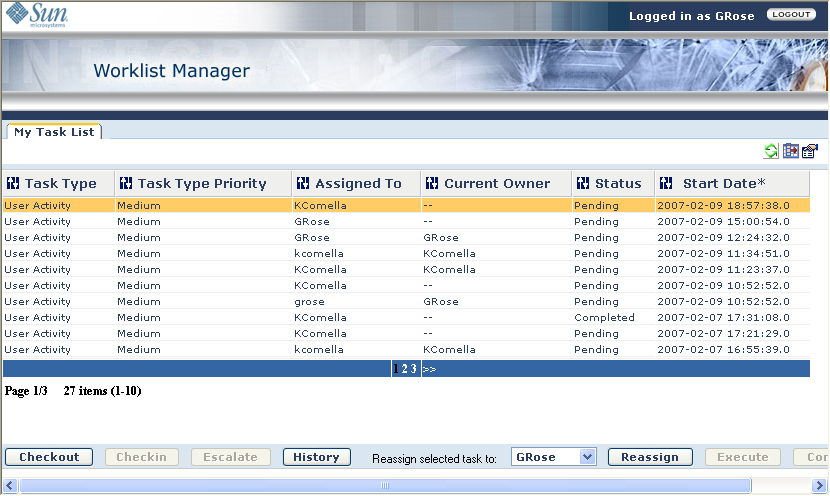
The Worklist Manager appears, as shown in Figure 25.
Figure 25 Worklist Manager Task List

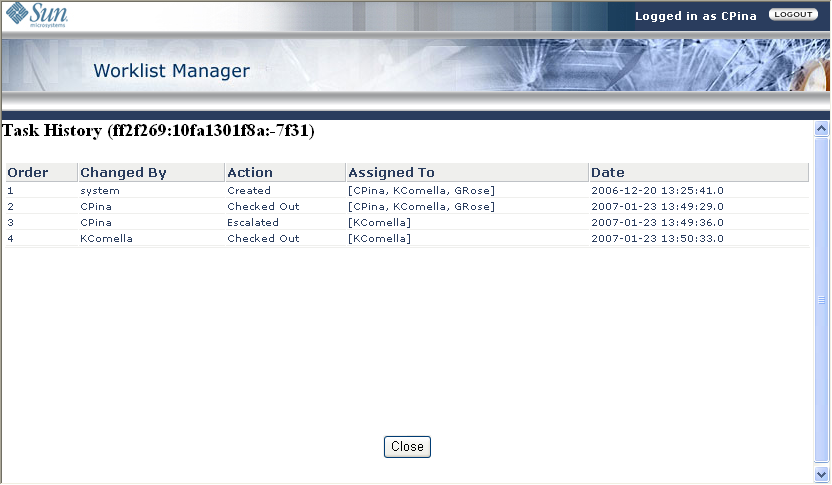
The Worklist Manager provides a complete history of changes made to each task. You can view the changes from the Worklist Manager.
The Task History page appears, as shown in Figure 26.
Figure 26 Worklist Manager History Page

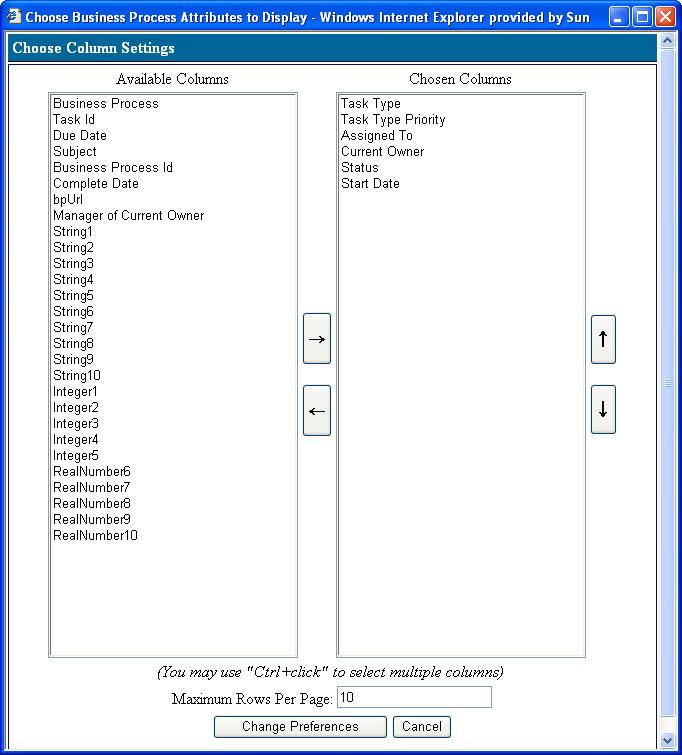
You can specify the columns that appears on the main page of the Worklist Manager, and you can specify the order in which they appear. Columns include standard Worklist Manager fields along with any flex attributes you defined.
The Choose Column Settings page appears, as shown in Figure 27.
Figure 27 Worklist Manager: Choose Column Settings

If you mapped values to any of the flex attributes in the user activity, you can view the values for those attributes in the Worklist Manager.