Managing Websheet Applications
Use the options on the Administration menu to view the Websheet Dashboard, monitor Websheet activity, edit application properties, and control Websheet access.
Viewing the Websheet Dashboard
The Websheet dashboard displays the following details about the current Websheet application including recent changes, top users, and top pages.
To view the Websheet Dashboard:
-
Log in to and run the Websheet. See "Running a Websheet".
-
From the Administration menu, select Dashboard.
The Dashboard appears and is divided into the following sections:
-
Application Details
-
Recent Changes
-
Top Users
-
Top Pages
-
-
To edit the time frame, select a new value from the TimeFrame list.
-
Click Reset to return to the default setting.
Monitoring Websheet Activity
Use the Monitor Activity page to analyze usage, performance, and popularity of pages and content.
To access the Monitor Activity page:
-
Log in to and run the Websheet. See "Running a Websheet".
-
From the Administration menu, select Monitor Activity.
The Monitor Activity page appears and is divided into the following sections:
-
Activity
-
Page Views
-
Top Pages
-
Top Data Grids
-
Top Reports
-
Top Users
-
-
Annotations
-
Top Files
-
Top Notes
-
Top Tags
-
Each report displays as an interactive report. To learn more about interactive reports and using the Actions menu, see "Customizing Interactive Reports" and "About the Actions Menu".
-
Editing Websheet Application Properties
You can access the Application Properties page from inside or outside a running Websheet. Use the Application Properties page to control general application defaults and behavior. The home page identifies the Home page users land on when running the Websheet. The name of the application is displayed within the breadcrumb.
Accessing Application Properties from a Running Websheet
To access the Application Properties page:
-
Log in to and run the Websheet. See "Running a Websheet".
-
From the Administration menu, select Application Properties.
The Application Properties appears.
-
To view a section, click the greater than sign (>) to the left of the section title.
-
To learn more about a specific attribute, see item Help and "About Websheet Application Properties".
Accessing Application Properties from Application Builder
To access the Application Properties page:
-
On the Workspace home page, click the Application Builder icon.
-
Select the Websheet application.
The Run or Edit Application page appears.
-
Click Edit Properties.
The Application Properties appears. See "About Websheet Application Properties".
-
To learn more about a specific attribute, see item Help.
About Websheet Application Properties
This section describes the attributes on the Websheet Application Properties page.
Application
Use the Application section to control general application properties. Table 5-1 describes Application attributes.
Table 5-1 Application Attributes
| Attribute | Descriptions |
|---|---|
|
Identifies the name of the application. This name displays within the breadcrumb when the application is running. |
|
|
Identifies the status of the application. Available options include: Available or Unavailable. |
|
|
Select the home page for this Websheet. This is the first page a user sees when running the Websheet. |
|
|
Determines the date format to be used in the application. This date format is used to alter the |
|
|
Identifies the default language of the application. Users will be able to change their language preference from within the application. This language list is determined by the translated versions of Application Express which are installed. |
|
|
Identifies the default territory of the application, which controls attributes like date language and numeric characters. Users will be able to change their territory preference from within the application. |
|
|
Controls the display of the Reset Password link on the Login page. This link enables users to reset their passwords. This option works only if the application is using Application Express Account authentication. |
Details
Use the Details section to edit the application description and login message. Table 5-2 describes Details attributes.
Logo
Use the Logo section to create a logo for this Websheet application. This logo displays at the top of the Websheet. Table 5-3 describes Logo attributes.
Authentication
Use the Authentication section to select an authentication scheme for this Websheet. Table 5-4 describes Authentication attributes.
| Attribute | Descriptions |
|---|---|
|
Select the way users of the application are authenticated. Options include:
|
|
|
Specify a URL to become this application's LOGOUT URL attribute. This attribute is referenced in logout links as follows:
If this application uses built-in session verification, you may use |
Authorization
Use the Authorization section to control who can log in to a Websheet application. Table 5-5 describes Application attributes.
| Attribute | Descriptions |
|---|---|
|
If authentication is Application Express Account, choose whether authorization is determined by the role in the Application Express workspace, or if authorization is determined by the access control list. For all authentication types other than Application Express Account, authorization is always determined by the access control List. |
|
|
Options include:
|
Click Access Control Roles to learn more about roles and their privileges. Click Edit Access Control List to link to the Access Control List page. To learn more, see "Controlling Websheet Access".
SQL and PL/SQL
Use the SQL and PL/SQL section to determine if users can use SQL and PL/SQL in the current Websheet. By default, this capability is disabled. To change the default setting, click Edit SQL and PL/SQL Access and Suggested Objects.
If enabled, users can use SQL in reports and SQL Tags as well as include PL/SQL in page sections. Click Add Object to link to the Suggestion Objects page. Users can write custom reports as well as use SQL tags on database objects within the schema associated with the current workspace. Identifying a database table or view as a Suggested Object makes it easier to write SQL by exposing the table and view columns in the help page.
Tip:
instance administrators can control the ability to use SQL and PL/SQL for an entire instance. To learn more, see "Enabling and Disabling SQL Access in Websheets" in Oracle Application Express Administration Guide.Controlling Websheet Access
This section describes how to control access to a Websheet application.
How Websheet Access Works
An administrator controls who can log in to a Websheet application by specifying one of the following authentication mechanisms:
-
Public access (no authentication)
-
Oracle Application Express Account
-
Single Sign-On Verification
-
LDAP Credentials Verification
-
Custom
If authentication is defined as Custom, an access control list manages the privileges of this application's users.
If authentication is Oracle Application Express Account, you must specify whether authorization is determined by the user role defined in the Application Express workspace, or if authorization is determined by the access control list. For all authentication types other than Oracle Application Express Accounts, authorization is always determined by the access control list.
Once a user logs in to an application, a user's assigned role determines access. User assigned roles include:
-
Reader - May view, but not edit content.
-
Contributor - May view and edit content.
-
Administrator - May view and edit content as well as edit Application Properties and manage the Access Control List.
To learn more about user roles and privileges, click Help and then select Access Control. See "About the Help Link".
Specifying the Access Control List Type
To use an access control list, you must edit the Application Properties and define the Access Control List Type as Custom:
-
On the Workspace home page, click the Application Builder icon.
-
Select the Websheet application.
The Run or Edit Application page appears.
-
Click Edit Properties.
The Application Properties appears.
-
Scroll down to Authorization.
-
From Access Control List Type, select Custom.
-
Click Apply Changes.
Creating Access Control List Entries
To create access control list entries:
-
Log in to and run the Websheet. See "Running a Websheet".
-
From the Administration menu, select Access Control.
-
Click Create Entry.
The Entry Details page appears.
-
On the Entry Details page:
-
Username - Enter the username of the user for whom you wish to control access.
-
Privilege - Identify the user's privileges:
-
Reader - May view, but not edit content.
-
Contributor - May view and edit content.
-
Administrator - May view and edit content as well as edit Application Properties and manage the Access Control List.
-
-
-
Click either Create or Create and Create Another.
Changing Your Websheet Password
To change your Websheet password:
-
Log in to and run the Websheet. See "Running a Websheet".
-
From the Administration menu, select Change My Password.
The Change Password page appears.
-
Follow the on-screen instructions and click Change Password.
Emailing a Websheet Page
To email a Websheet page:
-
Log in to and run the Websheet. See "Running a Websheet".
-
Locate the page you wish to email.
-
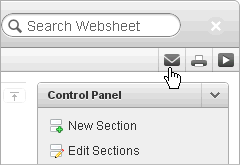
Click the Email Page icon above the Control Panel.

Description of the illustration websheet_mail_pg.gif
-
On the Email Page:
-
To - Enter the target email address.
-
Subject - Enter a description of this email.
-
Body - Enter the email content you wish to include along with the Websheet page link.
-
-
Click Send.
An email link to the currently selected page will automatically be included in your email message.
See Also:
"Configuring Email" in Oracle Application Express Administration GuidePrinting a Websheet Page
To print e Websheet in printer-friendly mode:
-
Log in to and run the Websheet. See "Running a Websheet".
-
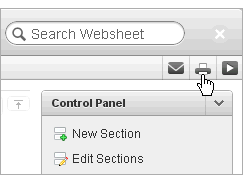
Click the Print icon above the Control Panel.

Description of the illustration websheet_print.gif
The page displays in printer-friendly mode.