 Understanding Menus
This chapter provides an overview of menus and discusses how to:
Define custom component menus.
Work with menu definitions.
Define pop-up menus.
Understanding Menus
A menu is a logical grouping of components for assigning security to your system. You create a menu as an organizer for components. After you save a menu, use the Registration Wizard to assign components and security.
You can create two types of menus using PeopleSoft Application Designer:
Custom (component) menus provide an internal reference for components and pages. They are grouped logically into menu groups to assign security. They are not used for navigational purposes.
Pop-up menus appear when a user clicks a pop-up button.
See Also
Understanding PeopleSoft Security
Defining Custom Component MenusThis section discusses how to:
Create custom component menus.
Set menu item properties.
Set general properties.
(Optional) Set use properties.
 Creating Custom Component Menus
After you create records, pages, and components, register your new component using the Registration Wizard. To do so you must first create a menu definition if one does not already exist. This definition enables you to add the component to the new menu (for navigational purposes) and register it in the portal.
To create a new menu definition:
From the PeopleSoft Application Designer toolbar, select File, New..
Select Menu from the list.
Click OK.
Select the Standard option for the menu type.
Click OK.
The thick rectangle surrounding the bar item indicates that this element in the menu definition is currently selected. The empty, dashed rectangle is a placeholder for a new bar item label.
Assign a bar name and label.
You can define multiple menu bars for the menu. Double-click the rectangle to display the Bar Item Properties dialog box.
Enter the bar item name and label.
The most commonly used bar item name is Use..
Click OK to accept the settings in the Bar Item Properties dialog box.
The new label appears in the menu, and the empty rectangle appears in a new location.
Set the menu item properties.
When creating a menu simply as a placeholder for components for the Registration Wizard, you need only add a separator bar to save the menu.
Set the menu properties.
Save the menu definition.
See Also
Setting Menu Item Properties
Set the menu item properties to define your menu item. When creating a new menu definition to be used in the Registration Wizard, select Separator from the Type area of the Menu Item Properties dialog box to save the menu definition for use in the Registration Wizard. If you decide not to use the Registration Wizard, complete the following procedure, and set the general and use properties for the menu definition.
To define a menu item:
In a standard menu definition, double-click a menu item to access its properties.
To create a new menu item, double-click the empty rectangle at the bottom of the menu.
Specify the menu item.
|
Specify the system name for the menu or menu item. Menu and menu item names must conform to a specific set of naming conventions for the system to recognize them: all uppercase letters, no embedded spaces, and no special characters (for example, %, ^, &, *, $, #). |
|
|
Specify the text label to appear on the menu. The label appears in the Home bar item or in a cascade menu of a menu group. You can place an ampersand in the text to assign a keyboard shortcut for the menu. |
|
Component |
Select for a standard component menu item. |
|
PeopleCode menu items trigger PeopleCode programs. The program runs in a component buffer context, which allows PeopleCode to access values in the component buffer. |
|
|
Separator |
Select this option when creating a menu for the Registration Wizard. Selecting this option disables all other fields in the Menu Item Properties dialog box. |
Click the Select button.
Select an enabling component in the Open dialog box.
At runtime, standard PeopleCode menu items are always visible in a menu, but they are active (enabled) only when their enabling components are open.
Save the menu item if it has not yet been saved.
In the menu definition, right-click the menu item, and then select View PeopleCode.
The PeopleCode Editor appears.
Add a PeopleCode program in the ItemSelected event of the menu item.
After you enter a program, save the PeopleCode program and close the PeopleCode editor.
(Optional) Override the component search record.
You might want to reuse the same component multiple times with different search records. You can accomplish this by overriding the component search record at runtime when the component is opened from a menu item without creating separate copies of the component. The component override is temporary and occurs only when the component is opened from the menu item in which the override is set. It does not change the component definition.
Select the Override check box, and then select an override search record from the Override prompt field. The override search record must be a valid search record for the component; that is, it must have all of the search key fields that are at level 0 of the component pages.
Click OK to accept the settings.
Save the menu definition.
Setting General Properties
When you create or make changes to a menu, you should document the changes for future reference. You can do this on the General tab of the Menu Properties dialog box.
|
Enter a descriptive name for the menu. |
|
|
Comments |
Add a description of the menu or any other useful information. |
|
View a list of applications with which this menu is used. This list is helpful to identify the applications with which the menu is associated during application development. |
|
|
View the date and time of the last modification and the name of the user who made the modification. |
(Optional) Setting Use PropertiesSetting properties on the Use tab of Menu Properties is optional. Any settings you assign are stored internally only.
Working With Menu Definitions
You should not modify PeopleTools or other application-specific menus; instead, create your own custom menus.
This section discusses how to:
Add components to a menu.
Rename menu definitions.
Copy menu definitions.
Delete menu items.
Print menu definitions.
Set up menu security.
Import menu groups into portals.
Adding Components to a Menu
Use the Registration Wizard to add components to a menu.
See Using the Registration Wizard.
Renaming Menu Definitions
When you change the name of a menu definition, you do not change the name of the application window that appears when you select the new menu from the PeopleSoft application.
To rename a menu definition:
Close all open definitions in the definition workspace.
Select File, Rename.
The Rename Definition dialog box appears.
Select Menu from the Definition Type drop-down list box.
Click Rename.
From the list of available menus, double-click the menu that you want to rename.
Type the new name over the name that is selected on the menu definition.
Click Rename.
Note. If you rename a menu definition, be sure to rename the corresponding registry entries manually.
See Also
Copying Menu Definitions
Creating a copy of a menu definition is different from renaming a definition. The Save As command creates a copy of the definition with a new name while keeping the old menu definition unchanged.
To copy a menu definition:
Open the menu definition that you want to copy.
Select File, Save As.
The Save As dialog box appears.
Type a new name for the copy of the menu definition.
Click OK.
You are prompted to save a copy of any PeopleCode that you have associated with the menu definition.
Deleting Menu Items
Delete an item to remove it permanently from a menu definition. To help prevent accidental deletions, you can delete only one entry at a time.
To delete a menu item:
Select the menu item that you want to delete.
Select Edit, Clear.
If you attempt to delete a menu item that is linked to PeopleCode, the system issues a warning.
If you proceed to delete it, the linked PeopleCode menu items are also deleted.
If you delete an item by mistake, before you perform any additional edits or saves, select Edit, Undo to restore the menu item.
Note. When deleting menu items, remember to delete any corresponding registry entries.
Printing Menu Definitions
In addition to printing a menu definition from the definition workspace, you can obtain a formatted report of all menu definitions by printing the PeopleTools Menu Listing cross-reference report (XRFMENU). This report lists application windows in alphabetical order, and details all menus in each window and all page definitions in each menu. It also includes the associated search record definition name and detail page definition name.
To print a menu definition:
Open the menu definition that you want to print so that it appears in the definition workspace as the current definition.
Select File, Print.
The standard Windows Print dialog box appears.
Setting Up Menu Security
Whenever you make a change or add items to an existing custom menu definition, you might need to adjust your security settings. When you add a new menu to a security profile, that menu is available the next time that you sign in to the system. Use the Registration Wizard to assign security.
See Also
Understanding PeopleSoft Security
Importing Menu Groups Into Portals
The menu import process creates content references for all components and pages that belong to a menu group. Use this process only to migrate custom menus.
See Also
Importing Menu Groups into the Portal Registry
Defining Pop-up Menus
This section provides an overview of pop-up menus and discusses how to:
Create pop-up menus.
Define transfer menu items.
Understanding Pop-up MenusPop-up menus define the transition to another page—either a system-defined page containing a set of standard commands or a pop-up menu page that was created and associated with the pop-up button by an application developer.
You can also use pop-up menus to run a PeopleCode program. PeopleCode in pop-up menus does not share the same limitations as PeopleCode in standard menus, so pop-up transition menus provide an effective alternative to using command push buttons on pages. Pop-up menu PeopleCode programs can be used for any number of purposes, for example:
To perform a modal transfer.
To recalculate a field value.
To trigger a PeopleSoft Workflow business event.
Behavior of Pop-up Menus in Pages
These standard icons appear on the page at runtime when a pop-up menu is defined for a page field:
|
|
When a user clicks the pop-up icon (PT_POPUP) on a page, a screen appears with a list of menu items from which to select. |
|
|
This pop-up icon (PT_POPUP_SKIP) appears if a pop-up menu has only one menu item. When a user clicks this icon, the target transaction page appears immediately, skipping an intermediate page containing a list with one menu item. |
For example, the Annual Benefits Base Rate field on the following page contains a pop-up icon, which opens the Display in Other Currency page.
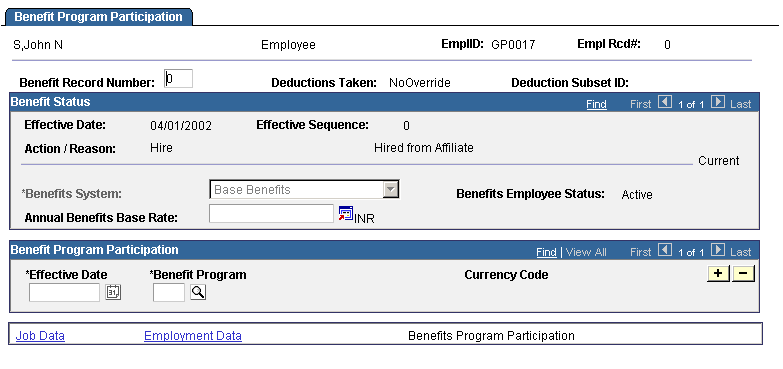
Pop-up button on a page
This type of transfer to another component is called a definitional transfer to distinguish it from transfers that are made using PeopleCode programs. Definitional transfers are always nonmodal. To run a modal transfer, you must use PeopleCode.
Creating Pop-up Menus
This section discusses how to:
Create new pop-up menus.
Associate pop-up menus with page fields.
Creating New Pop-up Menus
To create a new pop-up menu:
Select File, New.
The New dialog box appears.
Select Menu.
Click OK.
The New Menu dialog box appears.
Select the Popup option for the menu type.
Click OK.
A new pop-up menu definition appears.
Define the menu items for the pop-up menu.
Set the menu properties:
Add a description and comments about your pop-up menu.
On the Use tab, type the menu label that you want to appear for that pop-up.
Save the pop-up menu definition.
To provide users with access to the pop-up menu, associate it with a page field.
Associating Pop-up Menus With Page Fields
To associate a pop-up menu with a page field:
Open the page definition that contains the page field to which you want to associate the pop-up menu.
Right-click the page field and select Page Field Properties.
When the properties dialog box for that field appears, select the Use tab.
In the Popup Menu group box, select from the available pop-up menus in the drop-down list box.
Click OK.
Save the page definition.
See Also
Defining Transfer Menu Items
Transfer menu items, which you create only in pop-up menus, enable you to specify a menu, component, and page to which the user is taken when the transfer menu item is selected. The following procedure describes how to create a new transfer menu item or redefine an existing menu item as a transfer menu item.
To define a transfer menu item:
In a pop-up menu definition, double-click a menu item to access its properties.
To create a menu item, double-click the empty rectangle at the bottom of the menu. The Menu Item Properties dialog box for pop-up menus appears.
If this is a new menu item, enter a menu item name and label text in the Menu Item fields.
You can create a shortcut key for the menu item by placing an ampersand in the label.
Set the transfer properties.
Click the Transfer button to make this a transfer menu item.
Click the Define Transfer button to display the Transfer Properties dialog box.
This dialog box enables you to define the properties of a definitional transfer that is made from a pop-up menu item. The component from which you are transferring is the originating component. The component to which you are transferring is the destination component.
Specify the following:
|
Portal |
Select the navigation registry, such as employee portal. |
|
Node |
Select the PeopleSoft database to which you want the transfer menu to point. Local is the default. Valid values include all of the values in the MSGNODENAME column of the PSMSGNODEDEFN table. If you select a node other than Local, the system deselects the Use data from current page in search dialog check box. |
|
Menu |
Select the name of the menu containing the destination component. |
|
Component |
Select the name of the destination component. |
|
Market |
Select the market of the destination component. |
|
Component Item |
Select the name of the page to display at the front of the destination component. |
|
Select an action mode (Update/Display, Update/Display All, Correction, or Data Entry) to constrain the user profile to a specific action mode at the time of the transfer. The action modes that are available in the prompt list depend on which modes are specified as valid in the destination component definition. Select Prompt to enable the user profile to select an available action mode at the time of the transfer. The action modes that the user profile can select depend on which action modes are defined as valid in the destination component definition and to which action modes the user profile is granted access in Maintain Security. |
Set the transfer type.
|
Re-use current window |
Select to transfer to the component in the same window in which the transfer is initiated. |
|
Use new window (minimize current window) |
Select to minimize the current window and open the destination component in a separate window. |
Specify whether to supply search key values from the originating component.
|
Use data from current page in search dialog |
Select to use the values from the originating component search keys in the search dialog box of the destination component. If these values allow the system to select a unique row from the search record, the search dialog box is bypassed and the destination component opens immediately. Deselect this check box if you want the user to type the search key values into the search dialog box. |
Click OK to accept the Transfer Properties dialog box settings.
Click OK to accept the Menu Item Properties dialog box settings.
Save the menu definition.