4 Complete the Management Console Setup Wizard
This chapter discusses:
4.1 Access the Management Console
After the initial installation of the Management Console, an administrator can sign on to the Management Console using the jde_admin user and password specified during the installation. Access the Management Console using this URL:
http://servername:port/manage
where server_name is the name of the Server Manager machine on which the Management Console is installed, and
where port is the port that you specified for the Management Console when you ran the Management Console installer.
For example:
http://denlcmwn5.mlab.jdedwards.com:7000/manage/
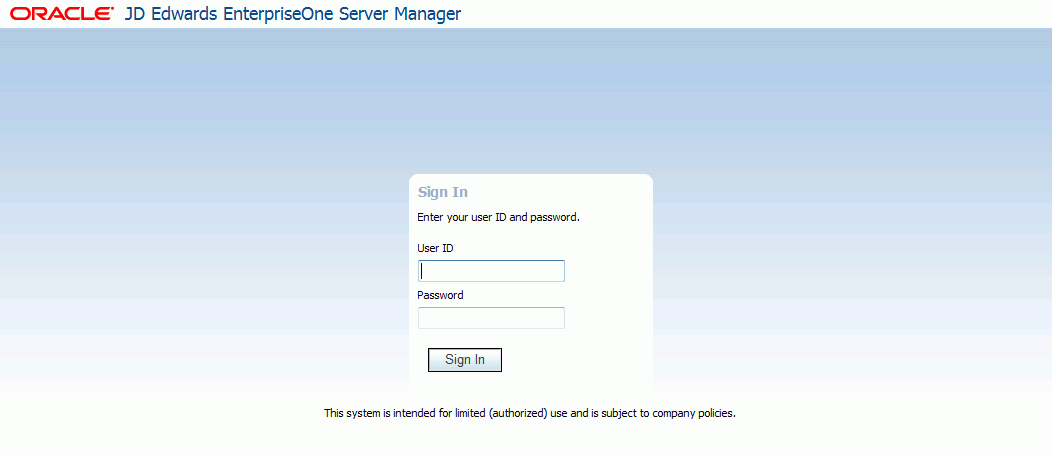
Description of the illustration ''logon_screen.gif''
4.2 Run the Management Console Setup Wizard
The setup wizard guides you through the initial setup and configuration of the Server Manager Management Console. The wizard automatically starts the first time you access the Management Console after running the Management Console installer.
Tip:
You can stop and log out of the Management Console at any time. Upon signing back into the Management Console, you automatically return to the same wizard step.Alternately, you can access the setup wizard at any time by entering this URL on the Management Console machine:
http://servername:port/manage
where server_name is the name of the Server Manager machine on which the Management Console is installed, and
where port is the port you specified for the Management Console when you ran the Management Console installer.
For example:
http://denlcmwn5.mlab.jdedwards.com:7000/manage/welcome

-
On Introduction, click Next to continue with the wizard.
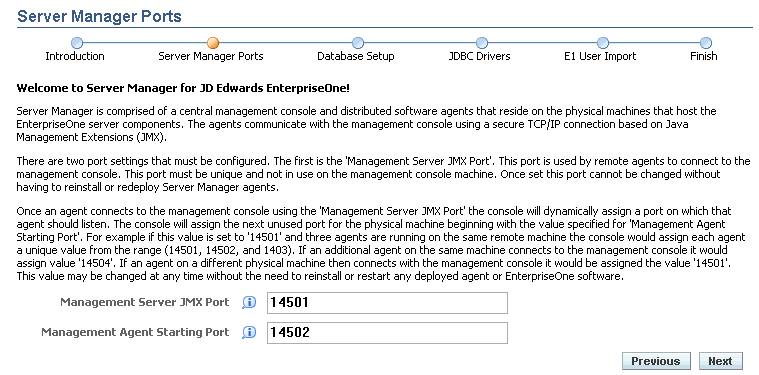
Server Manager is comprised of a central Management Console and distributed Management Agents that reside on the physical machines that host the EnterpriseOne server components. The Management Agents communicate with the Management Console using a secure TCP/IP connection based on Java Management Extensions (JMX).
-
On Server Manager Ports, complete these fields:
-
Management Server JMX Port
This port is used by Management Agents to connect to the Management Console. This port must be unique and not in use on the Management Console machine. Once it is set, you cannot change this port without having to reinstall Server Manager Management Agents.
The default value is 14501.
-
Management Agent Starting Point
Once a Management Agent connects to the Management Console using the Management Server JMX Port, the Management Console dynamically assigns a port on which that Management Agent should listen. The Management Console assigns the next unused port for the physical machine beginning with the value specified for Management Agent Starting Port.
For example if you set this value to 14501 and three Management Agents are running on the same remote machine, the Management Console assigns each Management Agent a unique value from the range (14501, 14502, and 14503). If an additional Management Agent on the same machine connects to the Management Console, the Management Console assigns the value 14504. If a Management Agent on a different physical machine then connects with the Management Console it assigns the value 14501. This value can be changed at any time without the need to reinstall or restart any deployed Management Agent or EnterpriseOne software.
Tip:
This document does not discuss changing the Management Agent Starting Port after installation, but it can be done through reading how to change http port in a standalone OC4J. The OC4J user guide is delivered with the Server Manager installation. An example location is:c:\jde_home\targets\oc4j\j2ee\home\default-web-app\oc4jusersguide.pdf -
-
Click Next to continue the wizard.
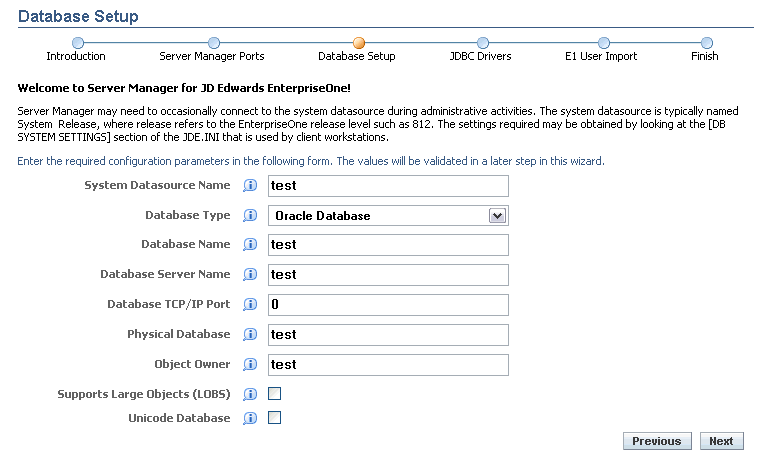
Server Manager may need to occasionally connect to the system datasource during administrative activities. The system datasource is typically named System Release, where Release refers to the EnterpriseOne release level such as 900. The settings required can be obtained from the
[DB SYSTEM SETTINGS]section of the JDE.INI that is used by Web Development Client workstations (sometimes referred to as fat clients). -
On Database Setup, complete the fields whose values will be validated in a later step in this wizard:
-
System Datasource Name
Enter the name of the data source where the OCM and other system tables reside.
This entry corresponds to the
Base Datasourceentry in[DB SYSTEM SETTINGS].Note:
This setting is not critical for bootstrap connections, but if it is missing or incorrect, appropriate error messages will be logged. -
Database Type
This value defines the type of database this datasource represents. Valid values are:
-
AS/400
-
Oracle Database
-
SQL Server
-
IBM DB2
This entry corresponds to the
Typeentry in the[DB SYSTEM SETTINGS]in the JDE.INI of a JD Edwards EnterpriseOne Web Development Client. -
-
Database Name
Enter the name of the database that this datasource represents. This entry is applicable only to Oracle database and UDB database types.
The value for this entry corresponds to the
Databaseentry in the[DB SYSTEM SETTINGS]in the JDE.INI of a JD Edwards EnterpriseOne Web Development Client.For the Oracle database, the value of this entry is the name of the connect string (SID) identifying the database in the
tnsnames.oraconfiguration file. -
Database Server Name
Enter the name of physical machine that contains the database application. This entry corresponds to the 'Server' entry in the [DB SYSTEM SETTINGS] in the JDE.INI of a JD Edwards EnterpriseOne Web Development Client.
-
Database TCP/IP Port
Specify the TCP/IP port used to communicate with the database.
This entry corresponds to the
ServerPortentry in the[DB SYSTEM SETTINGS]in the JDE.INI file of a JD Edwards EnterpriseOne Web Development Client.If a database port is not applicable, such as DB2/400 datasources, enter a zero.
-
Physical Database
Enter the physical database name.
For AS/400 datasource types, this specifies the library name.
For MS SQL Server datasource types, this specifies the actual database name.
Otherwise, this setting is not used for the other datasource types.
This entry corresponds to the
DatabaseName2entry in the[DB SYSTEM SETTINGS]in the JDE.INI file of a JD Edwards EnterpriseOne Web Development Client. -
Object Owner
Enter the object owner or schema of the tables within the database this datasource represents.
This setting is only used for Oracle, SQL Server, and UDB datasource types.
This entry corresponds to the
Object Ownerentry in the[DB SYSTEM SETTINGS]in a JDE.INI for of a JD Edwards EnterpriseOne Web Development Client. -
Supports Large Objects (LOBs)
Defines whether the datasource supports large objects (LOBs) as a column type.
This setting is used for Oracle and AS/400 datasource types only.
This entry corresponds to the
LOBFlagentry in the[DB SYSTEM SETTINGS]in a JDE.INI for of a JD Edwards EnterpriseOne Web Development Client. -
Unicode Database
Defines whether the datasource contains UNICODE encoded data.
This setting is only used for SQL Server.
This entry corresponds to the
UnicodeFlagentry in the[DB SYSTEM SETTINGS]in a JDE.INI for of a JD Edwards EnterpriseOne Web Development Client.
-
-
Click Next to continue the wizard.
Note:
In this context at this stage in the Welcome Wizard, the JDBC drivers are only required to complete the next step in the Wizard, which is to import users from an existing JD Edwards EnterpriseOne installation.For information on managing JDBC drivers, refer to the chapter entitled: Chapter 12, "Manage JDBC Drivers"
When your Management Console already has the appropriate JDBC driver, the Management Console displays the message The appropriate JDBC driver has been successfully detected and initialized and then prompts you to restart the Management Console in order to use the drivers.
-
On JDBC Drivers, click the Restart Management Console button.
Note:
It might take a few minutes for the Management Console to restart. Upon restart, you are prompted to enter your Management Console login credentials. Server Manager returns you to the same Management Console Setup Wizard step that you were using before to the restart. -
Click Next.
The Management Console verifies that your JDBC Driver is properly setup and if so it proceeds to the next screen. If not, then you are prompted to remedy errors as appropriate.
-
On Database Setup, the Management Console displays the appropriate page depending on the database that you selected from the Database Type dropdown, as described in these substeps:
AS400, see Substep a
Oracle database, see Substep b
MS SQL Server, see Substep c
IBM DB2, see Substep d
-
For AS400, once the Database Setup and JDBC Drivers forms are properly completed, the last page on the JDBC Drivers portion of the wizard is displayed indicating that the appropriate JDBC driver has been successfully detected and initialized:

Description of the illustration ''wzrd_4_jdbcdrv_as400_scss.gif''
-
For the Oracle database, you are prompted to complete this form to configure your
tnsnames.orafile: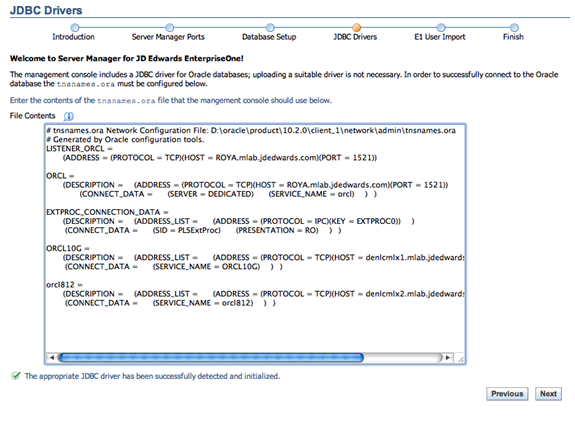
Description of the illustration ''wzrd_4_jdbcdrv_oracle.gif''
Tip:
You can cut and paste the contents of thetnsnames.orafile from the JD Edwards EnterpriseOne Web Development Client into this form. -
For Microsoft SQL Server, you are initially prompted to uploaded the
sqljdbc4.jarfile.Note:
Depending on the value that you enter for Database Type, the wizard chooses the appropriate next screen for JDBC Drivers.If the Management Console displays this message, you have already uploaded the appropriate driver and proceed to Step 8

Description of the illustration ''wzrd_4_jdbcdrv_success.gif''If you have not yet uploaded the JDBC driver for the database that you selected, the Management Console displays the appropriate form that you can use to Upload the driver.

-
For IBM UDB, once the Database Setup and JDBC Drivers forms are properly completed, the last page on the JDBC Drivers portion of the wizard is displayed indicating that the appropriate JDBC driver has been successfully detected and initialized:

-
-
When you have completed setting up your JDBC drivers, click Next.
The Management Console saves the current configuration data before continuing to the next screen. This enables you to exit and re-enter the wizard and not lose any entered configuration data up to this point in the wizard.
-
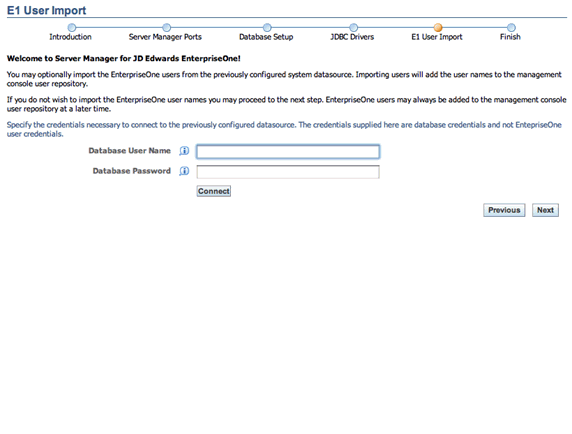
On E1 User Import, you can optionally import the JD Edwards EnterpriseOne users from the previously configured System Datasource. Importing users adds the user names to the Management Console user repository.
If you do not wish to import the EnterpriseOne user names, you can proceed to Step 11. JD Edwards EnterpriseOne users can always be added to the Management Console user repository later. Refer to Chapter 10, "Configure Management Console Users".
If you want to import JD Edwards EnterpriseOne users, you must specify the credentials necessary to connect to the previously configured datasource. The credentials supplied here are database credentials and not EnterpriseOne user credentials.
-
Database User Name
Enter a valid user name for the database to use when connecting directly to the configured database.
-
Database Password
Enter a valid password for the user name specified in the Database User Name field.
-
-
Click Next to continue with the setup wizard.
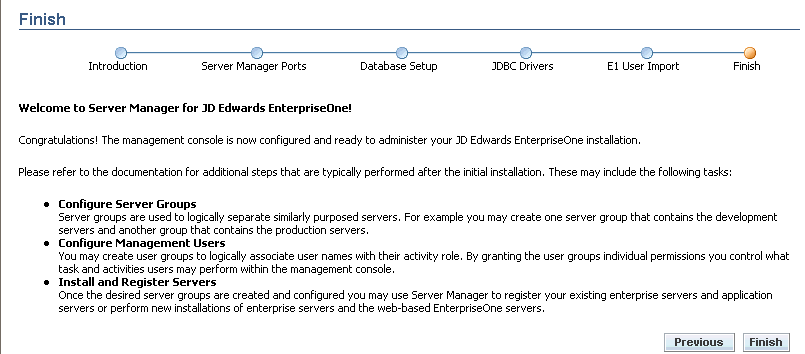
Congratulations! The Management Console is now configured and ready to administer your JD Edwards EnterpriseOne installation.
-
On Finish, you are advised to review the Management Console documentation for additional steps that are typically performed after the initial installation. These steps include:
-
Configure Server Groups
Server groups are used to logically separate servers with a similar purpose. For example, you might create one server group that contains the development servers and another group that contains the production servers.
Refer to the sections in this guide entitled: Administer Server Groups.
-
Configure Management Users
You can create user groups to logically associate user names with their activity role. By granting the user groups individual permissions, you control what task and activities users may perform within the Management Console.
Refer to the section in this guide entitled: Administer Management Console Users and User Groups.
-
Install and Register Servers
Once the desired server groups are created and configured you can use Server Manager to register your existing Enterprise Servers and application servers or perform new installations of Enterprise Servers and the web based EnterpriseOne servers.
Refer to the sections in this guide entitled:
-
Register or Create a JD Edwards Enterprise Server as a New Managed Instance
-
Create a JD Edwards EnterpriseOne Web-Based Server as a New Managed Instance
This chapter includes the steps to create these JD Edwards EnterpriseOne web-based servers:
-
HTML Web Server
-
Transaction Server
-
Collaborative Portal
-
Business Services Server
-
-
Click Finish to complete the Management Console setup wizard.