3 Working with the Deployment Server
This chapter contains the following topics:
Caution:
If you do not install all four standard environments as recommended, the Tools Accelerator will fail at this point for each environments that is not installed. However, this does not prevent it from running correctly for the standard environments that you did install.3.1 Understanding the Deployment Server
Release 9.0 resides on an Intel Pentium-based Deployment Server running Microsoft Windows. The software install and upgrade programs enable you to create and maintain installation plans and deploy Release 9.0 to the workstations. The installation program loads the software on the Deployment Server, installs a local database, and then loads Planner and Workbench tables into the local database on the Deployment Server. The local database for the Oracle VM templates for JD Edwards EnterpriseOne is Oracle Enterprise Edition (OEE). You must order the Deployment Server CDs intended for use with the Oracle VM EnterpriseOne templates.
Important:
There is no migration path between local databases on the Deployment Server. The Deployment Server CDs for the OracleVM template install a Local Oracle database for you. You cannot migrate the planner databases to a different local database.No separate end-user licensing is required for installation of the database by the Deployment Server installer. It should be noted, however, that the local OEE database is not fully functional relative to the commercial versions of Oracle Enterprise Edition installed separately using the Oracle installer.
3.1.1 Microsoft Server 2008 and Above Considerations
For Windows/2008 and above, if you are using a physical DVD and the installation starts automatically, you must cancel this process and start the installation manually.
On the Microsoft Windows 2008 platform, in order to run an executable program you must right-click on the executable and select Run as Administrator from the drop-down. This includes the Deployment Server installer, the EnterpriseOne Planner Update installer, running any EnterpriseOne applications, and running Change Assistant for EnterpriseOne.
3.1.2 Local Oracle Enterprise Edition (OEE) Considerations
The Deployment Server installation includes the OEE database (version 10.2.0.3) for local use by the Deployment Server. The installation does not include any GUI tools for database administration. By default you can only work in the local database using command line entries. However, you can download a free and fully support GUI tool such as Oracle SQL Developer, which is available at this link:
http://www.oracle.com/technology/products/database/sql_developer/index.html
3.1.3 JD Edwards EnterpriseOne Application P96717
Best practices in JD Edwards EnterpriseOne environments are to never directly modify an EnterpriseOne database outside of EnterpriseOne. Therefore a new application, P96717, is provided to perform the following Oracle database actions:
-
Import Tablespace
-
Export Tablespace
-
Create Tablespace
-
Drop Tablespace
3.1.4 Best Practices for OEE Performance
You should always verify that your Deployment Server machine meets the MTRs (refer to Accessing Minimum Technical Requirements). The local Oracle database performs best on hard drives that are not fragmented or full. Additionally, the following table lists some guidelines for minimum configurations.
| Specification | Recommendation |
|---|---|
| RAM | 2 GB minimum |
| Page File Size | Minimum setting should be two times the amount of memory |
| Disk Space Usage | When fully loaded, best performance is obtained if the hard drive on the Deployment Server machine has at least 20% free space. |
| Local Database Name | Ensure that any reference in data sources and .ini files refere to the local database name in the exact mixed case, which is: E1Local Failure to use the exact mixed case will lead to decreased performance of JD Edwards EnterpriseOne on the Deployment Server and on Administrative Clients (also called "fat" or Web Development Clients). |
3.2 Before You Install the Deployment Server
The Deployment Server installer process creates temporary files during the install. By default these are placed on the c: drive of your Windows-based Deployment Server. You may need a sizable amount of free space on your c: drive in order to complete the installation successfully. Alternately, you can redirect these temporary files to a different drive with more space by using this procedure to change the Environment Variables for the logged in user:
-
Create a new empty folder on the drive that has more room.
For example, the drive and folder might be:
d:\ISMPTemp -
Right click on My Computer then choose Properties | Advanced | Environment Variables.
-
Scroll through the variables in the top pane (User) and find TEMP and TMP.
-
Change both of these to point to the folder you created on your larger drive in Step 1.
This table lists the mandatory and optional components of the Deployment Server installation.
| Server | Mandatory Component | Optional Components |
|---|---|---|
| Deployment Server | JD Edwards EnterpriseOne files | Prototype environment
Pristine environment Production environment Development environment |
The installation process for the Deployment Server performs these functions:
-
Installs the objects from the CDs.
-
Creates the path code directory structures (PS900, PY900, PD900, and DV900) based on your selections.
-
Updates the Microsoft Windows Registry.
Note:
In concurrent operations, you can install the Deployment Server while creating the Oracle VM virtual machine servers.After verifying the support structure, you can install the Deployment Server. This process installs the Deployment Server from CDs.
Note:
You must install the Deployment Server locally; you cannot install the Deployment Server from a remote machine.3.3 Installing the Deployment Server
Caution:
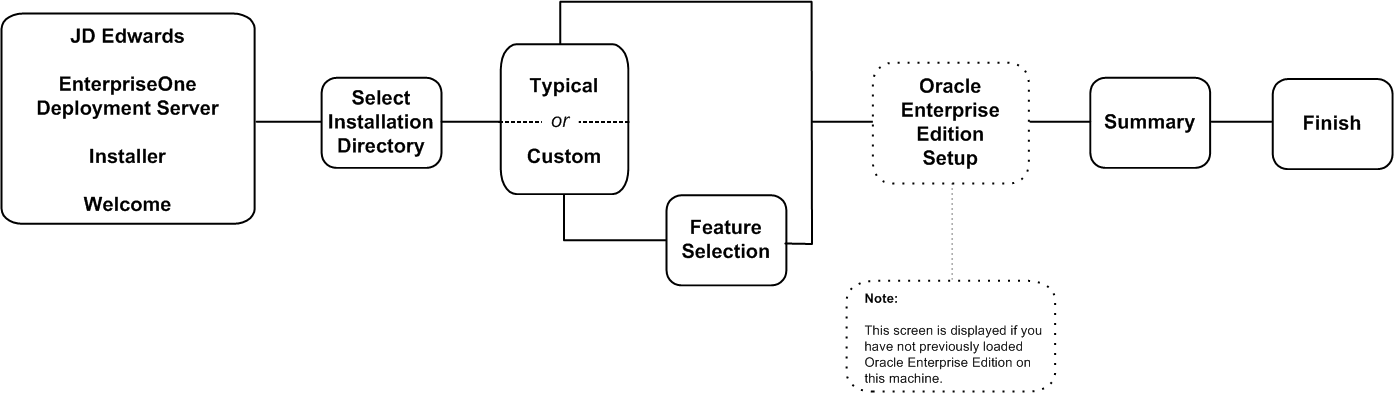
Before you run the installation program, shut down all programs running on the Deployment Server that could cause DLL conflicts (such as Microsoft SQL Services, Internet Explorer, Microsoft Word, or Adobe Acrobat). You can restart these programs after you finish installing the Deployment Server.The diagram below illustrates the process flow and the various installation paths.
To install the Deployment Server:
-
Log on to the Deployment Server as a user with Administrator rights.
Caution:
Ensure that the Administrator account name that you use does not contain any special characters.Microsoft Server 2008 and above. Refer to Microsoft Server 2008 and Above Considerations in this guide.
-
You can install the Deployment Server from CDs (Step a below) or from images obtained from the Oracle e-delivery web site (Step b below).
-
To install from CDs, insert the first Deployment Server CD into the CD drive.
The setup starts automatically.
If the setup does not begin automatically or if you wish to start the installation manually, you can execute the
RunInstall.exefile which is located at the root of the installation disk. TheRunInstall.exe(which is called by theautorun.inf) enables the JD Edwards EnterpriseOne Deployment Server Installer to detect the drive with the most available space and to use it as the default drive for the installation. If you directly execute the Deployment Server installation program (setupwin32.exe) then the JD Edwards EnterpriseOne Deployment Server Installer will not scan available drives for disk space and you must have adequate space on your c: drive which will be the assumed default drive. -
To install from images downloaded from the Oracle e-delivery web site, create a parent download directory on a disk with at least seven (7) GB free space. For example:
c:\DepSvrDownload the source DVD images for the JD Edwards EnterpriseOne Deployment Server for Oracle VM into the above directory.
Create a sub directory for each DVD image. For example:
c:\DepSvr\disk1c:\DepSvr\disk2c:\DepSvr\disk3Move the DVD images into each sub directory as appropriate. Unzip each DVD image in place within the sub directory.
Each unzip process automatically creates the appropriately-named subdirectory. It is important to preserve the above directory names - disk1, disk2, and so on.
For example, you should:
-Download the first JD Edwards EnterpriseOne Deployment Server for Oracle VM zip file (for example,
V21290-01.zip).-Move the downloaded .zip file into the
\disk1sub directory.-Extract the .zip file in place.
In this example, the unzip process creates the contents of the
\disk1subdirectory within the parent download directory, as shown below:c:\DepSvr\disk1Continue with this example, when all CD images are downloaded and extracted, your directory structure should look similar to this:
c:\DepSvr\disk1 c:\DepSvr\disk2c:\DepSvr\disk3Locate the
RunInstall.exewithin the\disk1subdirectory and double click on this executable to begin the Deployment Server or Enterprise Server installer.As the installer executes, it automatically moves through the directories within the parent download directory until the installation is complete. If the delivered directory names are not found with the expected names and within the same parent download directory, you will encounter Java exception error messages and the installation will stop. Therefore it very important that you not rename any child directories that are created by the unzip process within the parent download directory.
Note:
The InstallShield Wizard begins to initialize and prepare the requisite JVM for the JD Edwards EnterpriseOne Deployment Server Installer. Although this may take a few minutes to completely initialize, you can view the progress on the InstallShield Wizard dialog that appears on your screen or Task Bar. When the initialization is complete, a new and separate JD Edwards EnterpriseOne Deployment Server Installer window is displayed.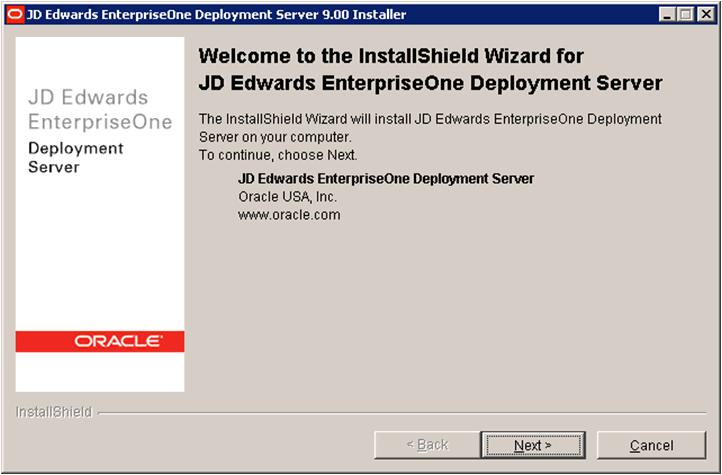
-
-
On the Welcome screen, click the Next button.

-
On the directory selection panel, complete this field:
-
Directory Name
Enter the drive and directory where you want the files installed on your Deployment Server. The JD Edwards EnterpriseOne Deployment Server Installer automatically scans all drives for available space and by default chooses the drive that contains the most available space. For example:
d:\JDEdwards\E900
-
-
Click the Next button.
-
On the information advisory screen, review the content and click the Next button.
-
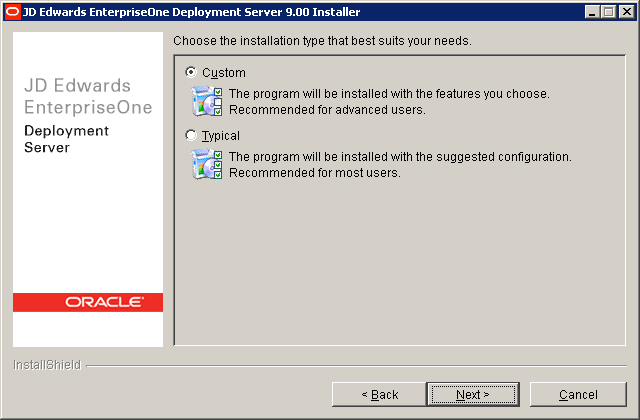
On JD Edwards EnterpriseOne Deployment Server Installer, setup type panel, choose your installation type:
-
Custom
You should chooseCustom and select all environments.
Caution:
The selection of all environments is required to ensure the environments on your Deployment Server exactly matches those that are installed on the Enterprise, Database, and HTML servers using Oracle VM templates. -
Typical
The Typical install only installs the PS900 and PY900 environments.
Caution:
The Typical install is not recommended because the Enterprise, Database, and HTML servers that are installed with the Oracle VM Templates each have all four standard environments installed.
-
-
Click the Next button.
-
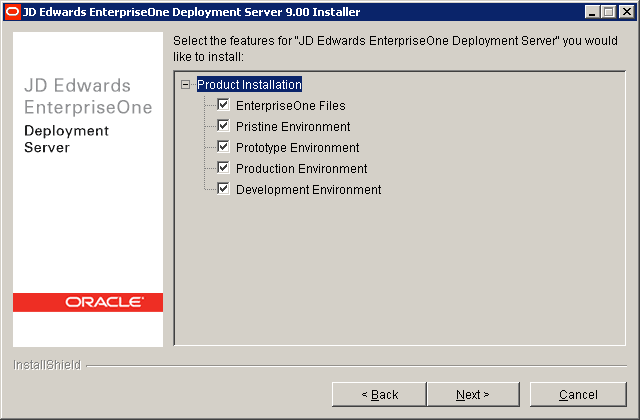
On JD Edwards EnterpriseOne Deployment Server Installer, Select features screen, you should select EnterpriseOne Files and all environments.
Caution:
You must select each checkbox and all environments to ensure the environments on your Deployment Server exactly matches those that are installed on the Enterprise, Database, and HTML servers using Oracle VM templates. -
Click the Next button.
-
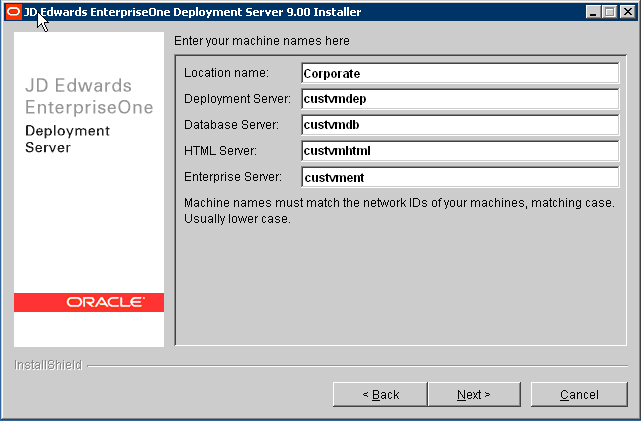
On the machine names screen, complete these fields:
-
Location Name
Enter the location to which this Deployment Server applies. The location could be a city, company headquarters, or a division of a company. For example:
CorporateImportant:
When running the scripts to create VM Guest from the JD Edwards EnterpriseOne Database Server Template, you must supply the same value you enter here.Caution:
This value is case-sensitive and a maximum of 15 alphanumeric characters. -
Deployment Server
Verify the machine name for your Deployment Server.
Caution:
Machine names for Deployment Servers are limited to a maximum of 15 characters, as limited by the JD Edwards EnterpriseOne database table and application design. -
Database Server
Enter the name of the Oracle VM Database Server. For example:
custvmdb -
HTML Server
Enter the name of the Oracle VM HTML Web Server. For example:
custvmhtml -
Enterprise Server
Enter the name of the Oracle VM Enterprise Server. For example:
custvmentCaution:
This value is case-sensitive and a maximum of 13 alphanumeric characters.The machine name must match the network ID, matching case (usually lower case).
Important:
You should record the names you enter on this screen on the Oracle VM Templates the Pre-Install Worksheet located in Chapter 4 of this guide in the section entitled: Completing the Pre-Install Worksheet.
-
-
Click the Next button.
-
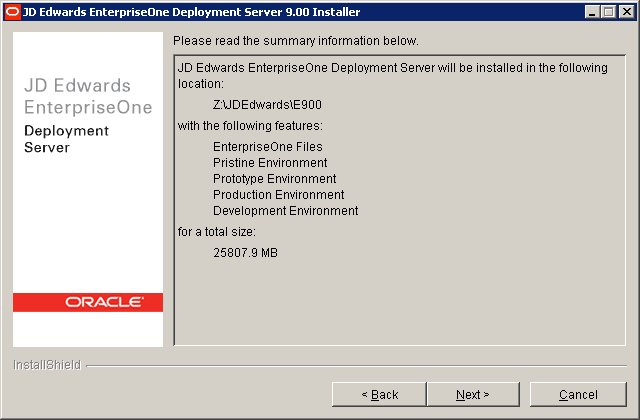
On the summary information panel, verify that the appropriate components are selected.
If there is insufficient disk space available to complete the installation on the Deployment Server target machine, an error message is displayed.
-
Click the Next button to begin the installation.
The JD Edwards EnterpriseOne Deployment Server Installer displays a panel showing the ongoing status of the installation.
On JD Edwards EnterpriseOne Deployment Server Installer, after the installation is complete, a message appears stating that the installation was successful.
-
On JD Edwards EnterpriseOne Deployment Server Installer, click the Finish button to complete the installation and exit the JD Edwards EnterpriseOne Deployment Server Installer.
Tip:
Deployment Server Log Files. You should review the log file created by the Deployment Server Installer. The file is named log.txt and is located in the Deployment Server installation directory. For example:x:\JDEdwards\E900\log.txtLocal Oracle Database Installation Failure. Occasionally the install of the local Oracle database fails due to some transient locking or authority problem on the Deployment Server. You should review the
OEEInstall.logonc:\and also run the TestPlannerDBs.bat script which is inJDEwards\E900\planner\data. This script tests that you can connect to each of the planner databases as well as your local Spec database.
3.4 Downloading and Installing the Latest Software Updates (optional)
Tip:
This is an optional step. Your source DVDs and Oracle VM templates are already updated with the latest Tools Release and ESUs of the time of mastering the product.You can download and install the latest Tools Release, Tools Release Patch, and Planner Update from the Update Center on My Oracle Support.
Caution:
The order in which the following Tools Release, patch, and updates are applied is very important. Do not deviate from the order below.This section discusses:
3.4.1 Installing the Latest Tools Release and Latest Tools Release Patch to the Deployment Server
To install the latest tools release and latest tools release patch:
-
From My Oracle Support, download the latest JD Edwards EnterpriseOne Tools Release Patch (for example, 8.98.A1) and Tools Release documentation.
-
Using the Tools Release documentation, install the Tools Release Patch to the Deployment Server.
3.4.2 Installing the Latest Planner Update
Caution:
Due to unpredictable timing issues, there is a possibility that at the end of the Deployment Server install, the databases or tablespaces that are needed for the planner environment may not automatically get attached as designed by the Installer. Not only will an unattached database or tablespace cause the installation of the planner update to fail, it will also prevent you from signing on to the JDEPLAN environment.Navigate to the directory JDEdwards\E900\planner\data and run this script:
attach_planner.bat
Tip:
To attach the metadata local database, navigate to the Planner\spec directory and run this batch file:attach_metadata.bat
To install the latest planner update:
-
From My Oracle Support, download the latest planner update for JD Edwards EnterpriseOne Applications Release 9.0 to the Deployment Server.
-
Run the self-extracting executable and follow the on-screen instructions to install the planner update on the Deployment Server.
-
You must enter a valid JD Edwards EnterpriseOne user and password in order to initialize the Planner environment.
The shipped values are JDE for the user and JDE for the password.
Note:
The version of Oracle on the Database Server is case sensitive for passwords. The above login screen is displayed so that the Planner Update can update the metadata specifications on the Deployment Server. -
When the installation finishes, review the information presented on the JD Edwards EnterpriseOne Deployment Server Setup screen to confirm that the installation was successful.
Tip:
If the folder into which you expanded the Planner Update is empty, you should run the self-extracting executable (JLnnnnn.exe) again. When the Welcome screen comes up, click on Cancel to quit. -
Follow the steps in the Special Instructions, which are contained within an HTML file that is shipped with the Planner Update. The special instructions file located in this directory with this file name:
x:\download_directory\planner_update_id\E900SpecialInstructions.htmwhere download_directory is the directory where you downloaded the Planner Update.
Caution:
Every time you apply a new Planner Update you must run these two processes:-
SpecialInstrs.bat -
R98403XB XJDE0002
-
3.5 tnsnames.oraFile Location
The tnsnames.ora file is located in these directories:
..\Oracle\E1Local\NETWORK\ADMIN
..\System\OC4J\j2ee\home\applications\webclient.ear\webclient\WEB-INF\classes
3.6 Rebooting the Deployment Server
You must reboot the Deployment Server after installing or uninstalling the local Oracle database, where:
-
The install should always be done using the JD Edwards EnterpriseOne Deployment Server installer, and
-
The uninstall should be done using the Oracle Universal Installer.
3.7 Configuring the Planner Databases
The install CDs for the Oracle VM Deployment Server include the Installation Plan created for you at Oracle. You do not need to create and run an Installation Plan for the PS900, PY900, PD900, and DV900 environments. However, there are some steps that normally run during an Installation plan that must be done on your Deployment Server. An Oracle Tools Accelerator has been provided to do these steps, and must be run at this point.
-
Install the latest version of Change Assistant if not already done.
-
Set the Preferences in Change Assistant to store and find ESUs in your install location, for example:
c:\JDEdwards\E900\Change Assistant\Downloads\ESUs -
Start Change Assistant and deploy TLOVM001_20_99.par which is in the above location. This Tools Accelerator does the following:
-
Shares the install folder on the Deployment Server for Client Install and Package Build
-
Updates ESU entries in the registry for the shipped ESUs
-
Configures the shipped install and package inf files and ini files
-
Configures the Package Feature records.
-
Configures the manifest records for these shipped packages:
PS900FA
PY900FA
PD900FA
DV900FA
Caution:
If you do not install all four standard environments as recommended, the Tools Accelerator will fail at this point for each environments that is not installed. However, this does not prevent it from running correctly for the standard environments that you did install. -