B Installing WebLogic Server
This appendix discusses installing WebLogic Server 10.3.5.0. Prior running WebLogic Server installation, you must install a 64-bit JDK and set it to the system path.
-
Install a 64-bit JDK based on your platform.
-
Sun JDK 1.6.0_24+
-
Oracle JRockit 1.6.0_24-R28.1.3+
-
IBM JDK 6 (SR9 with FP1+)
-
-
Add the JDK to your system path.
Note:
A plus sign (+) after the fourth digit in the version number indicates that this and its subsequent versions are supported.
Use these steps to install WebLogic Server 10.3.5.0
-
Download the wls1035_generic.jar file.
-
Run this command:
-
On Windows and Linux: >java -jar wls1035_generic.jar
-
On Solaris with Sun JDK: >java -d64 -jar wls1035_generic.jar
-
-
Click Next on the Welcome page.
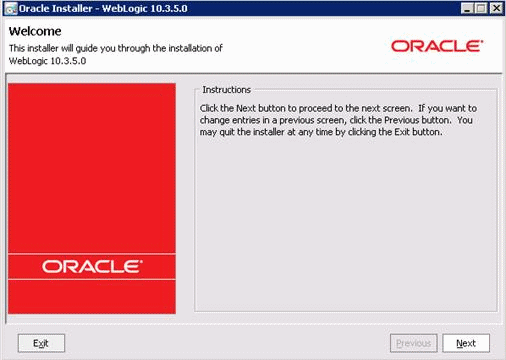
Description of the illustration image169.gif
-
Click Create a New Middleware Home option, and then enter the Home Directory.
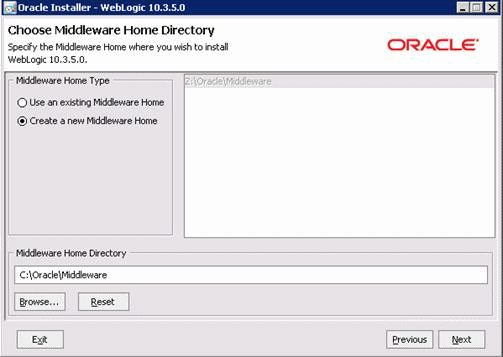
Description of the illustration image170.gif
-
Enter the contact information for Security Updates.
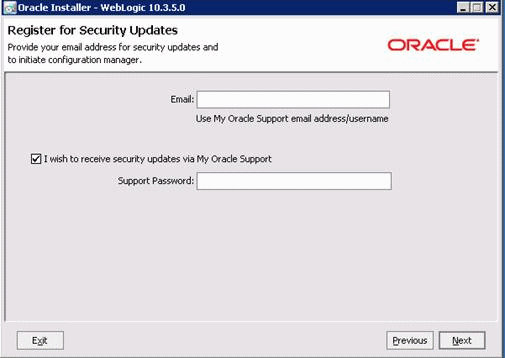
Description of the illustration image171.gif
-
Select Typical as the installation type.

Description of the illustration image172.gif
-
Verify the JDK location.
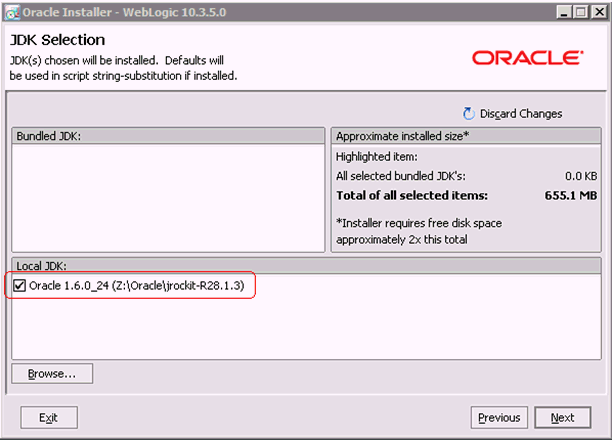
Description of the illustration image173.gif
-
Confirm the install location.
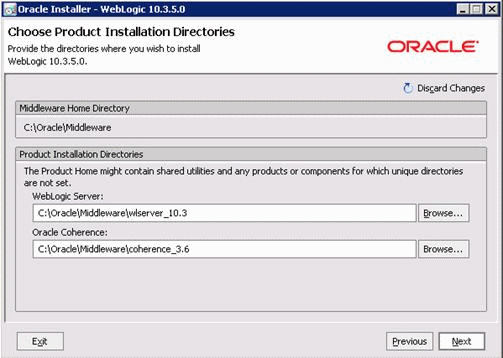
Description of the illustration image174.gif
-
On Windows platform, the system prompts you for a shortcut location.
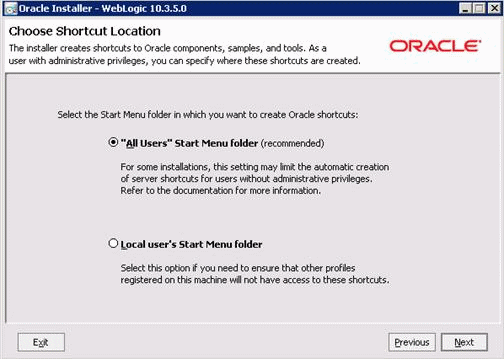
Description of the illustration image175.gif
-
Review the Installation Summary page.
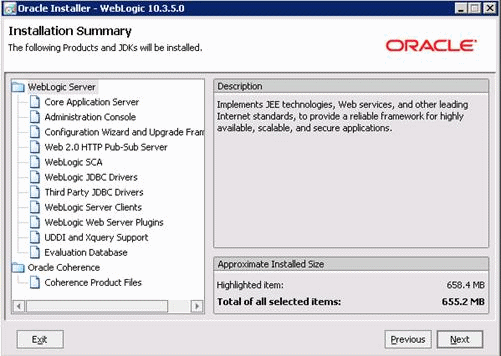
Description of the illustration image176.gif
-
Click Run Quickstart to launch the domain configuration wizard.
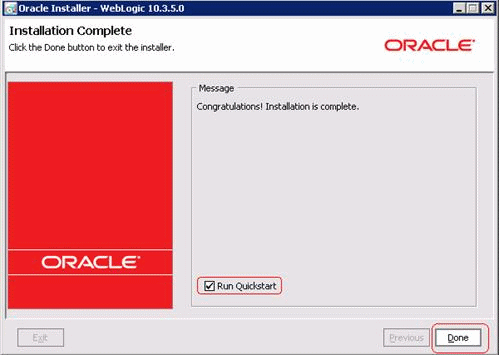
Description of the illustration image177.gif
-
Select Getting started with WebLogic Server 10.3.5.
Note:
Some Oracle applications (such as WebCenter and OID/OAM) create the domain during installation. If so, you can skip the Quickstart process.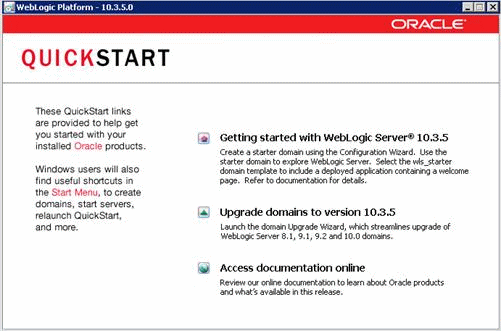
Description of the illustration image178.gif
-
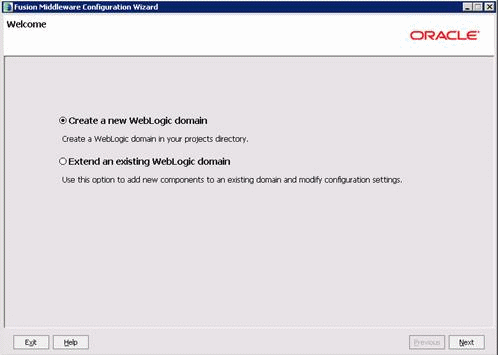
Select Create a new WebLogic domain.
Description of the illustration image179.gif
-
Select only the WebLogic Server Domain - 10.3.4.0 (Selected as default).
Note:
The 10.3.4.0 version shows that you are installing 10.3.5.0 version.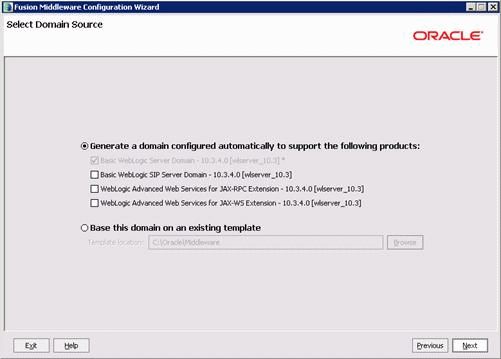
Description of the illustration image180.gif
-
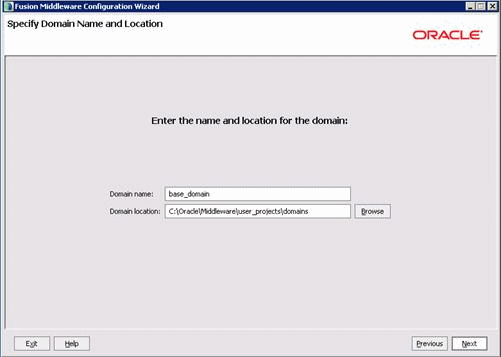
Enter a domain name.
Description of the illustration image181.gif
-
Enter the Administrator user name and password.
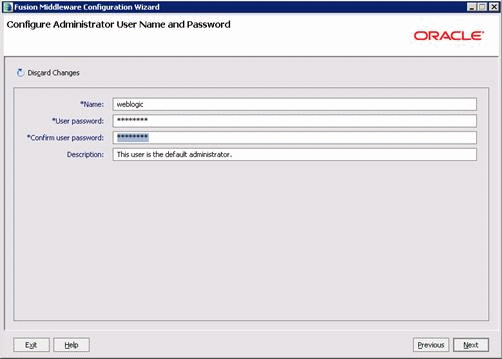
Description of the illustration image182.gif
-
Select Production Mode.
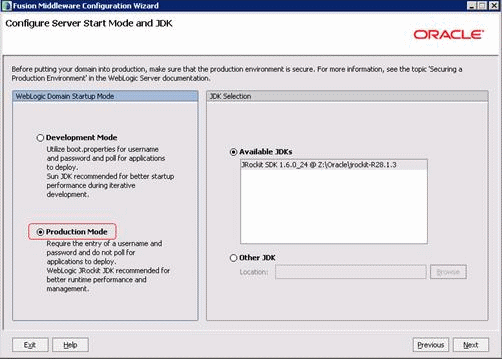
Description of the illustration image183.gif
-
Select Administration Server and Managed Servers, Clusters and Machine options.
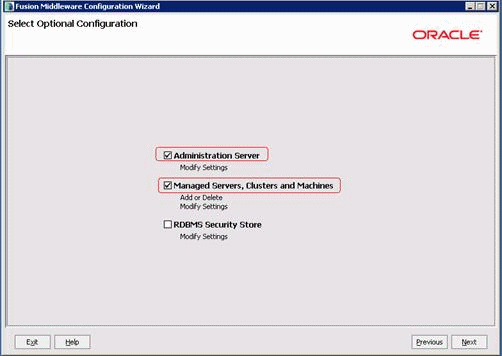
Description of the illustration image184.gif
-
Enter the Admin Server name and port. The default port is 7001.
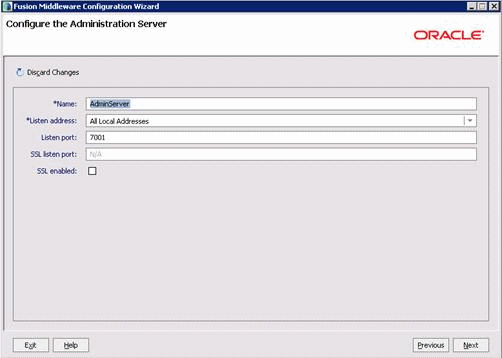
Description of the illustration image185.gif
-
On Configured Managed Servers, click Next.
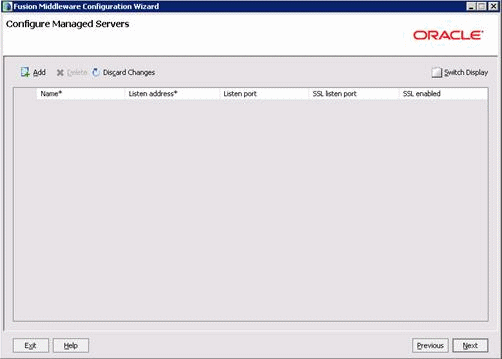
Description of the illustration image186.gif
-
On Configure Clusters, click Next.
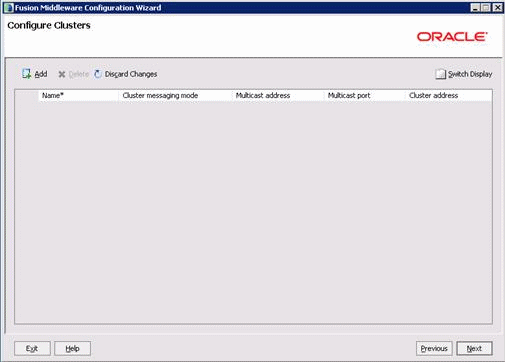
Description of the illustration image187.gif
-
Click Add to configure the machine information.
Note:
On UNIX platform, select the Unix Machine tab prior to clicking the Add button.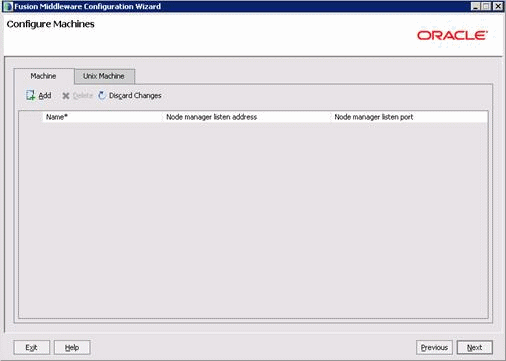
Description of the illustration image188.gif
-
Enter a logical machine name.

Description of the illustration image189.gif
-
Assign the server to your newly created machine name.
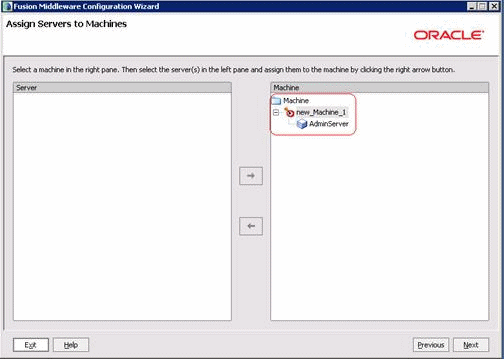
Description of the illustration image190.gif
-
Review the Configuration Summary page.
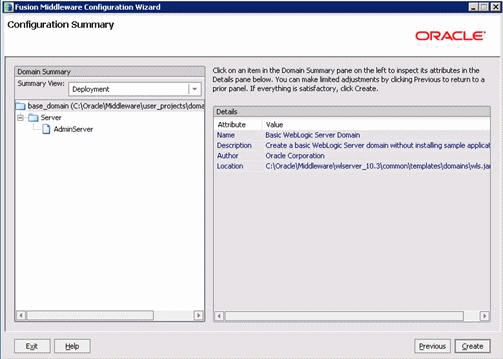
Description of the illustration image191.gif
-
Click Create.
-
Review the domain information.
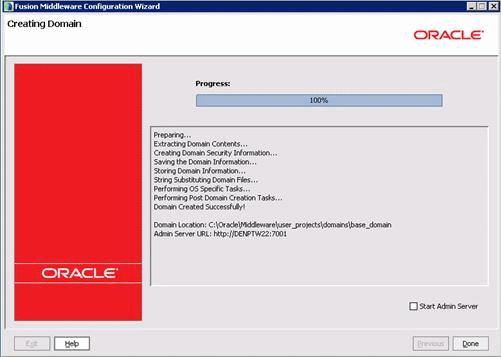
Description of the illustration image192.gif
Now you can start the Admin Server process.
Launch the Admin Server console:
http://server:7001/console
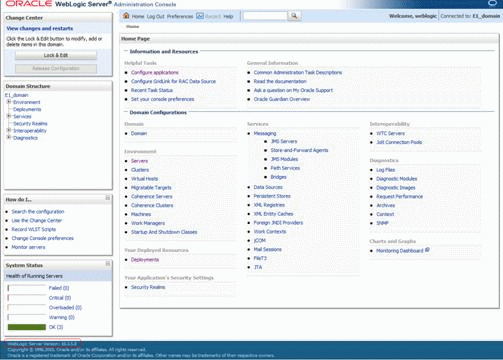
Description of the illustration image193.gif