3 WebSphere Application Server
This chapter contains the topic:
If you do not already have an appropriate WebSphere Application Server, create an application server. Refer to Appendix B, "Create WebSphere Application Server" in this guide.
3.1 Installing the WebSphere Application Server
To install the WebSphere Application Server
-
Start Application Server.
Launch the IBM Web Administrator for i: http://localhost:2001/HTTPAdmin
Figure 3-1 IBM Web Administrator (Manage All Servers Tab) screen
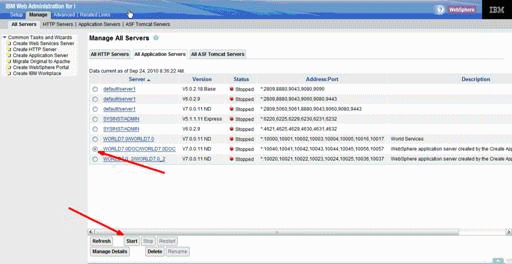
Description of ''Figure 3-1 IBM Web Administrator (Manage All Servers Tab) screen''
-
Select the appropriate Application Server and then click Start.
Figure 3-2 Start Page on the IBM Web Administrator screen
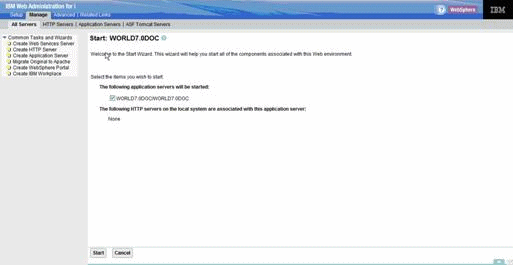
Description of ''Figure 3-2 Start Page on the IBM Web Administrator screen''
-
Click Start.
Launch Administrative Console.
Figure 3-3 Manage WebSphere Application Server screen

Description of ''Figure 3-3 Manage WebSphere Application Server screen''
-
Select the Application Servers Tab then select the appropriate server from the Server dropdown box.
Click the Launch Administrative Console link.
-
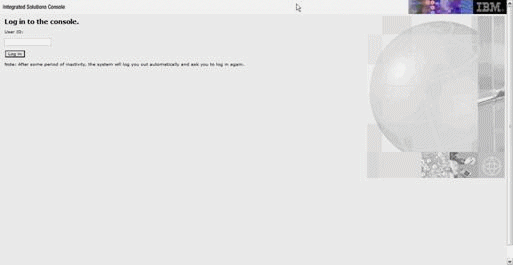
Leave the User ID blank and click Log in.
Figure 3-5 Global Security (Wizard Button) screen
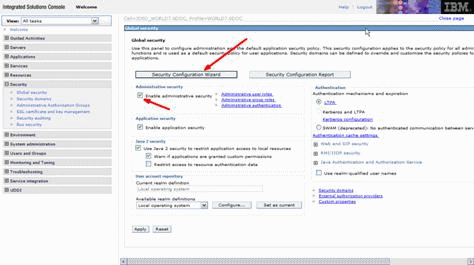
Description of ''Figure 3-5 Global Security (Wizard Button) screen''
-
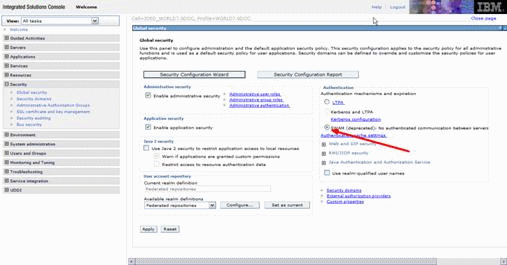
Configure security for JAAS.
Open: Security - Global Security.
Select the Enable administrative security checkbox.
Click Security Configuration Wizard.
Figure 3-6 Specify Extent of Protection (Enable Application Security Button) screen
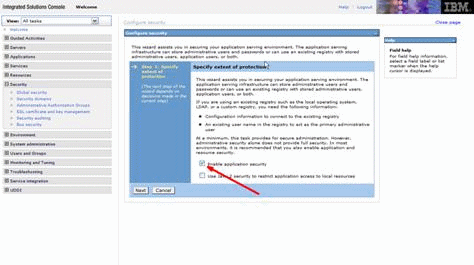
Description of ''Figure 3-6 Specify Extent of Protection (Enable Application Security Button) screen''
-
Select Enable application security and then click Next.
Figure 3-7 Federated Repositories Button
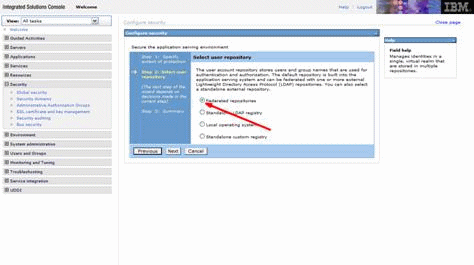
Description of ''Figure 3-7 Federated Repositories Button''
-
Select Federated repositories and then click Next.
Figure 3-8 Primary Administrative User Name field
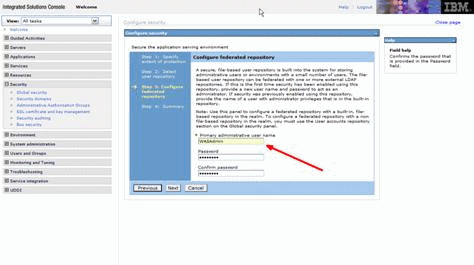
Description of ''Figure 3-8 Primary Administrative User Name field''
-
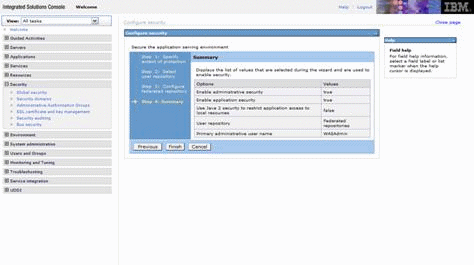
Enter Primary administrative user name and Password and then click Next.
-
Review settings and then click Finish.
Figure 3-10 SWAM Button on the Global Security screen
Description of ''Figure 3-10 SWAM Button on the Global Security screen''
-
Select the Use SWAM -no authenticated communication between servers checkbox.
Click Apply and then click Save.
Figure 3-11 Global Security screen with Selection Noted
Description of ''Figure 3-11 Global Security screen with Selection Noted''
-
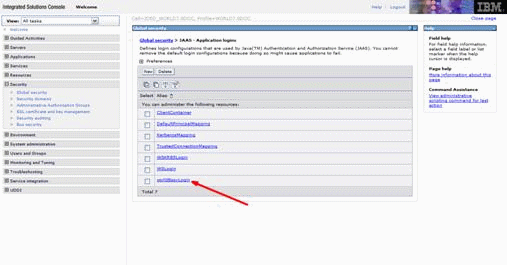
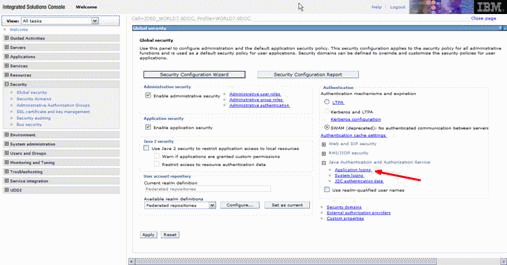
Add World Application login and configure custom login module.
Open Security - Global Security - Java Authentication and Authorization Service - Application Logins.
Figure 3-12 Global Security JAAS Application Login screen
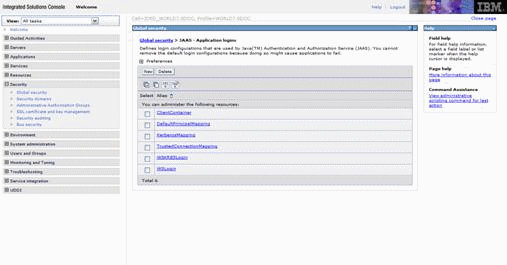
Description of ''Figure 3-12 Global Security JAAS Application Login screen''
-
Click New.
-
Enter the Alias:
worldBssvLogin
Click Apply.
-
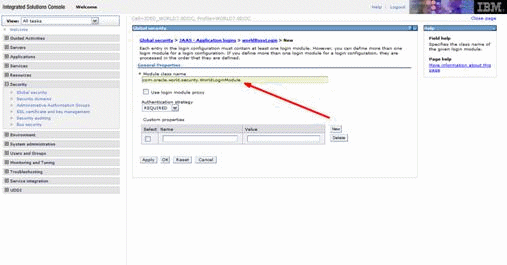
Click the worldBssvLogin link.
-
Click New.
-
Enter full pathname for custom login module in the Module class name field.
com.oracle.world.security.WorldLoginModule
Click Apply.
Figure 3-17 New Button on the JAAS Application Login screen
Description of ''Figure 3-17 New Button on the JAAS Application Login screen''
-
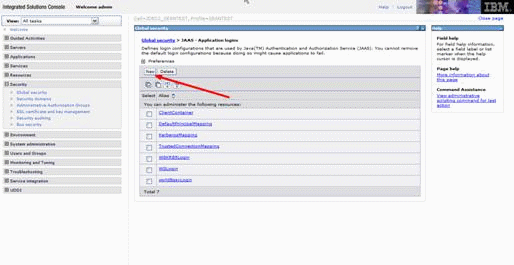
Navigate back to the JAAS - Application logins screen and then click New.
-
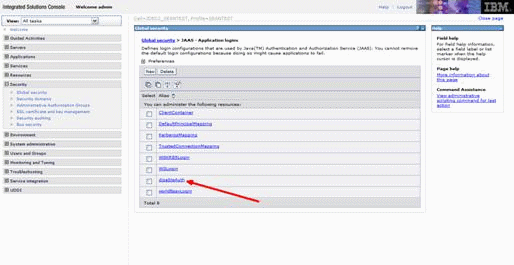
Enter the Alias:
disableAuth
Click Apply.
Figure 3-19 Global Security screen with Selection Noted
Description of ''Figure 3-19 Global Security screen with Selection Noted''
-
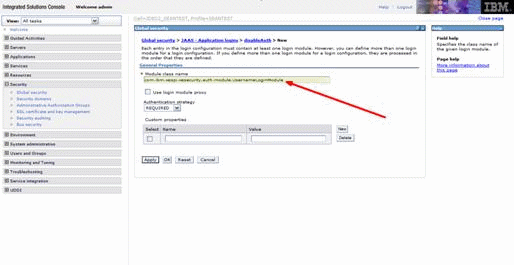
Click the disableAuth link.
Figure 3-20 New button on the Global Security JAAS Authorization Login screen
Description of ''Figure 3-20 New button on the Global Security JAAS Authorization Login screen''
-
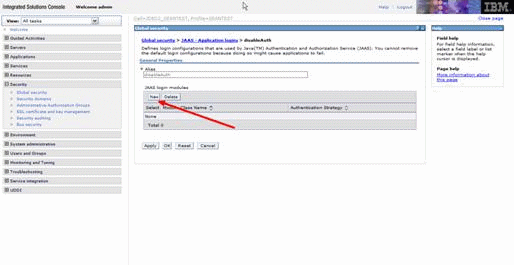
Click New.
-
Enter full pathname for custom login module in the Module class name field.
com.ibm.wssecurity.auth.module.UsernameLoginModule
Click Apply.
You must logout of the Console and restart the server for these changes to take effect.
Click the Logout link in the upper right-hand corner of the Console.
Restart the server. Refer to Step 1, Start Application Server section of this document. Use the User name and Password you created when logging in after restarting the server.
Figure 3-22 Correct Application (Type Noted) screen
Description of ''Figure 3-22 Correct Application (Type Noted) screen''
-
Deploy Web Services EAR file.
Figure 3-23 Correct Application (Type Noted) screen
Description of ''Figure 3-23 Correct Application (Type Noted) screen''
-
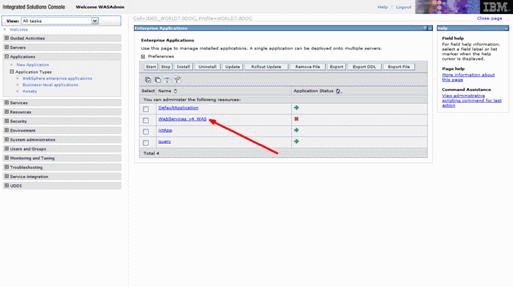
Open the Applications then click the WebSphere enterprise applications link.
Figure 3-24 Enterprise Applications screen
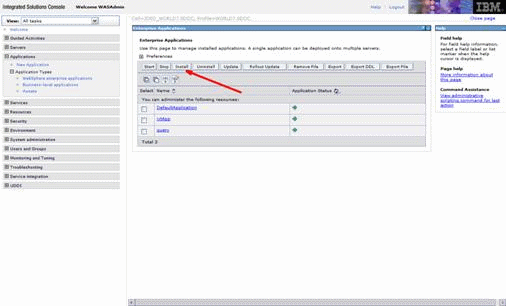
Description of ''Figure 3-24 Enterprise Applications screen''
-
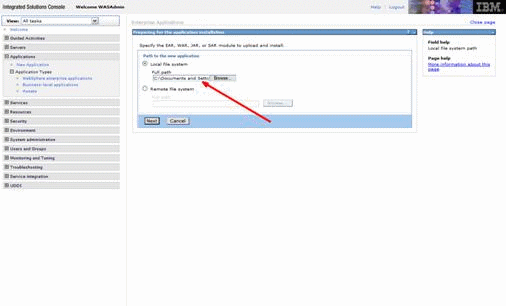
Click Install.
-
Enter the Full path to WebServices_v4_WAS.ear file and then click Next.
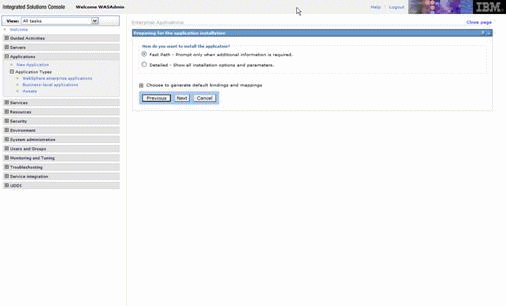
-
Click Next.
Figure 3-27 Deploy Web Services checkbox
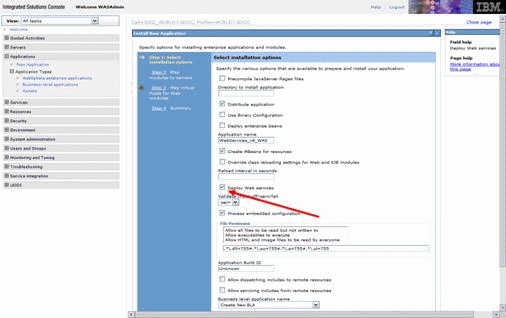
Description of ''Figure 3-27 Deploy Web Services checkbox''
-
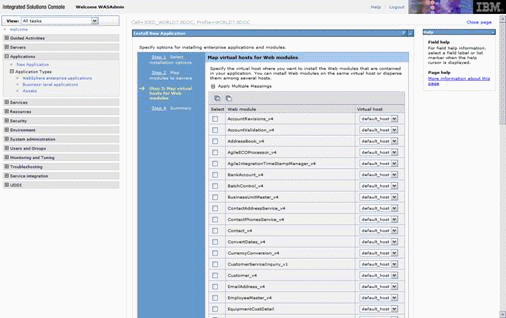
Select Deploy Web services and then click Next.
Figure 3-28 Map Modules to Servers screen
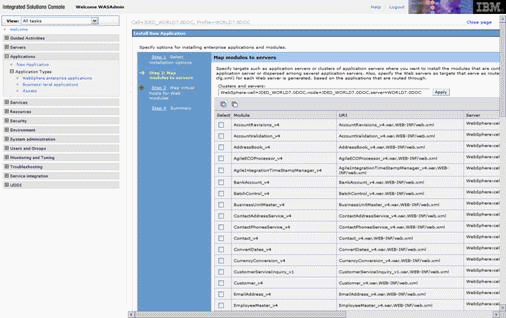
Description of ''Figure 3-28 Map Modules to Servers screen''
-
Click Next.
-
Click Next.
Figure 3-30 Summary screen with Finish button
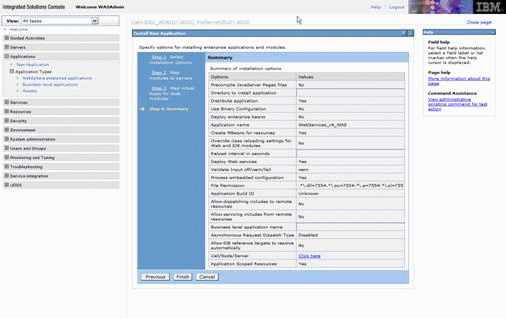
Description of ''Figure 3-30 Summary screen with Finish button''
-
Click Finish.
-
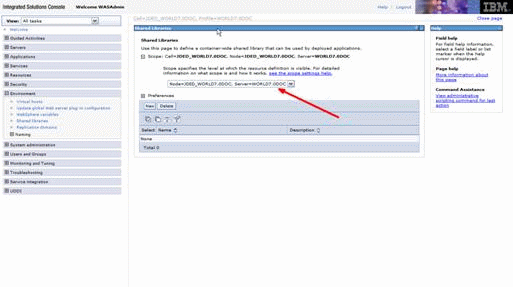
Create Shared Libraries.
-
Open the Environment and then click the Shared Libraries link.
Select the appropriate Scope from the dropdown list and then click New.
-
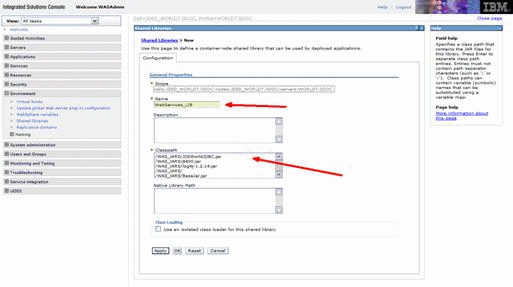
Enter WebServices_LIB in the Name field.
Enter the location of the JDEWorldJDBC.jar, jt400.jar, log4j jar, and the BaseJar.jar in the Classpath field.
Click OK.
For details about the latest version supported for log4j, see Doc ID 2318897.1 in My Oracle Support. (WS: Instructions to Address JD Edwards World Security Vulnerabilities (Doc ID 2318897.1)(Release A9.3 Update)
-
Copy jt400.jar, JDEWorldJDBC.jar, log4j jar, and BaseJar.jar to the IFS.
Copy all four files to the directory you specified in the Classpath field.
The JDEWorldJDBC.jar and the BaseJar.jar are included in the Web Services .zip file downloaded from the MyOracleSupport Web site.
-
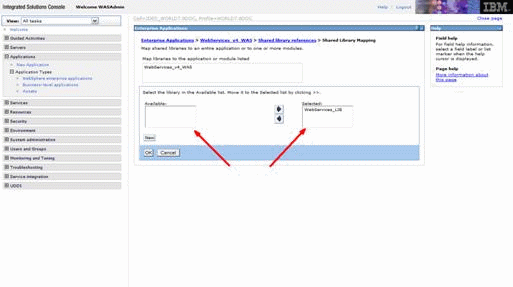
Associate WebSeverices_LIB Shared Library with the WebServices_v4_WAS Application.
Figure 3-33 Enterprise Applications screen
Description of ''Figure 3-33 Enterprise Applications screen''
-
Open the Applications and then select the WebSphere enterprise applications link.
Click the WebServices_v4_WAS link.
Figure 3-34 Enterprise Applications WebServices_v4_WAS screen

Description of ''Figure 3-34 Enterprise Applications WebServices_v4_WAS screen''
-
Click the Shared Library References link under References.
Figure 3-35 Reference Shared Libraries button
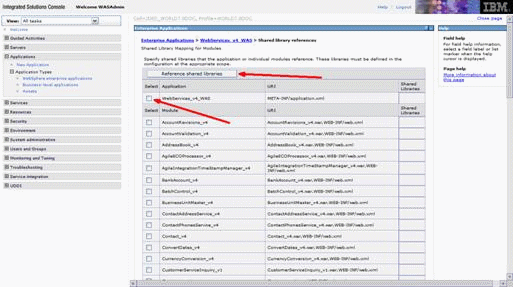
Description of ''Figure 3-35 Reference Shared Libraries button''
-
Select the WebServices_v4_WAS application box.
Click Reference Shared Libraries.
-
Select the WebServices_LIB Shared Library Reference using the arrow button
Click OK.
-
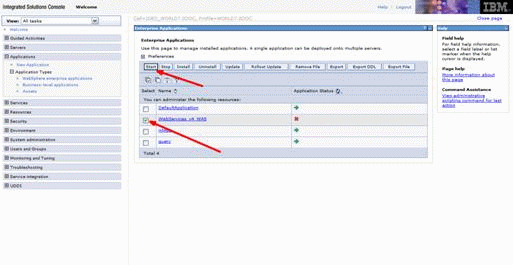
Start WebServices_v4_WAS application
-
Open Applications and then select the WebSphere enterprise applications link.
Select the WebServices_v4_WAS application.
Click Start.