4 Approvals for Notification
This chapter contains these topics:
For Notification Real Time Events (RTEs) to function, you must first activate the RTEs in the Approvals Management system and subscribe to the JD Edwards World system to receive notification when a specific transaction occurs. See Overview to Approvals Management in the JD Edwards World Technical Tools Guide for more details. Complete the following tasks:
4.1 Configure Approvals Constants
-
Sign on to the JD Edwards World A9.3 Environment and select the Approvals Management menu (G00A).
-
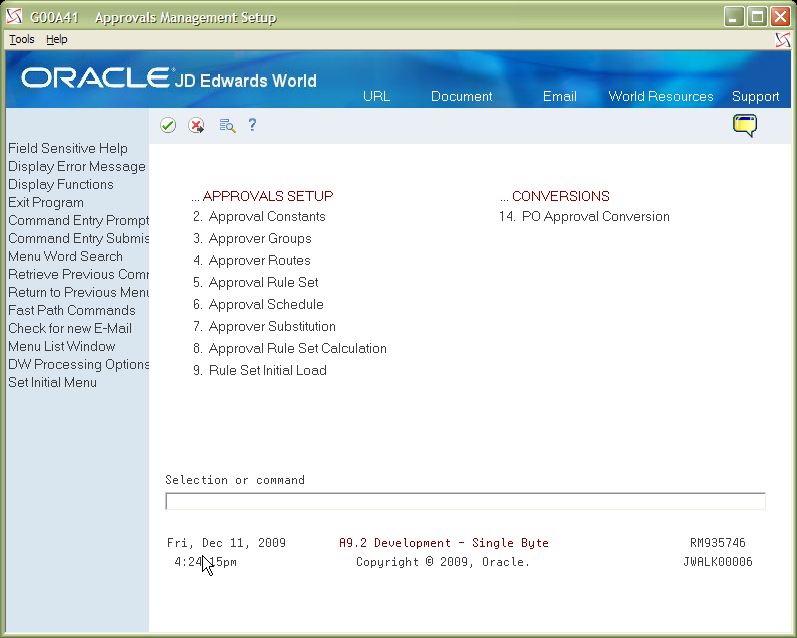
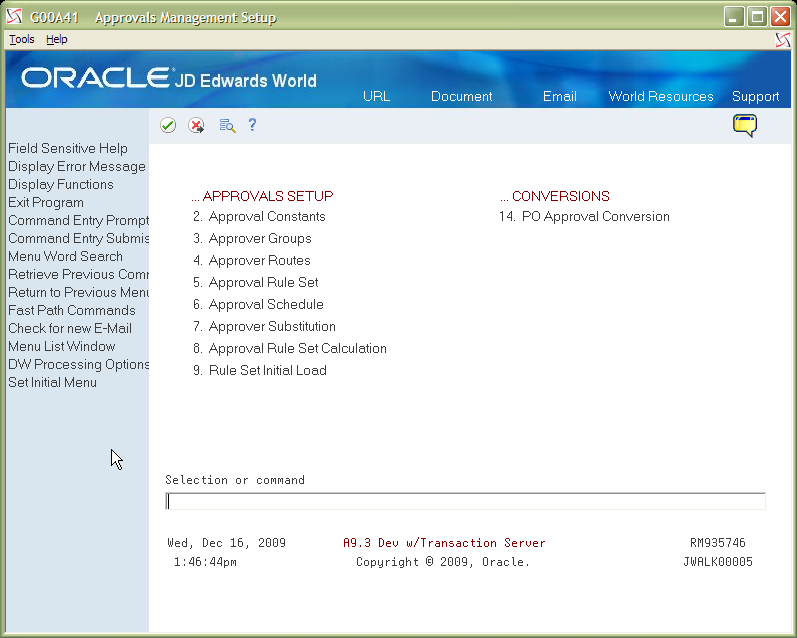
Select hidden selection 29 to access the Approvals Management Setup menu (G00A41).
Figure 4-2 Approvals Management Setup screen

Description of "Figure 4-2 Approvals Management Setup screen"
-
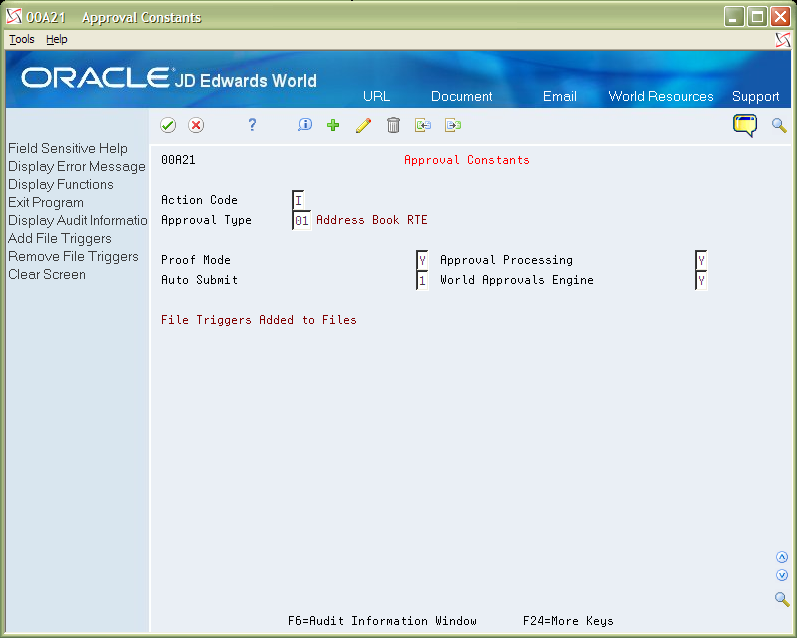
Select option 2, Approvals Constants and then press F6 to proceed past the Warning screen.
-
If not already added, add either Approval Type 01 or Address Book RTE. Set Proof Mode, Approval Processing, Auto Submit, and World Approvals Engine as follows:
Figure 4-4 Approval Constants (Approval Type 01) screen
Description of "Figure 4-4 Approval Constants (Approval Type 01) screen"

4.2 Configure Program Calls
When programs are called to process real time event transactions, the real-time event main program knows what program to call and they must be set up using UDC table 00A/01. The program called must contain the following entry parameters:
-
Approvals Transaction Number - 15 Numeric
-
Code value from UDC 00A/01 - 10 Alphanumeric
-
Description value from UDC 00A/01 - 30 Alphanumeric
-
Description-2 value from UDC 00A/01 - 30 Alphanumeric
-
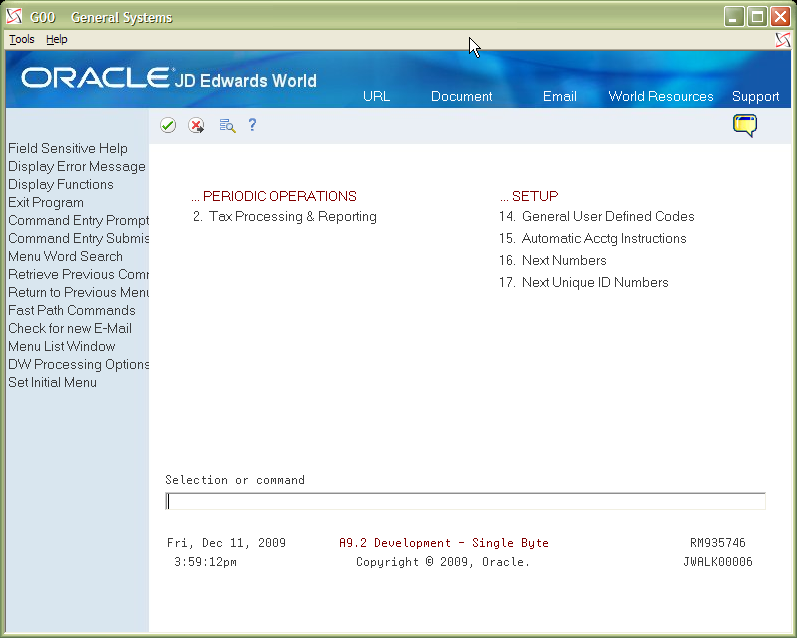
Sign on to the JD Edwards World A9.3 Environment and select the General Systems menu (G00).
-
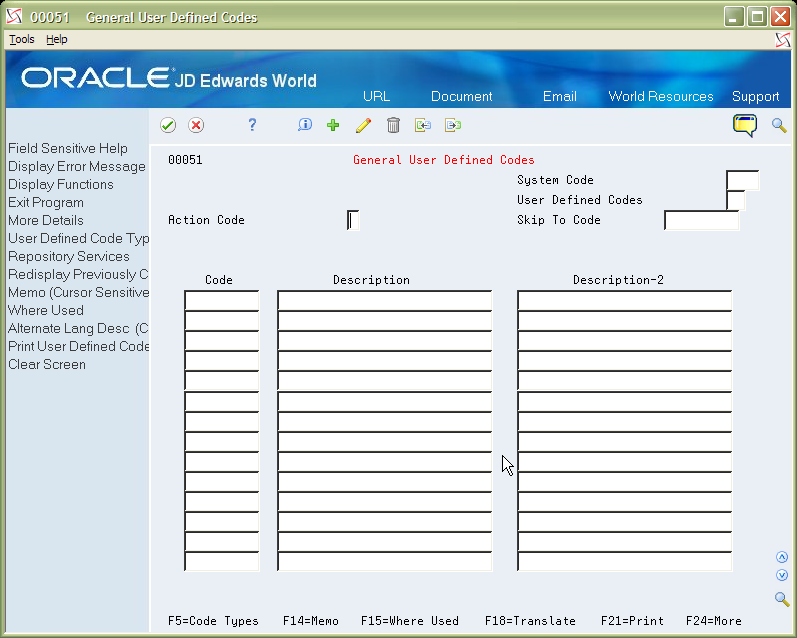
Select Option 14 for General User Defined Codes.
Figure 4-6 General User Defined Codes (Configure Program Calls) screen
Description of "Figure 4-6 General User Defined Codes (Configure Program Calls) screen"
-
Inquire on System Code 00A, User Defined Code 01. Add a record with the following fields for the real time event process to call.
Field Explanation Sample Use Case Value Code The code uniquely defines the program call in the UDC list. The code value gets passed to the called program as the second entry parameter. EMP_RTE Description The Description value gets passed to the called program as the third entry parameter. Employee RTE Program Description-2 The Description value gets passed to the called program as the fourth entry parameter. This value corresponds to the Event Name set up in the Notification Event Definition. EMPLOYEE1 Special Handling Code The special handling code contains the name of the program to be called. J00A1213 Figure 4-7 General User Defined Codes (System Code 00A)screen
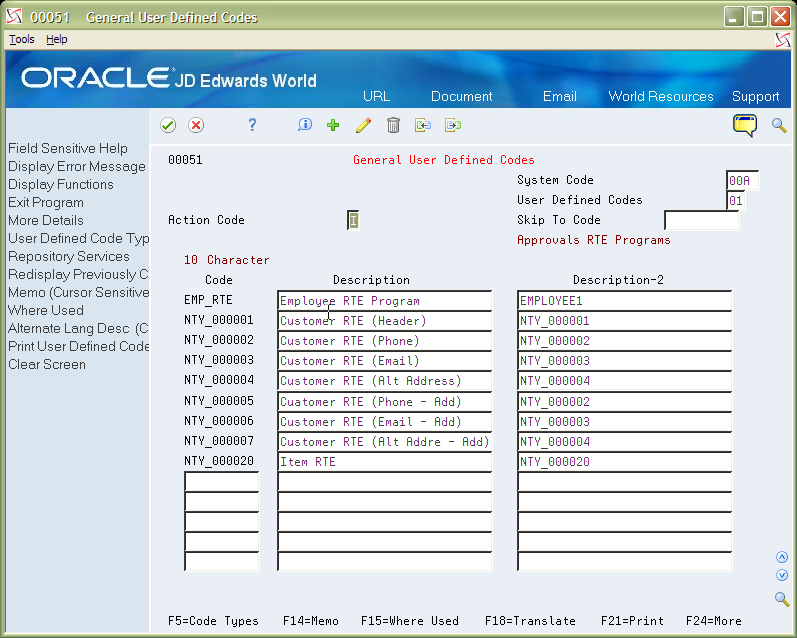
Description of "Figure 4-7 General User Defined Codes (System Code 00A)screen"
4.3 Configure Approval Rule Sets
Approval Rules are set up to determine when transaction data must be gathered and used to create a transaction. The Approval Rule Set application is a very flexible tool that allows for specifically telling the system when a transaction must be created. When used for Notifications, if an Approval Rule Sets criteria is matched, a transaction is created and the Notification program is called to process real time event transactions.
-
Sign on to the JD Edwards World A9.3 Environment and select the Approvals Management menu (G00A).
Figure 4-8 Approvals Management (Approvals Rule Sets) screen

Description of "Figure 4-8 Approvals Management (Approvals Rule Sets) screen"
-
Choose hidden selection 29 and then press Enter to get to the Approvals Management Setup menu. Select the Approvals Rule Sets (5).
Figure 4-9 Approvals Management Setup (Approvals Rules Sets) screen
Description of "Figure 4-9 Approvals Management Setup (Approvals Rules Sets) screen"
-
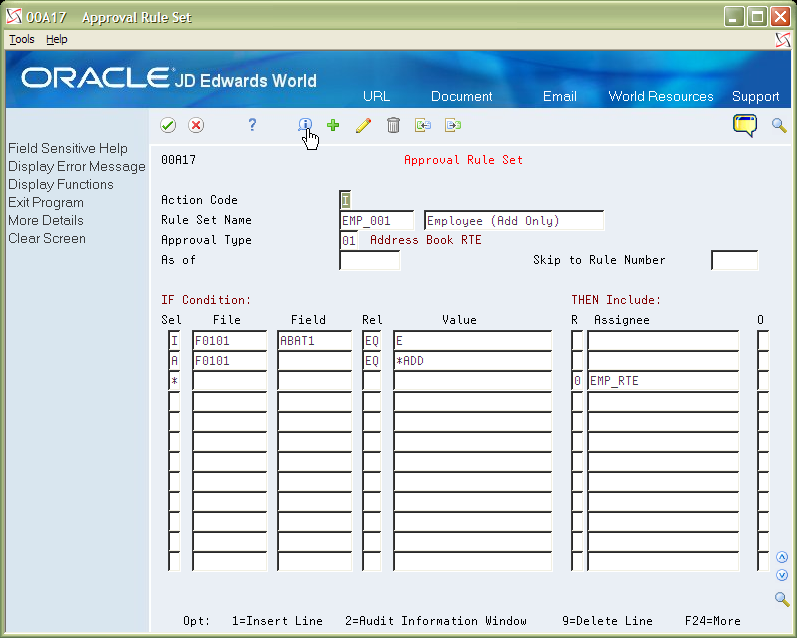
For the Sample Use Case, the Rule Set includes Address Book records added with a Search Type E. Enter the following values and then press Enter.
Field Explanation Sample Use Case Value Action Code A code that indicates the activity you want to perform A Rule Set Name A 10-digit, free-form, user defined, alphanumeric field used to identify a rule set. EMP_001 Description A 30-digit, free-from, user defined description or remark. Employee (Add Only) Approval Type A user defined code (00/AT) that indicates the type of approval request. 01 Sel A code that determines whether compound data selection logic is based on an A = AND condition or an O = OR condition. Line 1 = I Line 2 = A
Line 3 = *
File Used in the approval rule set definition to specify the file name. Line 1 = F0101 Line 2 = F0101
Line 3 =
Field Used in the approval rule set definition to specify the field name in a file. Line 1 = ABAT1 Line 2 =
Line 3 =
Rel A code that indicates the relationship in the approval rule set definition. Valid values are:
EQ Equal to
LT Less than
LE Less than or equal to
GT Greater than
GE Greater than or equal to
NE Not equal to
Line 1 = EQ Line 2 = EQ
Line 3 =
Value A free-form, alphanumeric field used to store the approval rule value. Line 1 = E Line 2 = *ADD
Line 3 =
R A code that determines whether an approver is required to approve an approval request. 0 = Used in real time event transactions to designate that the value entered into the Person/Group/Route field is a program call. Program calls must be setup in UDC.
Line 1 = Line 2 =
Line 3 = 0
Assignee This field holds the person, group, or route responsible for approving an approval request. For Notifications, the assignee is the UDC 00A/01 value that points to the program to be called. Line 1 = Line 2 =
Line 3 = EMP_RTE
-
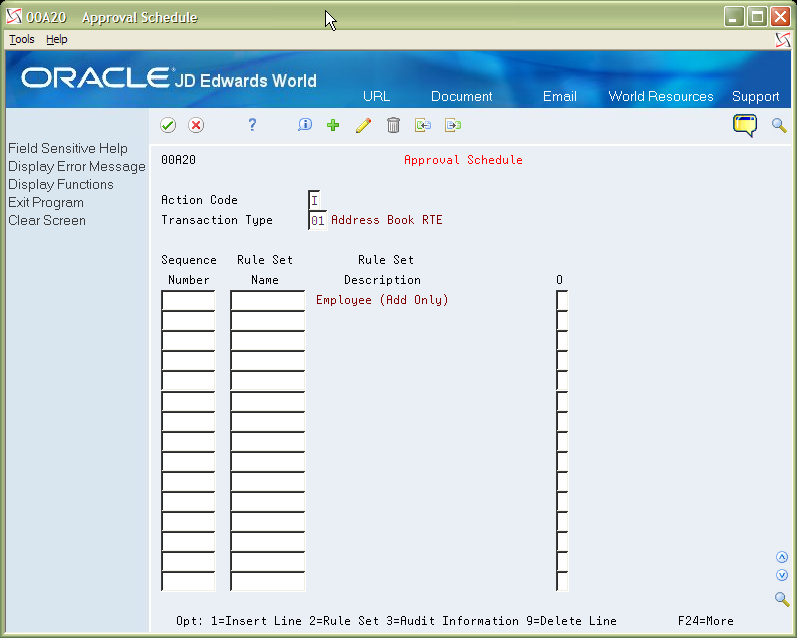
Once the Rule Set is set up, it must be added to the schedule and used when Employee records are added. Exit from the Rule Set application if not already done. Select Approvals Schedule (6) from the Approvals Setup menu (G00A41).
Figure 4-11 Approvals Management Setup (Approvals Rules Sets) screen
Description of "Figure 4-11 Approvals Management Setup (Approvals Rules Sets) screen"
-
From the Approvals Schedule screen, inquire on Transaction Type 01. Press Enter.
-
Add a schedule record for the employee Rule Set. Enter a C in the Action Code field. Enter a number in the first available Sequence Number field (if no other Approval Rule Sets are scheduled, you can enter a 1 in the sequence).
Enter EMP_001 in the first available Rule Set Name field. Press Enter.
Figure 4-13 Approval Schedule (EMP_001) screen
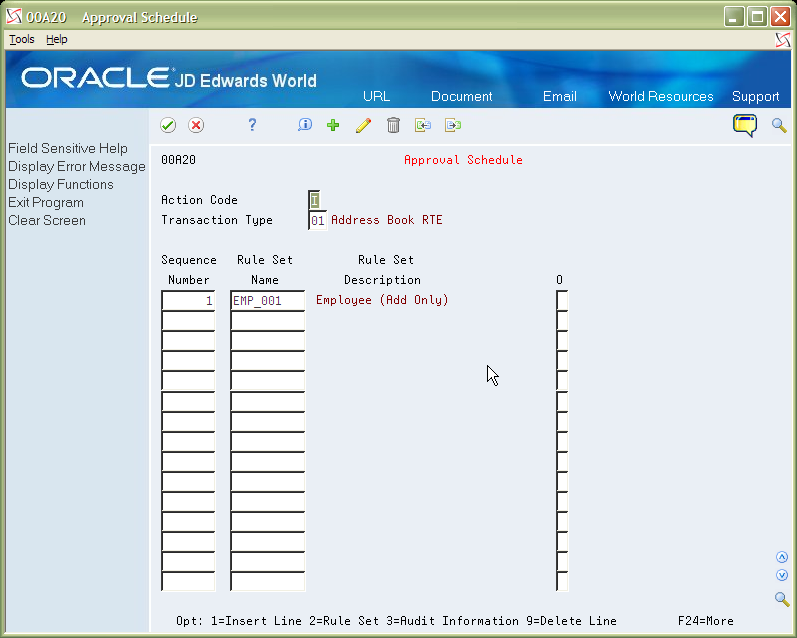
Description of "Figure 4-13 Approval Schedule (EMP_001) screen"