GIS Assets Map Integration
This chapter covers the following topics:
- Overview of GIS Assets Map Integration
- ESRI-GIS Assets Integration
- Oracle Spatial-GIS Assets Integration
- Custom GIS with Oracle Spatial-GIS Assets Integration
- Using Linear Spatial Routes
- Using the Linear Spatial Route Map
Overview of GIS Assets Map Integration
Setting the Profile CSI: Map Viewer Name drives the map integration option. Select of the following options for GIS assets:
-
ESRI: For ESRI integration
-
Oracle Spatial: For Oracle Spatial Integration
-
Custom GIS with Oracle Spatial: For Custom GIS integration
The integration option determines where you want the GIS geometry of the GIS assets to reside.
ESRI-GIS Assets Integration
Oracle Enterprise Asset Management directly integrates with an ESRI GIS System. With this integration, ESRI is the primary source GIS system. The geometry would be part of the ESRI GIS, and EAM holds the reference of the geometry and pulls the geometry whenever required.
This applies both for discrete assets which can refer to Point geometry, and GIS assets which can refer to Line geometry of an ESRI Feature Class.
Prerequisites
- Required Software Licenses
-
ArcGIS for Server
-
ArcGIS for Desktop
-
Esri Roads and Highways Extension for Desktop and Server: Applies only for GIS assets and if line geometry has measure dimensions. This is needed to publish the line geometry with Linear Referencing capabilities.
- Prerequisite Steps Before Asset Association
-
Publish the ESRI Feature Class that the discrete or GIS asset needs to reference.
-
Set up the parameters in Map Manager. See Using Map Manager for more details.
Perform the following steps before associating assets:
ESRI Geometry
ESRI maintains the geometry in the Feature Class. Each row has a shape and can be identified by a unique ID.
As part of the ESRI integration implementation, the ESRI Feature Class which has either a point shape or polyline shape should be published to the Server using the ArcGIS for Desktop tool.
If the Feature Class has a polyline shape and a measure dimension, the published webservices must also have GIS referencing capability. This option requires ESRI Roads and Highways Extension for Desktop and Server to publish the webservices with GIS referencing capability. This would generate additional webservices of geomentrytomeasure and measuretogeometry.
After the required Feature Classes are published, the generated URLs must be seeded in the Map Manager under the GIS asset and discrete asset webservices section, based on the polyline or point Feature Class published. Refer to Using Map Manager for more information regarding how the generated URLs should be set up.
Note: Please review ARCGIS Help for publishing Feature Classes as web services using the ARCGIS Desktop tool. In addition, review the ESRI Road and Highways extension product which assists in the selection of the Linear Referencing capabilities.
Mapping ESRI Geometry to EAM GIS Assets
The ESRI Polyline Feature class is mapped to the EAM Linear Asset Segment so that the geometry is associated to the GIS asset. If the ESRI integration option is selected, the segment table will include additional columns, ESRI Feature Class and ESRI Feature ID. Use these columns to choose the Feature Class that is set up in Map Manager and enter the unique ID pointing to a row in chosen Feature Class to create the association between the ESRI Polyline Geometry and the EAM GIS asset. If geometry has a measure dimension, you can enter the measures and length to specify the portion of measure that the segment is mapped.
During the asset visualization in Map Workbench, the geometry is fetched using Webservice Query URLs seeded in the Map Manager by passing the unique ID entered in Linear Asset Segment fields using the GIS Asset Workbench.
The mapping between ESRI Unique ID and the EAM GIS Asset can be performed in several ways. You can select from various mapping options based on the length of geometry and how you wanted to view, manage, or maintain the asset in Enterprise Asset Management. This gives flexibility to define GIS assets based on operational needs but not driven by GIS feature objects.
| One Asset to One Route | The Linear Asset Segment can be mapped to a single ESRI Feature ObjectID which would mean that the asset maintains the complete geometry route as defined in the ESRI system. |
| One Asset to Many Routes | Multiple asset segments of an asset are mapped to different ESRI object IDs, which indicates that the asset maintains all the geometry of the mapped objectIDs as one single asset. |
| Many Assets to One Route | Create multiple assets, map the Segment to same Object ID field with (entered) Measure values which indicates that multiple assets maintain the same geometry. However, each asset has its own share of length, and only that portion of the GIS route can be maintained. Example: An ESRI pipe route, 1000212, has a geometry stretch of 100km. Map the same routeId Assets A1, A2 with measure values entered in GIS Asset Workbench Segment Details:
|
Mapping ESRI Geometry to EAM Discrete Assets
The ESRI Point Feature Class is enabled so that it can be associated to the EAM discrete asset. When the ESRI integration option is selected, the Location tab will display additional fields of ESRI Feature Class and ESRI Feature ID in the Define Asset Number and Define Rebuildable Serial Number forms. Use these fields to choose the Feature Class setup in the Map Manager and enter the unique ID pointing to a row in the selected Feature class to create the association between the ESRI Point Geometry and the EAM discrete asset.
During the asset visualization in the Map Workbench, the geometry is fetched by passing the unique ID using Webservice Query URLs seeded in the Map Manager.
Note: You can use the Latitude and Longitude fields in the Locations tab to enter the location details to visualize the asset on the map. If Latitude, Longitude and ESRI Feature Details are defined, then the ESRI feature takes priority.
Oracle Spatial-GIS Assets Integration
Oracle Enterprise Asset Management GIS assets geometry can be maintained in Oracle Spatial if Oracle Spatial is installed as part of the EBS database.
With this integration, the geometry would be maintained in EAM as a Spatial Route, and the EAM GIS asset would hold the reference of the spatial route geometry and pulls the geometry when required for viewing.
Prerequisites
- Required Software License
-
Oracle Spatial in EBS Database
- Prerequisite Steps Before Asset Association
-
Set up parameters in Map Manager. Please review Using Map Manager for more details.
-
Run the EAM: Reindexing Oracle Spatial Tables concurrent program. This concurrent program is run after the Map Manager setups to create the index of the spatial columns are completed for the Oracle Spatial integration.
-
Use a Linear Spatial Route and create geometry.
Geometry
The geometry can be created in EAM system from the Linear Spatial Route setup. Spatial Routes enable you to draw the geometry on Google Maps, Oracle Maps, or Oracle Spatial Maps. Please review Using Linear Spatial Routes, Oracle Enterprise Asset Management User's Guide to create and manage Spatial Routes for more information.
Mapping Spatial Route Geometry to an EAM Asset
The Spatial Routes must be mapped to EAM asset so that the geometry is associated to the asset. This can be performed using GIS Asset Workbench Segment Details. If the Oracle Spatial integration option is selected, the segment section in GIS Asset Workbench displays an additional column, Spatial Route ID, where the spatial route can be selected to create an association between the Route Geometry and the EAM GIS asset.
During asset visualization in the Map Workbench, the geometry is fetched from the asset associated spatial route.
The mapping between Spatial Route and an EAM GIS Asset can be performed in several ways. You can select from various mapping options based on length of the spatial route geometry, and how you want to view and maintain the asset in Oracle Enterprise Asset Management.
| One Asset to One Route | The Linear Asset Segment can be mapped to a single Spatial Route without entering measure values, indicating that the asset maintains the complete geometry route as defined in the Spatial Route. |
| One Asset to Many Routes | Multiple asset segments of an asset are mapped to different Spatial Routes, indicating that the asset maintains all the geometries of the mapped Spatial Routes as one single asset. |
| Many Assets to One Route | Create multiple assets, map the Segment to same Spatial Route with Measure values also entered. This indicates that multiple assets maintain the same geometry but each one has its own share of length and each asset can maintain only that part of the GIS route. Example: A pipe Spatial Route, Pipe100, has a geometry stretch of 100km. Map the same Spatial Route to Assets A1, A2 with measure values entered in GIS Asset Workbench Segment Details:
|
Custom GIS with Oracle Spatial-GIS Assets Integration
Oracle Enterprise Asset Management gives option to integrate with your GIS System as the primary source GIS system.
In this integration, the geometry would be part of custom GIS, and the EAM GIS asset would hold the reference of the geometry and pulls the geometry when needed.
Prerequisites
- Required Software License
-
Oracle Spatial in EBS Database
- Prerequisite Steps
-
Set up parameters in Map Manager. Please review map Manager for more details.
-
Implement API EAM_GIS_CUSTOM.Get_Custom_Route()
The EAM_GIS_CUSTOM.Get_Custom_Route () package specification is seeded as part of EAM. You must implement this API which will return Custom GIS geometry data in the Oracle Spatial Format.
The custom_route_id and asset_number would be passed to the API, for you to implement logic to fetch related geometries from your GIS system and fetched data must be converted to Oracle Spatial SDO_GEOMETRY format for EAM to use.
function Get_Custom_Route (custom_route_id number,asset_number number) return sdo_geometry
The custom_route_id is the unique id entered in GIS Asset Workbench for the GIS asset.
If you have a custom GIS system that has Spatial capabilities or if the custom GIS uses Oracle Spatial, you must have a separate Oracle Spatial license as part of EBS database. This is necessary for EAM to process geometry further during visualization.
Geometry
The Custom GIS system maintains the geometry.
Mapping Custom GIS Geometry to an EAM Asset
The Custom GIS geometry must be mapped to the EAM asset so that the geometry of associated asset can be fetched. This can be performed using GIS Asset Workbench Segment Details.
If the Custom GIS with Oracle Spatial integration option is selected, the segment section will include a Custom Route ID column where the you can enter a unique ID used to retrieve the geometry from Custom GIS system.
During asset visualization in the Map Workbench, the geometry is fetched by calling the custom API Get_Custom_Route by passing the unique id you have associated in GIS Asset Workbench, enabling you to fetch related geometry from your GIS system.
The mapping between the Custom Route ID and an EAM GIS asset can be performed in many ways. You can select from various mapping options based on the length of the Spatial route geometry and how you want to view or maintain the GIS asset in Oracle Enterprise Asset Management.
| One Asset to One Route | The Linear Asset Segment can be mapped to a single Custom routeid without entering measure values, indicating that the asset maintains the complete geometry route as defined in GIS system. |
| One Asset to Many Routes | A multiple Asset segments of an asset are mapped to different Custom routeIds, which would mean the asset maintains all the geometries of the mapped routeId as one single asset. |
| Many Assets to One Route | Create multiple Assets, ,map the Segment to same routeId with Measure values also entered, which would mean multiple assets maintain the same geometry but each one has its own share of length and each asset is eligible to maintain only that part of the GIS route Example: A Custom GIS pipe route, 1000212, has a geometry stretch of 100km. Map the same routeId Assets A1, A2 with measure values entered in GIS Asset Workbench Segment Details:
|
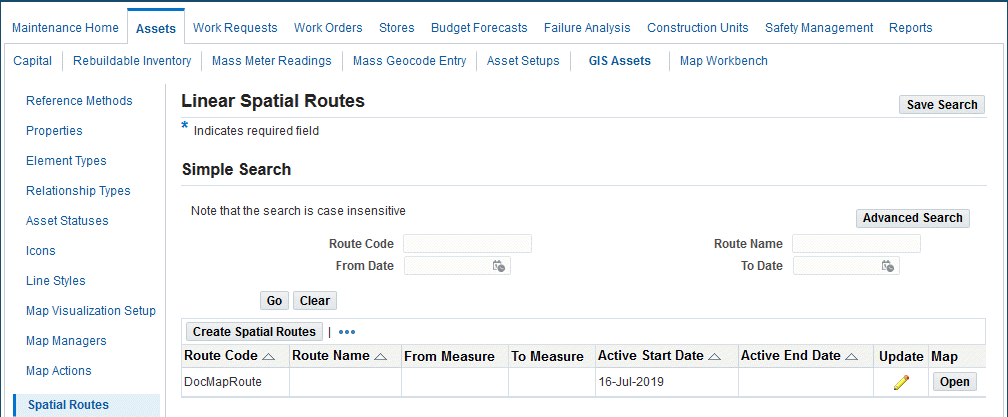
Using Linear Spatial Routes
Linear Spatial Routes will be used only if you choose the option of Oracle Spatial for map integration.
Creating Spatial Routes
-
Navigate to the Create Spatial Route page (Maintenance Super User > Assets > GIS Assets > Spatial Routes > Create Spatial Route).
-
Enter a spatial Route Code (required).
-
Enter an Active Start Date (required).
-
Optionally enter values in any of these fields:
-
Route Name
-
Line Style
-
Active End Date
-
-
Save your work.
Updating Linear Spatial Routes
-
Navigate to the Linear Spatial Route page (Maintenance Super User > Assets > GIS Assets > Spatial Routes).
-
Click the Go button to retrieve the existing linear spatial routes.
-
Click the Update icon to make changes to the spatial route.
-
Enter new values for the Route Name, Active Start Date, Line Style, and Active End Date.
You cannot edit the Route Code.
-
Save your work.
After the Spatial Route Definition has been created, you can view the map and draw the geometry profile. Refer toUsing the Linear Spatial Route Map.
Using the Linear Spatial Route Map
The Linear Spatial Route Map is a spatial map page that supports basic toolbar actions to draw the route profile on a map. This geometry can be saved for the spatial route defined in EAM.
In addition, you can use the Linear Spatial Route Map to view, draw and modify the geometry associated with the spatial route.
Note: Make sure the Map Manager setup and Reindexing Oracle Spatial concurrent program are run before you use Linear Spatial Route Map.
Creating Route Geometry Using the Linear Spatial Route Map
-
Navigate to the Linear Spatial Routes page (Maintenance Super User > Assets > GIS Assets > Spatial Routes).
-
Search for an Oracle Spatial route, and click the Go button.
-
Click the Open button in the Map column to launch the Spatial Route Map.
-
The Linear Spatial Route Map appears with the map layer. The map layer could be Google Maps, Oracle Maps, or Oracle Spatial Map sourced from the data source based on the Map Manager setup.
-
Click the Draw Route button to draw the geometry on the map layer.
-
Right-click to stop drawing.
-
Once finished with drawing, enter From measure and To measure.
-
Click Save Spatial Route to save the geometry.
-
-
Optionally use the Undo, Redo, Clear buttons and distance tool while modifying the geometry of the spatial route.
Modifying Route Geometry Using the Linear Spatial Route Map
-
Navigate to the Linear Spatial Routes page (Maintenance Super User > Assets > GIS Assets > Spatial Routes).
-
Search for a spatial route, and click the Go button.
-
Click the Open button in the Map column to launch the Spatial Route Map.
The Linear Spatial Route Map appears with map layer. The map layer could be Google Maps, Oracle Maps or Oracle Spatial Map sourced from the datasource based on the Map Manager setup
-
Click the route line and begin editing the drawing by performing drags and drops.
-
Update the From and To measures if required.
-
Click Save Spatial Route to save the geometry.
-
-
Optionally use the Undo, Redo, Clear buttons and distance tool while modifying the geometry of the spatial route.