The management port on each Oracle VM Server is specified at installation time and is automatically configured as a bonded interface. You create additional bonds to add redundancy and if desired, load-balancing to your network environment. Once created, these bonds can be used as building blocks when building VLAN Groups or networks.
This section discusses managing bonded interfaces and contains:
Creating bond ports
Making changes to bond ports
Deleting bond ports
To create a bond port:
In the Hardware view, select the Hardware tab.
In the navigation pane, select the Oracle VM Server on which the bond port is to be created. If the server is already part of a server pool, it will be listed under Resources. Otherwise, find and select the server in the Unassigned Servers folder.
In the management pane, select the Ethernet Ports tab. Make sure that the selected server's ports to be used for the bond port are not part of an existing bond, network or VLAN group. Verify that the ports are available.
In the management pane, select the Bonding tab. Click Create to start the Bond Port creation wizard.
In the right pane of the Create Bond Port window, select the ports to be part of the new bond.
Note: You cannot add a port to a bond if the port has an IP address.
You can also assign an IP address to this bond now, or wait to assign an IP address later, when using the bond to create VLAN Groups or networks. If you chose to assign an IP address now, select the Addressing type, and if applicable, the IP address and netmask.
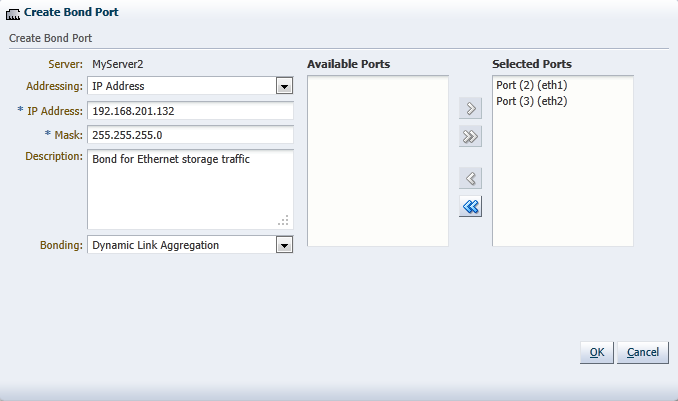
Optionally, add a description for this bond.
Except for the bond in the management network for each Oracle VM Server, you can specify the bonding mode from the Bonding list. See Section 5.4, “Network Bonding”, for more information regarding network bonding modes.
Click OK to complete the operation.
Once you have created the bond port, you can make changes to its configuration. You can update its bonding mode, and add or remove ports as well as changing its description and IP addressing.
To update a bond port:
In the Hardware view, select the Hardware tab.
In the navigation pane, browse the tree structure and select the Oracle VM Server on which the bond port is to be updated.
In the management pane, select the Bonding tab.
From the list of bond ports for the server, select the bond port to update.
You can set or change the IP addressing, the description, or the ports that are part of the bond.
Click OK to save and apply your changes.
If the bond port is no longer in use in any VLAN Group or network, it can be deleted.
To delete a bond port:
In the Hardware view, select the Hardware tab.
In the navigation pane, browse the tree structure and select the Oracle VM Server on which the bond port is to be deleted.
In the management pane, select the Bonding tab.
From the list of bond ports for the server, select the bond port to delete.
Click Delete to delete the bond port.