 Understanding User Profiles Security
This chapter provides an overview of user profiles security and discusses how to:
Prepare for user profiles management.
Set up user profiles management.
Run the User Profiles Management process.
Generate password notification letters.
Resolve issues for the User Profiles Management process.
Understanding User Profiles Security
To provide self-service access to an individual, create a user profile by selecting PeopleTools, Security, User Profiles, User Profiles. You then add a password and all the security that the individual needs to access the site. The User Profiles Management process enables you to create and maintain user profiles in batch. You must understand how a user profile is created before you run the User Profiles Management process.
Warning! Before you use this process, make sure that you understand how PeopleTools security works. When you provide database access to a large number of people, you can only revoke the access manually. A user with a high level of security in the institution should be in charge of running and setting up the process. Few people should have access to the user profiles management setup and process pages.
The User Profiles Management Application Engine process (USERPROFILE) consists of four main processes. These processes enable you to:
Create new user profiles and add role for the user IDs.
Delete a role from user profiles.
Add a role to existing user profiles.
Assign user preferences (default values) for the user IDs, including security values needed for the online credit card process.
You can run these four processes individually or all at once. The User Profiles Management process runs the four processes one role at a time. The mass change selects a group of people—for example, applicants—and then runs the processes based on a role (for example, the Applicant role). Each of the processes uses temporary tables so you can validate the processes' actions. These temporary tables are useful if you run the User Profiles Management process for many roles at once. A cleanup page enables you to delete these temporary tables.
The User Profiles Management process enables you to create user profiles and assign user IDs and passwords to groups of individuals. You can select which algorithms to use for creating the user ID and password and assign a checklist, a communication, or a comment to the user ID. The communication can include a letter that informs new users of their user IDs and passwords for access to the web.
The User Profiles Management process also enables you to maintain existing user profiles by adding or deleting roles to grant or remove page access. It can also set up the user preferences, which are default values, for basic fields like Academic Career and Academic Institution. If the institution accepts credit cards, you can use the feature to give appropriate security access for the online credit card functionality. The system uses mass changes to select the population of individuals for whom you want to create or maintain user profiles.
See Also
PeopleTools PeopleBook: Security Administration
Supplemental Installation Instructions for Campus Solutions Applications: Using the User Profiles Management Result Table on My Oracle Support, ID 751540.1.
 Delivered Mass Changes for User Profiles Management
Several mass change examples that you can use with the User Profiles Management process are delivered with this application.
These mass change examples are delivered:
Userprofile - Advisor.
Userprofile - Applicant.
Userprofile - Contributor.
Userprofile - Employee.
Userprofile - Former Student.
Userprofile - Fundraiser.
Userprofile - Graduate.
Userprofile - Instructor.
Userprofile - Prospect.
Userprofile - Recruiter.
Userprofile - Student.
Note. If you elect to use the Dynamic Role Member Assignment process (DYNROLE_PUBL) that is provided with PeopleTools to assign roles to already existing user IDs make sure the queries you create have the same criteria as the mass changes you are using.
The PeopleTools PeopleBook: Security Administration contains more information about the Dynamic Role Member Assignment process.
Preparing for User Profiles Management
Before you run the User Profiles Management process, you must complete the setup described in this section. You should complete the setup in the order shown.
Warning! Make sure you understand PeopleSoft security before you attempt to use the User Profiles Management process.
This section provides an overview of the creation of the model user ID and discusses how to:
Create the model user ID.
Enter the model user ID description.
Set up the roles.
Set up permission lists.
Set up primary permission lists.
Set up mass changes.
Set up event IDs for the communication, checklist, and comment (3C) engine.
Set up communications.
Set up checklists.
Set up comments.
See Also
PeopleTools PeopleBook: Security Administration
Understanding the Creation of the Model User ID
The User Profiles Management process creates user profiles based on a user ID that serves as a model. You create user IDs or user profiles in the User Profiles component USERMAINT (PeopleTools, Security, User Profiles, User Profiles.
For example, use the delivered model user ID SCC_MODEL for the Campus Solutions model. You only need to complete the first two pages in the User Profiles component. The other pages in the component do not contain any fields that the User Profiles Management process uses.
Pages Used to Prepare for User Profiles Management
|
Page Name |
Definition Name |
Navigation |
Usage |
|
USER_GENERAL |
PeopleTools, Security, User Profiles, User Profiles, General |
Create a user ID that the User Profiles Management process uses as a clone (model) for creating user profiles. |
|
|
PSOPRALIAS |
PeopleTools, Security, User Profiles, User Profiles, ID |
Enter the ID type None and a description for the model user ID that the User Profiles Management process uses for creating user profiles. |
Creating the Model User ID
Access the User Profiles - General page (PeopleTools, Security, User Profiles, User Profiles, General).
Add a new value to create a user ID or used the delivered example called SCC_MODEL.
Note. The Account Locked Out functionality is not cloned for the user profiles created in batch. When the user profiles are created, they are ready for the self-service users to access the site.
The system clones these fields to create these user profiles: Symbolic ID, Language Code, Navigator Homepage, Process Profile, Primary, and Row Security.
You should always select a symbolic ID, regardless of the role for which you are running the process. For example, if you are running the process using the role Prospects and you believe the role does not need a symbolic ID, then consider that when prospects become applicants or students, they do need a symbolic ID. There is no background process to create one.
Enter a password and confirm it. These fields are required on this page, but the system does not clone the password when you create the new user IDs.
See Also
Entering the Model User ID Description
Access the User Profiles - ID page (PeopleTools, Security, User Profiles, User Profiles, ID).
The system uses none of the fields on this page during the User Profiles Management process. However, the component requires an ID type. Select an ID type of None. This value is not cloned by the User Profiles Management process. Use the User Profiles Mass Creation setup page to set up the ID type to use for the user profiles that you create.
|
Attribute Value |
The process automatically adds a value for each user profile that you create. |
User Description
|
Description |
Enter the name for the model user ID. |
Note. You do not need to enter any other fields than the ones described when you create the model user ID to be used by the User Profiles Management process. None of the fields on this page are cloned.
Setting Up the Roles
You must define the roles that the User Profiles Management process assigns to self-service users. For example, you might want to have roles for applicants, students, prospects, instructors, or recruiters.
Consider the names of the delivered mass changes when creating the roles. For example, the mass change User Profile - Applicant could be used to assign the role of Applicant. Refer to the list of delivered mass changes earlier in this chapter.
See Also
Setting Up Permission Lists
You must set up a permission list to give self-service users access to pages. You should at least give self-service users access to the Campus Personal Information pages if you licensed the PeopleSoft Campus Self Service product. You set up permission lists in the Permission Lists component (PeopleTools, Security, Permissions & Roles, Permission Lists).
See Also
Using Self-Service Campus Personal Information
Setting Up Mass Changes
For each role that you create, you must create a corresponding mass change to define the search criteria that will identify a population. The PeopleSoft system comes with several mass change examples that you can use to create your own.
See Also
Delivered Mass Changes for User Profiles Management
PeopleTools PeopleBook: Data Management, "Mass Change"
Setting Up Event IDs for the 3C Engine
To assign a communication, checklist, or comment to the user IDs that you create with the User Profiles Management process, you must set up a 3C engine event ID.
See Also
Setting Up Communications
To send a letter to notify new users of their user IDs and passwords, set up a communication. Make sure the letter code that you create in the Standard Letter table has these characteristics:
Function equal to Gen (general).
SQC name equal to CCLTRWOL.
Without having this specific SQC name, the Letter Generation SQR process (CCLTRGEN) does not extract the user IDs and the passwords to print on the letters. To facilitate printing letters with the user IDs and passwords, you can use the delivered template called CCLTROPR.doc. To use this template, create a letter code called OPR. You must also create a communication speed key (also called a comm key) and an event ID.
Warning! Do not modify the SQC named CCLTRWOL.sqr in any way.
The User Profiles Management process enables you to assign more than one communication. For example, if you are creating user profiles for the prospects for next term, you can create an event ID with different comm keys. One might include a letter code for a letter communicating user IDs and passwords, a second might be for a postcard for an invitation to an open house, and a third might be for an admission package.
Warning! The User Profiles Management process assigns communications only to individuals with a user profile created by the process.
See Also
Generating Password Notification Letters
Setting Up Checklists
To assign a checklist code to self-service users, you must create checklist items and a checklist code, and you must add the checklist to the event ID. A checklist could be used for the users' list of things to do.
Warning! The User Profiles Management process assigns checklists only to the individuals who have a user profile created by the process.
See Also
Setting Up Comments
You can assign a comment to the self-service users. For example, you might need to know whether an individual's user profile was created by the User Profiles Management process. You could create this comment: this individual's user ID was created by the User Profiles Management process. To do this, you create a comment category and add it to the event ID.
Warning! The User Profiles Management process assigns comments only to the individuals who have a user profile that is created by the process.
See Also
Setting Up User Profiles Management
To set up user profiles, use the User Profiles Mass Creation component (OPER_LOAD).
The User Profiles Mass Creation component is the setup component for the User Profiles Management process. When you access the component, select a role name. That role is added to user profiles or deleted from existing user profiles, depending on the processes you select when you run the User Profiles Management process.
On the first page of the component, select the mass change that you want to use to select a group of individuals. You select individuals whose role you want to add or delete in new or existing user profiles. You can then review the list of these individuals whose user profiles you plan to create or modify. The individuals appear in a search results grid at the bottom of the page after you run the mass change. The list provides a count of the number of IDs selected. On the first page, you also determine how the user ID and passwords are created. You can also assign 3C items and create a result table, which is a temporary table that holds the new user IDs and their nonencrypted passwords.
On the second page of the component, you select the user preferences (default values) to assign to the user IDs. You also set IDs to use the online credit card functionality.
This section discusses how to:
Select users.
Assign user preferences.
Pages Used to Set Up User Profiles Management
|
Page Name |
Definition Name |
Navigation |
Usage |
|
OPER_ROLE_DEFN |
Set Up SACR, Security, Secure Student Administration, Setup, User Profiles Mass Creation, User Profiles Mass Creation |
Select the users to manage (using a mass change definition) and define other parameters, including the algorithms for creating user IDs and passwords and the model user ID. You can also assign 3C IDs to the user ID that you create. |
|
|
OPER_ROLE_DEFN_ASS |
Set Up SACR, Security, Secure Student Administration, Setup, User Profiles Mass Creation, Assign User Preferences |
Select user preference default values for institution, academic career, term, and aid year. You can also set up the values for institution set and business unit if the institution uses the online credit card process. |
Selecting Users
Access the User Profiles Mass Creation page (Set Up SACR, Security, Secure Student Administration, Setup, User Profiles Mass Creation, User Profiles Mass Creation).
Enter the mass change that the system uses to create the list of users to process. Click the Mass Change Definition link to access the Mass Change Definition component, where you can select different parameters for the mass change selection.
Note. It is good practice to always regenerate a mass change prior to using it, even if you didn't modify the criteria. That way, you ensure that you are using the latest data.
|
Count |
Displays the number of users selected by the mass change. This field is populated after you click the Populate Selection button. |
|
Populate Selection |
Click to run the selected mass change. The Selection Results grid displays a list of person IDs when the mass change processing is complete. Generate the mass change each time that you create user profiles. That way, you ensure that you are using the latest data. |
|
Refresh Grid |
Click to delete the mass change results from the buffer and from the Search Results table. If you do not refresh the grid after you use it, it may take a while to open this page the next time that you access it. |
User ID
The fields in this area are used as the basis for the new user profiles.
|
User ID |
Enter the user ID that you want to use as the model for the user profiles. For example enter the SCC_MODEL user ID. |
|
Email Type |
Select the email type to enter in the user profile. The system uses the EMAIL_ADDRESSES record to determine the email address, based on the type that you enter. The email address (for the IDs that have one) is added in. the Email Addresses page of the User Profiles component (PeopleTools, Maintain Security, Use, User Profiles, Edit Email Addresses link). If the user does not have an email address of the selected type, no email address is added to the user profile. If you selectPreferred, the system uses the email address marked as the preferred address on the Electronic Addresses page. Note. If you select a value for Email Type, you are required to enter an equivalent value in the User Profile Email Type field, and vice versa. |
|
User Profile Email Type |
Because the user profile stores different Email Type values than the ones used throughout the applications, select the corresponding email type that will match the type previously selected. Values are:Blackberry, Business, Home, Other, and Work. These values are delivered with the system as translate values and should not be modified. |
|
ID Type |
By default, the system uses the value Employee. You can run the User Profiles Management process only for that ID type. |
Algorithms
Enter the algorithms for the system to use when creating new user IDs and passwords.
|
For User IDs |
Select ID or Email to indicate which value to use to create the user IDs for the selected users. If you selectID, the new user ID is the same as the ID. If you select Email, you must select the Email Type For User ID to be used. |
|
For Passwords |
Select to indicate how the system creates the new passwords for the new user IDs. Select First Name, Last Name, ID to create passwords using the first two characters of the first name plus the first two characters of the last name plus the ID, if the ID is four characters or less. If the ID has more than four characters, the last four characters of the ID are used. Enter Random Creation to create more secure passwords. The random password is created by using the 26 letters of the alphabet and numbers from 1 to 9. The length of the password is determined by the Minimum Password Length field on the Password Controls page (PeopleTools, Maintain Security, Setup). If the value in this field is less than 8, then a password length of eight characters is used. If the Required Number of Specials field on the Password Controls page is set to a value other than 0, then the same number of special characters (that is, @, #, $, %, ^, &, *, ~, !, ?) is randomly picked and appended to the end of the password. |
|
Email Type |
Select the email type to use. If you selectPreferred, the system uses the email address marked as the preferred address on the Electronic Addresses page. The new user IDs are the characters before the @ symbol, excluding spaces and special characters. Important! If you selectEmail in the For User IDs field and the user does not have the email type that you select, a user profile is not created for the user. Instead, an error row is added to the temporary table (PS_ERR_LOG_USRPRF) with the error code 4. |
Communicate User IDs and Passwords
|
Assign 3C |
Select to assign communications, checklists, or comments to the user IDs that the process creates. If you select this check box, select a 3C engine event ID that the system uses to determine which communications, checklists, and comments to assign. Any communications, checklists, or comments should be created in one event ID. You can use this field to assign a communication that tells new users their user IDs and passwords for an internet site. When the User Profiles Management process runs with the Create User Profiles option and the Assign 3C option selected, the system invokes the 3C engine. 3C engine adds communications, checklists and comments directly to the communication tables, checklist tables, and comments tables, respectively. Consequently, all new users automatically receive the communications, checklists, and comments that are assigned. |
|
Institution |
Select the institution associated with the event ID. This information is needed for the 3C engine. |
|
Event ID |
Select the event ID that you created to assign communications, checklists, and comments. This information is needed for the 3C engine. |
|
Create result table |
When this check box is selected, a temporary result table is created when you run the User Profiles Management process. This temporary table is the only place where the newly created passwords appear nonencrypted. If you do not select this check box, the passwords cannot be seen and therefore cannot be communicated to the new self-service users. Note. The check box is automatically selected at save time if you select the Assigned 3C option using an event ID that has been set up with a comm key that includes a letter code with the unique SQC CCLTRWOL. The Letter Generation process uses the temporary table to print the user IDs and the passwords on the letters. See Supplemental Installation Instructions for Campus Solutions Applications: Using the User Profiles Management Result Table on My Oracle Support, , ID 751540.1. |
Selection Results
Click the Populate Selection button to populate this area.
|
ID |
Displays the list of person IDs that match the criteria specified in the selected mass change. If an ID is listed multiple times, more than one user ID was previously created for the same ID. Note. The User Profiles Management process does not create a user ID for the person IDs that already have a user ID. If you see in the gird that a person ID has multiple user IDs, it is because an administrative user manually created them. |
|
Name |
Displays the name associated with the person ID. |
|
User ID |
Displays the user ID assigned to the person ID. This information enables you to determine which IDs have a user ID versus the ones who do not. The User Profiles Management Application Engine process (USERPROFILE) creates a user ID for the one that do not have one. Note. If a user ID already exists, the process does not create a new one. |
|
Institution Set |
Displays the institution set assigned to a user ID by the Assign User Preferences Application Engine process. This value is mostly used by the online credit card process. If a user ID already has an institution set associated with it, the institution set is overridden by the Assign User Preferences process if the value that you select on the Assign User Preferences page is different from the user ID's institution set. However, if an administrator has manually entered an institution set, the process does not change the manually entered institution set. |
|
Institution Set Override |
Displays the institution set entered on the Self Service Institution Set Override page. The background process does not override this value. |
|
Business Unit |
Displays the business unit assigned to a user ID by the Assign User Preferences process. This value is used by the online credit card process. If a user ID already has a business unit associated with it, the business unit is overridden by the Assign User Preferences process if the value that you select on the Assign User Preferences page is different from the user ID's business unit. |
See Also
PeopleTools PeopleBook: Security Administration, "User Profiles"
Assigning User Preferences
Access the Assign User Preferences page (Set Up SACR, Security, Secure Student Administration, Setup, User Profiles Mass Creation, Assign User Preferences).
The values that you select on this page override the values created for the user ID in the OPR_DEF_TBL_CS table.
Assign Default Values for User IDs
|
Institution, Academic Career, Aid Year, and Term |
These fields are used as user preferences when the user accesses pages that include these fields. |
|
Institution Set |
This value is used by Student Financials. Enter a value if you use online credit card processing. |
|
Business Unit |
This value is used by Student Financials. Enter a value if you use online credit card processing. |
See Also
Setting Security for Credit Cards
Running the User Profiles Management Processes
To set up user profile management, use the User Profiles Management component (RUN_CC_USERPROFILE).
Before running the User Profiles Management process, regenerate the mass change that you plan to use.
The User Profiles Management process consists of a series of mass changes templates and definitions, as well as a series of application engine programs.
This section discusses how to run the processes that are part of User Profiles Management process.
Page Used to Run the User Profiles Management Processes
|
Page Name |
Definition Name |
Navigation |
Usage |
|
RUNCNT_USERPROFILE |
Set Up SACR, Security, Secure Student Administration, Process, User Profiles Management, User Profiles Management Processes |
Run any of the four user profile processes. You can create user profiles, delete or assign a role to user profiles, and assign user preferences. |
Running the User Profiles Management ProcessAccess the User Profiles Management Processes page (Set Up SACR, Security, Secure Student Administration, Process, User Profiles Management, User Profiles Management Processes).
|
Role Name |
Enter the name of the role to create or maintain. The available options correspond to the roles for which you set up a mass change on the User Profile Mass Creation page. |
|
Detail |
Click to access the User Profiles Mass Creation page, where you can review and modify the setup before running the processes. |
The four check boxes represent the four processes that you can run when you run the USERPROFILE Application Engine process. You can select one or more of these check boxes.
|
Create User Profiles |
Select to create a user profile for the IDs that are selected by the mass change (if they do not already have user IDs). The role that you selected is also added to the new user IDs. The user IDs and the passwords are based on the algorithms that you select on the User Profiles Mass Creation setup page. When this check box is selected, the User Profiles Management process creates a temporary table to list all the user IDs that are created. This temporary table is called PS_USRPRF_NWID_TMP. If on the User Profiles Mass Creation setup page you select to create the result table, this process creates the temporary table. See Supplemental Installation Instructions for Campus Solutions Applications: Using the User Profiles Management Result Table on My Oracle Support, ID 751540.1. |
|
Delete Role in User Profiles |
Select to delete the role from the user IDs that are not selected by the mass change. This option deletes the role name on the user profiles that no longer meet the criteria for the specified role name. For example, to provide self-service access to the applicants of the current term, this function deletes the Applicant role for all the user profiles that have the role but are not part of the current term. When this process runs, it creates a temporary table so you can review the IDs for which the specified role is removed. The temporary table is called PS_USRPRF_DEL_TMP. |
|
Assign Role |
Select to assign the role to the existing user IDs that are selected by the mass change. This process creates a temporary table called PS_USRPRF_ASG_TMP. It lists the user IDs that have the role assigned to them. Note. This is the same process that you can run from the Dynamic Members page in the PeopleTools, Security, User Profiles, User Profiles, Roles component. If you assign roles using that component, be sure the query that you use has the same criteria as the mass change. |
|
Assign User Preferences |
Select to assign the user preferences from the Assign User Preferences page. These user preferences are assigned to all user IDs selected by the mass change. If a user ID already has a value set for the preferences, it is overridden by this process (unless a value is added to the institution set override). If you are using online credit card processing, you should select this process to assign a business unit and an institution set to the user IDs. The process creates a temporary table called PS_ASSN_SETVAL_TMP. Use this table to review the IDs that have the user preferences assigned to them. |
|
Comment |
Enter any comments about the selections. The selected settings are associated with the user ID and the run control ID, so when you use the same settings, you can see the comments. This field is for informational purposes only. |
|
Explain |
Click these links to view the explanation for the selected check box. |
|
Run |
Click to run the User Profiles Management Application Engine process (USERPROFILE). When you run this process, do not select a type or a format on the Process Scheduler page. |
Error Log Information
An error log (PS_ERR_LOG_USRPRF) is created by the User Profiles Management process that lists any IDs for which a user profile is not created. Review the error log after running any of the processes. In the error log these error codes are used:
|
1 |
In the Assign Role Application Engine process, the save method was not completed for the existing user ID. The system also assigns this error code if it encounters an invalid user ID. A valid user ID must meet these conditions:
|
|
2 |
In the Create User Profile Application Engine process, the save method was not completed for the newly created user ID. |
|
3 |
In the Create User Profile process, the newly created user ID cannot be saved because the user ID already exists. |
|
4 |
In the Create User Profile process, no user ID can be created because Email was selected in the For User IDs field on the User Profiles Mass Creation page. |
|
5 |
In the Delete Role Application Engine process, the save method was not completed for the existing user ID. |
After you run the process, you can access the User Profiles Mass Creation page Set Up SACR, Security, Secure Student Administration, Setup, User Profiles Mass Creation for the role you just ran and click the Populate Selection button to see which user IDs were created. You can also see which business unit and institution set were assigned, if any where defined. In addition, you can review the temporary tables that are created by the processes.
See Also
PeopleTools PeopleBook: PeopleSoft Applications User's Guide, "Working with Processes and Reports"
Generating Password Notification Letters
You can create letters to send notifications to new users whose IDs are created by the User Profiles Management process. You can notify them of their assigned user ID and password using the Letter Generation process.
Note. This section refers to the temporary result table, which includes sensitive information including user IDs and passwords. For security reasons, this PeopleBook does not explain how the temporary result table functions.
This section discusses how to:
Set up password notification letters.
Run the letter generation process for password notification letters.
See Also
Supplemental Installation Instructions for Campus Solutions Applications: Using the User Profiles Management Result Table on My Oracle Support, ID 751540.1.
Pages Used to Generate Password Notification Letters
|
Page Name |
Definition Name |
Navigation |
Usage |
|
OPER_ROLE_DEFN |
Set Up SACR, Security, Secure Student Administration, Setup, User Profiles Mass Creation, User Profiles Mass Creation |
Select the users to manage (using a mass change definition) and define other parameters, including the algorithms for creating user IDs and passwords and the model user ID. You can also assign 3C IDs to the user ID that you create. |
|
|
RUNCTL_LTRGEN1 |
Campus Community, Communications, Letter Generation, General Parameters |
Run the process that generates password notification letters. |
Setting Up the Password Notification Letters
Access the User Profiles Mass Creation page (Set Up SACR, Security, Secure Student Administration, Setup, User Profiles Mass Creation, User Profiles Mass Creation).
To set up information for notification letters and use the Letter Generation process, you must enter the appropriate event ID and institution on this page. When the User Profiles Management process runs with the Create User Profiles option selected, it invokes the 3C engine. The 3C engine adds communications directly to the communications table, so all of the new users that are created have a communication assigned to their records.
To create password notification letters, the event ID must include a comm key that has been defined with a letter code. You set up the letter code with the function equal to General and the SQC name equal to CCLTRWOL. Complete this setup on the Standard Letters page.
Warning! Do not modify the SQC named CCLTRWOL.sqr in any way.
When the event ID includes a letter code with the SQC equal to CCLTRWOL, the
same process creates a temporary result table where all of the new user IDs
and passwords are stored. The Letter Generation process reads this table to
extract the passwords and the use IDs.
See Also
Supplemental Installation Instructions for Campus Solutions Applications: Using the User Profiles Management Result Table on My Oracle Support, ID 751540.1.
Running the Letter Generation Process (CCLTRGEN) for Password Notification
Letters
After you have run the Create User Profiles process, you can run the Letter Generation process to extract the data. To run letter generation access the Letter Generation – General Parameters page (Campus Community, Communications, Letter Generation, General Parameters).
When you run the Letter Generation process for password notification letters, the system updates the temporary result table with a flag indicating that the data has been extracted and the rows can be deleted from the temporary table. After the temporary table has been cleaned up, a critical error occurs if you attempt to run a communication for password notification letters for those user IDs and passwords.
Note. When running the Letter Generation process for notification letters, make sure both the Produce Communication and Complete Communication check boxes are cleared in the Missing Critical Data group box. If these check boxes are cleared, the system does not extract and complete a communication if critical data (for example, address information) is missing. Consequently, you can add or correct the missing data for the individual ID specified in the log. You can then rerun the Letter Generation process. If you do not rerun the communications, be sure to use the User Profile Clean Up Processes page to delete the rows from the results temporary table, even though the Letter Generation process did not set the ready-to-delete flag. If you run the process with these check boxes selected, the system creates the communication despite the missing data and updates the temporary result table with the flag to indicate that these rows can be deleted.
Warning! When the letter generation process extracts the data, it creates a .DAT file (CCLTRGEN.DAT ) and two .CSV files (CCLTR<LETTERCODE>.CSV for letters and CCLBL<LETTERCODE>.CSV for labels). These files are either stored on the temporary directory of the PeopleSoft Process Scheduler server or on the computer where the extract file path has been redirected. (You redirect the extract on the Date/Merge Parameters page of the Letter Generation component.) The passwords in the data extracts are unencrypted. No process automatically deletes the extracts. They are available for running future communications. To prevent misuse, the institution should take the appropriate security measures. For example, be sure to write the extract to a secure directory, verifying that the CCLTRGEN macro points to the same directory. Then manually delete the data extract after you have performed the merge with the letter template.
The extract file (CCLTR<LETTERCODE>.CSV files) that includes the nonencrypted passwords is overridden every time you run the Letter Generation process for the letter code that you set up to run the password notification letters. If you do not plan to run the macro to perform the merge with the data extract and the letter template right away, save the files using a different name. Make sure that they are stored in a secure folder and that they are deleted after the communication is produced.
The PeopleSoft system comes with these items specifically for generating the notification letters:
A sample Microsoft Word template called CCLTROPR.doc for printing notification letters.
You can modify the template or use it to create new templates so that you can create different letters. If you use this template and you do not rename it, the letter code that you create must be named OPR.
A unique SQC called CCLTRWOL.
The CCLTRWOL SQC generates the variable data necessary for the password notification letters associated with the letter code that you create. You should not modify this SQC.
Example
Here is an example of a password notification letter created with the sample template CCLTROPR.doc:
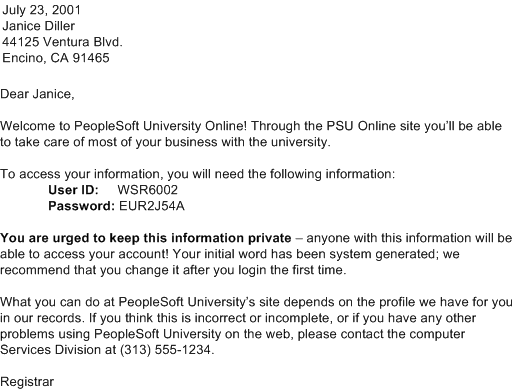
Example of password notification letter
Warning! When you merge the letter template with the extract files, a copy of the letter is saved on the local drive of the computer that was used to merge and print the letters. Be sure to delete these local copies because they contain the nonencrypted passwords.
Resolving Issues for the User Profiles Management Process
This section discusses techniques that enable you to run the User Profiles Management process successfully. If you receive an error or if a process runs unsuccessfully, try these problem solving techniques.
Mass Changes That Select No IDsIf the Count field on the user Profiles Mass Creation page displays 0 after you click the Populate Selection button, then the system selected no IDs for the process; the process ran successfully, but no IDs were created or maintained. In this case, regenerate the mass change using the mass change definition on the Generate SQL page. Be sure to save the mass change. Run the process again. If the count still shows zero, then the criteria may not match any of the data in the database.
Processes That End AbnormallyIf a process abnormally ended, the next time you run it may be unsuccessful because of the data stored in these temporary tables:
PS_ENG_COMM_TMP
PS_EMPLID_GRP_TMP
In this case, delete the tables and run the process again.
User IDs Not CreatedIf no user ID was created for an ID that was selected by the mass change, look at the error log PS_ERR_LOG_USRPRF and verify if an error code was given. Error codes are documented inside the "Error Log Information" section of this chapter.
See Also
Running the User Profiles Management Process