10 Customizing Task Flows for a Portal
This chapter describes how to use the Task Flow Editor system page to customize task flows for a portal.
Note:
Task flow customization is also possible at design time through Oracle JDeveloper. The process differs significantly from the runtime procedure discussed in this chapter. For more information, see the "Customizing WebCenter Portal Tools and Services Task Flows" chapter in Oracle Fusion Middleware Developing Portals with Oracle WebCenter Portal and Oracle JDeveloper.
This chapter includes the following topics:
Permissions:
To perform the tasks in this chapter, you must be a portal moderator or member with Manage All or Manage Configuration permission in the portal.
For more information about permissions, see Section 29.1, "About Roles and Permissions for a Portal."
10.1 About Task Flow Customization for a Portal
Task flow customization provides a means of configuring a particular task flow in a way that all instances of that task flow within the current scope are affected. For example, you can add a link or icon to a task flow that requires it in a particular portal.
The task flow customization feature is available exclusively on the Task Flow Editor system page. The Task Flow Editor system page is available for both the application (all portals) and for individual portals:
-
To change all instances of a given task flow across all portals (including the Home portal), the system administrator can customize the task flow on the application-level Task Flow Editor system page, as described in the "Customizing Task Flows Across Portals" chapter in Oracle Fusion Middleware Administering Oracle WebCenter Portal.
-
To change only those instances exposed in a given portal, customize the task flow on the portal-level Task Flow Editor system page, as described in this chapter.
Note:
When you customize a task flow element at the application level, and another user customizes the same task flow element at the portal level, the portal-level customization take precedence in that portal.
The Task Flow Editor system page is provided to enable customization of any out-of-the-box task flow. Custom task flows that are created through the Assets or Shared Assets page cannot be customized in this way.
System pages have a Restore Default feature that enables authorized users to remove all page customizations and restore a system page to its out-of-the-box state. It is important to note that Restore Default does not also restore customized task flows to their default states. A separate control, Reset Task Flow, is available to remove task flow customizations.
See Also:
For information about the Restore Default and Reset Task Flow features for system pages, see Section 8.3, "Removing All Page Customizations from a System Page (or Page Variant)" and Section 10.3, "Removing Task Flow Customizations", respectively.
10.2 Customizing Task Flows for a Portal
This section describes how to perform task flow customizations at the portal level.
Note:
When a system administrator customizes a task flow element at the application level, then you customize the same task flow element at the portal level, the portal-level customization take precedence in that portal.
To perform portal-wide task flow customizations through the Task Flow Editor system page:
-
In the portal administration (see Section 7.1, "Accessing Portal Administration"), click System Pages in the left navigation pane.
You can also enter the following URL in your browser to navigate directly to the System Pages page:
http://host:port/webcenter/portal/portalName/admin/systempages
-
Click the Customize link next to the Task Flow Editor system page (Figure 10-1) to open it in the page editor (Composer).
Figure 10-1 Customize Link Next to the Task Flow Editor System Page

Description of "Figure 10-1 Customize Link Next to the Task Flow Editor System Page"
-
Add a task flow that you want to edit to the Task Flow Editor page.
The method for adding a task flow to a page is that same as for any other component in the resource catalog. For more information, see Section 14.2, "Adding a Component to a Page."
-
Click the Structure tab to view the page source (Figure 10-2).
Figure 10-2 Structure View of Task Flow Editor System Page
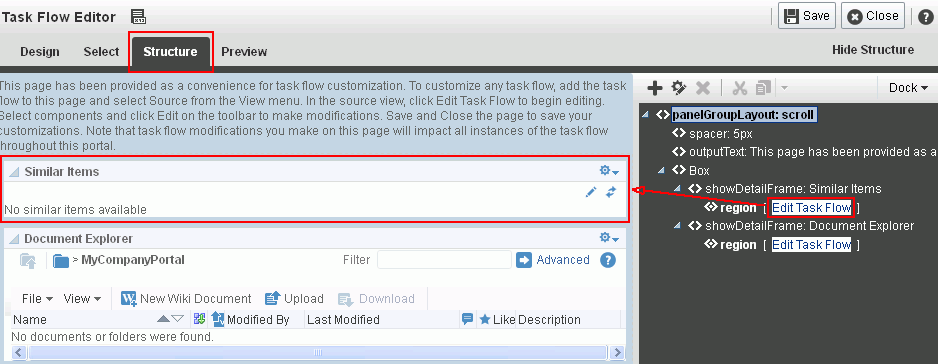
Description of "Figure 10-2 Structure View of Task Flow Editor System Page"
-
Click the Edit Task Flow link next to the task flow you want to customize (Figure 10-2).
-
In the Confirm Task Flow Edit dialog, click Edit.
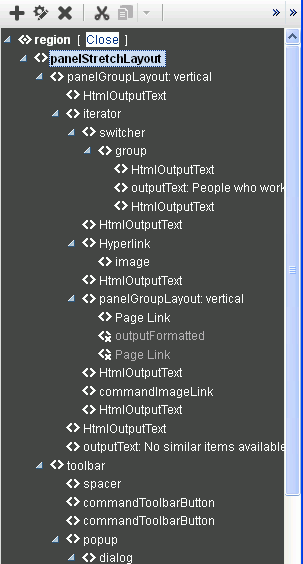
Structure view zooms into the source code hierarchy of the task flow being edited (Figure 10-3).
-
Set the properties of a task flow element by clicking it in the Task Flow Editor, then click the Show the properties of
regionicon. Alternatively, right-click theregionand select Edit (Figure 10-4).Figure 10-4 Setting Properties of Task Flow Element in Structure View
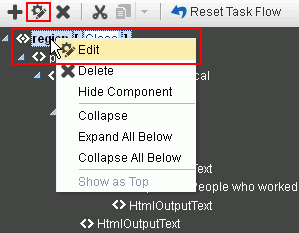
Description of "Figure 10-4 Setting Properties of Task Flow Element in Structure View"
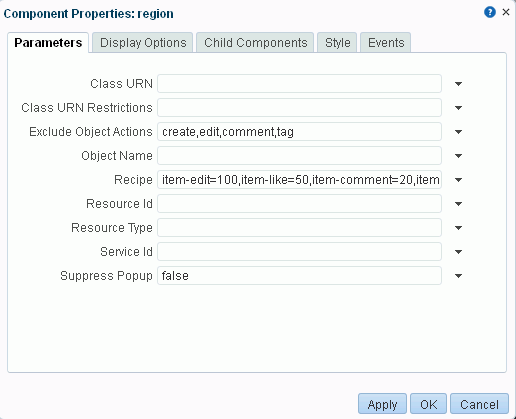
The Component Properties dialog opens (Figure 10-5). Click the Help icon for descriptions of the parameters for the component you are editing.
-
Make your changes to the element's properties.
Note:
Remember that changes to one element affect all like elements in the task flow within the current scope. For example, a change to the font used on a folder name affects all folder names within the scope and not just the selected instance.
-
Click Apply to view the effect of your changes; click OK to save your changes and exit the dialog.
Every instance of the customized task flow within the current scope renders with your customizations.
-
Click Save then Close to exit Composer.
10.3 Removing Task Flow Customizations
You can remove all customizations made to seeded task flows in the current portal.
Note:
This procedure does not apply to task flows created at runtime. That is, task flows created through the Assets or Shared Assets pages. Changes made to a task flow created at runtime are base edits rather than layered customizations; therefore, when you click Reset Task Flow, there are no customization layers to remove.
To remove task flow customizations made at the portal level:
-
In the portal administration (see Section 7.1, "Accessing Portal Administration"), click System Pages in the left navigation pane.
You can also enter the following URL in your browser to navigate directly to the System Pages page:
http://host:port/webcenter/portal/portalName/admin/systempages
-
Click the Customize link next to the Task Flow Editor system page (Figure 10-6) to open it in the page editor (Composer).
Figure 10-6 Customize Link Next to the Task Flow Editor System Page

Description of "Figure 10-6 Customize Link Next to the Task Flow Editor System Page"
-
Click the Structure tab to view the page source, select the customized task flow.
-
In the toolbar, click Reset Task Flow (Figure 10-7).
Figure 10-7 Reset Task Flow Option for a Selected Element
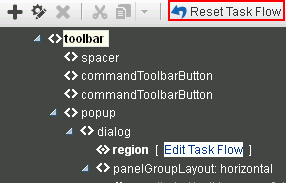
Description of "Figure 10-7 Reset Task Flow Option for a Selected Element"
-
In the Reset Task Flow dialog, click Reset Task Flow to confirm the action.
