25 Coding Templates for In-Context and Presentation Editing
This chapter presents information on coding templates for in-context editing and presentation editing. For information on new tags used in this chapter, see the Oracle Fusion Middleware WebCenter Sites Tag Reference.
This chapter contains the following sections:
25.1 Coding Templates for In-Context Content Editing
Note:
Any mention of in-context refers to the Web Mode of the WebCenter Sites Contributor interface.
In this section, we examine how templates need to be instrumented to allow editorial users to edit content or create content in the context of their website, instead of using the standard content forms.
This section modifies the HelloDetail template introduced in Chapter 24, "Creating Templates and Wrappers." See these previous topics that build on the HelloDetail template:
-
Section 24.1.1.4, "Use Case 1: Building a Layout Template for Article Assets"
-
Section 24.1.2.4, "Use Case 2: Using Pagelet Templates"
Note:
Doctype and Internet Explorer: The in-context editorial UI may not be fully functional if IE renders a page in quirks mode. In order to ensure that local settings cannot affect the UI, it is best to ensure that pages get rendered with an appropriate doctype.
See the DOCTYPE element description in the HTML/XHTML Reference of the Microsoft Library for details: http://msdn.microsoft.com/
This section contains the following topics:
25.1.1 Attribute Data Types
Asset types are defined by one or more attributes, which can be of the following types:
-
string: A short string (normally 255 characters max)
-
text: Aa long string. Typically mapped to a CLOB database type (maximum size depends on the underlying database).
-
date: A date field
-
binary: A BLOB attribute. Typically meant to store binary files such as image files, PDFs, etc.
-
asset: A reference to another asset
-
number: An integer, float, or money data type
25.1.2 String Fields
In this section, we examine how to make string fields editable. These fields are restricted in length (usually 255 characters) and are best suited to hold content metadata such as article headlines, author, etc.
This section modifies the HelloDetail template introduced in Chapter 24, "Creating Templates and Wrappers" in order to make the article headline field editable.
In the previous examples, we used the ics:listget tag to print the value of the headline field (which is stored in the value column of the article:headline list).
<h1>
<ics:listget
  listname="article:headline"
  fieldname="value" />
</h1>
-
To make this field editable in-context, add the following taglib directive:
<@ taglib prefix="insite" uri="futuretense_cs/insite.tld" %>
and replace the previous code with the code snippet below:
<h1>
<insite:edit
  field="headline"
  list="article:headline" column="value"
  assetid='<%=ics.GetVar("cid")%>'
  assettype='<%=ics.GetVar("c")%>' />
</h1>
where:
-
The field parameter designates which field of the asset is edited.
-
The
listandcolumnparameters designate where the current field value is stored. -
The
assetidandassettypeparameters designate the edited asset
The syntax can be simplified as follows:
<h1>
<insite:edit
  field="headline"
  list="article:headline"
  column="value" />
</h1>
Because the edited asset is designated by the asset type (c) and asset id (cid) variables, WebCenter Sites performs the retrieval of these values directly from the ICS scope.
Examining any asset in Web Mode of the Contributor interface, using HelloArticleLayout will not show any noticeable differences from the previous display. In fact, when in preview or inspect view, the
insite:edittag behaves exactly like theics:listgettag we just replaced. -
-
Selecting Edit View makes all editable areas active. In our case, the headline field as shown in the following screen capture:
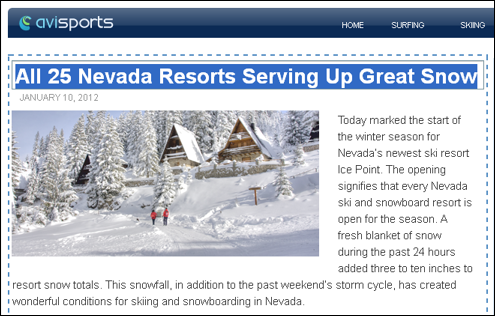
Description of the illustration b-new_editview_small.png
-
Editorial users are now able to edit the headline field in the context of the article detail web page and click Save to make this change permanent. This action is equivalent to going to the article asset form, editing the headline field of the article, and then clicking Save:
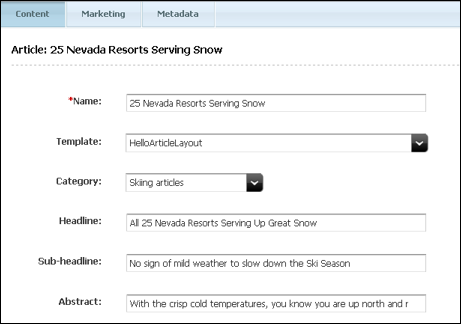
Description of the illustration l_contentchange_small.png
25.1.2.1 Variants of the <insite:edit/> Tag
In the previous example, the value of the edited field was stored in a list. This is how the assetset tags work; they query the database and return attribute values in a list object whether attributes are single-valued or multivalued.
In some cases, the value might be made available in a variable. The following variant of insite:edit can then be used:
<h1>
<insite:edit
  variable="headlineVar"
  field="headline" />
</h1>
In a case where the field value is not available in a variable or a list, it is possible to specify the value directly using the value attribute in the insite:edit tag.
<%String headline = getHeadlineValueFromSomewhere(); %>
<insite:edit
  value="<%=headline%>"
  field="headline" />
The insite:edit tag also supports the property and ssvariable attributes, in case the field value is available in, respectively, a WebCenter Sites property file or a session variable. These variants are rarely used.
25.1.3 Text Fields
In this section, we examine how to make text fields editable. This section builds on the HelloDetail template introduced in the Chapter 24, "Creating Templates and Wrappers" chapter.
Similar to string fields, we can replace the render:stream tag in the HelloDetail template with the insite:edit tag. See Section 25.1.2, "String Fields" for an example of working with string fields in the HelloDetail template:
Previously, we used the render:stream tag:
<render:stream
  list="bodyList"
  column="value" />
To make this field editable, change the render:stream tag: to an insite:edit tag. In this example, we also define body as the field and ckeditor as the editor type.
<insite:edit
  list="bodyList"
  column="value"
  field="body"
  editor="ckeditor" />
Clicking on the body text displays the CKEditor widget as shown in this screen capture:
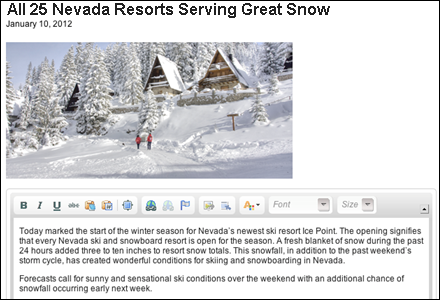
Description of the illustration b-3-ckeditor.png
Note that additional arguments can be passed to CKEditor as follows:
<insite:edit
  list="bodyList"
  column="value"
  field="body"
  editor="ckeditor"
  params="{width: '500px', height: '350px',
           toolbar: 'MyToolbar'}" />
See Section 19.1, "Configuring CKEditor" for more information.
25.1.4 Date Fields
In this section, we examine how to make date fields editable. This section builds on the HelloDetail template introduced in Chapter 24, "Creating Templates and Wrappers."
Date fields are made editable in-context using the same insite:edit tag used for string or text fields. However, when dates need to be formatted, a few extra steps are required. The value of date fields when initially retrieved from the database is in JDBC format, which is, 2012-01-01 00:00:00.0. This format is unsuitable for rendering on a website where dates are generally rendered as a readable string, such as January 1, 2012.
In addition, the date is interpreted in the server's time zone, which we can display in a different time zone. We first get the time zone ID by using the java.util TimeZone API. We then format the date by using the "long" date format (which is a predefined format).
Note:
For more about predefined date formats see:
http://docs.oracle.com/javase/tutorial/i18n/format/dateFormat.html
If you choose to format the date, you can use one of the date formatting APIs, described in the next section. Depending on your decision, the resulting date and calendar widget will look like one of the following:
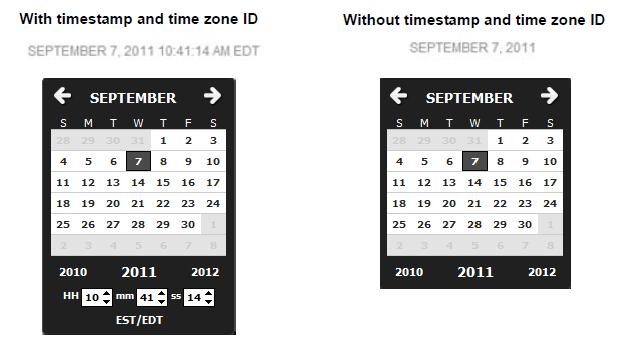
Description of the illustration datepicker_timestamp.png
The HelloDetail template uses the formattedDate variable to display the date. See Section 24.1.1.4, "Use Case 1: Building a Layout Template for Article Assets" for details.
<span class="date">
  <ics:getvar name="formattedDate" />
</span>
The formattedDate variable must be set by using one of the date formatting APIs: fmt:formatDate or the Sites dateformat API.
The formattedDate can be rendered with a timestamp if you add the time style parameter. It can also be rendered with a specific time zone if we add a parameter for time zone. If the time zone parameter is omitted, the date is interpreted and rendered in the server's time zone. Following is a description of the APIs:
-
The
fmt:formatDate(which supports EL expression) is one such API, which takes the date injava.util.Date()in String format and takes thetimeZoneparameter as shown below:<fmt:formatDate value="${asset.postDate}" dateStyle="long" type="both" timeStyle="long" var="formattedDate" timeZone="US/Eastern" /> -
The Sites
dateformatAPI has an additional parameter namedtimezoneidand may be used in place offmt:formatDate:<dateformat:create name="dateFormat" datestyle="long" timestyle="long" timezoneid="US/Eastern" />
If timestamp is needed, we use
dateformat:getdatetime:<dateformat:getdatetime name="dateFormat" value='<%=postDate%>' valuetype="jdbc" varname="formattedDate"/>
If timestamp is not needed, we use
dateformat:getdate:<dateformat:getdate name="dateFormat" value='<%=postDate%>' valuetype="jdbc" varname="formattedDate"/>
The Sites
dateformatAPI takesmillisorjdbcin thevaluetypeargument.
Enabling Date Fields for Editing in Web Mode
The formatted date is now ready to be used in the insite:edit tag. We follow the steps below to enable date fields for editing in Web Mode.
-
Because the
insite:edittag passes the formatted value, an appropriateformatLengthparameter is required in theparamsargument. In our example,formatLengthis set to set tolong, as shown below. In addition, if we choose to display the timestamps and time zone in date fields, we would set two additional parameters;timePicker:trueandtimeZoneID:'US/Eastern', also shown below:<span class="date"> <insite:edit field="postDate" value="formattedDate" params="{constraints:{formatLength: 'long'}, timePicker:true, timeZoneID:'US/Eastern'}" /> </span>Note:
The date widget in edit mode will function correctly only if we pass a properly formatted date.The
datestyleandtimestylearguments indateformat:createorfmt:formatdateAPIs must be consistent with theformatLengthparams argument in theinsite:edittag. In our example, the datestyle and timestyle arguments in the date formatting API must all belong.If theformattedDateis constructed using the time zone parameter, then the same time zone ID must be used in theinsite:edittag. -
The date will now be rendered according to how we specified its format:
-
With timestamp and
timeZoneID:'US/Eastern'
Description of the illustration date_long.png
-
Without timestamp and
timeZoneID
Description of the illustration date_no_timestamp_zone.png
-
-
The date field is now editable. Clicking on the date field while viewing an article in the Contributor interface in Web Mode / Edit View displays one of the following calendar popup widgets:
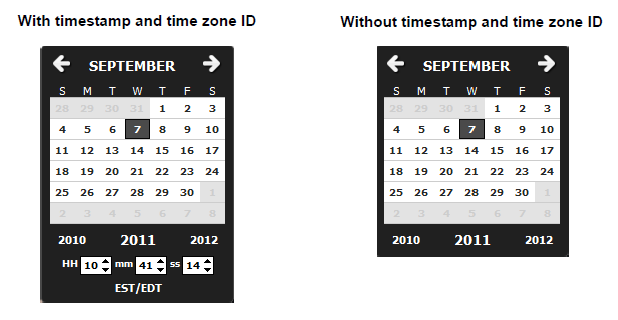
Description of the illustration datepicker_plain.png
Note that the date format is passed to the insite:edit tag using the params attribute. The params attribute is used to pass extra configuration settings to the Dojo widgets, formatted as a JSON string. In this case:
{constraints: {formatLength: 'long'}, timePicker : true,
  timeZoneID:'US/Eastern' }
For details on available widget settings, refer to the Dojo documentation at http://dojotoolkit.org/.
25.1.5 Binary Fields
Binary fields are typically database BLOB or CLOB fields. Binary fields typically store images, or downloadable documents. By default, the insite:edit tag will make binary fields editable through a file upload component.
Note:
This section also applies to WebCenter Sites URL columns. That is, URL columns storing a reference to a file which is stored on the file system
In our HelloDetail template, we are rendering the largeThumbnail field of the related AVIImage asset. In order to make this field editable in-context, we first need to retrieve the value of this field, which contains a BLOB ID (not the actual BLOB value):
<assetset:setasset
  name="image"
  type="AVIImage"
  id='<%=ics.GetVar("imageId")%>' />
<assetset:getattributevalues
  name="image"
  attribute="largeThumbnail"
  typename="ContentAttribute"
  listvarname="largeThumbnail" />
The <img> tag is then inserted between an opening and closing insite:edit tag.
<insite:edit
  field="largeThumbnail"
  assetid='<%=ics.GetVar("imageId")%>'
  assettype="AVIImage"
  list="largeThumbnail"
  column="value" >

    <img class="photo left"
      src='<%=ics.GetVar("imageURL")%>' />
</insite:edit>
Note that passing the BLOB ID to the insite:edit tag is primarily used to determine whether the binary field is empty or not. If empty, the insite:edit tag shows a default empty value indicator.
The <img> tag should be the only HTML tad inside the insite:edit tag. The <img> tag is the only tag permitted inside the inside:edit tag. The insite:edit tag can also handle <a> tags (normally used when building hyperlinks to downloadable documents). Other types of binaries may be handled but might require specific customizing.
When hovering over the image, content contributors are now shown a tooltip, giving access to the upload component, and allowed to clear the largeThumbnail field.
Note:
The HelloDetail template allows contributors to edit two distinct assets on the same page (the "headline", "date", "body", "relatedImage" fields of the AVIArticle asset, and the largeThumbnail field of the related AVIImage asset). Generally, it is possible to render multiple assets on the same page, and make them editable simultaneously.
25.1.6 Asset Fields
Asset fields store references to other assets. In this section, we examine how to make asset fields editable.
This section builds on the HelloArticleLayout template created in Section 24.1.1.4, "Use Case 1: Building a Layout Template for Article Assets" of Chapter 24, "Creating Templates and Wrappers."
In this section we will enhance the HelloArticleLayout template and populate the side bar by rendering the article assets related to our article through the relatedStories field.
Note:
Although "relatedStories" is a multivalued field, we treat it, in this section, as a single-valued field. That is, we will consider that the field holds only one related article content asset. Code samples shown in this section are therefore applicable to any single-valued field. See Section 25.1.8, "Multivalued Fields" for more information on handling multivalued fields.
-
Create a pagelet template called HelloSideBar, applicable to the AVIArticle asset type and Article subtype, which renders the associated article asset using the avisports Summary/SideBar article template using the following code:
<%@ taglib prefix="cs" uri="futuretense_cs/ftcs1_0.tld"%>
<%@ taglib prefix="assetset" uri="futuretense_cs/assetset.tld"%>
<%@ taglib prefix="ics" uri="futuretense_cs/ics.tld"%>
<%@ taglib prefix="render" uri="futuretense_cs/render.tld"%>
<cs:ftcs> <render:logdep c="Template" cid='<%=ics.GetVar("tid")%>' /> <assetset:setasset name="article" type="AVIArticle" id='<%=ics.GetVar("cid")%>' /> <assetset:getattributevalues name="article" attribute="relatedStories" listvarname="relatedStories" typename="ContentAttribute" /> <%-- we are getting the first item in the list --%> <ics:listget listname="relatedStories" fieldname="value" output="articleId" /> <render:calltemplate tname="Summary/SideBar" c="AVIArticle" cid='<%=ics.GetVar("articleId")%>' /> </cs:ftcs> -
Modify the HelloArticleLayout template to invoke the HelloSideBar pagelet template inside the "side-bar" div element.
<div class="side-bar">
    <render:calltemplate tname="HelloSideBar" args="c,cid" />
</div>
Assuming that relatedStories contain one asset reference (Cold Snap Back on the Scene in our example) the related article now gets rendered in the side bar using the Summary/SideBar template, as dictated by the template code.

Description of the illustration b-8-assetreference.png
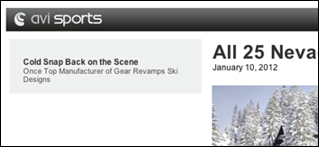
Description of the illustration b-9-rendered.png
Previously, the
render:calltemplatetag was used in the HelloSideBar pagelet:<render:calltemplate tname="Summary/SideBar" c="Article" cid='<%=ics.GetVar("articleId")>' /> -
The relatedStories asset field can be made editable in-context, by turning the area occupied by the asset into a drop target. That is, an area which will accept assets dragged from other parts of the UI (such as the search result pane or the content tree). To do this, add the following taglib directive:
<%@ taglib prefix="insite" uri="futuretense_cs/insite.tld" %>
and replace the
render:calltemplatetag in the HelloSideBar pagelet with theinsite:calltemplatetag:<insite:calltemplate tname="Summary/SideBar" c='AVIArticle' cid='<%=ics.GetVar("articleId")%>' field="relatedStories" assetid='<%=ics.GetVar("cid")%>' assettype='<%=ics.GetVar("c")%>' /> ...where:
-
The
tname(template),c(asset type) andcid(asset id) variables behave exactly as in therender:calltemplatetag and have the same meaning. -
The
assetidandassetypevariables designate the asset being edited (in our example, an article asset). -
The
fieldvariable designates which field of the asset is being edited (in our example, "relatedStories").
The syntax can be simplified as follows:
<insite:calltemplate
  tname="Summary/SideBar"
  c='AVIArticle'
  cid='<%=ics.GetVar("articleId")%>'
  field="relatedStories" />
This simplified structure can be used because the edited asset is the asset designated by the
candcidvariables. Thus, WebCenter Sites retrieves the variable values by looking them up directly in the ICS context. -
-
If the field is initially empty (in which case the
articleIdvariable is null), viewing the asset in Web Mode of the Contributor interface shows an empty content-editable slot (provides a droppable zone for the user) as shown in this screen capture below: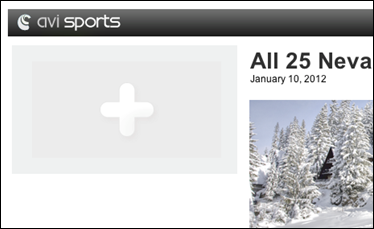
Description of the illustration b-10-emptyzone.png
-
It is now possible to drag and drop an article asset to the content-editable slot, by selecting an asset in the content tree, or from the docked search panel.
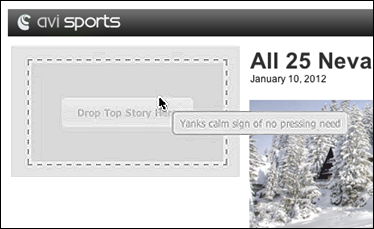
Description of the illustration b-11-dragdrop.png
25.1.6.1 Editing an Association
When using an asset association instead of a flex attribute of data type asset, the field attribute needs to be specified as follows:
Association-named:<associationName>
For example, for an association called "topStory" the code would be:
<insite:calltemplate
  field="Association-named:topStory"
  ...
/>
25.1.6.2 Editing a Parent Asset
It is also possible to edit a flex asset's parent asset. The syntax for the field attribute is as follows:
Group_<parentDefinitionName>
For example, in the case of avisports, article assets have a "Category" parent definition:
<insite:calltemplate
  field="Group_Category"
  ...
/>
25.1.7 Number Fields
When dealing with number attributes (i.e. integer, double and money), raw values are retrieved from the database, and are typically formatted according to the current locale.
For example, assuming that price is a money attribute, a JSP reading the attribute value and rendering it as a formatted string could be written as follows:
<%@ taglib prefix="cs" uri="futuretense_cs/ftcs1_0.tld" %>
<%@ taglib prefix="assetset" uri="futuretense_cs/assetset.tld" %>
<%@ taglib prefix="fmt" uri="http://java.sun.com/jsp/jstl/fmt" %>

<cs:ftcs>

<assetset:setasset
  name="theAsset"
  type='<%=ics.GetVar("c")%>'
  id='<%=ics.GetVar("cid")%>' />

<assetset:getattributevalues
  name="theAsset"
  attribute="price"
  listvarname="pricelist"
  typename="ContentAttribute" />

<ics:listget
  listname="pricelist"
  fieldname="value"
  output="price" />

<fmt:formatNumber
  type="currency"
  value='<%=ics.GetVar("price")%>'
  var="formattedValue"
  currencySymbol="&eur;" />

The price is: ${formattedValue}
</cs:ftcs>
Assuming that the raw value is 123456, it would be rendered as €123,456 (en_US locale). The value is made editable using the insite:edit tag as follows:
<%@ taglib prefix="cs" uri="futuretense_cs/ftcs1_0.tld" %>
<%@ taglib prefix="assetset" uri="futuretense_cs/assetset.tld" %>
<%@ taglib prefix="fmt" uri="http://java.sun.com/jsp/jstl/fmt" %>

<cs:ftcs>

<assetset:setasset
  name="theAsset"
  type='<%=ics.GetVar("c")%>'
  id=''<%=ics.GetVar("cid")%> />

<assetset:getattributevalues
  name="theAsset"
  attribute="price"
  listvarname="pricelist"
  typename="ContentAttribute" />

<ics:listget
  listname="pricelist"
  fieldname="value"
  output="price" />

<fmt:formatNumber
  type="currency"
  value='<%=ics.GetVar("price")%>'
  var="formattedValue"
  currencySymbol="&eur;" />

The price is: <insite:edit field="price"
                value="${formattedValue}"
                params="{currency: 'EUR'}" />
</cs:ftcs>
Note that the editing widget is passed the formatted value (containing the currency symbol). For this reason, the currency ISO code is specified using the params field.
For more configuration options, refer to the Dojo documentation at http://dojotoolkit.org/.
25.1.8 Multivalued Fields
All previous examples were intended for single-valued fields. When dealing with multivalued fields, beyond editing the existing values, editors need to access more features such as:
-
adding a new value
-
removing an existing value
-
reordering existing values
For this reason, multivalued fields need to be treated specifically. This section will discuss working with multivalued text fields and multivalued asset fields.
25.1.8.1 Example 1: Editing Multivalued Text Fields
-
Page assets of the AVIHome subtype have a multivalued text field (see attribute value "teaserText" in the
assetset:getattributevaluestag below). Create a test layout template, rendering only the value of this field:<%@ taglib prefix="cs" uri="futuretense_cs/ftcs1_0.tld"%> <%@ taglib prefix="ics" uri="futuretense_cs/ics.tld"%> <%@ taglib prefix="assetset" uri="futuretense_cs/assetset.tld"%> <%@ taglib prefix="render" uri="futuretense_cs/render.tld"%>
<cs:ftcs>

<render:logdep
  cid='<%=ics.GetVar("tid")%>'
  c="Template" />

<assetset:setasset
  name="page"
  type="Page"
  id='<%=ics.GetVar("cid")%>' />

<assetset:getattributevalues
  name="page"
  attribute="teaserText"
  listvarname="teaserList"
  typename="PageAttribute" />

<div style="width: 500px; font-size: small">
  <ics:listloop listname="teaserList">
    <render:stream list="teaserList" column="value" />
  </ics:listloop>
</div>
</cs:ftcs>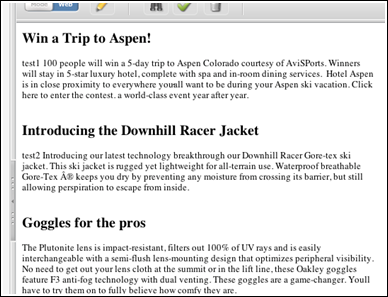
Description of the illustration b-12-textfields.png
-
Modify this template to make the multivalued
teaserTextfield editable.Add the
insitetaglib directive:<%@ taglib prefix="insite" uri="futuretense_cs/insite.tld" %>
and replace the original code:
<ics:listloop listname="teaserList">
  <render:stream list="teaserList" column="value" />
</ics:listloop>
with the following code:
<ics:listloop listname="teaserList">
  <ics:listget
    listname="teaserList"
    fieldname="#curRow"
    output="currentRowNb" />
  <insite:edit
    assetid='<%=ics.GetVar("cid")%>'
    assettype='<%=ics.GetVar("c")%>'
    field="teaserText"
    list="teaserList"
    column="value"
    index='<%=ics.GetVar("currentRowNb")%>'
    editor="ckeditor" />
</ics:listloop>
The syntax for the
insite:edittag can be simplified as follows:<ics:listloop listname="teaserList"> <ics:listget listname="teaserList" fieldname="#curRow" output="currentRowNb" /> <insite:edit field="teaserText" list="teaserList" column="value" index='<%=ics.GetVar("currentRowNb")%>' editor="ckeditor" /> </ics:listloop> -
In the Contributor interface, change to Web Mode / Edit View. We are now able to edit each of the existing values using CKEditor as shown in the screen capture below.
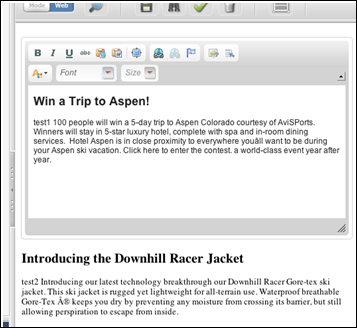
Description of the illustration b13-editvalues.png
The only noticeable difference with a single-valued field, is that we only added an index attribute which notifies WebCenter Sites the index of the value being edited.
At this point we are only able to edit existing values. See the next section on how to add, remove, or reorder existing values.
25.1.8.2 Example 2: Multivalued Text Fields
This section builds on Section 25.1.8.1, "Example 1: Editing Multivalued Text Fields" of this chapter and includes adding, removing, and reordering values.
Modify the previous code sample as follows:
<insite:list
  field="teaserText"
  editor="ckeditor"
  assetid='<%=ics.GetVar("cid")%>'
  assettype='<%=ics.GetVar("c")%>'>

    <ics:listloop listname="teaserList">
      <insite:edit list="teaserList" column="value" />
    </ics:listloop>
</insite:list>
The insite:edit tag is now nested inside an insite:list tag. The nested insite:edit tags are do not specify the field, assetid, assettype or editor attributes since they are already specified at the parent tag level, and each nested insite:edit tag is, by default, inheriting those values when not locally specified. This is also applicable to the params attribute of the insite:edit tag.
The index attribute is no longer required. In this case, the insite:list tag is keeping track of the current index. The tag assumes that the order in which the insite:edit tag appear matches the order of the multivalued field, that is, the first insite:edit tag edits value #1, etc. If that is not the case, the index has to be specified. See Section 25.1.8.3, "Specifying a Different Ordering" for details.
Like the insite:edit tag, the syntax for the insite:list tag can be simplified if the asset being edited is the asset designated by the c (asset type) and cid (asset id) variables; in which case the assetid and assettype attributes can be omitted.
<insite:list field="teaserText" editor="ckeditor" >
  <ics:listloop listname="teaserList">
    <insite:edit list="teaserList" column="value" />
  </ics:listloop>
</insite:list>
-
Now that we added the
insite:listtag, a toolbar is displayed whenever the user hovers over the area showing the field values: -
When clicking on that area, a popup gets rendered, allowing to add, edit, remove or reorder field values.
This section builds on Section 25.1.8.1, "Example 1: Editing Multivalued Text Fields" and Section 25.1.8.2, "Example 2: Multivalued Text Fields."
In the case of asset reference fields, we will use the insite:slotlist tag instead of the insite:list tag. In this case, rather than nested insite:edit tags, we will have nested insite:calltemplate tags.
In this example, instead of rendering a single related article, we will go through the whole list, and render each of them.
Modify the previous code sample as follows (for the time being, this code omits any in-context editing capabilities:):
<%@ taglib prefix="cs" uri="futuretense_cs/ftcs1_0.tld"%>
<%@ taglib prefix="assetset" uri="futuretense_cs/assetset.tld"%>
<%@ taglib prefix="ics" uri="futuretense_cs/ics.tld"%>
<%@ taglib prefix="render" uri="futuretense_cs/render.tld"%>

<cs:ftcs>

<assetset:setasset
  name="article"
  type="AVIArticle"
  id='<%=ics.GetVar("cid")%>' />

<assetset:getattributevalues
  name="article"
  attribute="relatedStories"
  listvarname="relatedStories"
  typename="ContentAttribute" />

<ics:listloop listname="relatedStories">
  <ics:listget
   listname="relatedStories"
   fieldname="value"
   output="articleId" />
  <render:calltemplate
    tname="Summary/SideBar"
    c="AVIArticle"
    cid='<%=ics.GetVar("articleId")%>' />
</ics:listloop>
</cs:ftcs>
The screen capture below shows the field with three values:
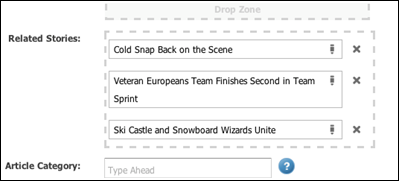
Description of the illustration b16-related.png
The SideBar will now show those three articles:

Description of the illustration b-17-articles.png
If you want to make the article list editable, we need to make the following changes:
<%@ taglib prefix="cs" uri="futuretense_cs/ftcs1_0.tld"%>
<%@ taglib prefix="assetset" uri="futuretense_cs/ assetset.tld"%>
<%@ taglib prefix="ics" uri="futuretense_cs/ics.tld"%>
<%@ taglib prefix="render" uri="futuretense_cs/render.tld"%>
<%@ taglib prefix="insite" uri="futuretense_cs/insite.tld"%>

<cs:ftcs>
<render:logdep c="Template" cid='<%=ics.GetVar("tid")%>' />

<assetset:setasset
  name="article"
  type="AVIArticle"
  id='<%=ics.GetVar("cid")%>' />

<assetset:getattributevalues
  name="article"
  attribute="relatedStories"
  listvarname="relatedStories"
  typename="ContentAttribute" />

<insite:slotlist field="relatedStories">
  <ics:listloop listname="relatedStories">
    <ics:listget
      listname="relatedStories"
      fieldname="value"
      output="articleId" />
    <insite:calltemplate
      tname="Summary/SideBar"
      c="AVIArticle"
      cid='<%=ics.GetVar("articleId")%>' />
  </ics:listloop>
</insite:slotlist>
</cs:ftcs>
Every item of the list becomes a content-editable slot (droppable zone):
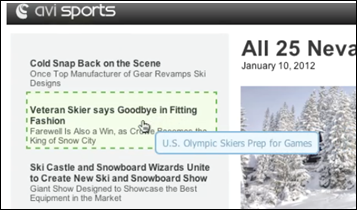
Description of the illustration b-18-dropzone.png
In addition, since we used the insite:slotlist tag in our example, when hovering over the relatedStories area, a toolbar is shown, similar to the previous example.
25.1.8.3 Specifying a Different Ordering
In the previous example, the articles are rendered in a sequence, the first nested insite:calltemplate tag renders article #1, the second insite:calltemplate tag renders article #2, and so on:
<div class="top-stories">
  <div>article #1</div>
  <div>article #2</div>
  <div>article #3</div>
  <div>...</div>
</ul>
Your structure may be different depending on the structure of the HTML markup used in your site. For example, you may want articles to be displayed in a column layout such as:
article #1  article #2
article #3  article #4
etc.
Using the underlying HTML markup similar to the following:
<div class="left-column">
  <div>article #1</div>
  <div>article #3</div>
  ...
</div>
<div class="right-column">
  <div>article #2</div>
  <div>article #4</div>
  ...
</div>
In this example, articles are rendered in an order which doesn't match the ordering of the field (#1, #3, #5, then #2, #4, #6, etc.). If this is the case, WebCenter Sites needs to be aware of the ordering.
To do that, you need to explicitly indicate the index of the list item being edited, by using the index attribute as shown in Section 25.1.8, "Multivalued Fields."
25.1.8.4 Editing Mode and Caching
Caching is not disabled when working in Web Mode / Edit View. Therefore, templates which are configured to be cached, will still be cached when rendered in Edit View.
When working with assets, WebCenter Sites will automatically handle cache flushing providing that the correct dependencies are logged. For example, modifying the definition of a particular attribute (e.g., changing the allowed types of an asset reference field), will automatically flush all pagelets which rendering depends on this particular attribute.
There are however some instances where the page cache will need to be manually flushed:
-
Modifying the definition of an association field.
-
Removing a role from WebCenter Sites, if this role is directly referenced from a
insite:calltemplatetag, through therolesattribute. -
Removing asset types or subtypes from WebCenter Sites, if this asset type or subtype is referenced from an
insite:calltemplatetag through theclegalattribute.
25.2 Coding Templates for Presentation Editing
In this section, we'll look into the other aspect of the in-context UI and explain how templates can be coded to allow non-technical users to control presentation of content. This section presents information on context and on how to make a presentation change local (i.e. visible only on a given web page), or global (i.e. changing the presentation on one page can propagate the same change to multiple pages on the site).
Controlling presentation includes being able to select which page layout to select to render an entire web page, being able to select which content layout to select to render an asset in a given portion of a web page, and being able to select arguments sent to a pagelet template
This section builds on the HelloDetail template introduced in Chapter 24, "Creating Templates and Wrappers" and the examples in Section 25.1, "Coding Templates for In-Context Content Editing."
This section contains the following topics:
-
Section 25.2.1, "Selecting a Different Layout for the Entire Web Page"
-
Section 25.2.2, "Selecting a Different Layout for a Page Fragment"
-
Section 25.2.3, "Editing Presentation and Content Simultaneously"
-
Section 25.2.5, "Using Slots with CSElement and SiteEntry Assets"
25.2.1 Selecting a Different Layout for the Entire Web Page
Editorial users can assign a layout template to assets by either:
-
directly modifying the value of the
templatefield in Form Mode of the Contributor interface. -
or selecting the Change Layout functionality from either the toolbar or menu bar.
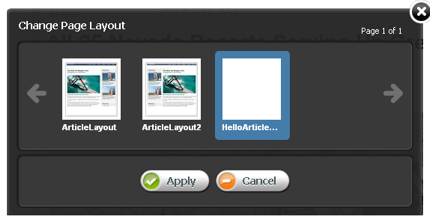
Description of the illustration l_changelayout_small.png
Selecting a layout template for an asset will make this template the default choice when working with an asset in Web Mode of the Contributor interface, or when previewing the asset.
In order to enable content contributors to control the page layout used to render a given asset on a live site, the value of the template field should be looked up and used to calculate asset hyperlinks, as in the following example:
<asset:list
  type='<%=ics.GetVar("c")%>'
  list="asset"
  field1="id"
  value1='<%=ics.GetVar("cid")%>' />

<ics:listget
  listname="asset"
  fieldname="template"
  output="template" />

<render:gettemplateurl
  outstr="pageURL"
  tname='<%=ics.GetVar("template")%>'
  args="c,cid" />
25.2.2 Selecting a Different Layout for a Page Fragment
This section builds on the HelloArticleLayout template used in Section 25.1, "Coding Templates for In-Context Content Editing."
Previously, in the HelloArticleLayout layout template, the main area of the article page was rendered using the HelloDetail template as shown in this code snippet:
<div id="container">
  <div class="content">
    <render:calltemplate tname="HelloDetail" args="c,cid" />
  </div>
  <div class="side-bar">
    ...
  </div>
</div>
which renders as (see screen capture below):

Description of the illustration bb-2-renders.png
Note:
The syntax used in the code sample:
<render:calltemplate tname="HelloDetail" args="c,cid" />
is a shortcut for (and is strictly equivalent to):
<render:calltemplate
  tname="HelloDetail"
  c='<%=ics.GetVar("c")%>'
  cid='<%=ics.GetVar("cid")%>' />
The avisports sample site also provides a Detail template for article assets. The Detail pagelet template is functionally equivalent to the HelloDetail template, in that it provides a detailed view of the article, and is meant to be rendered in the main area of the page, as shown in the screen capture below:
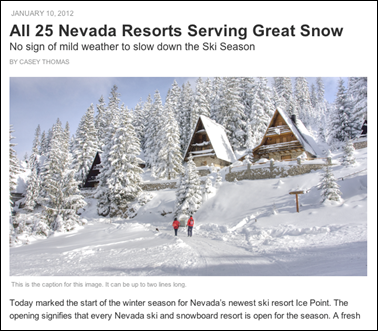
Description of the illustration bb-3-mainarea.png
25.2.2.1 Defining a Slot for Presentation Editing
If you want to allow non-technical users to choose which presentation (i.e. which pagelet template) to use in order to render a particular article page, you must define a slot.
The previous code in the HelloArticleLayout layout template rendered the main area of the article page using the HelloDetail template:
<div id="container">
  <div class="content">
    <render:calltemplate
      tname="HelloDetail"
      args="c,cid" />
  </div>
  <div class=side-bar>
    ...
  </div>
</div>
...
To define a slot, add the insite taglib directory.
<%@ taglib prefix="insite" uri="futuretense_cs/insite.tld" %>
and replace the previous render:calltemplate tag with an insite:calltemplate tag and add the slotname and variant sttributes:
<div id="container">
  <div class="content">
    <insite:calltemplate
      slotname="HelloSlot"

      tname="HelloDetail"
      variant="HelloDetail|Detail"
      args="c,cid" />
  </div>
  <div class=side-bar>
    ...
  </div>
</div>
...
By adding the slotname attribute we are defining a slot, in our example, called HelloSlot. The slotname attribute value can be any string, but it must be unique across all templates of a given site. See Section 25.2.4, "Understanding the Context System Variable" for more information.
If we run this template again, there is initially no noticeable changes. Our article is still rendered using the HelloDetail template, as directed by the tname attribute. The changes become apparent by switching to Edit View and hovering over the main div section.
-
the page fragment inside the main div is now marked with a blue overlay
-
the slot name is indicated in the top right corner
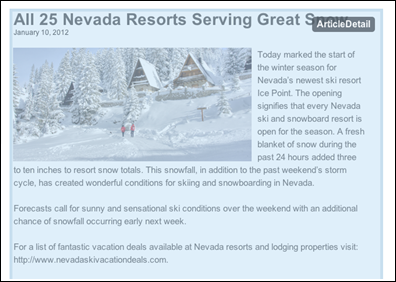
Description of the illustration bb-4-editview.png
Clicking the blue overlay also brings up a toolbar (as shown in the screen capture below):
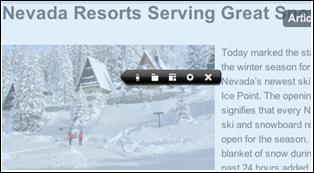
Description of the illustration bb-5-blue.png
By selecting the Change Content Layout option, it now becomes possible to select a different content layout to render the asset in the main area of the page:
Change Content Layout icon:
Description of the illustration n_contentlayout.png
Change Content Layout dialog:
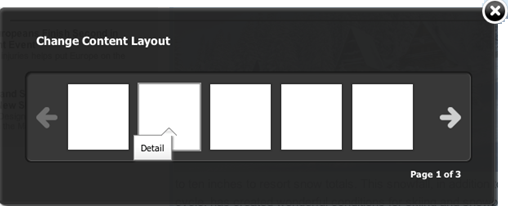
Description of the illustration bb-6-changelayout.png
The template picker shows the HelloDetail and Detail pagelet templates, specified by the variant attribute. Selecting the Detail template and clicking Apply renders the web page as shown in this screen capture:
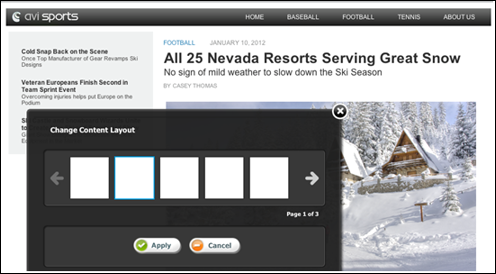
Description of the illustration bb-7-detail.png
The slot defined in our example above is only meant for presentation editing and is not a content-editable slot (not a droppable zone).
The reason for this behavior is:
-
The
insite:calltemplatetag does not define anyfieldattribute. That is, the content of the slot is not the value of an asset reference field. -
The tag is explicitly providing values for c (asset type) and cid (asset id). In this particular case, we want the article asset specified by the incoming c and cid request parameters to be rendered in this location.
In addition, if the variant attribute had been omitted, the slot layout would not have been editable, since the insite:calltemplate tag specifies an explicit value for the tname attribute (which acts as a default template for all assets dropped in this slot).
Note:
The variant attribute can contain any regular expression. For example; variant="Detail.*" would restrict available templates to any pagelet template whose name starts with Detail.
25.2.2.2 Adjusting the Slot Title
Rather than showing the value of slotname in the blue overlay, which is typically a technical string meaningful to developers only, we can replace the value with any string. To do this, add a title attribute to the insite:calltemplate tag as shown in this code:
<insite:calltemplate
  slotname="HelloSlot"
  tname="HelloDetail"
  args="c,cid"
  variant="HelloDetail|Detail"
  title="Article Detail Area" />
Defining the title attribute overrides the default slot title:
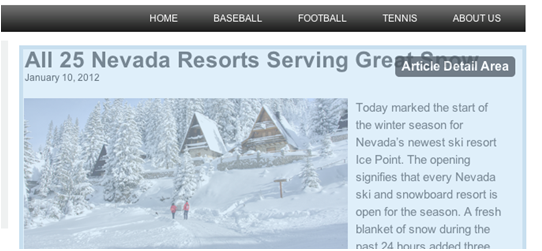
Description of the illustration bb-10-override.png
25.2.2.3 Controlling Template Arguments
This section provides an example of controlling template arguments. We modify the HelloDetail template to accept an extra argument called image-align which will be used to align the article image left or right.
The process is as follows:
-
The "image-align" argument has to be registered as a legal argument for the HelloDetail template. If this step is skipped, contributors will not be able to set its value from the editorial UI.
-
In order to make sure that caching works properly, the new argument has to be declared as a cache criteria.
-
Finally, the template code is modified in order to use the newly defined argument.
Note:
On Using Eclipse with the WebCenter Sites Developer Tools plug-in: When editing a Template asset from the Admin interface, if this Template is also opened in WSDT at the same time, you must remember to synchronize your changes to the WSDT workspace. Template metadata stored in the WSDT workspace will otherwise override the values entered from the web interface.
-
Declare "image-align" as a legal argument of our HelloDetail template asset.
-
From the Admin interface, edit the HelloDetail template asset.
-
For Legal Arguments, enter image-align and click Add Argument.
-
Select Required.
-
For Argument Description enter Image Alignment.
-
For LegalValues, add the following descriptions:
-
For Value: left enter Value Description: Aligned Left.
-
For Value: right enter Value Description: Aligned Right.
-
-
Click Save.
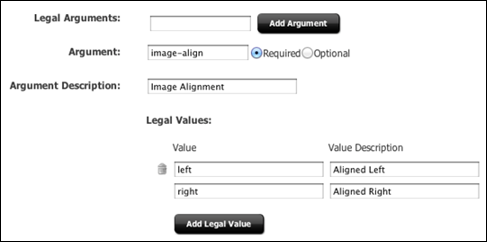
Description of the illustration bb-12-argument.png
-
-
Remember to sync the change made in WebCenter Sites with the WSDT workspace.
-
Use the WebCenter Sites Developer Tools plug-in to add
image-alignto the set of cache criteria.-
Right-click the HelloDetail Template in the Sites workspace.
-
Select Properties.
-
In the Cache Criteria field, append
image-alignto the end of the list. See Chapter 23, "Creating Template, CSElement, and SiteEntry Assets" for more information on Cache Criteria values. -
Click Submit.

Description of the illustration bb-11-cache.png
-
-
Optionally, a default value could be defined by using the Additional element parameters field and specifying the following value, for instance: "image-align=right".
-
Modify the HelloDetail pagelet template code
<insite:edit
  field="largeThumbnail"
  assettype="AVIImage"
  assetid='<%=ics.GetVar("imageId")%>' >

    <img class='photo <ics:getvar name="image-align"/>'
      src='<ics:getvar name="imageURL" />' />
</insite:edit>
...
Note that, in this particular case, the value of the parameter is used to set a different CSS class.
When going to the slot properties panel, assuming HelloDetail is the currently selected layout, the Advanced tab now shows the following options:
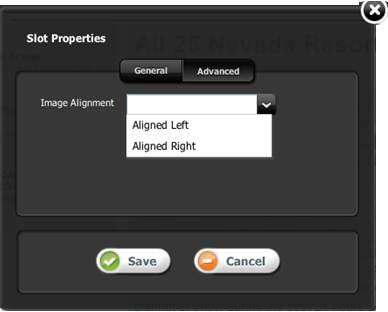
Description of the illustration bb-13-advanced.png
25.2.3 Editing Presentation and Content Simultaneously
The insite:calltemplate tag allows editorial users to edit associated content and edit the layout. This section explains the difference between a content-editable slot and a presentation-editable slot and how to combine the functionality of both to allow editorial users to edit both the associated content and the template used to render the content.
This section contains the following topics:
-
Section 25.2.3.1, "Understanding Content-Editable Slots and Presentation-Editable Slots"
-
Section 25.2.3.2, "Combining Content-Editable Slots and Presentation-Editable Slots"
25.2.3.1 Understanding Content-Editable Slots and Presentation-Editable Slots
Content-editable slots allow users to edit associated content by providing a droppable zone for the user. Presentation-editable slots allow users to select a different template to render the content.
To create a content-editable slot (creates a droppable zone for the user) the insite:calltemplate tag is used with the following defined parameters:
-
assetid: The edited asset ID. -
assettype: The edited asset type. -
field: The edited field. -
cid: The ID of the asset to be rendered by the called template. -
c: The asset type to be rendered by the called template. -
tname: The pagelet template used to render the associated asset.
This code defines a content-editable slot that creates a droppable zone for the user:
<insite:calltemplate
  assetid=" "
  assettype=" "
  field=" "
  cid=" "
  c=" "
  tname=" "
/>
To create a presentation-editable slot (allows users to select a different template to render content) the insite:calltemplate tag is used with the following defined parameters:
-
slotname: This attribute defines an identifier for the slot that is being filled with the called template. It should be reasonably easy to understand and should be unique across all templates. -
cid: The id of the asset to be rendered by the called template. -
c: The asset type to be rendered by the called template. -
tname: The default pagelet template to be called.
This code defines a presentation-editable slot that allows users to select a different template to render the content:
<insite:calltemplate
  slotname=" "
  cid=" "
  c=" "
  tname=" "
/>
25.2.3.2 Combining Content-Editable Slots and Presentation-Editable Slots
In this section, we present how to combine the functionality of a content-editable slot and a presentation-editable slot to allow editorial users to edit both the associated content and the template used to render the content.
To combine the functionality of both content-editable slots and presentation-editable slots, the insite:calltemplate tag is used along with all the attributes required for both a content-editable slot and a presentation-editable slot.
-
These attributes are required for a content-editable slot (creates a droppable zone for the user):
field, assetid, assettype
-
This attribute is required to define a presentation-editable slot (allows users to select a different template to render the content):
slotname
This code combines the attributes for a content-editable slot and a presentation-editable slot:
<insite:calltemplate
  slotname=" "
  assetid=" "
  assettype=" "
  field=" "
  cid=" "
  c=" "
  tname=" "
/>
25.2.3.2.1 Example: Combining a Content-Editable Slot and a Presentation-Editable Slot
This section builds on the HelloSideBar template created in Section 25.1, "Coding Templates for In-Context Content Editing."
Previously, the HelloSideBar template was coded as shown:
<%@ taglib prefix="cs" uri="futuretense_cs/ftcs1_0.tld"%>
<%@ taglib prefix="assetset" uri="futuretense_cs/assetset.tld"%>
<%@ taglib prefix="ics" uri="futuretense_cs/ics.tld"%>
<%@ taglib prefix="render" uri="futuretense_cs/render.tld"%>
<%@ taglib prefix="insite" uri="futuretense_cs/insite.tld"%>

<cs:ftcs>

<render:logdep cid='<%=ics.GetVar("tid")%>' c="Template"/>
<assetset:setasset name="article"
  type='<%=ics.GetVar("c") %>' id='<%=ics.GetVar("cid") %>' />
<assetset:getattributevalues name="article"
  listvarname="relatedStories" attribute="relatedStories"
  typename="ContentAttribute" />

<insite:slotlist field="relatedStories">
  <ics:listloop listname="relatedStories">
    <ics:listget listname="relatedStories" fieldname="value"
      output="articleId" />

    <insite:calltemplate
      tname="Summary/SideBar"
      c="Article"
      cid='<%=ics.GetVar("articleId") %>' />

  </ics:listloop>
</insite:slotlist>
</cs:ftcs>
...
In this template, the related articles are made editable with content-editable slots (droppable zones for the user). That is, they are rendered using the Summary/SideBar template, without any possibility for editorial users to select a different template. However, they cannot change how the related article should be rendered. For this to happen, the HelloSideBar template needs to be modified as follows:
<%@ taglib prefix="cs" uri="futuretense_cs/ftcs1_0.tld"%>
<%@ taglib prefix="assetset" uri="futuretense_cs/assetset.tld"%>
<%@ taglib prefix="ics" uri="futuretense_cs/ics.tld"%>
<%@ taglib prefix="render" uri="futuretense_cs/render.tld"%>
<%@ taglib prefix="insite" uri="futuretense_cs/insite.tld"%>

<cs:ftcs>

<render:logdep cid='<%=ics.GetVar("tid")%>' c="Template"/>
<assetset:setasset name="article"
  type='<%=ics.GetVar("c") %>' id='<%=ics.GetVar("cid") %>' />
<assetset:getattributevalues name="article"
  listvarname="relatedStories" attribute="relatedStories"
  typename="ContentAttribute" />

  <insite:slotlist
    slotname="RelatedStoriesSlot"
    field="relatedStories">

    <ics:listloop listname="relatedStories">
      <ics:listget listname="relatedStories" fieldname="value"
        output="articleId" />

      <insite:calltemplate
        tname="Summary/SideBar"
        c="Article"
        cid='<%=ics.GetVar("articleId") %>'
        variant="Summary.*" />

    </ics:listloop>
  </insite:slotlist>
</cs:ftcs>
This is the same code used previously, except that we have specified a slotname attribute, and a variant attribute (in this case, the list of available templates is restricted to all pagelet templates starting with Summary).
Because slotname was included inside the insite:slotlist tag, it is not required to add it for the inner insite:calltemplate tag. The value is automatically inherited, as is the value of tname and field.
For example:
<insite:slotlist slotname=" " field=" ">
  <insite:calltemplate tname=" " c=" " cid=" " />
</insite:slotlist>
The Summary/SideBar now behaves as a default template for the related articles. By right-clicking any related article and selecting the Change Content Layout feature, it now becomes possible to select alternate templates.
25.2.4 Understanding the Context System Variable
In WebCenter Sites templates, context is a system variable maintained internally. Its value is retrieved by using the ics:getvar JSP tag or the ics.GetVar() method.
For example:
<ics:getvar name=context/>
ics.GetVar(context)
The value of context is determined by default. It is initially set to an empty string. Then, for every template called using render:calltemplate or insite:calltemplate, the value of context changes in the called template following this logic:
if parent_context is empty
  context = <c>:<cid>:<tname>
otherwise
  context = <parent_context>;<c>:<cid>:<tname>
This section contains the following topics:
25.2.4.1 Defining the Scope of the Slot
When defining a slot, it is possible for template developers to decide the scope of the slot. Typically, whether any presentation change made in this slot should be local or global.
-
local: visible only on the currently edited web page
-
global: spanning across multiple web pages in a site (possibly, ALL web pages in a site)
This is done by manipulating the value of the context variable and will be explained in the following sections.
25.2.4.2 Using the Context Variable in Action
-
Assign the HelloArticleLayout template to two avisports articles (for example,. All 25 Nevada resorts serving great snow and Cold snap back on the scene).
-
If we observe both of these articles in Web Mode of the Contributor interface, we see that the main slot is rendered with the default template HelloDetail as this is the template specified as the default template in the JSP code.
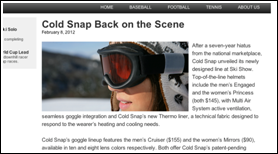
Description of the illustration bb-14-slot1.png
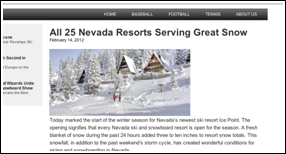
Description of the illustration bb-14-slot2.png
-
Assign the Detail template to All 25 Nevada resorts serving great snow article using the Change Content Layout option. The page should now look like this screen capture:
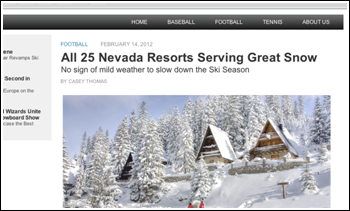
Description of the illustration bb-15-detail1.png
-
Refresh the web page with the Cold snap back on the scene article. The presentation of the main slot has also been modified on this web page as it is also using the Detail template.
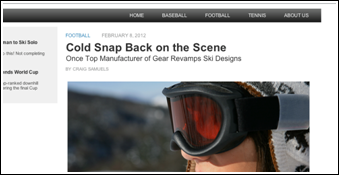
Description of the illustration bb-16-detail2.png
In order to understand what happened, we first need to know that WebCenter Sites stores presentation changes by recording the newly selected template against:
-
the slot name
-
the current site name
-
and context
Consequently, when we modified the slot content layout from HelloDetail to Detail, the following presentation data was recorded:
-
site: avisports
-
slotname: ArticleDetail
-
context: (empty)
-
tname: Detail
Context is empty since, when the HelloArticleLayout template is executed, context is initially empty, and is never modified when the slot gets rendered. Thus, any web page of avisports rendered using the HelloArticleLayout template will match the recorded presentation data above. Consequently, the Detail template is now used for all article pages.
25.2.4.3 Initializing the Context Value
The behavior observed in the previous section may be the intended behavior, but in some cases, editorial users will need to be able to make local presentation changes, that is, changes visible only on the current web page being edited.
To do this, the context variable has to be set to a value which will uniquely identify a given web page. In our case, it is enough to initialize context with, for example, the template name, and the identifier and type of the rendered asset:
<ics:setvar
  name="context"
  value='<%=ics.GetVar("c")
  + ":" + ics.GetVar("cid")
  + ":HelloArticleLayout"%>' />
Other parameters can be added to initialize the context, depending on the intended result. We can add the line above to the HelloArticleLayout template and verify that presentation changes are local to each article page.
25.2.4.4 Context Override
Both the render:calltemplate tag and the insite:calltemplate tag have an optional context attribute, which can be used to override the current context.
25.2.4.5 Context and Caching
Context is only useful when presentation editing capabilities are enabled on your site.
If that is not the case, context can be removed from every template's cache criteria (avoiding the creation of unnecessary duplicates in the page cache).
25.2.5 Using Slots with CSElement and SiteEntry Assets
In our previous examples, slots were used to hold content. In this section, we look at using slots to hold functionalities such as a navigation bar, a login box, a code snippet showing the last ten published articles in a site, etc.These types of functionalities can be made available as a CSElement or SiteEntry asset.
By allowing CSElement or SiteEntry assets to be dropped in slots, non-technical users are given the ability to modify the behavior of a particular web page without having to modify code.
This section contains the following topics:
25.2.5.1 Defining a Slot Containing a CSElement Asset
A slot meant to contain a CSElement asset is typically defined as:
<insite:calltemplate
  slotname="Navbar"
  clegal="CSElement"
/>
Or can be defined in this manner if the slot is meant to show the same content across all pages of the site:
<insite:calltemplate
  slotname="Navbar"
  clegal="CSElement"
  context="Global"
/>
There is no need to specify a tname attribute in this case, since the CSElement and SiteEntry assets are directly referring to the JSP element in charge of rendering them.
In order to see SiteEntry or CSElement in the list of allowed asset types for the slot, you need to make sure that both asset types have their Can Be Child Asset flag set to True (which means that this asset type can be the child asset type in an association field for another asset type.). See Section 15.2.6, "Step 4: Configure the Asset Type" for details.
Note:
In order to see SiteEntry or CSElement in the list of allowed asset types for the slot, you need to make sure that both asset types have their Can Be Child Asset flag set to True (which means that this asset type can be the child asset type in an association field for another asset type.). See Chapter 15, "Designing Basic Asset Types" for details.
25.2.5.2 Using CSElement or SiteEntry Assets
A SiteEntry asset does not hold any code, but simply points at a CSElement asset. The only difference between one case and the other is that, when using a SiteEntry, the element is invoked through the cache engine. Consequently, the same result can be achieved by dropping a SiteEntry asset or dropping its related CSElement asset.
The decision to use SiteEntry or CSElement is therefore implementation-dependent. Exposing a functionality as a SiteEntry only will ensure that caching is used to render this particular code snippet.
25.2.5.3 Using Legal Arguments
Like templates, it is possible to define legal arguments for CSElement assets. Once a CSElement has been dropped in a slot, the legal arguments are accessible from the slot properties panel.
The same applies when dropping a SiteEntry asset except that the legal arguments shown in the slot properties panel are the legal arguments of the related CSElement asset (SiteEntry assets do not have their own legal arguments).
25.2.5.4 Using Nested Slots
When dropping an asset in a content-editable slot, the template rendering this asset can potentially define other slots. In order to avoid too many controls and slots being rendered in a given area, the behavior of nested slots is automatically degraded to a simple droppable area (without a toolbar and overlay). It is generally recommended to avoid nested slots, in order to keep the Contributor interface simple and usable for users.
25.2.6 Constraining Asset Types
By default, WebCenter Sites allows the following asset types to be dropped into a slot:
-
if
fieldis defined (content-editable slot): any legal asset types given by the field definition -
if
fieldis not defined (presentation-editable slot): any asset type for which the Can Be Child Asset flag is set to True. See Section 15.2, "Creating Basic Asset Types" for details.
It is also possible to further restrict allowable asset types, using the clegal attribute:
<insite:calltemplate
  slotname="Main"
  clegal="Article,Product"
  ...
/>
The following syntax allows to additionally restrict by asset subtypes:
<insite:calltemplate
  slotname="Main"
  clegal="type1:subtype1,type2:subtype2"
  ...
/>
Note:
Using "type:*" (with asterisk as wildcard) is also valid, and behaves as the "type" value.
25.2.7 Preventing CSS and JavaScript Conflicts
The in-context UI is injecting styles and JavaScript into web pages, when rendered in the Contributor interface in Web Mode / Edit View (and only in this case).
This may possibly result in:
-
CSS conflicts: for instance, slots are improperly displayed due to a site CSS rule applying to them)
-
JavaScript conflicts: the web page already has JavaScript which conflicts with the JavaScript injected in the page in the editing view. As a result, either the editorial UI or the page itself do not work properly.
CSS conflicts are typically solved by adding extra CSS rules, which are loaded only when the template is rendered inside the editorial UI, in editing mode. This is done by using the insite:ifedit tag, which allows to execute JSP code only when the JSP template is ran in editing mode:
<insite:ifedit>
<%-- This stylesheet import will only occur in editing mode.
  -- It will not have any impact on the actual rendering of the
  -- live site.
  --%>
  <link rel="stylesheet"
   type="text/css"
   href="/css/editorial.css" />
</insite:ifedit>
Extra CSS classes can be added to slots by using the cssstyle attribute of the insite:calltemplate tag, to specify specific CSS rules for slots.
CSS conflicts typically when rendering slots around elements which are floated: in this case, the blue or green overlay which is marking the slot area is likely to not have the proper dimension.
JavaScript conflicts are normally solved by degrading the behavior of the web page in editing mode only, in order to let the scripts injected by the editorial UI function properly. This may mean disabling some of the page functionality in Web Mode / Edit View of the Contributor interface.
25.3 Enabling Content Creation for Web Mode
Contributors can be allowed to create content from the in-context UI. This is done by providing: a start menu item of type insite and at least one layout template applicable to the asset type to create.
This section contains the following topics:
-
Section 25.3.1, "Defining a Start Menu for In-content Creation"
-
Section 25.3.2, "Providing Layout Templates for In-Context Creation"
-
Section 25.3.4, "Providing Editing-Specific Presentation Logic"
25.3.1 Defining a Start Menu for In-content Creation
In order to enable a particular asset type for in-context creation, a start menu of type insite has to be provided. That is, the New Insite option has to be selected in the Type drop-down menu:
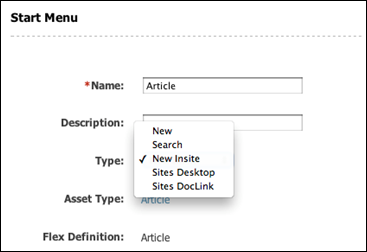
Description of the illustration e_dev4_01.png
In addition, if the asset being created has one or more required fields, default values have to be provided in the start menu, using the Default Values menu.
If required values are missing, the user will be directed to the asset form.
What happens when a user selects a New Insite start menu? The editorial user is first prompted to select a layout template and a name for the newly created asset:
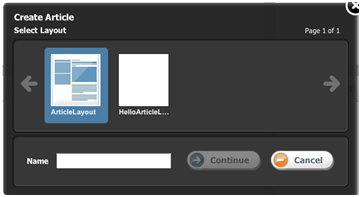
Description of the illustration e_dev4_02.png
Once Continue is clicked, assuming no workflow is configured, a new asset is created in the background, and then rendered using the selected layout template.
25.3.2 Providing Layout Templates for In-Context Creation
The same layout templates used for editing can be used for in-context creation. However, extra care must be taken in order to make sure the template will render properly with an empty asset.
This typically requires:
-
style adjustments, so the various elements on the page are rendered in the appropriate positions, although no values are rendered
-
meaningful help text (no value indicators), displayed to users when an editable field is empty
-
additional presentation logic, only executed when the template is ran in editing mode, on the editorial platform.
This section contains the following topics:
25.3.2.1 Adjusting Stylesheets
When the stylesheets have to be specifically adjusted for creating or editing content, the corresponding import statements can be enclosed in an insite:ifedit tag:
// import "delivery" stylesheets
<link type="text/css" rel="stylesheet" href="somecss.css" />
...

// then import "editing only" stylesheets. using the insite:ifedit
// tag ensures that only those stylesheets will be imported
// when rendering the template in create/edit mode.

<insite:ifedit>
  <link type="text/css" rel="stylesheet" href="edit.css"  />
  ...
</insite:ifedit>
25.3.2.2 Adjusting Stylesheets for Slots
When adjusting styles for the rendering of slots, the cssstyle attribute of the insite:calltemplate tag can be used to specify additional class names which can then be used in CSS rules.
<insite:calltemplate
  slotname="mySlot"
  ...
  cssstyle="myClassName"
  ...
/>
For example, if we wanted to force mySlot to have a 50px height when it is empty, we could provide the following CSS rule:
.myClassName .emptyIndicator {height: 50px !important;}
CSS rules can be grouped inside a specific stylesheet, and then imported conditionally, only when the template is executed in the context of Web Mode / Edit View of the Contributor interface, using the insite:ifedit JSP tag.
25.3.3 Providing Empty Value Indicators
For slots, use the emptytext attribute of the insite:calltemplate tag:
<insite:calltemplate
  slotname="mySlot"
  emptytext="Drag an Article here"
  ...
/>
For other editing fields, use the noValueIndicator parameter of the insite:edit tag:
<insite:edit
  field="headline
  params="{noValueIndicator: 'Enter Headline Here'}"
  ...
/>
25.3.4 Providing Editing-Specific Presentation Logic
In some cases, the presentation logic will be slightly different in delivery mode, compared to create/edit mode.
For example, in create/edit mode, when rendering an in-context editable list of articles, we might want to always display 5 extra empty slots. In that case, the logic has to account for both delivery and edit mode. It could be written as follows:
<%
// assuming that "relatedArticles" contains a list of
// related articles
%>
<insite:slotlist field="someAssetField">
  <ics:listloop listname="relatedArticles">
    <ics:listget
      listname="relatedArticles"
      fieldname="value"
      output="articleid" />
    <div class="post">
      <insite:calltemplate
        tname="Summary"
        c="Article"
        cid='<%=ics.GetVar("articleid")%>' />
    </div>
  </ics:listloop>
</insite:slotlist>

<%
// in this example, we add five extra empty slots
%>
<insite:ifedit>
  <%
    // in order to not disrupt rendering in delivery, this code is
    // added inside the insite:ifedit tag
  %>
  <c:forEach begin="0" end="4">
    <div class="post">
      <%
      // no c, cid specified, this renders an empty slot
      %>
      <insite:calltemplate tname="Summary" />
    </div>
  </c:forEach>
</insite:ifedit>
Obviously, the code could be adjusted to accommodate for any particular logic. For instance, we might want to display a maximum of 5 slots, empty or not. In that case, the last part of the code snippet could be written as follows:
<%
// get how many articles are in the list
%>
<ics:listget
  listname="relatedArticles"
  fieldname="#numRows"
  output="nbArticles" />

<c:forEach
  begin='<%=Integer.valueOf(ics.GetVar("nbArticles"))%>'
  end='4'>
  <div class="post">
    <insite:calltemplate tname='Summary" />
  </div>
</c:forEach>