2 Creating and Configuring an IBM DB2 Database
Use this chapter to set up a supported IBM DB2 database for your WebCenter Sites installation.
This chapter contains the following sections:
2.1 Installing DB2
-
Uncompress the correct installation file for your distribution.
-
Run
./db2setup -
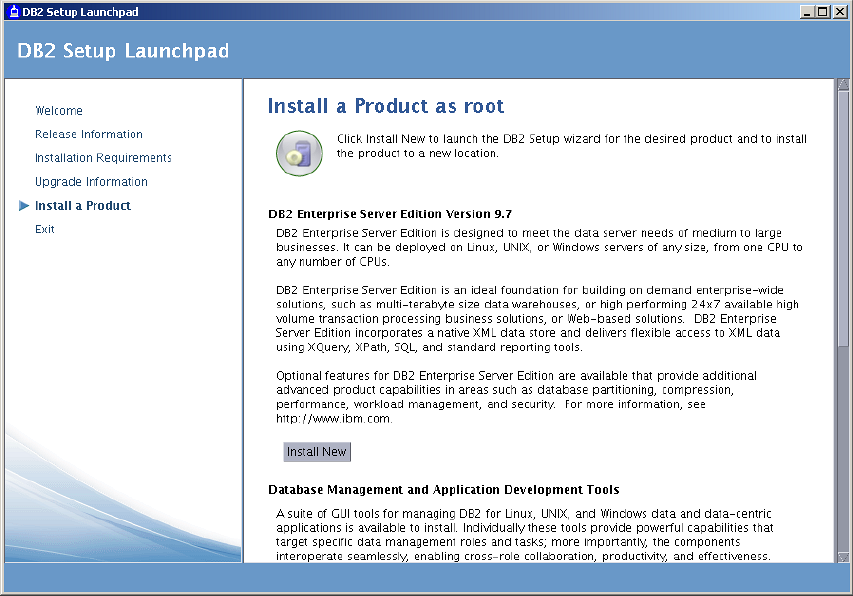
In the "Information Management Software" screen, select Install a Product.
-
Under "DB2 Enterprise Server Edition," (Figure 2-1) select Install New.
-
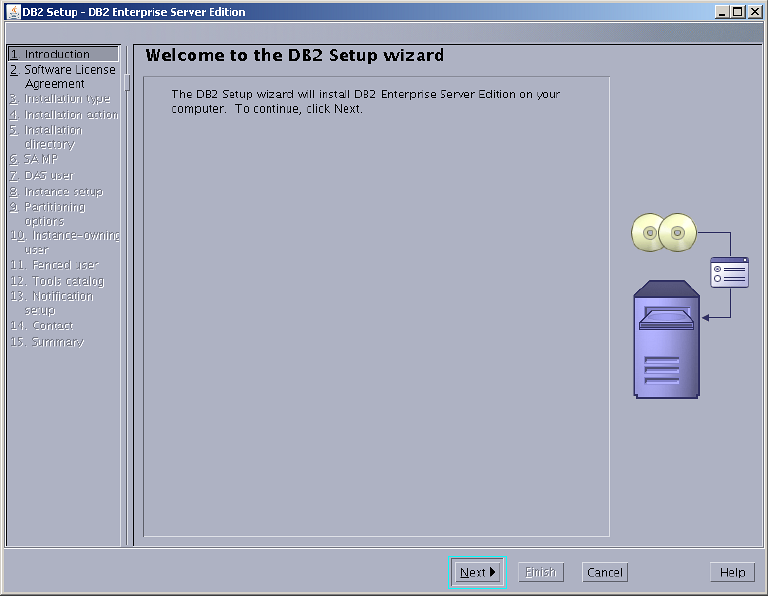
In the "Welcome to the DB2 Setup Wizard," (Figure 2-2), click Next.
-
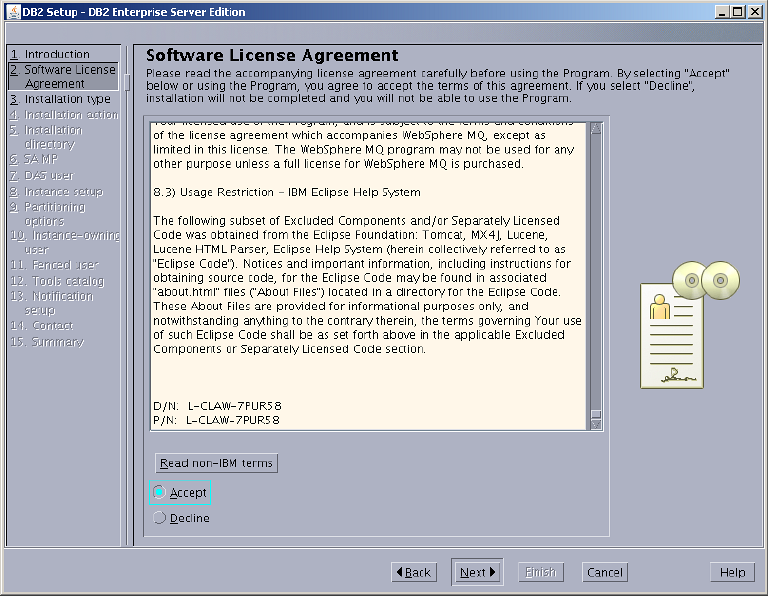
In the "Software License Agreement" screen (Figure 2-3), click Accept, then click Next.
-
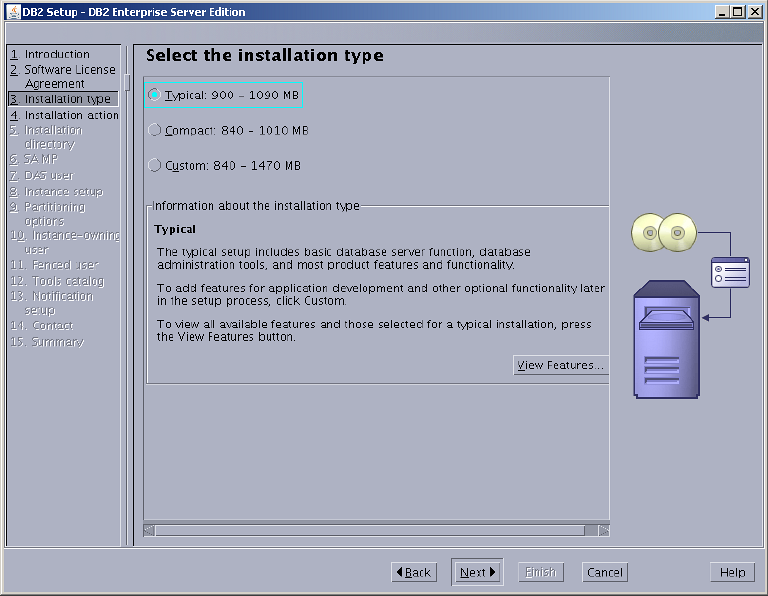
In "Select the Installation Type," (Figure 2-4) select Typical and click Next.
-
In "Select installation, response file creation, or both," (Figure 2-5) select Install DB2 Enterprise Server Edition on this Computer and click Next.
Figure 2-5 Installation And/Or Response File Creation
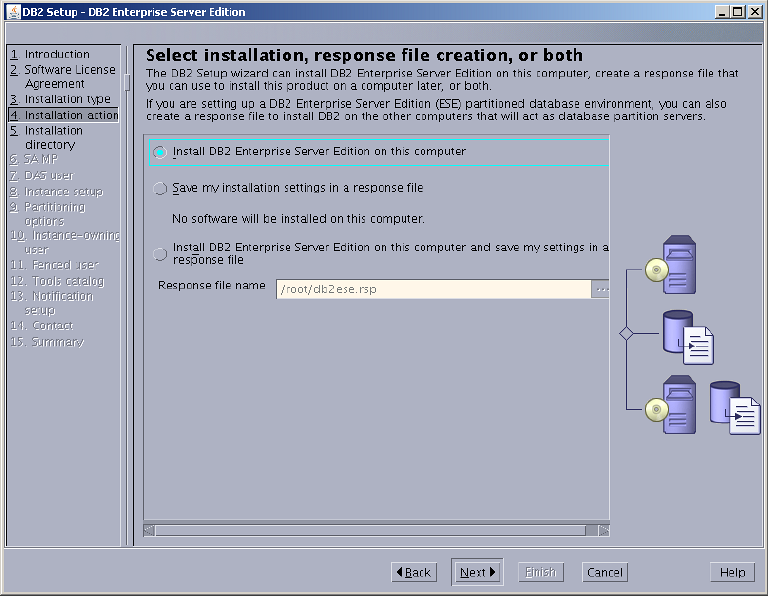
Description of ''Figure 2-5 Installation And/Or Response File Creation''
-
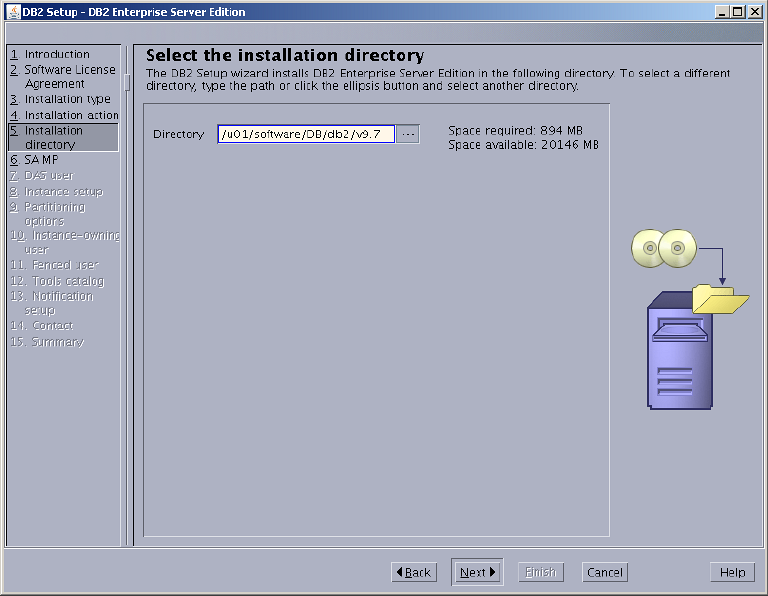
In "Select the installation directory," (Figure 2-6) either enter a directory or use the default and click Next.
-
In "Install the IBM Tivoli System Automation for Multiplatforms (SA MP)," (Figure 2-7) select Do not install SA MP, unless "SA MP" is required by your environment.
Figure 2-7 IBM Tivoli Automation for Multiplatforms (SA MP)
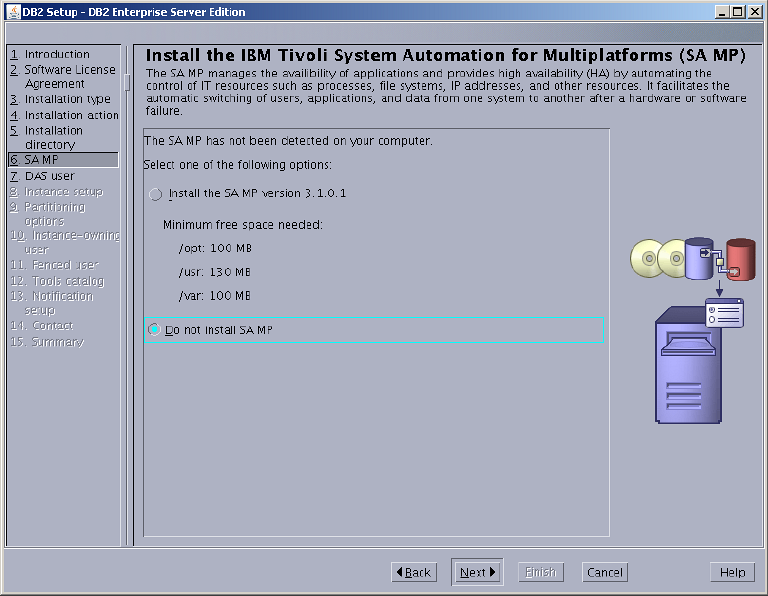
Description of ''Figure 2-7 IBM Tivoli Automation for Multiplatforms (SA MP)''
-
In "Set user information for the DB2 Administration Server" (Figure 2-8):
-
Keep the defaults, unless a previous attempt to install DB2 failed.
-
Enter a password.
-
Click Next.
Figure 2-8 User information for the DB2 Administration Server
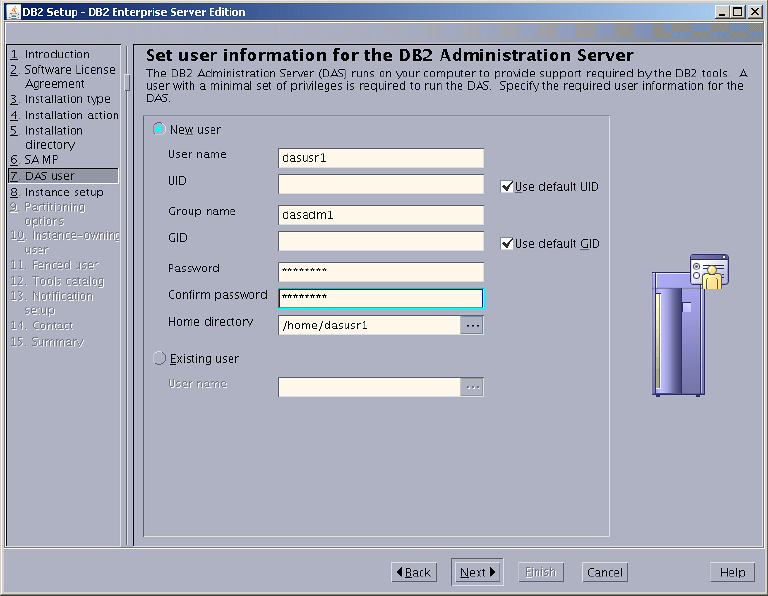
Description of ''Figure 2-8 User information for the DB2 Administration Server''
-
-
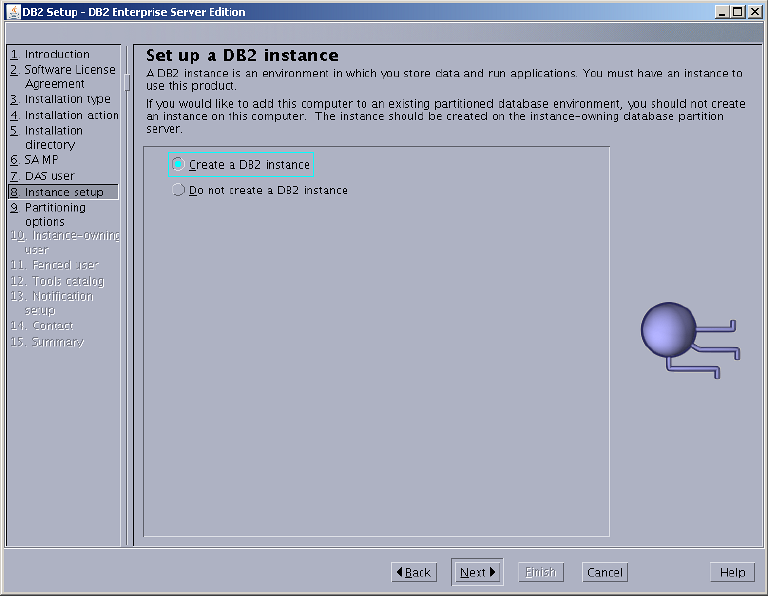
In "Set up a DB2 instance," (Figure 2-9) select Create a DB2 instance and click Next.
-
In "Set up partitioning options for the DB2 instance," (Figure 2-10) select Single partition instance and click Next.
Figure 2-10 Partitioning Options for the DB2 Instance

Description of ''Figure 2-10 Partitioning Options for the DB2 Instance''
-
In "Set user information for the DB2 instance owner" (Figure 2-11):
-
Keep the defaults, unless a previous attempt to install DB2 failed.
-
Enter a password.
-
Click Next.
Figure 2-11 User Information for the DB2 Instance Owner
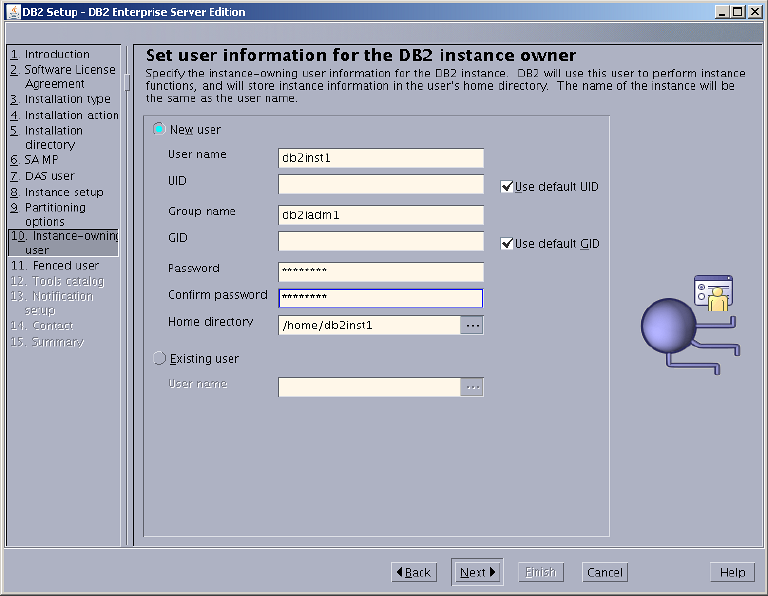
Description of ''Figure 2-11 User Information for the DB2 Instance Owner''
-
-
In "Set user information for the fenced user" (Figure 2-12):
-
Keep the defaults, unless a previous attempt to install DB2 failed.
-
Enter a password.
-
Click Next.
Figure 2-12 User Information for the DB2 Instance Owner
Description of ''Figure 2-12 User Information for the DB2 Instance Owner''
-
-
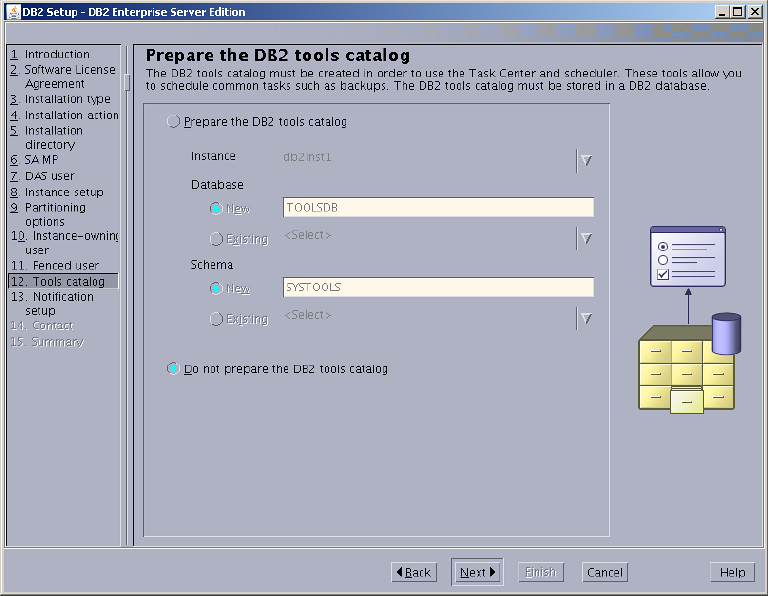
In "Prepare the DB2 tools catalog," (Figure 2-13) select Do not prepare the DB2 tools catalog and click Next.
-
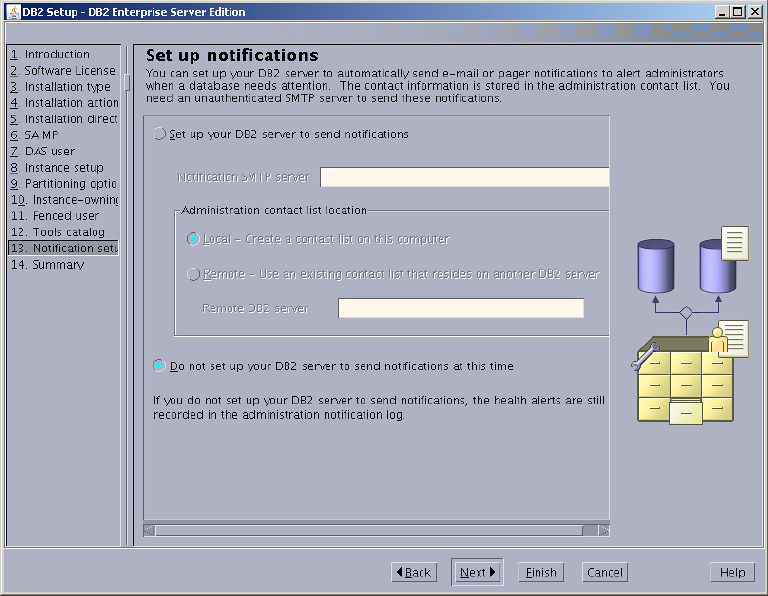
In "Set up notifications," (Figure 2-14) do one of the following:
-
If your system is a production server, select Set up your DB2 server to send notifications, enter a correct address for the local host, and click Next.
-
If your system is a not a production server, you can select Do not set up your DB2 server to send notifications at this time, and click Next.
-
-
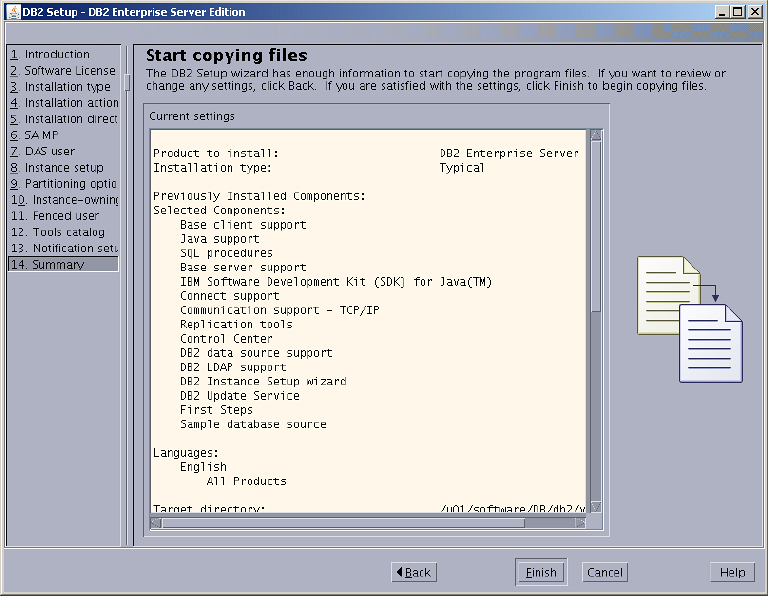
In "Start copying files," (Figure 2-15) check that your options are correct and click Finish.
-
Allow the installation to proceed (Figure 2-16).
Figure 2-16 DB2 Enterprise Server Edition Installation in Progress
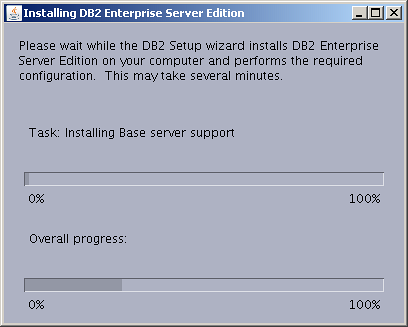
Description of ''Figure 2-16 DB2 Enterprise Server Edition Installation in Progress''
-
In "Setup has completed successfully," read the notes, check the log tab, and click Finish.
The installation of DB2 is now complete.
2.2 Creating a New DB2 Database
This section provides instructions for creating a new DB2 database.
-
Section 2.2.1, "Creating a New DB2 Database Using a SQL Script"
-
Section 2.2.2, "Creating a New DB2 Database Using the 'db2cc' Utility"
2.2.1 Creating a New DB2 Database Using a SQL Script
You can use a SQL script to create aDB2 database (and a user for the new database) for any version of IBM DB2 that is installed on your environment, including IBM DB2 versions 9.7 and 10.1.
Note:
If you installed IBM DB2 version 9.7, you have the option of creating a new DB2 database using thedb2cc utility. For instructions, see Section 2.2.2, "Creating a New DB2 Database Using the 'db2cc' Utility."To create a new DB2 database using a SQL script
-
Create a user for the new database. For example, to create a user named
csuseron Linux:useradd -d /home/csuser -m -p welcome1 csuser
-
Log in with DB2 instance owner credentials. For example,
db2inst1. -
Create a file with the following DB2 commands. (For example, create
db.sqland modify the database name, path, and user variables to match your installation):CREATE DATABASE <DBNAME> AUTOMATIC STORAGE YES ON '<DB2_HOME>/Databases/<DBNAME>' DBPATH ON '<DB2_HOME>/Databases/<DBNAME>' USING CODESET UTF-8 TERRITORY US COLLATE USING SYSTEM PAGESIZE 32768; CONNECT TO <DBNAME>; GRANT DBADM,CREATETAB,BINDADD,CONNECT,CREATE_NOT_FENCED_ROUTINE,IMPLICIT_SCHEMA,LOAD,CREATE_EXTERNAL_ROUTINE,QUIESCE_CONNECT,SECADM ON DATABASE TO USER <DBUSER>; UPDATE DATABASE CONFIGURATION USING APPLHEAPSZ 1024 DEFERRED; UPDATE DATABASE CONFIGURATION USING LOCKTIMEOUT 30 DEFERRED; UPDATE DATABASE CONFIGURATION USING APP_CTL_HEAP_SZ 1024 DEFERRED; UPDATE DATABASE CONFIGURATION USING LOGFILSIZ 32768 DEFERRED; UPDATE DATABASE CONFIGURATION USING LOGSECOND 8 IMMEDIATE ; CONNECT RESET;
-
Create the directory for your database.
mkdir -p <DB2_HOME>/Databases/<DBNAME>
-
Execute the sql script. For example:
db2 -tvsf createdb.sql
2.2.2 Creating a New DB2 Database Using the 'db2cc' Utility
If you installed IBM DB2 version 9.7, follow the steps in this section to create a new DB2 database using the db2cc utility. This section also includes instructions for creating a new database user.
Note:
Thedb2cc utility is only available for IBM DB2 version 9.7. For instructions on creating a new database for a later version of IBM DB2 (for example, version 10.1), see Section 2.2.1, "Creating a New DB2 Database Using a SQL Script."-
Log in as
db2inst1(or your instance user created during the installation, step 14 ). -
Navigate to:
./sqllib/binand rundb2cc. -
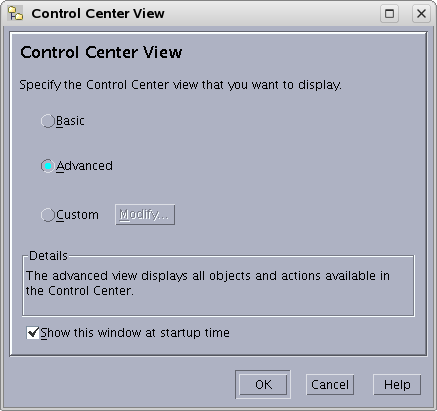
In the "Control Center View" screen (Figure 2-17), select Advanced.
-
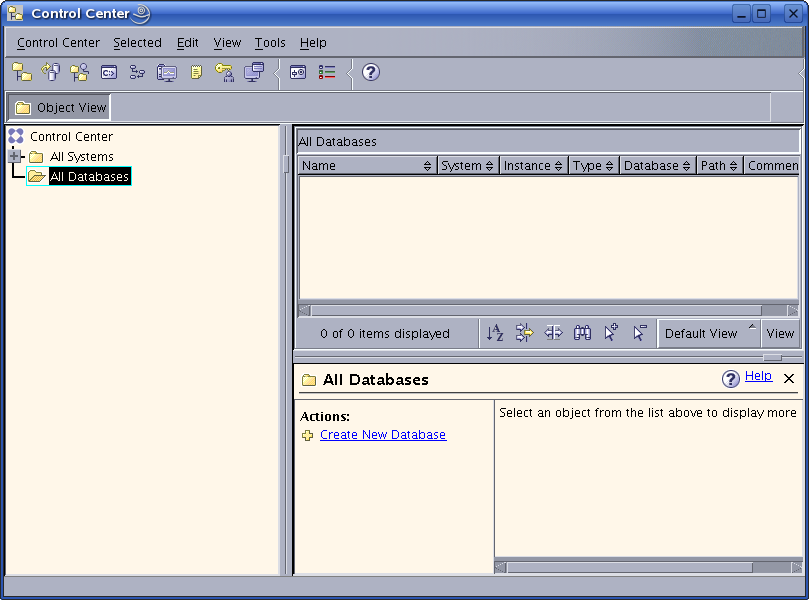
In the "Control Center," open the application for creating a database (Figure 2-18):
-
Click the plus sign next to the tree option All Systems.
-
Click the expanded branch All Databases. (If you have not created a database previously, this branch is empty.)
-
Right-click the branch All Databases and select Create Database > Standard.
-
-
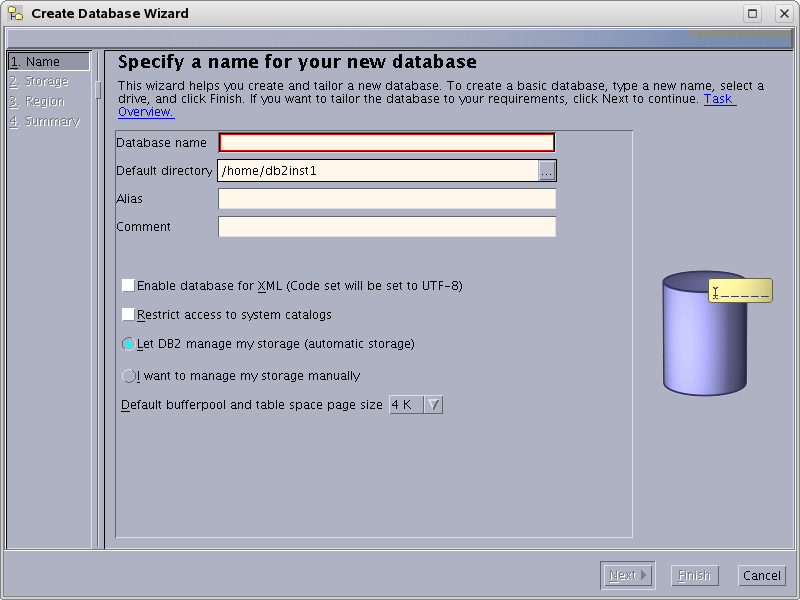
In "Specify a name for your new database" (Figure 2-19):
-
Enter a name for this database.
-
Select the check box Enable database for XML.
-
In the drop-down "Default bufferpool and table space page size," select 32 and click Next.
-
-
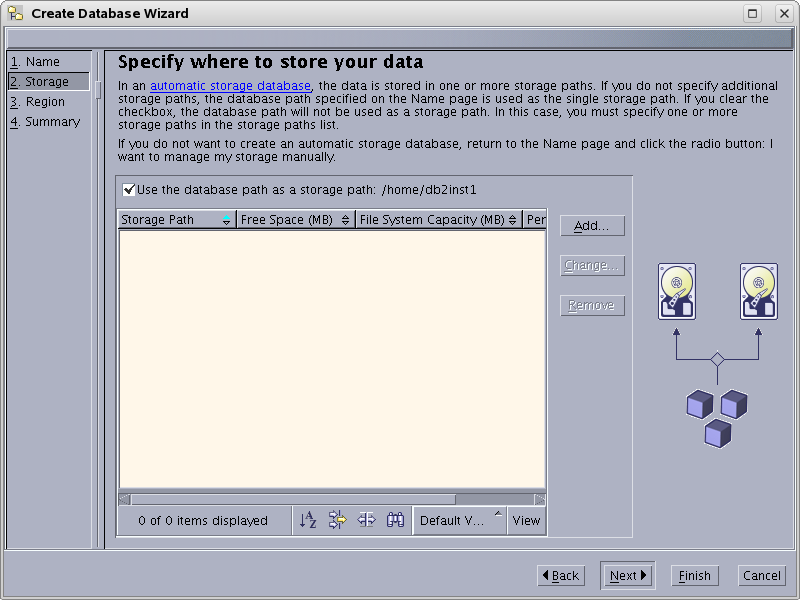
In "Specify where to store your data," (Figure 2-20) click Next (a value is unnecessary, as we kept the default option of Let DB2 manage my storage (automatic storage), on the previous page).
-
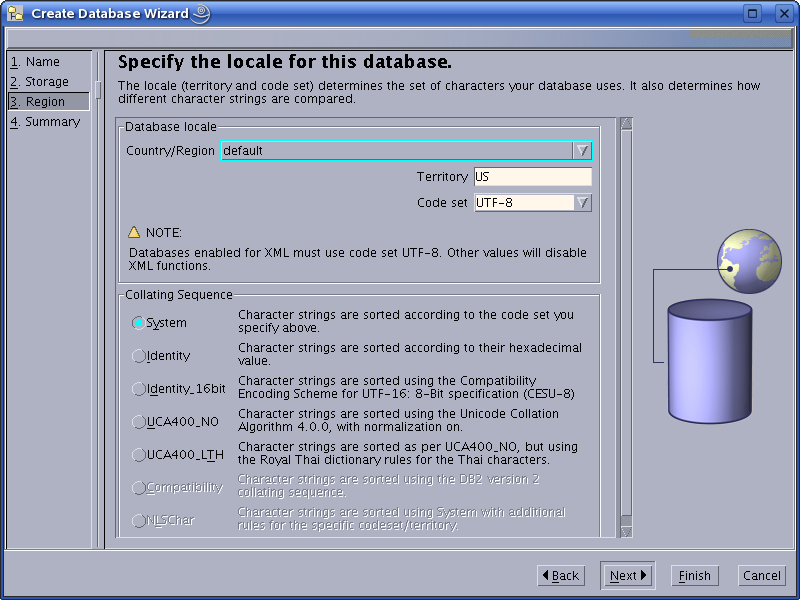
In "Specify the locale for this database," (Figure 2-21) ensure that the drop-down "Code set" displays UTF-8 and click Next.
-
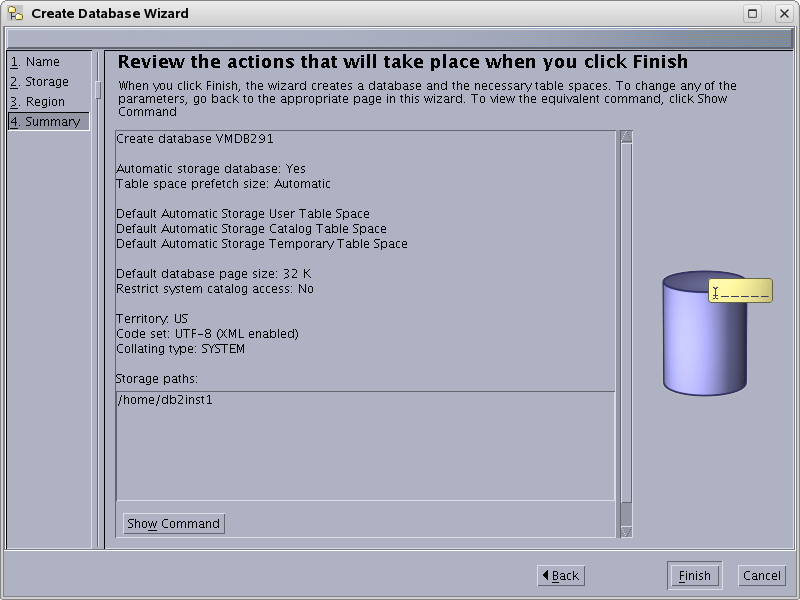
In "Review the actions that will take place when you click finish," (Figure 2-22) confirm that everything looks correct and click Finish.
-
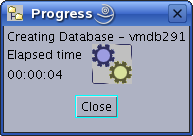
Allow the "Progress" window (Figure 2-23) to complete creating the database. The window will close automatically when the database has been created.
-
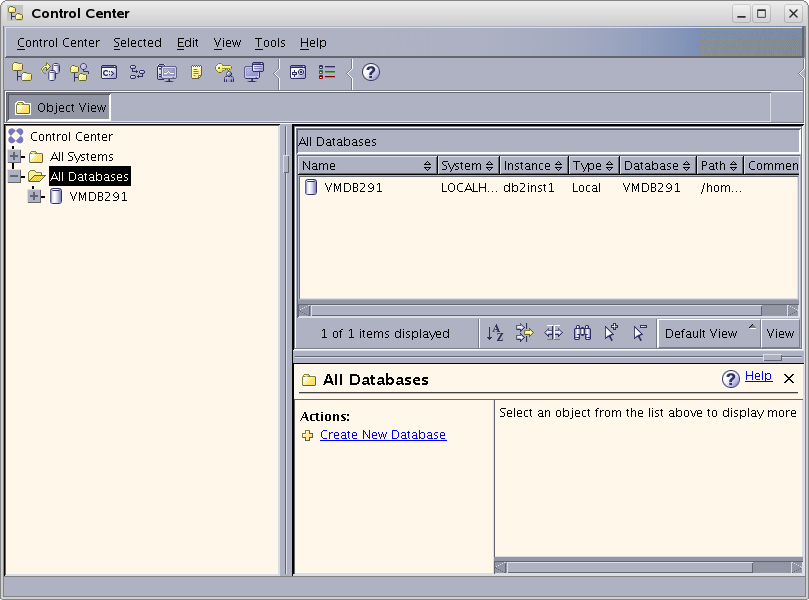
The database has now been created and is displayed in the control center.
Figure 2-24 shows that a single database named
vmdb291is present in the control center. -
Create a user for the new database
-
Go to the command line. As the system user, create a new user named
csuserthat will be used to access the database from your Oracle product.For example, to create a user named
csuseron Linux:useradd -d /home/csuser -m -p demo4132 csuser
-
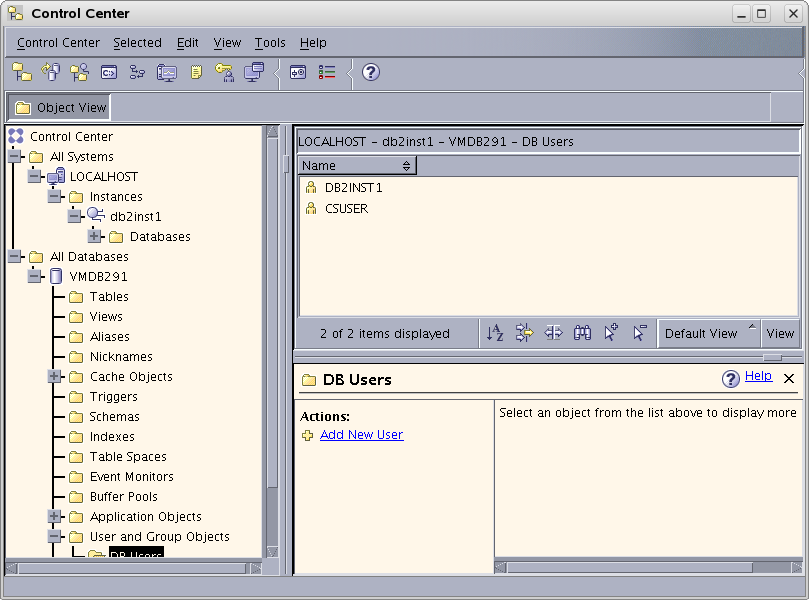
Go back to the "Control Center" and add the user:
-
Expand the newly created database in the tree by clicking the plus sign, then expanding the branch User and Group Objects.
-
Click DB Users to open the right-hand panel.
-
Right-click the branch DB Users (Figure 2-25) and select the Add option.
-
-
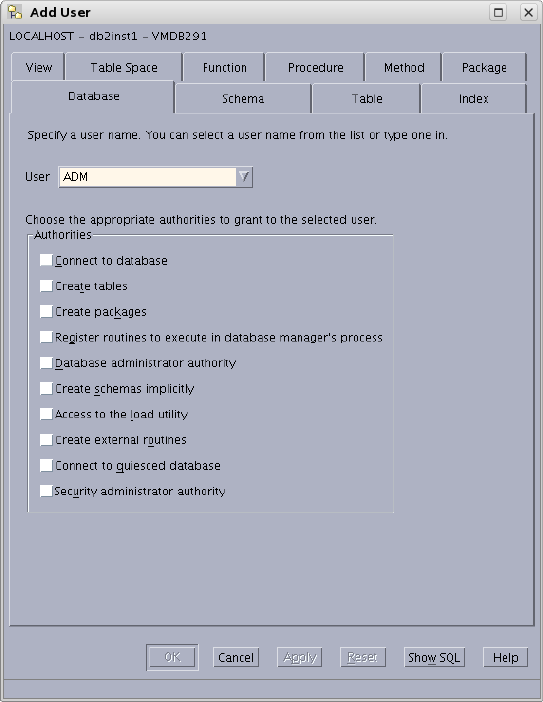
In the "Add User" application (Figure 2-26):
-
Select the user that was created in step a.
-
Under "Authorities," select all check boxes.
-
Click OK.
-
-

2.3 Configuring the Database
-
Right-click the database that you created (listed in the branch that displays the database icon) and select Configure Parameters.
-
In "Database Configuration":
-
Scroll through the list of options and replace the values of the following parameters with the values shown in Table 2-1.
-
Click OK (Figure 2-27).
Figure 2-27 Database Configuration - VMDB291 Dialog Box
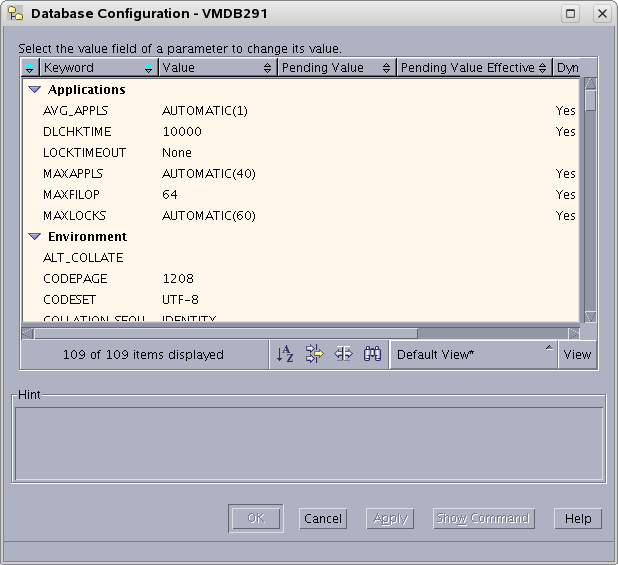
Description of ''Figure 2-27 Database Configuration - VMDB291 Dialog Box''
-
-
Right-click the database that you created (listed in the branch that displays the database icon) and select Restart.
A status window flashes. This does not mean that the operation has been completed. Typically, you will need to wait 2 to 3 minutes for the system to restart.
-
Stop the instance:
-
Expand the following "Control Center" tree branch (Figure 2-28): All Systems > LOCALHOST > Instances >
<name_of_your_instance> -
Right-click the instance.
-
Select Stop.
-
In the "Confirm stop" dialog box, click OK.
-
Wait for the message that the instance has been stopped.
-
-
Start the instance:
-
In the "Control Center" tree (Figure 2-29), expand All Systems, LOCALHOST, Instances, and then expand the
<name_of_your_instance>. -
Right-click the instance.
-
Select Start.
-
-
Wait for the message that the instance has been started. This does not mean that the operation has been completed. Typically, you will need to wait 2 to 3 minutes for the system to restart.
Your database is now ready for use with your Oracle software product.