13 Setting Up Oracle Internet Directory
This chapter provides information about setting up the Oracle Internet Directory. This chapter contains the following sections:
-
Section 13.2, "Starting the Required Oracle Internet Directory Components"
-
Section 13.5, "Connecting to Oracle Internet Directory using an LDAP Browser"
13.1 Installing Oracle Internet Directory
Use the documentation that corresponds with the version of Oracle Internet Directory you are installing to guide you through the installation process.
The following components are required to install Oracle Internet Directory:
-
Oracle Database 11g – Version 11.2.0
-
Oracle Fusion Middleware Repository Creation Utility 11g (11.1.1.5.x)
-
Oracle WebLogic Server (10.3.5) Generic and Coherence
-
Oracle Identity Management 11g (11.1.1.5.x)
13.2 Starting the Required Oracle Internet Directory Components
-
Start the WebLogic Admin Server:
<domain_home>/bin/startWebLogic.sh
For example:
/u01/software/Apps/OraMiddleware/user_projects/domains/OIAMDomain/bin/startWebLogic.sh
-
Start the WebLogic Node Manager:
<weblogic_home>/server/bin/startNodeManager.sh
For example:
/u01/software/Apps/OraMiddleware/wlserver_10.3/server/bin/startNodeManager.sh
-
View the Enterprise Manager Farm Application
-
From a browser, go to the following URL:
http://<weblogic_admin_host>:<weblogic_admin_port>/em
-
Log in using the WebLogic server credentials.
-
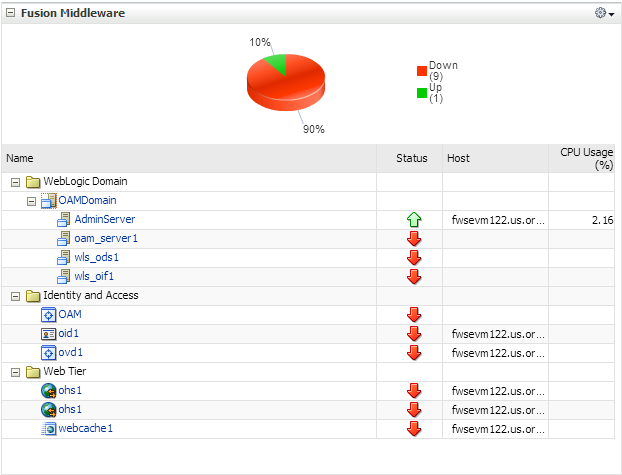
On the right side, under Fusion Middleware (Figure 13-1), you can view the status for each of the applications and servers. Currently only AdminServer should be shown as running.
The required applications are: the Oracle Internet Directory server (
oid1) and the Oracle Directory Services Manager web application (wls_ods1) which is used for Oracle Internet Directory administration.
-
-
Start the Oracle Internet Directory server.
-
Set the
ORACLE_INSTANCEenvironment variable:export ORACLE_INSTANCE=<middleware_home>/asinst_1
-
Start the server using the
opmnctlcommand:<middleware_home>/Oracle_IDM1/opmn/bin/opmnctl startall
-
View the
opmnctlprocesses:<middleware_home>/Oracle_IDM1/opmn/bin/opmnctl status
-
Stop any unwanted non-oid1 components using the values from the chart output from step 3c.
<middleware_home>/Oracle_IDM1/opmn/bin/opmnctl stopproc ias-compnent=<ias-component_name>
In the Enterprise Farm Application you should now see the Oracle Internet Directory server (oid1) as started.
-
-
Start the Oracle Directory Services Manager web application (Figure 13-2):
-
From the Farm Application, click wls_ods1.
-
Under wls_ods1, click WebLogic Server.
A drop-down menu opens.
-
In the drop-down menu, select Control and then click Start Up.
Figure 13-2 Oracle Directory Services Manager
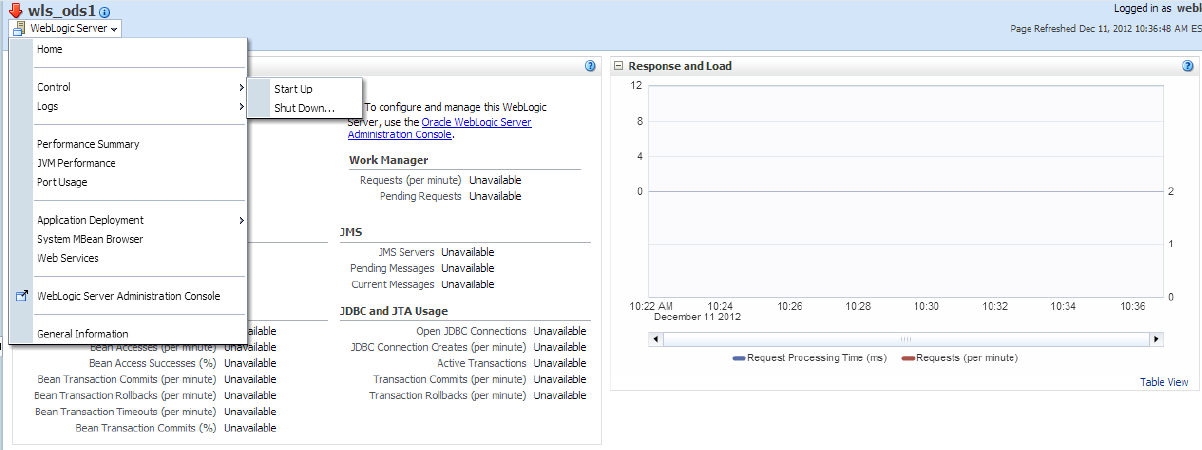
Description of ''Figure 13-2 Oracle Directory Services Manager''
When startup has completed, the status arrow changes to green.
-
13.3 Using the Oracle Directory Services Manager
-
Access the Oracle Directory Services Manager:
-
From the Farm Application, click oid1.
-
Under oid1, click Oracle Internet Directory which becomes a drop-down menu.
A drop-down menu opens.
-
In the drop-down menu, point to Directory Services Manager and click Data Browser.
-
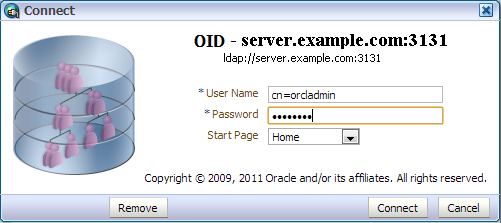
In the "Connect" screen (Figure 13-3), fill in the following fields and then click Connect:
-
In the User Name field, enter
cn=orcladmin. -
In the Password field, enter the password specified during the Oracle Identity Directory installation.
-
In the Start Page field, select a start page.
This connection will be saved for later use.
-
-
-
View or modify Oracle Internet Directory Data:
-
In the Oracle Directory Services Manager (Figure 13-4), click the Data Browser tab.
-
Expand
dc=com,dc=oracle,dc=us.The roles for WebCenter Sites are stored in
cn=Groups. The users for WebCenter Sites are stored incn=Users. -
(Optional) Add/Remove a role for a user:
-
Expand cn=Groups
-
Click the role to be added/removed.
Figure 13-4 Oracle Directory Services Manager
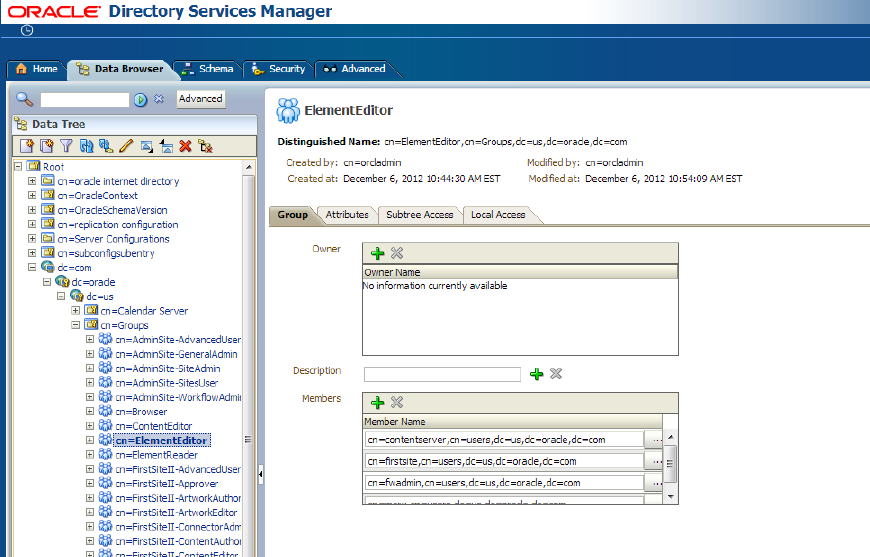
Description of ''Figure 13-4 Oracle Directory Services Manager''
To remove a role from a user, select the user's name and click the red X, then click Apply.
To add a role to a user, click the green + next to the desired role, then either enter the full user name, or browse to the name of the desired user.
-
-
(Optional) Change a user's password (Figure 13-5):
-
Expand cn=Users
-
Click the name of the user whose password you wish to change.
-
Click the Attributes tab.
-
In the "userPassword" field, enter the new password for the user and then click Apply.
Figure 13-5 Oracle Directory Services Manager

Description of ''Figure 13-5 Oracle Directory Services Manager''
-
-
13.4 Configuring Oracle Internet Directory
-
Set the Server Mode:
Note:
WebCenter Sites requires an LDAP server that is capable of recording data to enable User/Role modification in the WebCenter Sites Admin interface.-
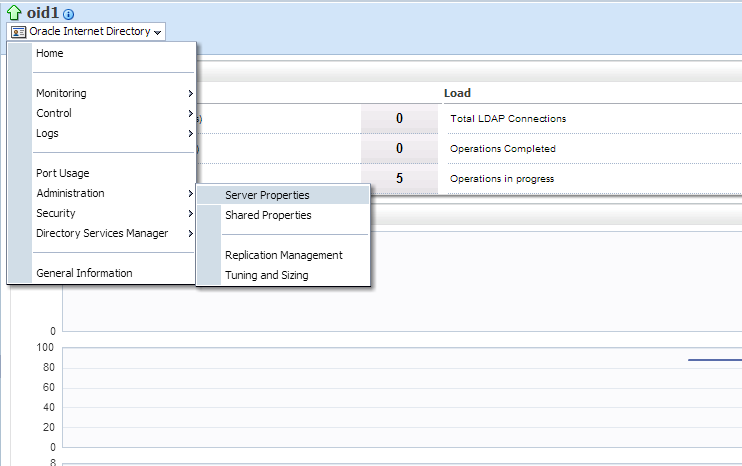
From the Farm Application, click oid1 (Figure 13-6).
-
Under oid1, click Oracle Internet Directory.
A drop-down menu opens.
-
In the drop-down menu, select Administration and then click Server Properties.
Figure 13-6 Oracle Internet Directory: Server Properties
Description of ''Figure 13-6 Oracle Internet Directory: Server Properties''
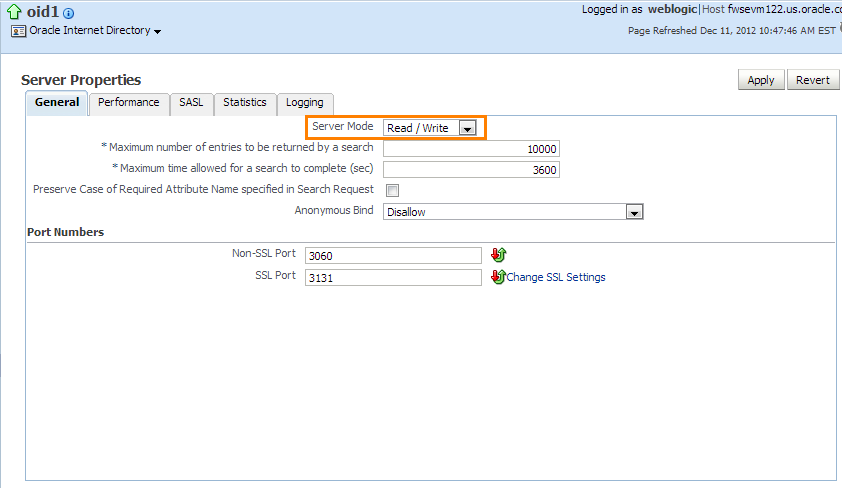
The "Server Properties" screen opens.
-
In the "Server Mode" field, select Read/Write (Figure 13-7) and then click Apply.
-
-
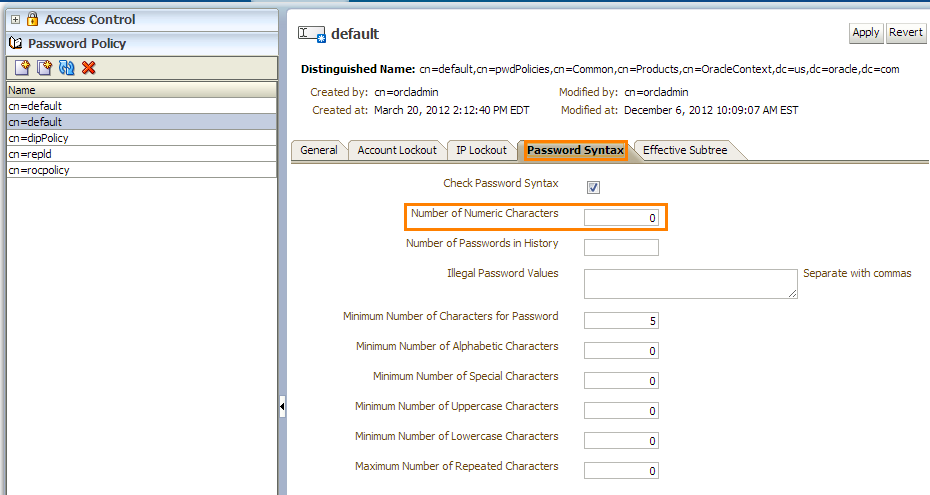
Modify the default Password Policy:
Note:
WebCenter Sites requires an LDAP server to allow passwords without numeric characters.-
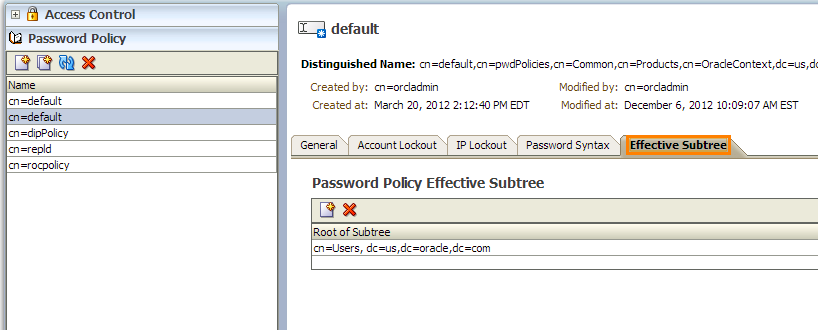
In the Oracle Directory Services Manager, click the Security tab.
-
In the left navigation pane, click Password Policy.
-
Find the policy named cn=default with an "Effective Subtree" of
cn=Users, dc=us,dc=oracle,dc=comby clicking each policy named cn=default and then clicking the Effective Subtree tab (Figure 13-8). -
Click the Password Syntax tab.
-
In the "Number of Numeric Characters" field, enter
0(Figure 13-9). -
Click Apply.
-
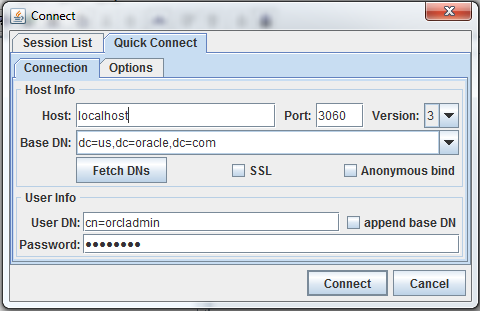
13.5 Connecting to Oracle Internet Directory using an LDAP Browser
-
Open the LDAP browser.
-
Select the Quick Connect tab.
-
In the "Quick Connect" tab (Figure 13-10), fill in the following information:
-
Host:
<oid_host> -
Port:
<oid_port>(default is3060) -
Base DN:
dc=us,dc=oracle,dc=com -
Anonymous bind: deselect
-
User DN:
cn=orcladmin -
Password:
<oid_password>
-
-
Click Connect.
13.6 Adding Users/Roles Using an LDIF File
-
Create an LDIF file:
-
Open a new file in a text editor.
-
For each new user add the following:
dn: cn=<user>,dc=Users,dc=us,dc=oracle,dc=com
userPassword: <password>
objectClass: top
objectClass: person
objectClass: organizationalPerson
sn: <user>
cn: <user>
-
For each new role add the following:
dn: cn=<role>,dn=Groups,dc=us,dc=oracle,dc=com
objectClass: top
objectClass: groupofUniqueNames
uniqueMember: cn=<user1>,cn=Users,dc=us,dc=oracle,dc=com
uniqueMember: cn=<user2>,cn=Users,dc=us,dc=oracle,dc=com
…
cn: <role>
-
Save the new LDIF file.
-
-
Import the LDIF file. Do one of the following:
-
If you are using the
ldapaddcommand:-
Change to the
<oracle_home>/bindirectory:cd <middleware_home>/Oracle_IDM1/bin
-
Import the file using the
ldapaddcommand:./ ldapadd -h <oid_host> -p <oid_port> -D "cn=orcladmin" -w <oid_password> -f <path to ldif file> -x
-
-
If you are using the Oracle Directory Services Manager:
-
Connect to the Oracle Identity Directory using the Directory Services Manager and click the Data Browser tab.
-
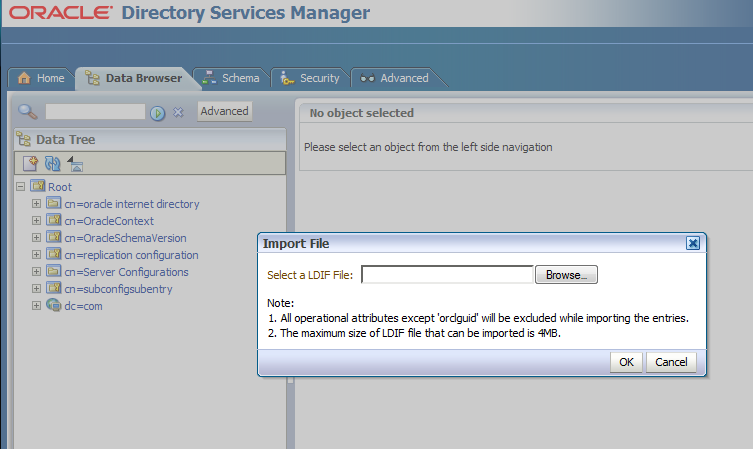
Under "Data Tree," select the icon located farthest to the right.
The "Import File" dialog box opens (Figure 13-11).
-
In the "Import File" dialog box, browse to the LDIF file you created in step 1 and then click OK.
-
-