14 Setting Up the Oracle WebLogic 10.3 Embedded LDAP Server
This chapter provides instructions on setting up the currently supported WebLogic Embedded LDAP Server for use with WebCenter Sites.
Note:
You must set up WebLogic LDAP before you run the WebCenter Sites-LDAP integrator.This chapter contains the following sections:
14.1 Enabling the WebLogic Embedded LDAP Server
This section explains how to enable the WebLogic Embedded LDAP Server.
To enable the WebLogic Embedded LDAP Server
-
Log in to the WebLogic Server Administration Console.
-
In the "Domain Structure" tree at the left, click your WebLogic portal domain.
-
Set the Embedded LDAP password (Figure 14-1):
-
In the workspace, select the Security tab, then select the Embedded LDAP sub-tab.
-
In the "Change Center" pane in the upper left, click Lock & Edit.
-
In the Credential field, enter the desired Embedded LDAP password. Re-enter the password in the Confirm Credential field for verification.
-
Click Save.
Figure 14-1 Security Tab - Embedded LDAP Sub-Tab
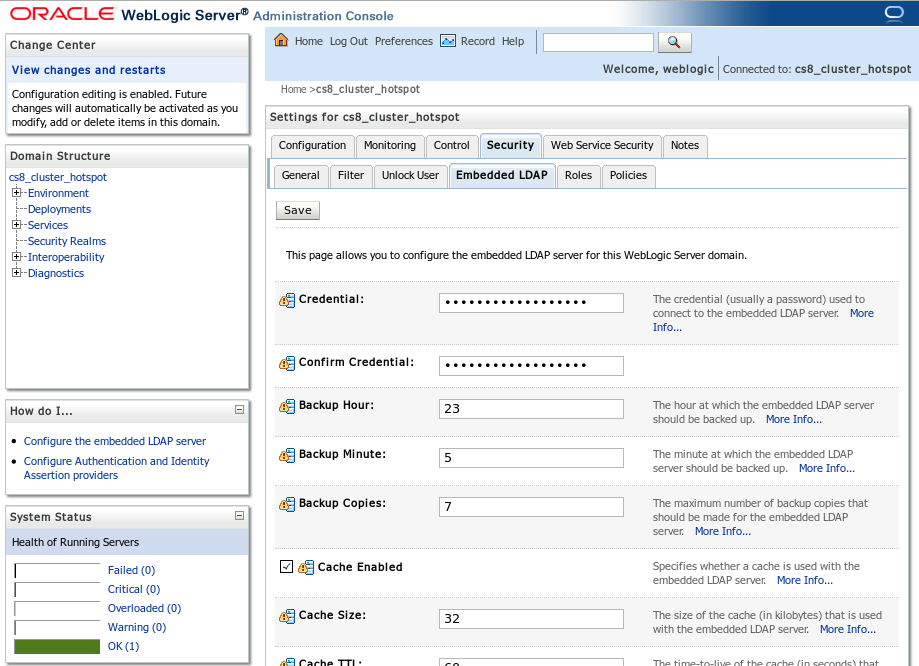
Description of ''Figure 14-1 Security Tab - Embedded LDAP Sub-Tab''
-
-
Create an Embedded LDAP authentication provider (Figure 14-2):
-
In the "Domain Structure" tree, click Security Realms.
-
In the workspace, click myrealm and select the Providers tab.
Figure 14-2 Providers Tab - Authentication Sub-Tab
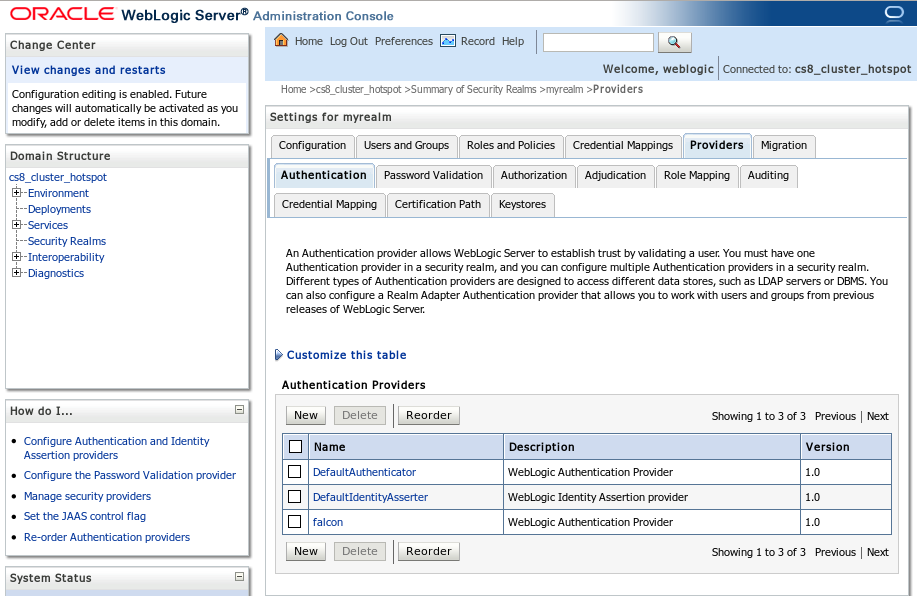
Description of ''Figure 14-2 Providers Tab - Authentication Sub-Tab''
-
Click New.
-
In the Name field, enter a name for the authentication provider.
-
In the "Type" drop-down list, select DefaultAuthenticator.
-
Click OK. The new authentication provider appears in the provider list.
-
-
In the "Change Center," Click Activate Changes.
-
Stop the admin server.
14.2 Modifying User Passwords
This section shows you how to modify user passwords in WebLogic LDAP Server.
To modify user passwords in WebLogic LDAP Server
-
Log in to the WebLogic Server Administration Console.
-
In the "Domain Structure" tree, click Security Realms.
-
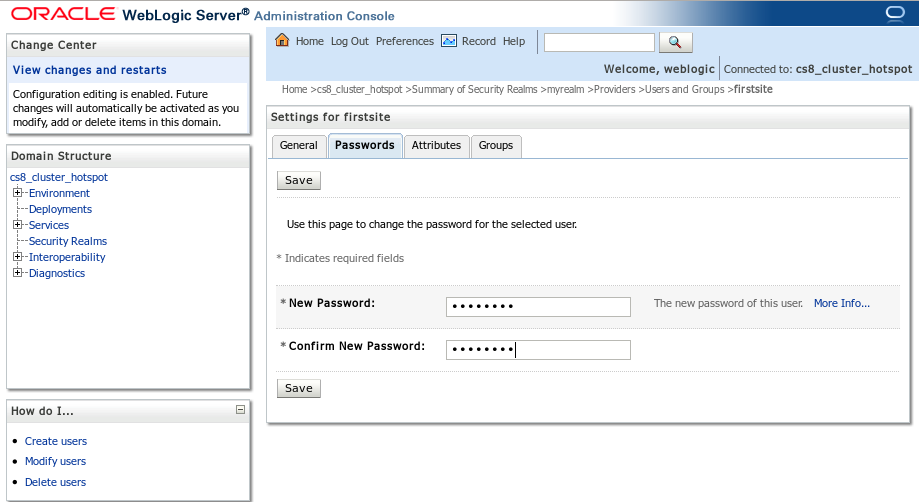
In the workspace, click myrealm and select the Users and Groups tab (Figure 14-3).
Figure 14-3 Users and Groups Tab - Users Sub-Tab
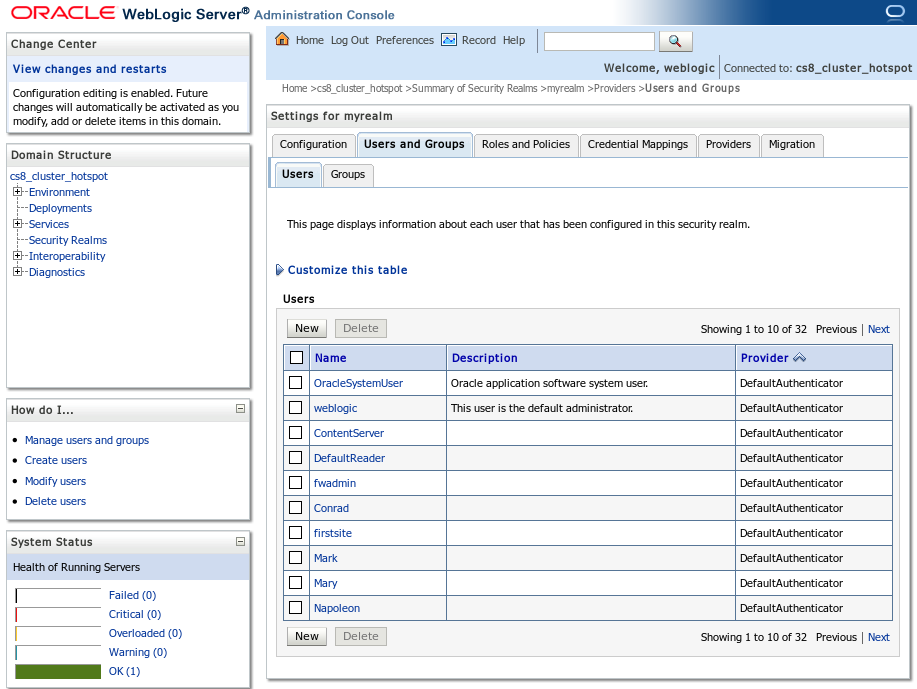
Description of ''Figure 14-3 Users and Groups Tab - Users Sub-Tab''
-
Click the user whose password you want to change.
The workspace displays the "Settings for
<user name>" screen, as shown in Figure 14-4. -
Select the Passwords tab and enter the new password into both fields (Figure 14-5).
-
Click Save.