21 Exploring Recommendations and Content
This chapter describes how to use the recommendations from WebCenter Portal of people, portals, and content.
This chapter includes the following topics:
Permissions:
The tasks described in this chapter are available to any WebCenter Portal user with access to a page that contains activity graph recommendations.
21.1 About Recommendations and Content
The activity graph serves up its recommendations in the following ways:
-
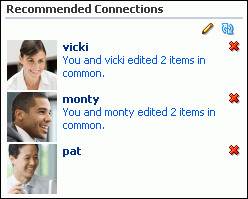
Recommended Connections
Use recommended connections (Figure 21-1) to view and connect with users similar to you.
-
Similar Portals
Use Similar Portals to identify and interact with portals that may be of interest to you. For example, people who worked on that portal also worked on these other portals.
-
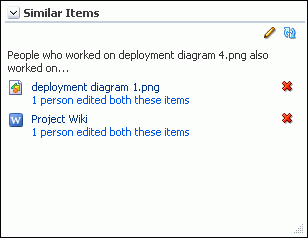
Similar Items
Use Similar Items (Figure 21-2) to identify and interact with WebCenter Portal content that may be of interest to you.
-
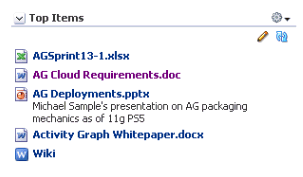
Top Items
Use Top Items (Figure 21-3) to view and interact with the WebCenter Portal items (documents, wikis, or blogs) the activity graph has calculated to be most active in the current portal.
See Also:
-
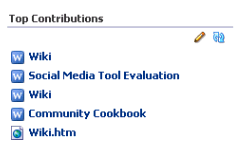
Top Contributions
Use Top Contributions (Figure 21-4) to view and interact with the WebCenter Portal items (documents, wikis, or blogs) the activity graph has calculated to be the most active by the current user.
Note:
The activity graph displays recommendations only if it is configured in your application.
The recommendations provided reflect the contents of the activity graph when the activity graph engines were last run. Activities that occurred after the last run are not included.
21.2 Working with Connection Recommendations
Recommended connections let you view and connect to people considered to be similar to you.
This section includes the following subsections:
-
Section 21.2.1, "Learning More About a Recommended Connection"
-
Section 21.2.2, "Inviting a Recommended Connection to Connect with You"
-
Section 21.2.3, "Removing a User from Your Recommended Connections"
-
Section 21.2.4, "Setting the Number of Users to Display in Recommended Connections"
-
Section 21.2.5, "Controlling Which Users to Include in Recommended Connections"
See Also:
21.2.1 Learning More About a Recommended Connection
Before you connect with someone new, you probably want to find out a bit more about that person to determine whether it is really a connection that you want to make. Recommended connections enables this by providing access to the user profile information and by including reasons why the recommendation has been made.
To view information about a recommended connection:
-
Go to a recommended connection.
Tip:
By default, you can find recommended connections on the Profile page in your Home portal.
-
Each recommended connection includes the name, title, and profile icon of the user. This provides a snapshot to help you decide quickly if you want to connect to this person.
-
To find out more information about the user, click name of the user to display the User Detail popup.
Note:
Alternatively, you can click the user icon to display the user's Profile Gallery.
-
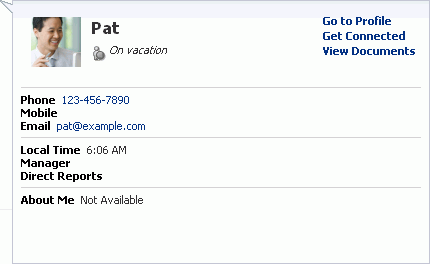
In the User Detail popup (Figure 21-5), you can view additional information about the user, such as his or her location and current status. You can also choose to view the full profile or contact the user by email or instant message.
Note:
The information in the User Detail popup depends on the information that the user has provided in their profile, and the tools/services that are enabled in the portal.
-
Click anywhere away from the popup to close it.
-
You may see a reason why each person was recommended as a potential connection. For example, you may be connected to some of the same people or you may have worked on the same documents or wikis.
Reasons for recommending a connection are:
-
You share connections with the user
-
You and the user edited one or more of the same items
-
You and the user worked in one or more of the same portals
-
You and the user tagged one or more of the same items
Click the reason to find out more details. For example, a list of the connections you have in common, or a list of the objects that you have both worked on (Figure 21-6).
Figure 21-6 Details for Reasons for Recommended Connections
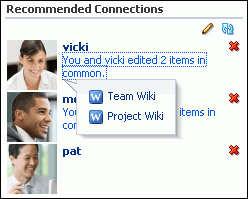
Description of "Figure 21-6 Details for Reasons for Recommended Connections"
-
-
Click anywhere away from the popup to close it.
-
After examining this information you can decide whether to connect to this person, or remove him or her from the list of recommended connections.
21.2.2 Inviting a Recommended Connection to Connect with You
If you find a person in the list of recommended connections that you want to connect with, you can do so quickly from the User Detail popup or the user's Profile Gallery.
To invite a recommended connection to connect with you:
-
Go to a recommended connection.
Tip:
By default, you can find recommended connections on the Profile page in your Home portal.
-
Find the person in the list of recommended connections.
-
Click the name of the user to display the User Detail popup, or the user icon to display the user's Profile Gallery.
-
Click Get Connected (Figure 21-7).
-
In the Invitation Message dialog (Figure 21-8), enter your own message or keep the default.
Figure 21-8 The Invitation Message Dialog
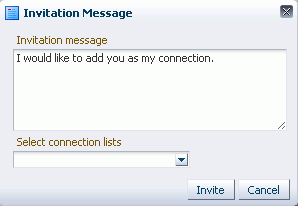
Description of "Figure 21-8 The Invitation Message Dialog"
-
From the Select connection lists dropdown list, select the connection list to which you want to add this user.
See Also:
-
Click Invite.
If the person you have invited set Preferences to automatically accept all invitations, you are connected immediately. Otherwise, the invitation becomes available in the recipient's Connections page.
21.2.3 Removing a User from Your Recommended Connections
If the list of recommended connections includes people that you do not want to connect with, you can remove them, making space for more recommendations. You might also choose to remove someone after you have issued them an invitation to connect. If you do so, the recommendation is removed from the list, but the invitation is not canceled.
To remove a recommended connection:
-
Go to a recommended connection.
Tip:
By default, you can find recommended connections on the Profile page in your Home portal.
-
Find the person in the list of recommended connections.
-
Click the Do not show this person icon next to the user in the list (Figure 21-9).
Figure 21-9 The Do Not Show This Person Icon

Description of "Figure 21-9 The Do Not Show This Person Icon"
-
The list is refreshed with a new recommended connection taking the place of the one you removed.
21.2.4 Setting the Number of Users to Display in Recommended Connections
You can control the number of users that are displayed in recommended connections.
To set the number of recommended connections to display:
-
Go to recommended connections.
Tip:
By default, you can find recommended connections on the Profile page in your Home portal.
-
Click the Display Options icon.
-
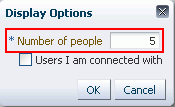
In the Display Options dialog, in the Number of People field (Figure 21-10), enter how many recommended connections you want to see. The default value is 5.
-
Click OK.
21.2.5 Controlling Which Users to Include in Recommended Connections
By default, recommended connections includes all recommended connections except those with whom you are already connected. You can change this setting by editing the display options. For example, you could show users who are similar to you, rather than to show recommended connections. In this case, you might want to include existing connections.
To control which users to include:
-
Go to a recommended connection.
Tip:
By default, you can find recommended connections on the Profile page in your Home portal.
-
Click the Display Options icon.
-
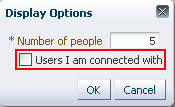
In the Display Options dialog, select the Users I am connected with check box (Figure 21-11) to include users in the list of recommended connections even if you are already connected with them.
Deselect the check box to remove users from the list if you are already connected with them.
Figure 21-11 The Users I Am Connected With Option
Description of "Figure 21-11 The Users I Am Connected With Option"
Note:
This check box is not selected by default.
-
Click OK.
21.3 Working with Similar Portals
Similar Portals provide you with recommendations of other portals that are similar to the one you are currently viewing. A portal is considered similar to another portal if the same people interact with it, especially if they edit the content.
Only portals that you are permitted to view are listed in the Similar Portals.
Note:
The recommendations made in the Similar Portals are determined based on the currently viewed portal only; they are not specific to the current user.
This section includes the following subsections:
-
Section 21.3.3, "Removing a Portal from the Suggested Portals"
-
Section 21.3.4, "Setting the Number of Portals to Display in the Similar Portals"
-
Section 21.3.5, "Controlling Which Portals to Include in the Similar Portals"
21.3.1 Learning More About a Suggested Portal
When looking at a portal through Similar Portals, one of the first things you probably want to do is find out more about that portal. This helps you determine whether the portal is one that you are interested in joining or not.
To learn more about a suggested portal:
-
Go to the list of Similar Portals that includes the portal about which you want to learn more.
-
Each suggested portals includes the name and description of the portal. This provides a snapshot to help you decide quickly if the portal is one that you might be interested in.
-
To go to the portal to find out more about it, click the name.
-
Examine the contents of the portal to determine if you are interested in it.
-
After examining the portal you can decide whether to join the portal or remove it.
21.3.2 Joining a Suggested Portal
If you find a portal through Similar Portals that you want to join, you can do so by visiting the portal.
To join a suggested portal:
-
Go to the list of similar portals that includes the portal that you want to join.
-
Find the portal that you want to join.
-
Click the portal name to open the portal.
-
In the portal, subscribe to the portal. Some membership requests require approval from the portal moderator so you may not gain access immediately.
See Also:
21.3.3 Removing a Portal from the Suggested Portals
If you decide that you are not particularly interested in a portal listed in the similar portals, you can remove it, making space for more recommendations. The portal is removed only from your view; the portal continues to be listed for other users, as long as they have permission to view it.
To remove a portal from the list of similar portals:
-
Go to the list of similar portal that includes the portal you want to remove.
-
Find the portal that you want to remove.
-
Click the Do no show this portal icon next to the portal (Figure 21-12).
Figure 21-12 The Do Not Show This Portal Icon

Description of "Figure 21-12 The Do Not Show This Portal Icon"
-
The list is refreshed with a new similar portal taking the place of the one you removed.
21.3.4 Setting the Number of Portals to Display in the Similar Portals
You can control the number of portals that are displayed in the Similar Portals.
To set the number of similar portals to display:
-
Go to the list of similar portals that you want to edit.
-
Click the Display Options icon.
-
In the Display Options dialog, in the Number of Portals field, enter how many similar portals you want to list. The default value is 5.
-
Click OK.
21.3.5 Controlling Which Portals to Include in the Similar Portals
By default, Similar Portals does not include portals that you are already a member of, but it does include portals that you have already viewed. You can change these settings by editing the display options.
To which portals to include:
-
Go to the list of Similar Portals that you want to edit.
-
Click the Display Options icon.
-
In the Display Options dialog, select the Show portals I have worked on before check box to display portals in which you have performed an action (excluding viewing) in the list of similar portals.
Deselect the check box if you do not want to include portals that you have worked on.
Note:
This check box is not selected by default.
-
Select the Show portals I have visited before check box to include portals in the list of similar portals even if you have already viewed them.
Deselect the check box to remove portals from the list if you have already viewed them.
Note:
This check box is selected by default.
-
Click OK.
21.4 Working with Similar Items
Similar Items provides you with recommendations of other items you might want to view, based on the item you have currently selected on the page.
Note:
The recommendations made in Similar Items are determined based on the currently selected item only; they are not specific to the current user.
This section includes the following subsections:
-
Section 21.3.3, "Removing a Portal from the Suggested Portals"
-
Section 21.3.4, "Setting the Number of Portals to Display in the Similar Portals"
-
Section 21.3.5, "Controlling Which Portals to Include in the Similar Portals"
21.4.1 Populating the Similar Items
Similar Items lists items that are similar to the currently selected item on the page. To populate Similar Items, you must select an item for which you want to see similar items.
Note:
If the page containing the similar items also contains the Document Viewer, the document currently displayed in the Document Viewer drives the content of the Similar Items and you do not need to explicitly select an item.
To populate the Similar Items:
-
Go to the page containing the Similar Items.
-
In one of the other components on the page, select the item for which you want to see similar items.
Similar items works in conjunction with the following components:
-
Documents components:
-
Recent Documents
-
Document List Viewer
-
Document Navigator
-
Document Explorer
-
Folder Viewer
-
Document Manager
-
Document Browser
-
-
Discussions (If your system administrator or application specialist specified a discussions resource ID for similar items).
-
-
Similar items refreshes to display items that are similar to the one you selected.
21.4.2 Viewing a Suggested Item
If you see an item in the similar items that you think might be useful, you can go ahead and view it.
To view a suggested item:
-
Go to the list of similar items that includes the item that you want to view.
-
Click the item's name to display the item.
The way the item is displayed depends on the type of item. For example, documents are displayed in the Document Viewer.
21.4.3 Removing an Item from Similar Items
If you decide that you are not particularly interested in an item listed in the similar items, you can remove it, making space for more recommendations. The item is removed only from your view; the item continues to be listed for other users, as long as they have permission to view it.
To remove an item:
-
Go to the list of similar items that includes the item that you want to remove.
-
Find the item that you want to remove.
-
Click the Do not show this item icon next to the item (Figure 21-13).
Figure 21-13 The Do Not Show This Item Icon

Description of "Figure 21-13 The Do Not Show This Item Icon"
-
The list is refreshed with a new similar item taking the place of the one you removed.
21.4.4 Setting the Number of Items to Display in the Similar Items
You can control the number of items that are displayed in the Similar Items.
To set the number of items to display:
-
Go to the list of similar items that you want to edit.
-
Click the Display Options icon.
-
In the Display Options dialog, in the Number of items field (Figure 21-14), enter how many similar items you want to list. The default value is 5.
-
Click OK.
21.4.5 Controlling Which Items to Include in Similar Items
By default, the list of similar items include items that you have already viewed. It also includes all types of supported items (documents, wiki pages, blogs, and discussion topics). You can change these settings by editing the display options. For example, you could show only discussion topics that are similar to the selected item.
To control which items to include:
-
Go to the list of similar items that you want to edit.
-
Click the Display Options icon.
-
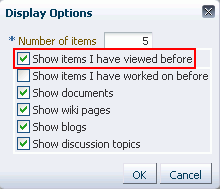
In the Display Options dialog, select the Show items I have viewed before check box (Figure 21-15) to include items in the list of similar items even if you have already viewed them.
Deselect the check box to remove items from the list of similar items if you have already viewed them.
Figure 21-15 The Show Items I Have Viewed Before Option
Description of "Figure 21-15 The Show Items I Have Viewed Before Option"
Note:
This check box is selected by default.
-
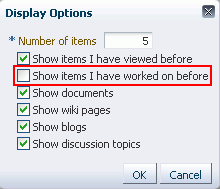
Select the Show items I have worked on before check box to include items in the list of similar items even if you have already interacted with them in some way (other than viewing).
Deselect the check box to remove items from the list of similar items if you have interacted with them already.
Figure 21-16 The Show Items I Have Worked on Before Option
Description of "Figure 21-16 The Show Items I Have Worked on Before Option"
Note:
This check box is not selected by default.
-
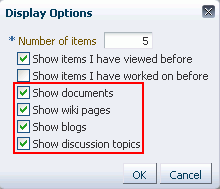
Select or deselect the following check boxes as required to determine which types of items to display (Figure 21-17):
-
Show documents
-
Show wiki pages
-
Show blogs
-
Show discussion topics
Figure 21-17 Options for Displaying Different Types of Items
Description of "Figure 21-17 Options for Displaying Different Types of Items"
Note:
These check boxes are selected by default.
-
-
Click OK.
21.5 Working with Top Items
Top items provide recommendations of other items you might want to view, based on the most active items in that portal.
Select an item from the list to view it. The way the item is displayed depends on the type of item. For example, documents are displayed in the Document Viewer.
Note:
The recommendations made in Top Items are determined based on the current portal only; they are not specific to the current user.
This section includes the following subsections:
-
Section 21.5.1, "Setting the Number of Items to Display in the Top Items"
-
Section 21.5.2, "Controlling Which Items to Include in Top Items"
21.5.1 Setting the Number of Items to Display in the Top Items
You can control the number of items that are displayed in the list of top items.
To set the number of items to display:
-
Go to the list of top items that you want to edit.
-
Click the Display Options icon.
-
In the Display Options dialog, in the Number of items field (Figure 21-18), enter how many top items you want to list. The default value is 5.
-
Click OK.
21.5.2 Controlling Which Items to Include in Top Items
By default, the list of top items includes all types of supported items (documents, wiki pages, blogs). You can change these settings by editing the display options. For example, you could show only blogs.
To control which items to include:
-
Go to the list of top items that you want to edit.
-
Click the Display Options icon.
-
Select or deselect the following check boxes as required to determine which types of items to display (Figure 21-19):
-
Show documents
-
Show wiki pages
-
Show blogs
Note:
These check boxes are selected by default.
Figure 21-19 Display Options Showing Only Blogs
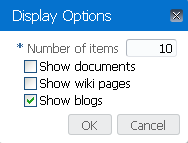
Description of "Figure 21-19 Display Options Showing Only Blogs"
-
-
Click OK.
21.6 Working with Top Contributions
Top contributions let you view the most active items contributed by the current user. Top contributions are listed on a user's Profile Gallery.
Figure 21-20 Top Contributions on the Profile Page
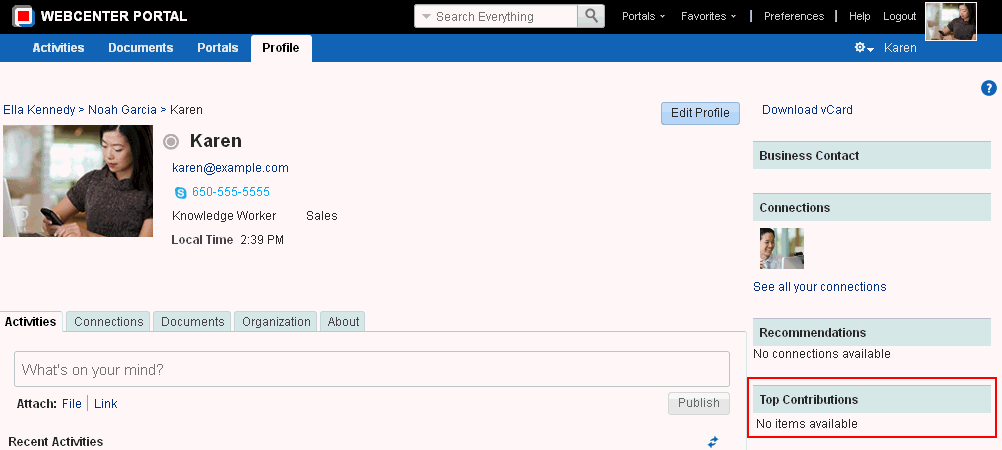
Description of "Figure 21-20 Top Contributions on the Profile Page"
Click a top contribution to view it, and click anywhere away from the popup to close it.
This section includes the following subsections:
-
Section 21.6.1, "Setting the Number of Users to Display in Top Contributions"
-
Section 21.6.2, "Controlling Which Items to Include in Top Contributions"
21.6.1 Setting the Number of Users to Display in Top Contributions
You can control the number of items that are displayed in top contributions.
To set the number of top contributions to display:
-
Go to the list of top contributions.
-
Click the Display Options icon.
-
In the Display Options dialog, in the Number of items field (Figure 21-21), enter how many recommended connections you want to see. The default value is 5.
-
Click OK.
21.6.2 Controlling Which Items to Include in Top Contributions
By default, the list of top contributions includes all types of supported items (documents, wiki pages, blogs). You can change these settings by editing the display options. For example, you could show only blogs.
To control which items to include:
-
Go to the list of top items that you want to edit.
-
Click the Display Options icon.
-
Select or deselect the following check boxes as required to determine which types of items to display (Figure 21-22):
-
Show documents
-
Show wiki pages
-
Show blogs
Note:
These check boxes are selected by default.
Figure 21-22 Display Options Showing Only Blogs

Description of "Figure 21-22 Display Options Showing Only Blogs"
-
-
Click OK.
