| Oracle® Healthcare Analytics Data Integration Secure Installation and Configuration Guide Release 3.1 for Oracle Data Integrator E29531-12 |
|
|
PDF · Mobi · ePub |
| Oracle® Healthcare Analytics Data Integration Secure Installation and Configuration Guide Release 3.1 for Oracle Data Integrator E29531-12 |
|
|
PDF · Mobi · ePub |
This chapter contains the following sections:
Perform the following steps to create a new OHADI ODI repository login:
Navigate to ODI > File > New > Create a New ODI Repository Login.
Figure 5-1 Create a New ODI Repository Login
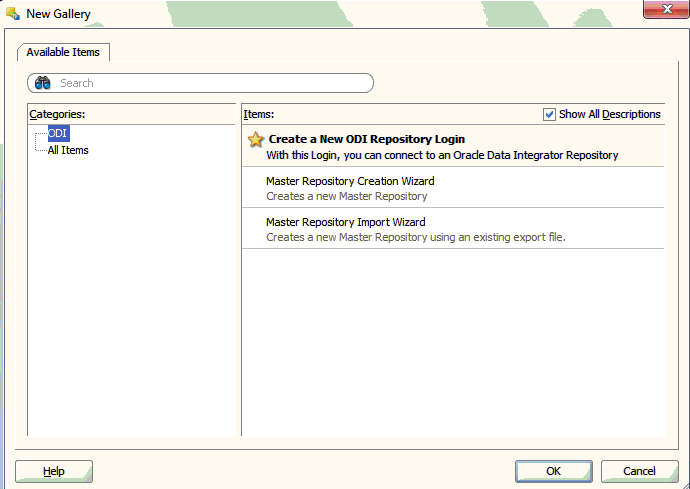
Click OK. The Repository Connection Information screen is displayed.
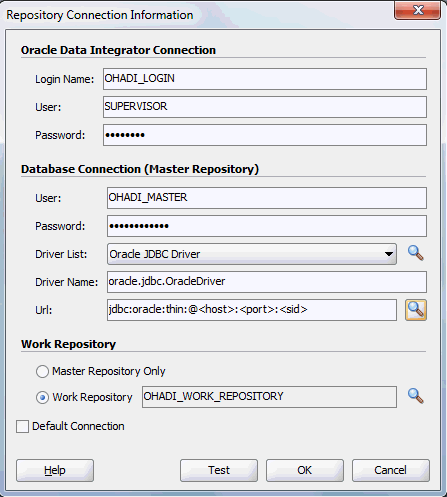
Enter the following values:
Login Name: For example, OHADI_LOGIN
User: SUPERVISOR
Password: Provide the ODI Login password which was entered during installation (Figure 3-11)
User: <database schema created for the master repository>
Password: <database schema password created for the master repository>
Driver List: Select Oracle JDBC Driver from the drop-down list.
Driver Name: oracle.jdbc.oracledriver
Url: Set appropriate values based on your database details
Work Repository - Select the Work Repository option, browse and select OHADI_WORK_REPOSITORY from the Work Repositories List, and click OK.
Figure 5-2 Repository Connection Information
Click OK. The login name is created with the name specified in step 3.
Navigate to ODI > Connect > ODI Studio.
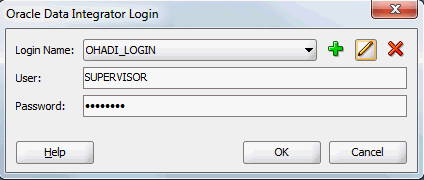
Enter the following details:
Login Name: Select OHADI_LOGIN
User: Supervisor
Password: Provide the ODI Login password which was entered during installation (Figure 3-11)
Figure 5-3 Oracle Data Integrator Login for OHADI
Perform the following steps to create a new HLI ODI repository login:
Navigate to ODI > File > New > Create a New ODI Repository Login.
Click OK. The Repository Connection Information screen is displayed.
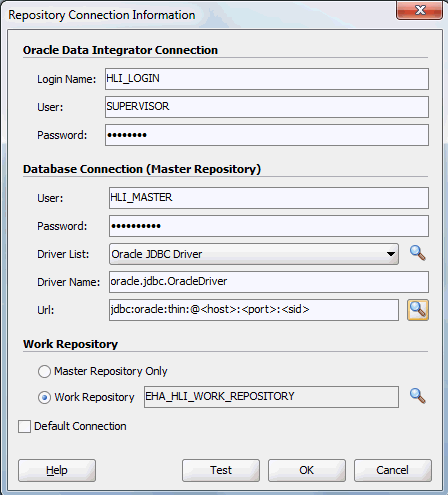
Enter the following values:
Login Name: For example, HLI_LOGIN
User: SUPERVISOR
Password: Provide the ODI Login password which was entered during installation (Figure 4-8 and Figure 4-9)
User: <database schema created for the master repository>
Password: <database schema password created for the master repository>
Driver List: Select Oracle JDBC Driver from the drop-down list.
Driver Name: oracle.jdbc.oracledriver
Url: Set appropriate values based on your database details
Work Repository - Select the Work Repository option, browse and select EHA_HLI_WORK_REPOSITORY from the Work Repositories List, and click OK.
Figure 5-4 Repository Connection Information
Click OK. The login name is created with the name specified in step 3.
Navigate to ODI > Connect > ODI Studio.
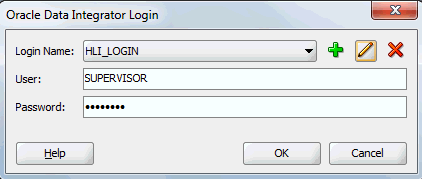
Enter the following details:
Login Name: Select HLI_LOGIN
User: Supervisor
Password: Provide the ODI Login password which was entered during installation (Figure 4-8 and Figure 4-9)
Figure 5-5 Oracle Data Integrator Login for HLI
To override the path updated during installation for the source file, perform the following steps:
Open ODI studio and click Connect to Repository.
Select the HLI login (created in Section 5.2 and click OK.
Navigate to Topology > Physical Architecture > Technologies > File. Double-click HLI_DATA.
In the JDBC tab, update the following values:
JDBC Driver: com.sunopsis.jdbc.driver.file.FileDriver
JDBC URl: jdbc:snps:dbfile
To update the existing physical schema for HLI_DATA, perform the following steps:
Navigate to Topology > Physical Architecture > Technologies > File > HLI_DATA.
Double-click physical schema.
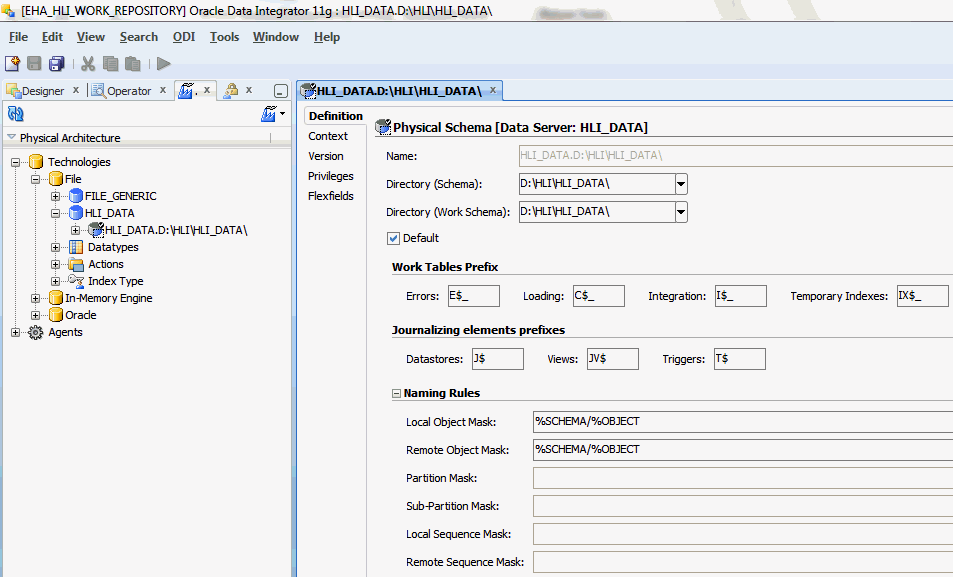
In the Definition tab, specify the actual physical folder location of the HLI Data Files for the properties Directory (Schema) and Directory (Work Schema).
Figure 5-8 Update the Physical Schema for HLI_Data
Click Save from the menu bar. The existing physical schema is saved.
Note:
For references on Topology configuration, see Oracle Data Integrator documentation.