Configuring the list of attributes to display for each location

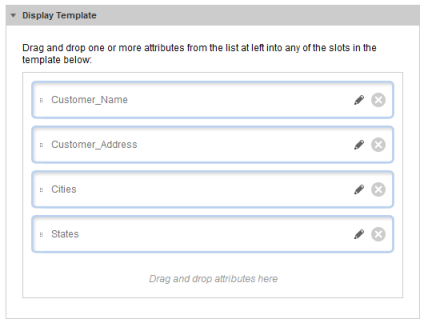
When end users click a location pin or list entry on the Map component, the details for that location are displayed. For each location set, you select the list of attributes to display.

To configure the display of the location details:

  1. To add an attribute to the details, drag it from the Attribute Groups list to the Display Template.
  2. To determine the display order of the selected attributes, drag each attribute up or down in the list.
    Display template for a Map component location set with no attributes selected
  3. To edit the format of the displayed attribute value, click the edit icon for the attribute.
  4. For values other than strings, use the Value Formatting section to configure the format of the displayed value.

    Attribute configuration dialog for a displayed attribute on the Map component

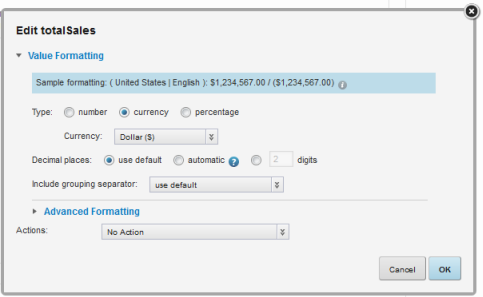
    String values do not support additional formatting.

    For information on configuring the format of displayed values, see Configuring the format of values displayed on a component.

  5. From the Actions drop-down list, select the action to perform when users click the attribute value.

    The available options are:

    Option Description
    No Action Indicates that the attribute value is not a hyperlink and cannot be used to display details or refine the data.

    This is the default value.

    Enable drill down by refinement on this field This option only displays if the attribute can be used for navigation.

    If you select this option, then when end users click the attribute value, the data set is refined to only show records with that value.

    The selected value is added to the Breadcrumbs component on that page.

    Link to record details This option is only available for the top attribute.

    If you select this option, then when end users click the attribute value, the Record Details component is populated with the details for that record.

    When you select the option, the Target page to display record details field is displayed.

    In the field, type the name of the page to display when end users click the value.

    The selected page must contain a Record Details component.

    If you do not provide a page name, then the current page is used.

    For more information on configuring a page transition, see Page transition syntax.

  6. After configuring the attribute, click OK.
  7. To save the Map component configuration, click Save Preferences.
  8. To exit the edit view, click Exit.