Set Up the Boot Media for a Remote Installation
To install the OS from media sourced from a remote location using the Oracle ILOM Remote System Console Plus application, perform these steps.
-
To redirect the boot media from a remote storage device, perform these steps; otherwise, go to
the next step.
-
Mount or present the OS boot media so that it is accessible, for example:
-
For CD/DVD-ROM, insert media into the built-in or external CD/DVD-ROM drive on a remote system.
-
For CD/DVD-ROM ISO image, ensure that the ISO image(s) are readily available on a network shared location or are mounted on the server service processor (SP).
For instructions on mounting an installation image onto the server SP, refer to the Oracle ILOM Administrator's Guide for Configuration and Maintenance at http://www.oracle.com/goto/ILOM/docs. Alternatively, refer to the More Details link in the Oracle ILOM Remote Control → Remote Device web interface page.
-
-
Mount or present the OS boot media so that it is accessible, for example:
-
Establish a web-based client connection to the server Oracle ILOM SP and launch the Oracle
ILOM Remote System Console Plus application.
For more details, see the setup requirements for web-based client connection in Selecting the Console Display Option.
-
In the remote console, do the following:
- Click KVMS to display the KVMS drop-down menu.
-
Click Storage.
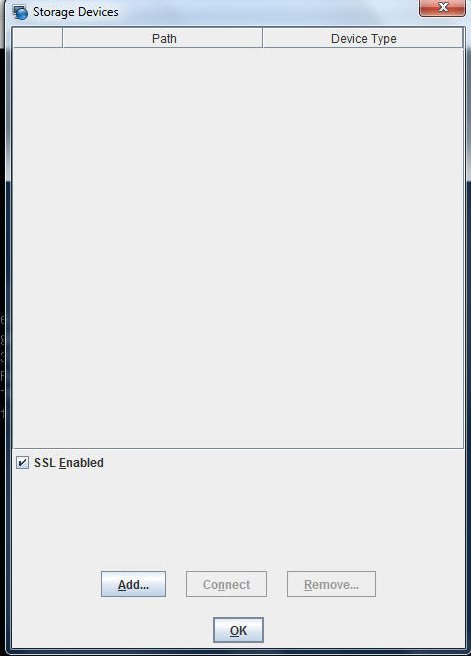
The Storage Devices dialog appears.

-
In the Storage Devices dialog, click Add.
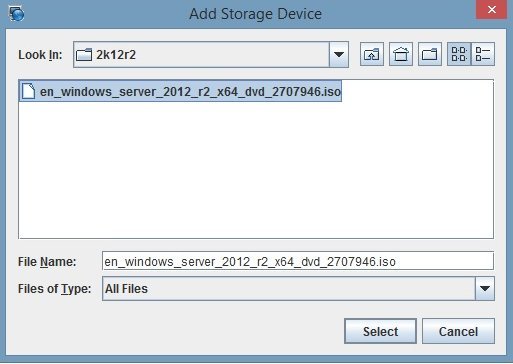
The Add Storage Device dialog appears.

-
Browse to the ISO image, select it, and click Select.
The Storage Devices screen appears and lists the ISO image.
-
Select the ISO image and click Connect.
The ISO image is mounted to the remote console and can be used to perform the OS installation.
-
To perform the installation using PXE, perform these steps.
- Configure the network server to export the installation using PXE boot.
-
Make the OS install media available for PXE boot.
If you are using an automated OS installation image, you will need to create and provide the automated OS install image.
For detailed instructions for automating the installation setup process, consult the Windows operating system documentation.
-
To boot the installation media, in the server's BIOS Setup Utility Please Select Boot Device
menu, select the PXE boot interface card as the temporary boot device.
For details for performing a Windows Server installation using a PXE network boot, see Install Windows Server 2012 or 2012 R2 Using PXE Network Boot.