Return the HBA Cache Settings to Default Values in Legacy BIOS Boot Mode
After you have installed VMware ESXi, you must return the Oracle Storage 12 Gb/s SAS PCIe RAID HBA (host bus adapter) Internal cache settings to their default values. Reverting to the default values ensures that the server is operating efficiently.
-
Access the host console.
For instructions, see Accessing the Host Console.
-
Power on or reset the server.
For example, to reset the server, do one of the following:
-
From the local server, press the Power button on the front panel of the server (for approximately 1 second) to power off the server, and then press the Power button again to power on the server.
-
From the Oracle ILOM web interface, select Host Management → Power Control, and then select Reset from the Select Action list box.
-
From the Oracle ILOM command-line interface, type reset /System.
The server begins the boot process, and the BIOS screen appears.
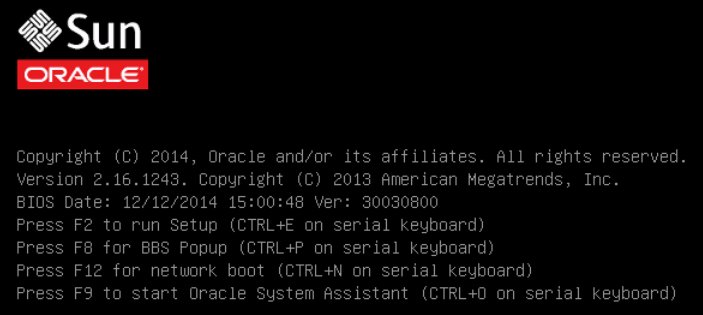
Note - The next events occur very quickly; therefore, focused attention is needed for the following steps. Watch carefully for these messages as they appear on the screen for a brief time. -
-
When prompted in the BIOS screen, press Ctrl+R to enter the MegaRAID Configuration Utility.
The Virtual Drive Management screen appears.
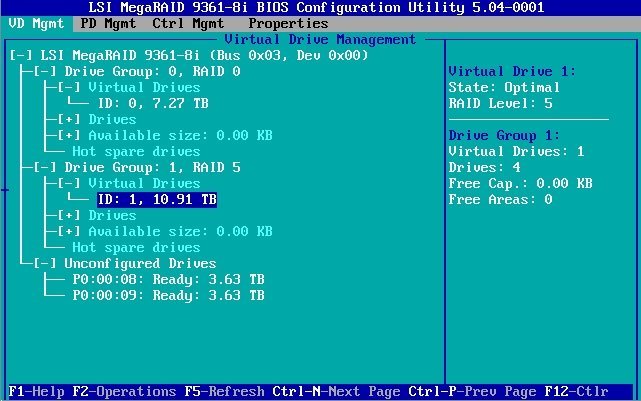
- In the Virtual Drive Management screen, navigate to the ID field for the Drive Group that contains the drive on which you installed the software.
-
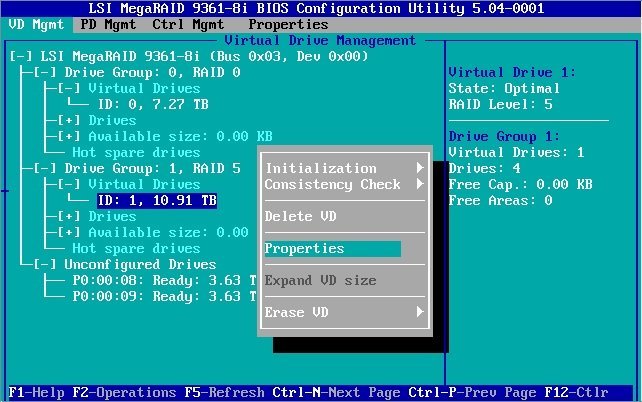
Press the F2 key.
The Operations menu appears.
-
In the Operations menu, navigate to the Properties option, and then press Enter.
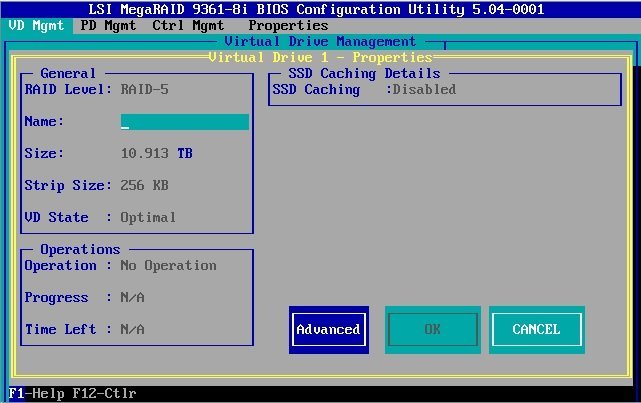
The Virtual Drive Properties screen appears.
-
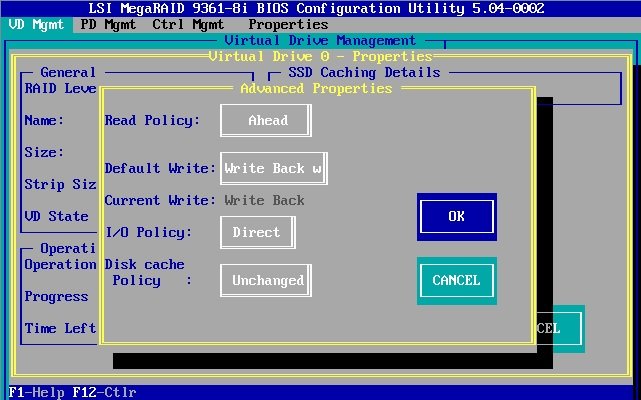
In the Virtual Drive Properties screen, select Advanced, and then press Enter.
The Advanced Properties dialog box appears.
-
In the Advanced Properties dialog box, perform the following steps:
- Set the Read Policy property to Ahead.
- Set the I/O Policy property to Direct.
-
Navigate to the OK button, and then press Enter to exit the Advanced Properties dialog box.
The Virtual Drive Properties screen reappears.
-
Navigate to the OK button, and then press Enter to exit the Virtual Drive Properties screen.
The Virtual Drive Management screen reappears.
-
Press Esc to save your changes and exit the MegaRAID Configuration Utility.
A message appears asking you to confirm that you want to exit.
- Navigate to the OK button, and then press Enter to confirm that you want to exit the utility.