The Discovery Applications page includes an option to create a new Studio application, which consists of a single page with a standard set of starting components.
The new application option is only available to Studio administrators and users with the Power User role. Users who only have the User role cannot create applications.
For all applications, you first set the application name and description, then decide the type of data to use.
To create a new application:
-
Under
Select a Data Source, click an option to
indicate the type of data to use for the application.
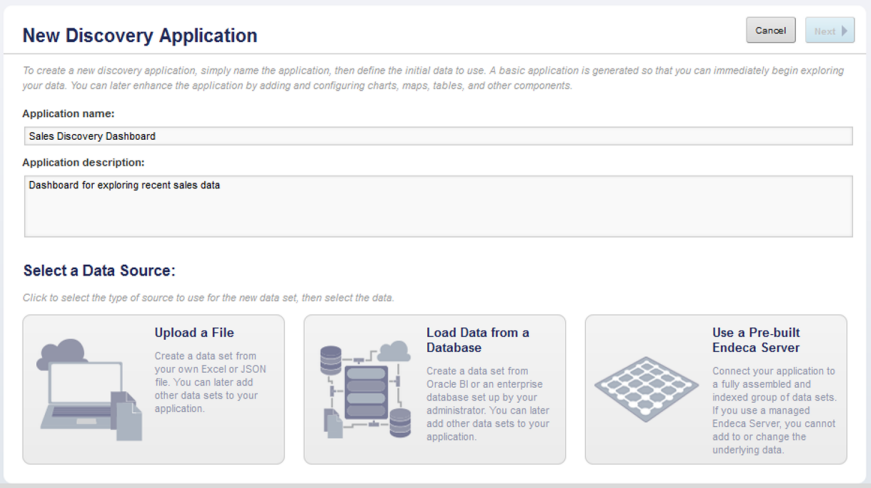
The possible options are:Data Option Description Upload a File Indicates that you will create the first data set for this application from an uploaded Excel or JSON file. This option is only displayed if:- The Provisioning Service has been installed.
- The connection to the Provisioning Service has been configured. See the Studio Administration and Customization Guide.
- On the
Endeca Server, the number of data domains created using the Provisioning
Service is less than the maximum allowed.
The maximum is configured using the df.provisioningServiceLimit framework setting. For information on configuring framework settings in Studio, see the Studio Administration and Customization Guide.
Load Data from a Database Indicates that you will create the first data set for this application using an Oracle BI or JDBC data source from the Data Source Library. This option has the same Provisioning Service requirements as the file upload option.
In addition, at least one valid data source must be configured on the Data Source Library
Use a Pre-built Endeca Server Indicates that the application will use an Endeca Server connection created and made available by a Studio administrator. If you connect to a shared Endeca Server, then you cannot add data sets to the application.
Whether you can configure the views and attribute groups is based on whether the administrator has configured the Endeca Server domain to be read-only.
-
If you selected the
Upload a File option, then Studio displays
fields for selecting the file to upload.
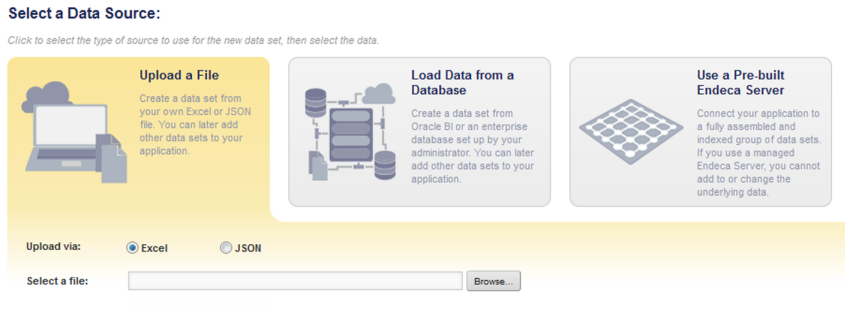
For details on creating a data set from an uploaded file, see Creating an application data set from an uploaded file.
After you create the data set, Studio displays the new application.
-
If you selected the
Load Data from a Database option, then Studio
displays the list of available data sources.
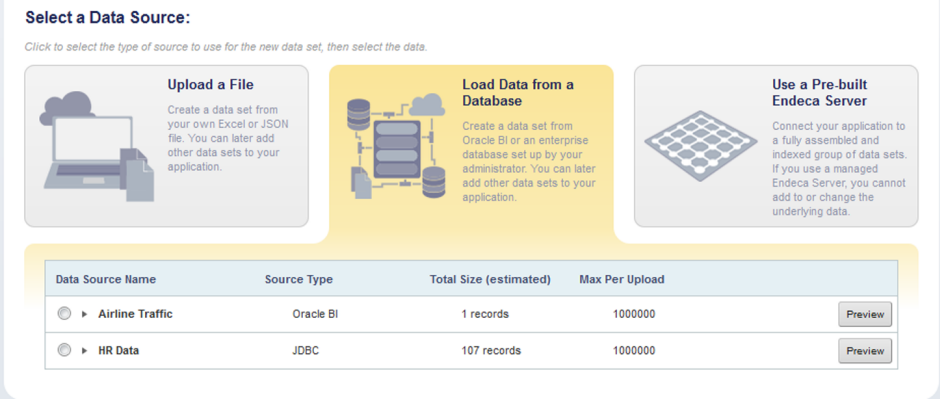
For details on creating a data set from the Data Source Library, see Creating an application data set from the Data Source Library
After you create the data set, Studio displays the new application.
-
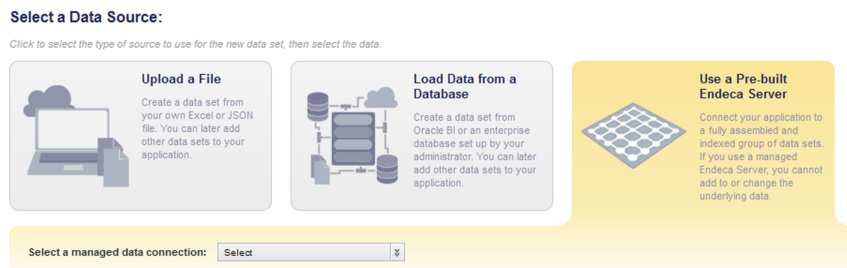
If you selected the
Use a Pre-built Endeca Server option:
-
From the drop-down list, select the Endeca Server connection
to use for the application.
-
From the drop-down list, select the Endeca Server connection
to use for the application.
