| Agile Product Lifecycle Management AutoVue for Agile Installation and User Guide Release 20.2.2 E40039-01 |
|

 Previous |
 Next |
| Agile Product Lifecycle Management AutoVue for Agile Installation and User Guide Release 20.2.2 E40039-01 |
|
Previous |
Next |
The AutoVue viewer has been integrated into the Agile system to make use of the ability to manage attached files by using Agile system features. The integration also streamlines the viewer menus, toolbars, and shortcuts.
This manual is a supplement to AutoVue online Help. It is intended to be used in conjunction with the AutoVue for Agile Online Help and other Oracle Agile manuals.
The following table shows where you can find information about Agile features and concepts, which you may find useful.
| Feature or concept | Contained in this document |
|---|---|
| Java Client Navigation | Getting Started with Agile PLM User Guide |
| Web Client Navigation | Getting Started with Agile PLM User Guide |
| Relationships and rules between objects | Getting Started with Agile PLM User Guide |
| Attachment files
Working with file folder objects File folder mass update Routing and reviewing file folders File validation (Handle Check Sum) Viewing and redlining file folder contents |
Getting Started with Agile PLM User Guide |
| Redlining through ECOs, MCOs and SCOs | Product Collaboration User Guide |
|
Note: To find an Agile PLM document, choose Help > Manuals in the Web Client or the Java Client to display the Agile PLM documentation web page. |
To get help at any time, choose Help > Contents in the AutoVue for Agile menu bar. The AutoVue for Agile Online Help is displayed; it includes detailed information about using viewer features.
|
Note: See "Agile-specific Features and Functions" for a complete list of features and user interface details described in the AutoVue for Agile Online Help that have been modified in order to integrate the viewer with the Agile system. |
AutoVue for Agile can display many different file formats without their authoring applications. You can view files from many database, graphic, spreadsheet, word-processing, and CAD applications. Even archived files can be listed and viewed without the need to decompress them. It isn't necessary for you to identify the file type; AutoVue for Agile automatically identifies the type of file you are requesting it to read. The Agile administrator determines which types of files can be viewed in the Viewer & Files node of the Agile Administrator module in Java Client.
|
Important: To view files through AutoVue for Agile, you need Agile Discovery, Read, and ViewFile privileges for the business object. To redline files through AutoVue applications, you need the appropriate privileges that allow you to redline attachment files (for example, the Agile default role Markup for Self and for ECO attachment redlining, a role that includes an appropriate Attachment Redlines for Others or Attachment Redlines for Self privilege). For information about roles and privileges, see Agile Administrator. |
The action of attaching your comments, notes, and drawings to a document is known as marking up, also commonly known as annotating or redlining. A markup refers to the change being made to a document by attaching a markup object. You can use AutoVue for Agile to mark up files as well as view them.
|
Note: Agile Web Client and Agile Java Client support attachment redlining. Markups for ECOs can be made on the Redline Attachments tab in Web Client and Java Client. You access the appropriate redline tab on the Affected Items tabs of ECOs. Markups for a file folder object can be made on the Files tab of the file folder object in Web Client and Java Client and do not require an ECO. |
Some of the AutoVue for Agile features are:
Flexible user-defined objects - AutoVue for Agile offers a vast selection of markup objects, including circles, clouds, polygons, and arrows. Text can be attached to objects, and lengthier comments can be contained in embedded notes.
See AutoVue for Agile Online Help for a detailed discussion of markup objects. Choose Help > Contents in the AutoVue for Agile menu bar.
Storage of unedited original documents - Original documents are never changed. All your notes and drawings are saved in a separate file called a markup file, although when viewed they appear to be part of the main document. You do not have to manage the storage and retrieval of markup files; Agile does that for you.
Support for non-English languages and operating systems - AutoVue for Agile works with many non-English languages, and has been tested on Japanese, Chinese, French, German, Hebrew, and Swedish operating systems.
You can start AutoVue for Agile from either the item Attachments tab or the file folder Files tab.
To start AutoVue for Agile in Web Client:
Click the file name link in the table.
Or
Select one or more rows.
|
Note: 9.2.2.x or 9.2.1.x: Click the View File(s) button's drop-down arrow and select View from the menu. |
Or
9.3.x: Click the View button's drop-down arrow and select View from the menu.
|
Note: If the View icon is visible on the button, you can simply click the button. |
When you start AutoVue for Agile, the main AutoVue for Agile window appears.
|
Note: For more information about starting AutoVue for Agile, see "Opening Agile Attachment Files in AutoVue for Agile." |
To start AutoVue for Agile in Java Client:
Double-click the attachment row.
Or
Select one or more rows.
|
Note: Click the View File(s) button's drop-down arrow and select View from the menu. |
|
Note: If the View icon is visible on the button, you can simply click the button. |
Web Client:
Attachment tab rows that refer to a multiple-file file folder display a link for each individual file in the File Name column. You can:
Click the file name link of a specific file you want to view.
Select the row and choose View > View in the Attachments tab menu.
For more information about starting AutoVue for Agile, see "Opening Agile Attachment Files in AutoVue for Agile."
Java Client:
When viewing files from the Attachments tab of an Agile business object in version 9.2.2.x or 9.2.1.x, if you view a single row that refers to a multiple-file file folder, the Select Files window appears. The Select Files window lists the files in that file folder and allows you to select one or more files that you want to view. In version 9.3.x, you can select the link of each individual file you want to view.
The following sections describe the main AutoVue for Agile window and performance modes, in addition to other information you need, to use AutoVue for Agile.
AutoVue for Agile has two modes of operation: View and Markup.
When a document is first opened from business object's Attachments tab or file folder Files tab, the menu bar and toolbars are those of View mode. View mode is the AutoVue for Agile default mode. Documents can be edited or marked up only from Markup mode, described in the next section.
When AutoVue for Agile is in Markup mode, the currently displayed document can be marked up. That is, you can redline or annotate it. Available markup objects include various shapes, notes, symbols, and text. When you open AutoVue for Agile from the Redline Attachments tab or Files tab in a file folder object, AutoVue for Agile opens either in View or Markup mode, depending on whether the attachment has a saved markup and the privileges assigned to the user. If the attachment is checked out, then the redlining will not be allowed, however, you can change to AutoVue for Agile Markup mode to display saved markups. For instructions on how to enter Markup mode from View mode, see "Guidelines for Marking Up or Redlining Attachments." When you open a markup file, Markup mode starts automatically.
|
Note: Markup mode is only available in AutoVue for Agile when the viewer is opened from tabs where markups are allowed: from a change order's Redline Attachments tab and from the Files tab of a file folder. In addition, you must have the appropriate privileges that allow you to redline attachment files (for example the Agile default role, Markup for Self privilege). Contact your Agile administrator if you have questions about your assigned roles and privileges. |
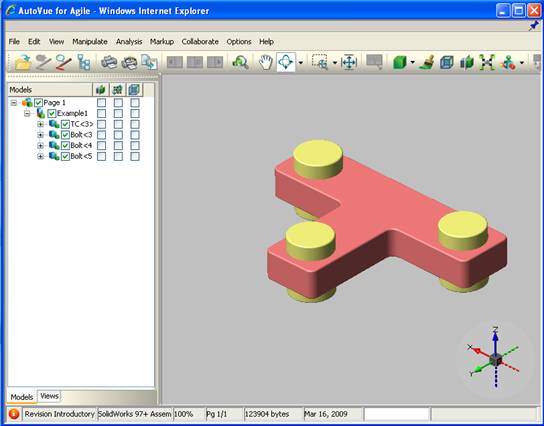
There are a few basic components to the AutoVue for Agile work environment, shown in the following figure. These differ depending on whether AutoVue for Agile is in View mode or Markup mode.
In the upper right corner of the AutoVue for Agile window is the PinMe icon. Click to pin (or lock) the AutoVue for Agile window open. A pinned AutoVue for Agile window (displays a pinned icon to indicate the AutoVue for Agile window is pinned). When you view an additional attachment, a new AutoVue for Agile window opens. This feature allows you to have multiple AutoVue for Agile windows open at one time, thus allowing you to switch between open windows to compare or refer to multiple viewed files.
The menu bar at the top of the window is the main access to all of the menu commands. The selection of available commands changes according to the mode AutoVue for Agile is in and the task that you are performing.
The tool buttons under the menu bar offer easy access to the basic commands present in the menu bar. As with menu commands, the selection of available toolbar buttons changes according to the mode AutoVue for Agile is in and the task that you are performing.
In both View mode and Markup mode, there is a status bar located at the bottom of the main window. The fields from left to right for each mode's status bar are as follows: markers (see the following list), current active file name, file type, zoom factor, current page and total number of pages, current active file size, date of the file's creation, and the pointer's coordinate position.
The following types of markers can appear on the status bar:
The File has saved markup marker indicates that the current active file has associated markup files. While in View mode, click the markup from the File menu to view the Markup Files dialog box. Then select a markup file or group of markup files to open. When you open a markup file, Markup mode starts automatically.
A red exclamation mark indicates that some main resources required to properly read the current active document are not available (for example, missing fonts or missing CAD files). To quickly identify the missing resources, click the red exclamation mark, and the File Properties dialog box appears.
You can use the left mouse button to click and drag.
In View mode - By default, drag to perform an autozoom of all supported file formats (including raster and vector files). Select the area you want to enlarge.
In Markup mode - If objects are selected, drag to modify and move objects. If no objects are selected, drag to perform an autozoom (same as in View mode).
To select an object, click it. Selected objects are framed by a text box. Modify the size of the object by dragging the frame handles. To move an object, move the cursor to the borders (the edges) of the markup entity until the cursor turns into a hand pointer. Drag the hand pointer to a new location.
The easiest and quickest way to access most of the AutoVue for Agile functions is by using the shortcut menus. Right-click with the pointer over the View window to access appropriate commands.
In View mode, use these commands:
Zoom Fit - to automatically fit the document to the width of the view window.
Zoom Previous - to automatically return to your previous zoom level.
Zoom Page Width - to automatically fit the document to the width of the view window.
Markup/Exit Markup - to enter and exit Markup mode and open an existing markup or create a new one. The Markup command is available in View mode only when markups are allowed.
In Markup mode, use these additional commands:
Line Style - to select a style of line to use in your markup.
Line Thickness - to select a line thickness for use in your markup.
Fill Type - to select the type of fill to apply to your markup object: Solid Fill, No Fill, or Transparent Fill.
Entity Color - to select a color for your markup object.
Order - to select the overlay order when several markups are being displayed simultaneously.
Markup Layer - to select which layers are visible or active, change layer color, add new layers, and rename existing layers.
Copy, Paste, Delete
Format (sub-menu), Group, Ungroup, Rotate, Order
Attachment
Close All Markups
For more information about using these AutoVue for Agile commands, refer to the AutoVue Help. Choose Help > Contents in the AutoVue for Agile menu bar.
To cancel an operation in progress, click the right mouse button. The current operation is canceled immediately.
For example, if while drawing a box you realize that you would prefer to draw a cloud, right-click while drawing the box and the box is canceled.
If you have already drawn a box, you can either choose Edit > Undo from the menu bar or select the box and press the Delete key on your keyboard, to remove it.
|
 Copyright © 2010, 2013, Oracle and/or its affiliates. All rights reserved. Legal Notices |
|