| Agile Product Lifecycle Management Getting Started with Agile Management for Pharmaceuticals Release 9.3.3 E39289-01 |
|

 Previous |
 Next |
| Agile Product Lifecycle Management Getting Started with Agile Management for Pharmaceuticals Release 9.3.3 E39289-01 |
|
Previous |
Next |
RMW is one of the solutions of Agile PLM. You can access the RMW application if you log in to Agile PLM with the necessary privileges. For details about logging in to Agile PLM, see the chapter 'Navigating in Agile Web Client' in the Getting Started with Agile PLM Guide.
To access RMW:
Log in to Agile PLM.
In the left navigation pane, click Tools and Settings.
Select Recipe & Material Workspace.
The RMW application appears, displaying the Home page. The Home page includes the Top pane, Navigation pane on the left and the Content pane.
To return to Agile PLM:
Click Tools and Settings.
Select Product Collaboration. You are back on the Agile PLM Home page.
To log out of RMW:
Click the Logout button on the left navigation pane.
|
Note: Logging out of RMW logs you out of Agile PLM as well. To return to RMW, you will have to log in again to Agile PLM. |
A PLM user can access the RMW solution after the PLM administrator assigns the PLM privilege mask called Recipe & Material Workspace UI Access.
|
Important: The tasks below do not indicate anything more than access to RMW solution. End-users must created in PLM and further configured in RMW. |
RMW-specific roles and privileges are assigned to users within the RMW solution. For more information, see the chapter "Roles" in the Agile Recipe Management for Pharmaceuticals Administrator Guide.
|
Note: You may want to create a role for "RMW User", especially if you want to consistently bundle together other PLM privileges for PLM users who will work in RMW. |
To give a PLM user access to RMW in Web Client:
All users who will work in the Recipe & Material Workspace solution are first created in Agile PLM (or the company's LDAP system).
An Agile PLM user must be assigned the Recipe & Material Workspace UI Access privilege mask. This privilege mask is based on the Recipe & Material Workspace UI Access privilege type.
From Agile Web Client's standard interface, a user chooses Tools & Settings > Recipe & Material Workspace to open the RMW user interface.
For RMW user, to access Product Collaboration from RMW:
In Agile Web Client's RMW interface, choose Tools & Settings > Product Collaboration to return to the standard UI for Product Collaboration and the other PLM solutions.
|
Note: You must have the necessary privileges to access Product Collaboration. |
You can personalize default settings to suit your requirements and set preferences using the My Preferences button, which appears on the left navigation pane of the Home page. You can view and edit settings in My Preferences. The profile displays in the content pane.
General: General preferences such as company name, date, time, number formats and other basic factors required in setting up and running the application.
Home page: Specify the tables you want to display on the Home page.
Preferred Start Page: The functionality of UI-UI context switching is dependent on the user's Preferred Start Page, which is set on the Preferences tab of the user object in PLM. See also: UI-UI Context Switching
To set general preferences:
Log in to the RMW application.
Click My Preferences on the Navigation pane toolbar.
In the General tab, click Change to change the Primary Site. A list of sites are displayed.
Select a site from the tree view.
|
Note: You can only select one site for this field. By default, the child sites are not selected if you select its parent site. |
Privilege flag set can be selected for site privilege assignment. In the Tree view, selection of a site is disabled, grayed, or not displayed for the following reasons:
It is a non-privileged site but is displayed to show the hierarchy of the privilege sites.
A site with no child and no privilege does not display on the screen.
To change the password, click the Change link next to the Password field. More fields requesting password confirmation appear.
Enter values in the Old Password, Password and Confirm Password fields.
To change Approval Password, fill in the fields as above.
Click the look-up icon to choose a Default Delegate.
Select a user from the search results and click OK.
|
Note: The language field is set by the Agile PLM Administrator and you cannot edit it. By default, the preference is set to English. |
Choose the Number Format and Time Zone from the respective menus.
The date format is set by the Administrator in Product Collaboration. The date format by default is dd-mm-yyyy.
Select a Button Display from the drop-down list.
Select the location to display toolbar buttons from the Display Toolbar Buttons dropdown list.
Select the number of columns to be displayed on the Home page.
Click OK to confirm, or Cancel to cancel the action.
A confirmation message informs you that you have successfully saved user preferences.
To customize the Home page:
The Home page tab displays the Dashboard, My Notifications and Workflow Routings tabs. The dashboard displays tables that you choose in the My Preferences page. You can view and edit the tables appearing on the Dashboard tab.
Example: You select content to display assigned tasks. The Dashboard displays all assigned tasks in the selected view, with the selected display name, either as a Table or Tree Table, in the selected number of rows to be displayed at one time.
Log in to the RMW application.
Click the My Preferences button in the navigation pane.
Click the Home tab.
Click Add Rows, select data from the drop-down list or enter values.
Click OK. You return to the Home page which displays your latest changes.
A confirmation message informs you that you have successfully customized the RMW Home page.
UI-UIcontext switching allows the user to view an integrated object in RMW, and switch to Agile PLM to see the object's details there (or vice versa). The system preserves the user's original context object, so that the user can be automatically brought back to the original context in his home location, either RMW or PLM.
|
Note: UI-UI context switching is only available for integrated business objects such as Material, Recipe, Manufacturer, and Supplier. |
The functionality of UI-UIcontext switching is dependent on the user's Preferred Start Page, which is set on the Preferences tab of the user object in PLM. If the user's Preferred Start Page is "Recipe & Material Workspace", then the user's object context in RMW is preserved. For example, if a user is looking at a material A123 in RMW and then switches to Product Collaboration, the system brings the user to material A123 automatically, assuming the material has been published. If the material does not exist in Agile PLM, then the user is taken to the Agile homepage. The user can move around and visit other objects, but if, and when, the user switches back to RMW, the originally preserved object context will be reloaded, which in this example means that the user will be brought back to material A123.
If the user is not an RMW user and the Preferred Start Page is set to anything other than Recipe & Material Workspace, the user's last location/context object in PLM is saved. If a PLM user is looking at an integrated object in PLM, then switches to RMW, that same object should automatically be opened upon landing in RMW. If the PLM user strays from that object and visits other objects, and then returns to PLM, the user will be brought back to the last saved PLM context.
| Agile PLM User | RMW User | |||
|---|---|---|---|---|
| StartingContextObject | If the context object exists in both PLM and RMW, when the Agile PLM user switches to RMW . .. | If the context object only exists in PLM, when the Agile PLM user switches to RMW . .. | If the context object exists in both PLM and RMW, when the Agile PLM user switches to PLM . .. | If the context object only exists in RMW, when the Agile RMW user switches to Agile PLM . .. |
| Material | The user is taken to a search results page in RMW, with the material listed in the results table.
Once the user switches back to PLM, the system automatically takes the user back to the preserved material context object. |
The user is taken to the RMW homepage.
Once the user switches back to PLM, the system automatically takes the user back to the preserved material context object. |
The user is taken directly to the material object in PLM.
Once the user switches back to RMW, the system automatically takes the user back to the preserved material context object. |
The user is taken to the PLM homepage.
Once the user switches back to RMW, the system automatically takes the user back to the preserved material context object. |
| Manufacturer | The user is taken to a search results page in RMW, with the manufacturer listed in the results table.
Once the user switches back to PLM, the system automatically takes the user back to the preserved manufacturer context object. |
The user is taken to the RMW homepage.
Once the user switches back to PLM, the system automatically takes the user back to the preserved manufacturer context object. |
N/A | N/A |
| Supplier | The user is taken to a search results page in RMW, with the supplier listed in the results table.
Once the user switches back to PLM, the system automatically takes the user back to the preserved supplier context object. |
The user is taken to the RMW homepage.
Once the user switches back to PLM, the system automatically takes the user back to the preserved supplier context object. |
N/A | N/A |
| Site | N/A | N/A | The user is taken to the manufacturer
/ supplier object in PLM. If the manufacturer and supplier have the same name, the supplier is used. Once the user switches back to RMW, the system automatically takes the user back to the preserved site context object. |
The user is taken to the PLM homepage.
Once the user switches back to RMW, the system automatically takes the user back to the preserved material context object. |
| Non-integrated object(ECO) | N/A | The user is taken to the RMW homepage.
Once the user switches back to PLM, the system automatically takes the user back to the preserved supplier context object. |
The user is taken to the PLM homepage.
Once the user switches back to RMW, the user is taken to the RMW homepage. The object context is not retained in this situation. |
N/A |
The Unit Of Measure (UOM) is consistent across RMW and uses the unit that is defined in the "Display UOM" field in the Material Library to drive all transactions.
For example, if purified water has a Display UOM of Liters in the material library, all transactions in RMW are conducted in Liters.
Transactions include Order, Receive, Allocate, Dispense, Stage, Pickup, Consume, Return, Dispose, Inventory, Analytical: Sample, and the BOM & Output tabs of Recipes, Control Recipes, and Work Requests.
All Material Quantity attributes are also displayed in this UOM, for example, Quantity on Hand and Available Quantity.
BatchML is an XML using tags specified in S-88. The Import from BatchML feature enables you to integrate Master Recipes authored in RMW with external systems.
Planned Work Request details, Recipes, Control Recipes, and Process Steps stored in RMW include:
Routings of recipe actions
Material and Equipment required
Standards you need to follow
Assays and parameters you need to measure within the recipe action.
These details can now be executed in other systems by exporting them as XML files.
Listed below are some of the ways you can use the Master Recipes.
Details in Work Requests, Recipes, Control Recipes and Process Steps can be executed in other systems by exporting them as XML files. You can also import and store the results of the execution into Agile PLM against the Item/Bill of Material as an attachment.
Converting the contents of a recipe into XML files and sending them to Manufacturing Execution Systems (MES) increases the production of the material on a large scale.
Working jointly with partners, CMO's, CRO's these files can be outsourced as a collaboration item to companies to manufacture material.
|
Note: The Import/Export BatchML feature is available through Web Services and application User Interface. |
The table below lists and describes objects as they appear in RMW application.
| Name | Description | Business Objects |
|---|---|---|
| Recipe | A unique set of information that defines the development requirements for a specific product.
For details, see Agile Recipe Management for Pharmaceuticals Recipe Management Guide |
Recipe Action: The lowest level of instruction in a Recipe.
RecipeElement: RMW allows users to create and manage templates using a set of elements - Phase, Operation, Unit Procedure. Library: A centralized repository within the system to retrieve data on recipes. |
| Process | A sequence of activities intended to lead to a Work Request.
For details, see Agile Recipe Management for Pharmaceuticals Process Management Guide |
Product: A completed dosage form that contains a drug substance.
Project: Involves a group of inter-related activities that are planned and executed in a certain sequence to create a unique product within a specific time frame. Campaign: Planning and executing a set of defined process steps to synthesize a target API material. Process Step: A process step defines the processes involved in creating the final drug product. Control Recipe: Defines the manufacture of a single batch of a specific product. Work Request: Includes materials, equipment, and master recipes that combine to produce one lot of material. |
| Equipment | A non-depletable resource used in the development process of a product.
For details, see Agile Recipe Management for Pharmaceuticals Equipment Management Guide |
Library: A centralized repository within the system to retrieve data on equipment.
Activity: Activities (calibrating, cleaning) performed on equipment before using it in a process. Qualification: Documented evidence that a process or system consistently and reproducibly performs as intended and does what it purports to do. Loan/Lease: Lend equipment for internal use/ lease it for use from external sources. Reservation: Reserve equipment for a period. |
| Material | A substance used in the development process of a product. Materials can be chemicals, excipients, solvents, consumables and so on.
For details, see Agile Recipe Management for Pharmaceuticals Material Management Guide |
Library: A centralized repository within the system to retrieve data on material.
Order: A request placed for material. Receiving: Receipt of Material Lots/Containers from a Supplier. Allocation: Reserve material for a process. Dispense: Allot/ transfer material as per request. Stage: Transferring the quantity to a location from where you can pick up. Pickup: Pick up the staged material. Consume: Use the ordered material in a process/project/campaign. Return: Return unused material. Disposal: Disposing material which is contaminated or has exceeded the shelf life. Disposal is done as per EPA rules and regulations, and needs to be tracked carefully. Inventory: An itemized list of available stock (Material, Equipment, etc). Manage Movement: Movement of Material containers from one location to another. System allows users to track location of containers at all times. Manage Shipping: Shipment of Material containers from one location to another. System allows users to ship containers. |
| Analytical | 'Analytical' relates to samples, assays and specification plans. The analytical method is a process used to characterize or detect a chemical or chemical mixture. | Assay: Assays are tests that are developed and run to verify the material composition of raw materials, intermediates and final product.
Parameter Template: Library of parameters (control settings of equipment, material characteristics) that can be stored ahead of time in the system as a library. Process scientists use these templates to create recipe actions quickly instead of re-creating them from scratch each time. Specification Plan: A list of tests and/or references to analytical procedures, and appropriate acceptance criteria Sample: A portion of a specific material that needs to be analyzed and is evaluated against a spec plan. Lot Release Process: Process to gather together samples & results and send it to a group of people for final inspection before the formal release. |
| Standards | Sets standards to follow while creating chemicals, keeping in mind the hazards that would ensue. | Standards: Predefined statements relating to safety, caution, general instructions in or around a manufacturing process, and the acronyms, and abbreviations used in the industry, and the organization. |
| People | Internal and external users accessing RMW. | Role: Defines responsibilities and actions the User can perform.
User: Person using RMW and assigned certain roles. User Group: Groups which are assigned roles to perform certain functions. Contact: People who serve the company directly or indirectly (external or internal). |
| Organization | An Organization represents the entity that is involved in the development of a product. An Organization can have multiple companies. A company is associated with one or more departments, sites, and locations. | Company: A company is the first organizational element. You can have more than one company in an organization. You can associate companies with one or more departments, sites and locations.
Site: A physical location for a company. It is mandatory to create sites while setting up companies. Location: Actual physical location of the Equipment/Material within a site. A location belongs to only one site and cannot be moved from one site to another. Department: Specific divisions in a company. A department can be assigned to many users but a user can access only one department. Site Qualification: Sites are qualified for certain types of materials, or categories of materials. |
You can edit objects that appear in the search results, provided you have the appropriate Modify privileges. Use Quick Search to search for a specific object.
To edit objects:
From the search results, select the check box of the object you want to edit. This activates the Edit button.
Click the Edit button.
Make the necessary modifications and click OK.
A message confirms the modification.
You can duplicate an object from the object that you have created and save it using a new name. The new object can continue to have all the existing attributes data or you can modify data as required by either deleting existing attribute data or adding new data to the attributes.
To duplicate an object:
Select an object from the search results.
Click the More menu.
Select Save As menu option.
In the Save As page that appears, enter a new name for the object.
To duplicate Notes attached to the object, select Yes. If not, select No.
To duplicate Attachments attached to the object, select Yes. If not, select No.
|
Note: Notes and Attachments are not duplicated by default. |
To modify or change existing attributes data, click the Save and Edit button. You can edit/ delete existing data.
To save with existing data, click OK. A message confirms that you have successfully saved the new object.
To cancel duplication, click Cancel.
You can delete objects that you no longer use in RMW provided you have the appropriate privileges. Once deleted, the deleted object does not show up in the search results.
|
Note: You cannot delete objects associated with other objects. |
To delete objects:
In the search results, select the check box of the row you want to delete. The Delete button is activated.
Click Delete. The object is deleted. If the object is associated with other objects, a message appears informing you of the association.
To view deleted objects:
Click the Show Deleted Items icon that appears on the search results table.
Search results return a list of objects. The Deleted column displays an icon in the row of the deleted object.
|
Note: You cannot view details of the deleted objects. |
The Preferred Start Page setting and the roles and privileges assigned to you by the Administrator determine the contents of the Home page. By default, the Home page displays the following:
Top Pane
Home page
Create menu
Search controls
Navigation Pane
Courtesy Controls (My Preferences, Tools and Settings, Help, Logout)
Navigation Drawers (Folders and Reports)
Content pane
The content pane displays tabular data of business objects. Administrator settings govern display in the content pane.
Dashboard
My Assignments
Workflow Routings
The buttons on the toolbar in the Top pane allows you to perform tasks listed in the following table, provided you hold appropriate roles and privileges.
| Name | Description |
| Home | The Home page displays Dashboard, My Notifications and Workflow Routings (by default) based on settings defined by the Administrator. |
| Create New | Lets you create objects in all classes for which you have privileges. |
| Quick Search criteria box | Select a class from the menu and enter the search criteria. Searches all objects listed. |
| Execute Search | Searches for objects that match the criteria in the text box. |
| Custom Search | Searches for objects as per the criteria you set in the Custom search page. |
The left pane or the Navigation pane contains the Oracle logo, Collapse and Expand buttons.
| Name | Description |
| My Preferences | Displays your preferences. |
| Tools & Settings | Product Collaboration: Returns you to Agile PLM login page. |
| Help | Help: Provides access to online documentation (Agile) and Oracle User Productivity Kit.
About: Details of License & Version. |
| Logout | Exits you from the application. |
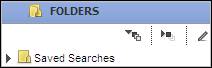
Description of the illustration ch2_01.jpg
The Folders drawer contains sub-folders of Saved Searches. You can access them if you have the necessary roles and privileges. The folder contains searches that you have created and saved. Click the icon to display and hide all searches. Click the icon to hide the searches. Click to display searches in that folder.
The Reports drawer contains reports which you can access, if you have the required roles and privileges. You can search for reports and save them for use at a later date, and generate reports. Click Expand icon to display all reports. Click the Collapse icon to hide all reports. Click to display reports in that folder.
You can show the Navigation pane using the Expand button and hide the Navigation pane using the Collapse button.
The Dashboard enables you to quickly view and manage information available in the system, as required by you. You can create a number of dashboard tabs and display content in the form of tables (for projects, campaigns, tasks, reports).
Access to view the dashboard is based on roles and privileges assigned to you by the Administrator. Contact the administrator for details of necessary roles and privileges.
Dashboard tabs are created by the administrator. The user only has privilege to view the tabs assigned by the administrator.
The Dashboard tab provides a view of specific data of projects and campaigns and related product information in the form of tables. The administrator creates channels and controls visibility of channels. Only users with the appropriate roles and privileges can view the channels. As a user, you can only select from an existing channel which information can be derived for display and where they appear. You can configure and view the information display, provided you hold appropriate privileges.
For details on configuring the Dashboard tab, see the Agile Recipe Management for Pharmaceuticals Administrator Guide.
To configure the dashboard:
Navigate to My Preferences> Home page tab in the navigation pane.
Click Add Rows. Select channels you want to display from the menu.
Click OK.
The channels that you have chosen appear on the Dashboard as tabs.
The Dashboard tab appears on the Home page of the RMW application along with My Notifications and Workflow Routings tabs.
To view the dashboard:
Click the Home page icon in the top pane to display the Home page. The Dashboard displays tabs depending on the roles and privileges assigned to you by the Administrator and the channels you have selected.
Click the Dashboard tab.
Click the subject link to open and view it.
The Filter icon, which appears on all the Dashboard tables enables you to create customized views of business objects you are reviewing or managing. You can use the options in the dropdown to filter the view and sort data by pre-defined views.
For example: Sort data by different attributes in ascending or descending order.
To filter the view of the dashboard:
Click the Filter icon. Filter fields display in all the columns along with Filter and Clear buttons.
Enter valid data in any one of the fields and click Filter. Data is filtered appropriately.
Click Clear to clear the field.
Click the Filter icon again and notice that the filter fields disappear.
The My Notifications tab on the Home page lists alerts sent to your account and items that require action. It provides you with a set of tools that you can efficiently use to manage them. You can sort, select or view rows in the assignment tables. My Notifications tab includes:
My Notifications
My Subscriptions
Possible Subscriptions
My Notifications displays a list of alerts. For example, if the restock limit alert is triggered, you will receive a notification that stock is below limit. You have to go to the inventory and request for stock. It also informs you of completion of a task, generation of a report, and trigger actions on a workflow.
To view a notification:
Select a notification from the table. This activates action buttons. Action buttons on the notification include:
Delete
Mark as Unread
Mark as Read
Show
Refresh
Export
Compare
Click the subject hyperlink. The notification displays the details.
To delete a notification:
Select a notification from the table.
Click Delete.
The notification table displays the following attributes:
Is Read: Specifies if the Notification is read or unread.
Priority: Specifies if the priority level is High, Medium, or Low.
Subject: A link which states the title of the notification. Click the subject link to see details.
Type: Type of notification - Informational or Warning.
Time of Alert: Informs you of the time of alert.
Alert Name: Name of the alert.
From Subscription: The Subscription from which you trigger the alert.
My Subscriptions lists alerts to which you have subscribed. Notifications are sent to subscribers informing them of alerts for which they are responsible. Alerts are sent to their email address or Dashboards depending on the preference they have set. Refer to My Preferences. Selecting a subscription enables Edit, Unsubscribe, More,Compare, and Export buttons.
To edit a subscription:
Select a subscription and click the Edit button.
|
Note: You cannot edit mandatory alert subscriptions. |
To unsubscribe from a subscription:
Select a subscription and click Unsubscribe to remove yourself from the list of subscribers.
|
Note: You cannot unsubscribe from mandatory alert subscriptions. |
To export the subscription:
Click the Export button to export the subscription to any of the following output formats: Microsoft Excel, PDF, HTML, or XML.
Possible Subscriptions lists available alerts to which you can subscribe. Selecting an alert enables the Subscribe, Compare, and Export buttons.
To subscribe:
Select an alert from the table and click Subscribe.
In the Subscription: New page,
Enter Subscription Name. This is a mandatory field.
Select a priority level from menu. High, Medium, or Low.
Select the Email or Dashboard check boxes to indicate the preferred notification methods.
Click Next. Enter condition details.
Click Finish.
A message informs you of successful subscription to the alert and it appears in the My Subscriptions table.
The Workflow Routings tab appears on the Home page and lists Workflows tasks and Notifications that requires review or action from you. For example, it may list a Task that you need to take action, a Workflow that you need to approve or a Notification alert.
Tasks are specific activities that you can distribute among people in an organization and complete over a specific period of time. Along with helping you manage time and resources efficiently and effectively, they also track progress in your schedule. The tabs that you can view in Tasks are:
Assigned tasks: Lists Tasks assigned to you.
Pending: Tasks pending for approval from Approvers/Observers/Reviewers.
Delegated: Tasks delegated for action to specified delegates.
Completed: Lists completed tasks.
Initiated tasks: Lists Tasks that you initiate and need to track.
Pending: Tasks pending for approval from Approvers/Observers/Reviewers.
Completed: Lists completed tasks.
Search: Searches for tasks.
You can view initiated tasks that are in Pending or Completed status.
To view initiated tasks:
On the Home page, click Workflow Routings > Tasks > Initiated Tasks.
Pending tasks display by default.
Click Task ID to view task details.
To view completed tasks:
Click Completed, to view tasks that are complete.
Click Task ID to view task details.
Tasks are attached to notifications that provide additional information. You can view workflow generated messages that require action and informational messages that do not require action, provided you hold the necessary privileges.
To view assigned tasks:
Click Workflow Routings.
Tasks > Assigned Tasks > Pending Tasks display by default.
Select the Task ID link you wish to view. The task opens displaying details. The Assigned Tasks tab also lists the following tasks:
Delegated
Completed
To take action on tasks:
By default, the Tasks tab displays details of the Pending Tasks assigned to you. The table below describes tabs in the Task: Workflow Status page.
| Tabs | Description |
| Workflow Progress | Displays Completed, Current, and Future states of tasks. |
| Task Details | Details of the task. |
| Authorized Parties | Displays the Primary Party and Backup Party who are authorized to take action on the current state. |
| Opinions | Opinions of users and optional reviewers. |
| History | Summary of actions taken and modifications made to the task. |
The action buttons appearing before the Delegate button depends on the actions you can take in the current state.
| Action Buttons | Description of the Actions |
| Approve | To approve the task. On approval the task moves to the next state. |
| Reject | To reject the ask. |
| Submit | To submit the task for approval. |
| Delegate | To delegate the task to another user. |
| Get Opinion | For opinion of other users, click Add User and select the user. |
| Cancel | To return to the search results page. |
You can delegate tasks for necessary action to a specified delegate. Once you delegate a task, you share all e-mails, notifications, and alerts with the delegate. The person to whom you delegate a task cannot re-delegate the task.
To delegate a task:
On the Home page, go to Workflow Routings > Tasks. By default the Tasks tab displays the pending tasks assigned to you.
Select the Task you want to delegate.
Click Delegate. Select the User ID of the person to whom you want to delegate the task.
Click OK.
A message confirms successful delegation.
Workflows are a sequence of status changes that an object goes through in a quality control process. The object needs to be in an appropriate status and get approval from the assigned Approvers, Reviewers and Observers before it can move forward. You can create workflows if you hold the necessary roles and privileges. You can view, delegate, un-delegate, activate, deactivate, set status, and search for workflows.
Workflow State is the current status of a workflow at a given point. Standard states include Draft, Release for Review, Approved, Rejected, and On Hold. In addition to these states, you can create your own workflow states.
A component needs to be in an appropriate workflow state before it can move forward. The table below gives you the initial status on creation of workflow for a component and the statuses it can move to.
| Menu objects | Active/ Inactive | Initial Status | Possible Statuses | Usable Only if in this State |
| Recipe | Active | Draft | Draft-Submitted-Approved/Rejected | Any state other than Canceled |
| Material | Active | Draft | Draft-Submitted-Approved/Rejected | Approved |
| Equipment | Active | Draft | Draft-Available-Offline-InUse-Hold-ReleaseToProcess-Clean-Retired | Available |
| Project | Active | Draft | Draft-In Development-In Progress-Completed | In Development |
Workflow Actions are actions you can perform on any workflow state. Standard workflow actions include Approve, Need More Info, Reject, and Submit.
The Workflows tab lists the following:
My Workflows: Lists favorite workflows that need approval of Approvers or Reviewers or Observers.
Delegated: Lists workflows you have delegated.
Search: Allows you to search for workflows.
Lifecycle Phase
Lifecycle phase involves the statuses an object goes through from its creation. Depending on the object, you can move it to the next applicable status. The options in the menu of a lifecycle phase changes according to the current status of the object. Only phases applicable to the object appear in the drop-down list. For example, the lifecycle phase of a material can be changed manually or through a workflow. When you create a material it is in the Draft status. A material can be used in a process only if it is in the Approved status. The system throws up a warning message appears if Materials in the Draft status are used in a process. You can edit material only if it is in the Draft status.
To change the lifecycle phase of a material:
Search Materials > Library and select a material record.
Click Change > Lifecycle Phase.
Select an appropriate status:
Draft - by default. the initial state of a new material.
Submitted - to submit the material for approval.
Approved - to approve the submitted material. You have to first submit a material before it can be approved.
Rejected - to disapprove the submitted material. You have to first submit a material before it can be rejected.
The My Workflows tab lists workflows assigned to you. You can view workflows assigned to you and also workflows delegated by you.
To view workflows:
On the Home page, click Workflow Routings> Workflows.
By default, My Workflows tab displays a list of initiated workflows.
Click Workflow ID link to view details. Selecting a workflow activates the Delegate and Export buttons for that workflow.
Workflow delegation implies assigning your workflow to a specified delegate to take action. When you delegate a workflow to another user, anytime the object tied to that workflow triggers tasks, the delegated user will receive all tasks assigned to you.
You can delegate a task to multiple users and set a start date and an end date for the workflow delegation. Once you delegate a task, you share all e-mails, notifications and alerts with the delegated user. The person to whom you delegate a task cannot re-delegate the task. You can also set a default user to whom you can delegate the task.
To delegate a workflow:
On the Home page, go to Workflow Routings> Workflows.
Select a workflow and click Delegate.
Enter information in the required fields:
Delegated User: User ID.
Starting Date: The day you delegate the task.
End Date: The day the task is automatically delegated back to you.
Click OK.
A message confirms the action.
To retain responsibilities on a delegated workflow tasks before the specified end date, un-delegate the workflow task.
To un-delegate workflows:
In the Home page, go to Workflow Routings> Workflows.
Select a workflow and click Un-delegate.
Click OK.
A message confirms the action.
You can search for workflows and take required action on them, provided you have the appropriate privileges to access the task. The Task Details pane displays action buttons when you select the Task ID hyperlink of the workflow.
|
Note: Action buttons do not appear on the Workflow tab, if you do not hold appropriate privileges. |
To perform a search for the workflow:
In the Home page, click Workflow Routings> Workflows.
In the Workflows tab, click Search. The search results return a list of workflows. See also: Searches.
Click the Workflow ID or Workflow Name link to view details.
Notifications can be either informational messages or alerts about actions you need to perform. Alerts also notify you of pending approvals to workflows. Default notifications are sent to Approvers, Reviewers or Observers.
The Notifications tab lists the following:
Workflow Notifications: Notifies you about pending or complete actions that need your attention.
Workflow Delegation Notifications: Notifies you about workflow delegations.
To view workflow notifications:
Navigate to Workflow Routings > Notifications > Workflow Notifications. The Workflow Notifications displays by default. On selecting a workflow notification, several action buttons are activated.
Click the Task ID link to view details.
To delete workflow notifications:
Select a Workflow Notification from the table.
Click Delete.
To view workflow delegation notifications:
Navigate to Workflow Routings > Notifications > Workflow Delegation Notifications. On selecting a Workflow Notification, several action buttons are activated.
Click Task ID to view details.
To delete workflow delegation notifications:
Select a Workflow Delegation Notification from the table.
Click Delete.
The Views button allows you to customize how you view objects. You can sort search results by pre-defined views. The drop-down list contains all the views which you have saved. The Views field appears at the top right corner of the search results table.
For example: You want to view Sites pertaining to geographical location. In the Views field, enter North America. The search results table returns all sites which are in North America.
Search results display data in a tabular format. Tables display data of objects you have sorted initially with either the Default View or Basic View. You can define and add multiple personal views to the table and select any of the views as your default view.
The table displays search results in a tabular format. The dropdown in the header row contains the Sort Ascending, Sort Descending and Columns buttons.
To view details of objects in a table by click on the Object ID. The Object ID is generated by the RMW application.
To sort table choose either Sort Ascending or Sort Descending menus.
To see the columns available on the table click button. Select the check box to display the column and de-select it to hide the column.
To view objects in a table:
Hover over the Name/Number ID link in the table. The synopsis view gives you a brief description of the object.
Click Close to close the dialog.
The Filter icon appears on all tables and enables you to filter data and create a customized view of data, as per the data entered into the filtered fields You can use the options in the drop-down list to filter the view and sort data by pre-defined views. For example: Sort data by different attributes in ascending or descending order. If not applicable, you only see a disabled Filter icon.
To filter the view on a table:
Click the Filter icon. Filter fields display in all the columns along with Filter and Clear buttons.
Enter valid data in any one of the fields and click Filter. Data is filtered appropriately.
Click Clear to clear the field.
Click the Filter icon again and notice that the filter fields disappear.
A table is initially sorted by Views - Default View or Base View. You can define additional personal views for each table, and select any view as your default view.
To sort a table:
Click the column header of the column by which you want to sort. For example, to sort the Equipment table by Equipment ID click the Equipment ID column header. On a search results table, you can sort all columns.
Click the column header to sort the table one way and click again to sort it the other way (ascending or descending order).
An indicator in the column header indicates if the table is sorted in ascending order or the descending order. how the table is currently sorted:
Selecting rows in tables activates the buttons at the top of the table which allows you to perform various actions on the objects. You can select single rows or multiple rows as required.
To select a single row, select the check box at the beginning of the row.
To select multiple rows in a table, select the check box at the left-hand corner of the table.
|
 Copyright © 2010, 2013, Oracle and/or its affiliates. All rights reserved. Legal Notices |
|