23.7 Configuring a DCC WebGate for X509 Authentication
Configure a WebGate for DCC and convert it to SSL for using it with X509 authentication.
23.7.1 Configuring the WebLogic Server
Use the procedures in the following sections to configure a WebLogic Server for X509 authentication.
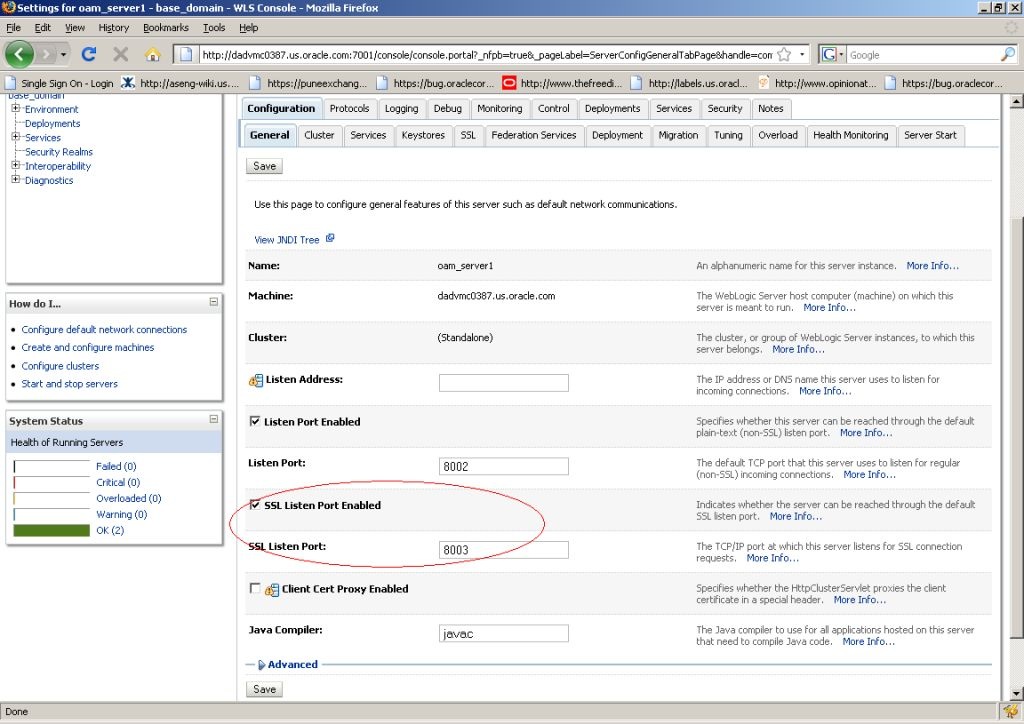
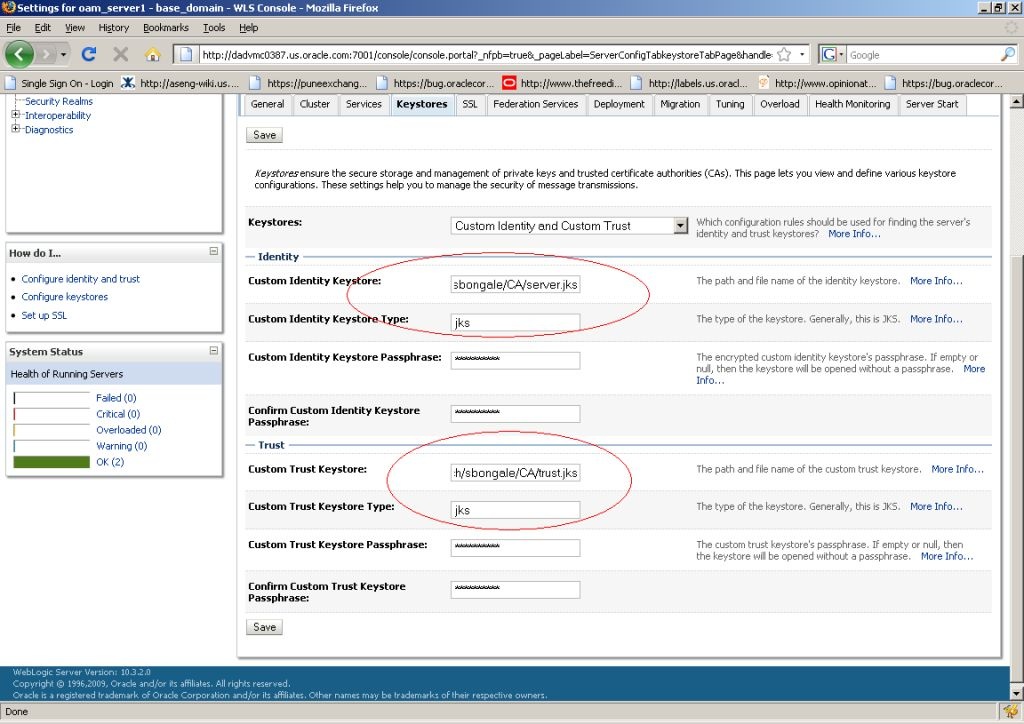
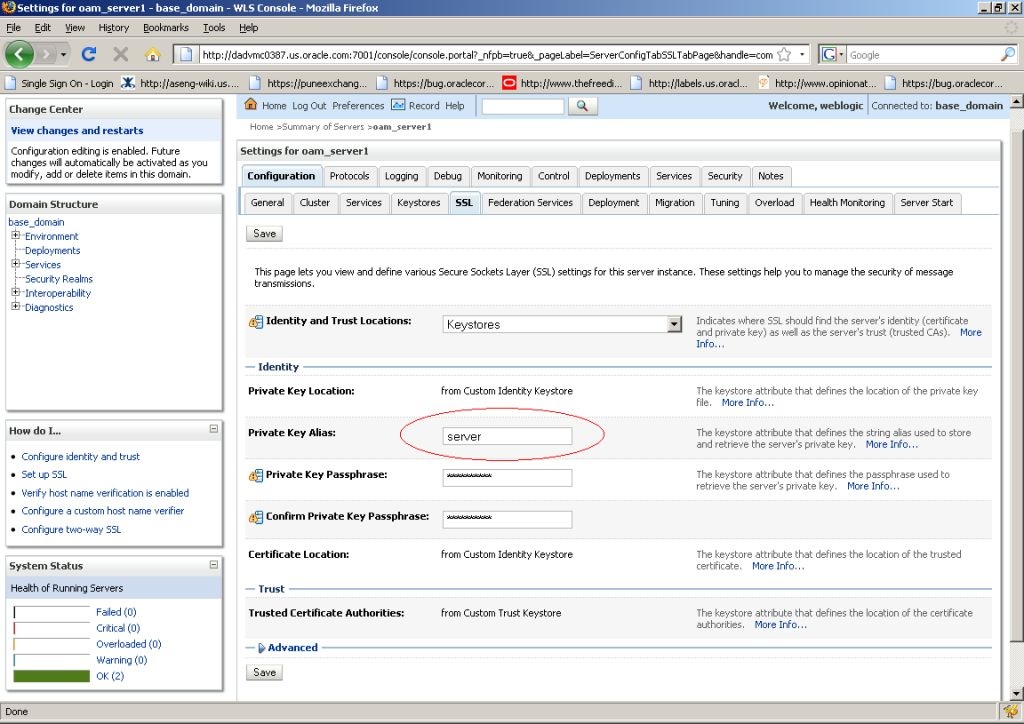
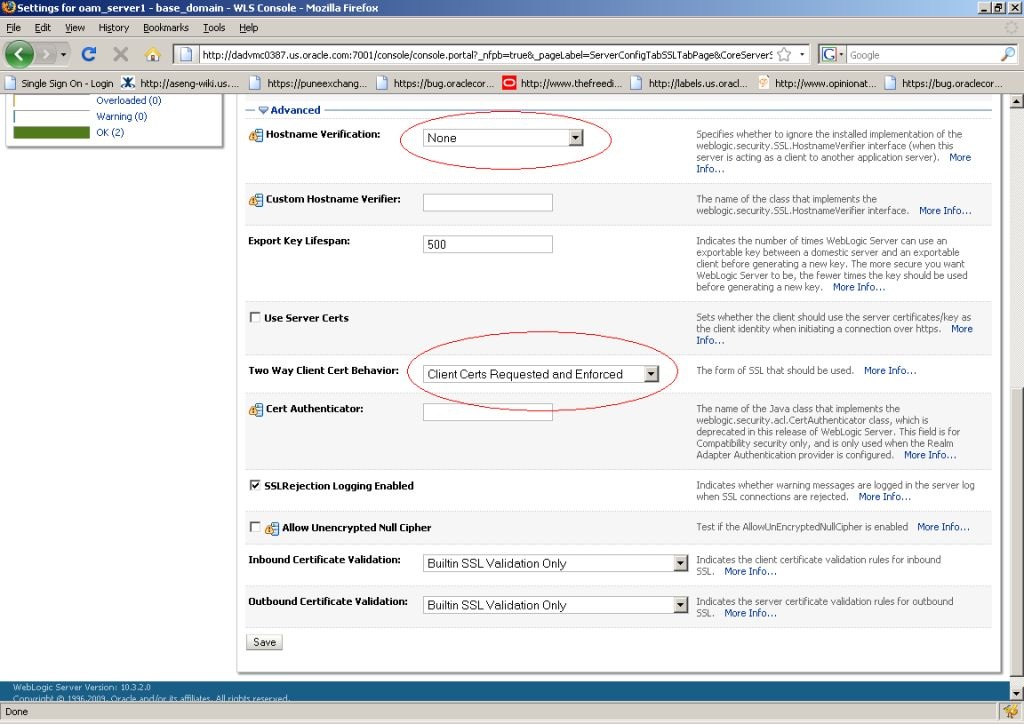
23.7.1.2 Configuring the WebLogic Server Instance
Use the WebLogic console to configure the instance of the WebLogic Server to be SSL and client certificate enabled.
23.7.1.3 Creating the User Certificate
You can create a user certificate in the .p12 format and install it in your browser.
Run the following OpenSSL commands:
23.7.1.4 Adding the Root CA Certificate
You can add the Root CA certificate of the certificate utility used to SSL enable the WebLogic server.
(In this example, the OpenSSL certificate utility is used.) The Root CA certificate must be added to the .oamkeystore and amtruststore files located in the following WebLogic directory:
$DOMAIN_HOME/base_domain/config/fmwconfig
-
Retrieve the password for the
.oamkeystoreandamtruststorefiles in WebLogic.-
Navigate to $MIDDLEWARE_HOME/Oracle_IDM1/common/bin/.
-
Run wlst.sh.
-
Run connect() in the WLST shell.
-
Run domainRuntime() in the WLST shell.
-
Run listCred(map="OAM_STORE",key="jks") in the WLST shell to display the password.
-
-
Add the Root CA certificate to the
.oamkeystoreandamtruststorefiles using thekeytoolcommand.The value of –storepass is the password retrieved in the previous step. For example:
./keytool -importcert -alias ROOT_CA -file /scratch/CA/ca.pem -keystore /scratch/Oracle/Middleware/user_projects/domains/base_domain/config/fmwconfig/.oamkeystore -storepass oru8nd3hhd4t4nrmh6unhv825b -storetype jceks

./keytool -importcert -alias ROOT_CA -file /scratch/CA/ca.pem -keystore /scratch/Oracle/Middleware/user_projects/domains/base_domain/config/fmwconfig/amtruststore -storepass oru8nd3hhd4t4nrmh6unhv825b -storetype jks
23.7.2 Configuring a WebGate For DCC
You can configure a WebGate for DCC. As part of this procedure you will also create the LDAPScheme_DCC Authentication Scheme.
You will use the Oracle Access Management Console for the configuration steps. This procedure assumes you have already installed the WebGates for which you will be creating profiles.
-
Configure an 11g WebGate profile named, for example, ABC_WG1 on http://<host>:7778/index.html.
-
Configure an 11g WebGate profile named, for example, XYZ_WG1_DCC on http://<host>:7779/index.html.
This WebGate will act as the authentication WebGate.
-
Navigate to the XYZ_WG1_DCC WebGate profile and Select Allow Credential Collector Operations Option.
This configures the WebGate for use as a DCC.
-
Create a new Authentication Scheme by making a copy of the LDAPScheme Authentication Scheme and modifying the following values.
Only modify the following values; leave the other parameters untouched.
-
Name as LDAPScheme_DCC
-
Challenge redirect URL is http://<host>:<port>/ (http://<host>:7779/)
-
Challenge URL : /oamsso-bin/login.pl
-
-
Navigate to the ABC_WG1 Application Domain and do the following.
-
Go to Authentication Policy.
-
Select Authentication Policy (Protected Resource Policy).
-
Select the newly created Authentication Scheme LDAPScheme_DCC.
-
-
Restart the Oracle HTTP Server with port 7779 in use.
-
Access the protected resource at http://<host>:7778/index.html.
You should get challenge page from the authenticating WebGate server (port 7779). After providing valid credentials, the resource on the port 7778 server should be displayed.
23.7.3 Converting the DCC WebGate to SSL
You can convert the DCC WebGate instance to SSL.
The following sections have details.
23.7.3.1 Generating Server Certificates
You can generate server certificates using Oracle Wallet Manager (OWM).
-
Create a Wallet using OWM.
-
Start OWM.
$ <webtier>/bin/owm
-
Select Wallet > New and follow the on screen instructions to create a Certificate Request.
-
Save the created Wallet in an accessible location and write down the path for future reference.
-
Select the Auto Login option and save the Wallet again.
-
-
Create and export the server request file as server.csr using OWM.
-
Select Operations > Export Certificate Request.
-
Save as server.csr
-
-
Sign server.csr to generate user certificate server.pem.
You can use the OpenSSL utility as follows:
openssl x509 -req -md5 -CAcreateserial -in ohs_server.csr -days 3656 -CA /
  <path>/ca.pem -CAkey /<path>/ca-key.pem -out server.pem
The values of ca.pem and ca-key.pem should be the same ones used when generating the client certificate.
-
Import the CA certificate (ca.pem) into OWM.
-
Select Operations > Import Trusted Certificate.
-
Point to ca.pem, your CA certificate.
-
Import the CA certificate and save the wallet.
-
-
Import server.pem as user cert
-
Select Operations > Import User Certificate.
-
Point to the server.pem certificate generated in step 3.
-
Import the server certificate and save the wallet.
-
-
Edit the Oracle HTTP Server (OHS) ssl.conf file to point to this wallet as follows.
#Path to the wallet
SSLWallet "/<path to wallet>/wallet"
SSLVerifyClient require
ssl.conf is located at <webtier>/<instance_home>/config/ohs/ssl.conf.
-
Restart the OHS instance.
