 Part 1:

In this section, you create an advertising beacon MAF application. Then you'll add the same Cordova beacon plugin you used in the previous part of the tutorial. This particular plugin includes code to use a device as a advertiser as well as a receiver.
-
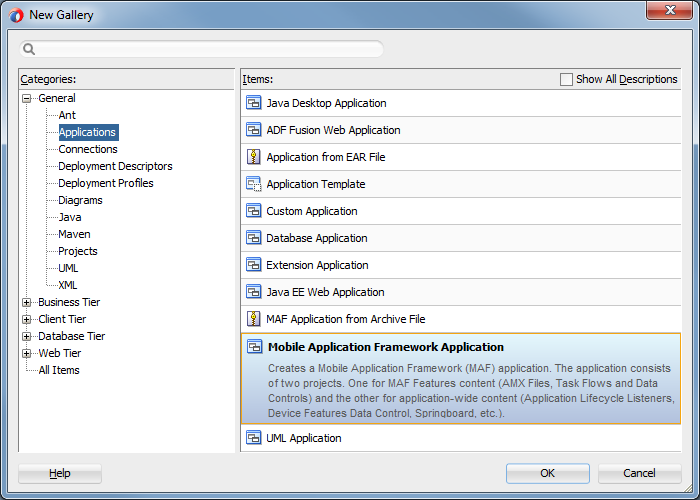
Using the New Gallery, create a new Mobile Application Framework Application.
-
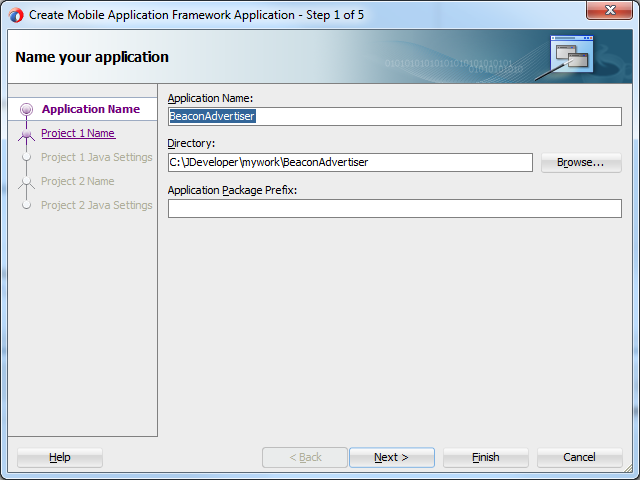
Name it BeaconAdvertiser and click Finish.
-
Next, add the Cordova plugin containing iBeacon functionality. In addition to monitoring and detecting beacons, this plugin can be used to advertise a beacon identifier.
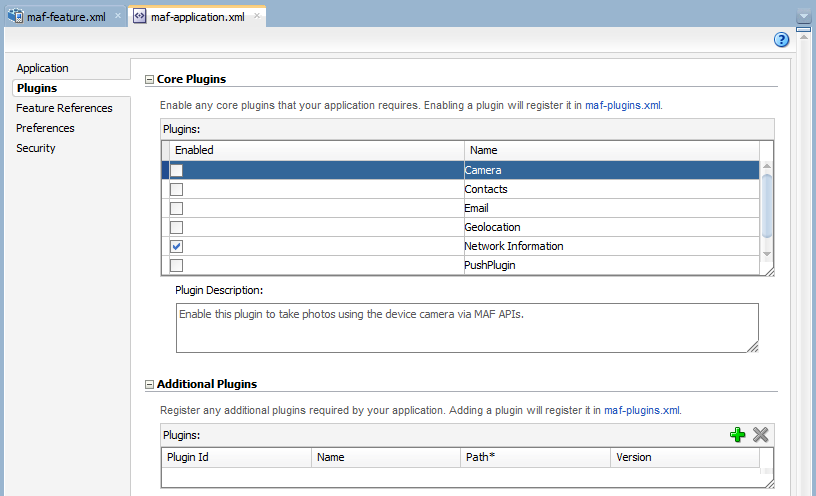
Open the maf-application.xml file and select the Plugins tab.
-
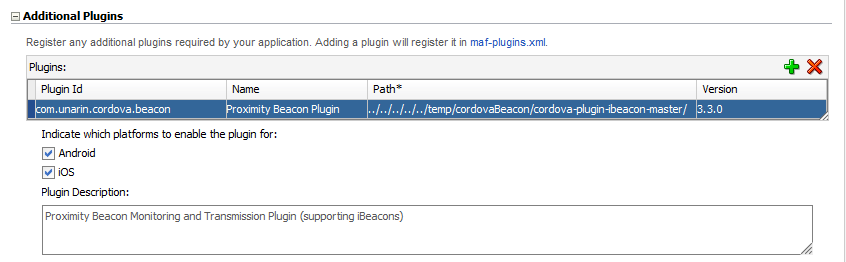
Set the location of the plugin. At the bottom, in the Additional Plugins area, click the green plus sign, navigate to the directory of the unzipped file (/cordova-plugin-ibeacon-master/), and select it.
You may also set the platforms the plugin is good for. Since this plugin is good for either iOS or Android, keep the default values.
-
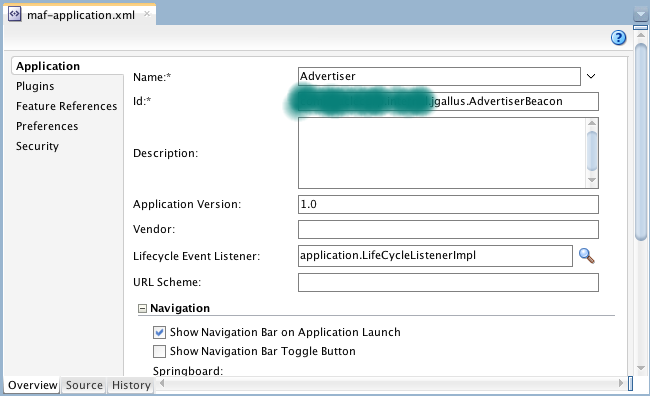
While you're in the maf-application.xml file, change the application name to something simpler and set the application bundle id.
Remember, you MUST deploy this application to an iOS device,
Click the Application tab and, at the top of the page, set the Name property to Advertiser.
Then, set the Id to a value that matches the App Id specified in your provisioning profile.
-
Save all your work.
Just like in the BeaconClient, where you added JavaScript code to allow the application to interact with the Cordova plugin, you need to do the same here. The code is different because you do not want to monitor and range with the device, you want to advertise with it.
-
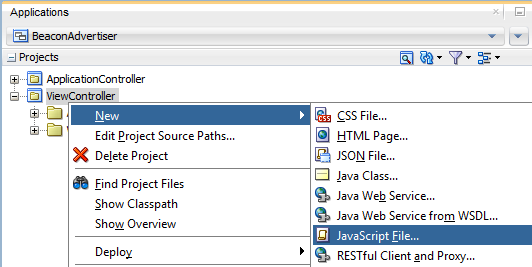
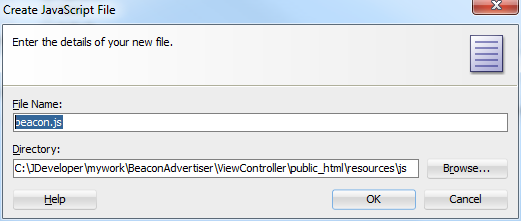
Right click the ViewController project and select New - JavaScript file.
-
Set the Name to beacon.js, and click OK.
-
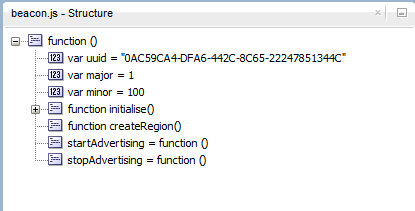
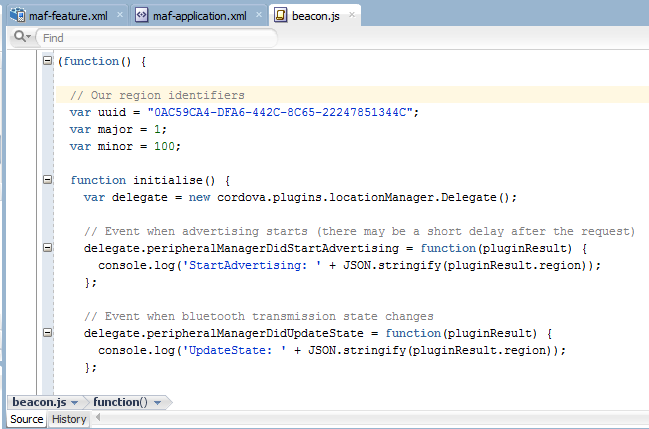
Add the code shown below to your file. You can copy the code from the beaconJSAdvertiser.txt file in the downloaded labs.zip file. If you did not download it earlier, you can do so here.
This code:
1: Includes two externally callable functions - startAdvertising and stopAdvertising, each of which invokes the corresponding plugin API.
2: Detects any bluetooth transmission state changes.
3: Defines the UUID, Major, and Minor transmission values.
4: Creates and initializes a beacon region.
-
Save all your work.
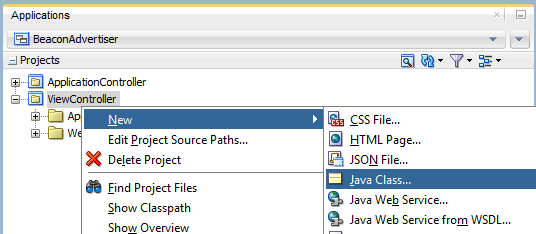
In this section, you create a managed bean to provide the interface between the AMX page and the JavaScript functions.
-
In the Applications window, right click the ViewController project and select New - Java Class.
-
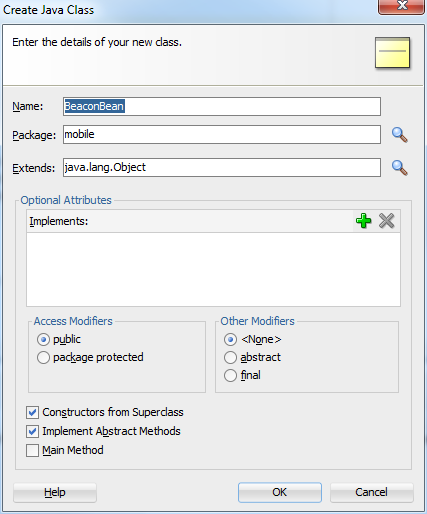
Name it BeaconBean.java and then click OK.
-
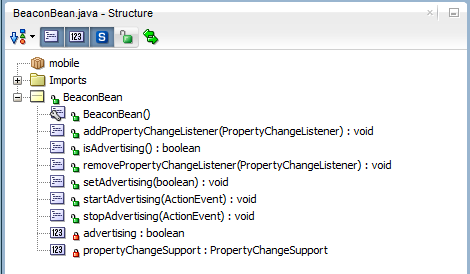
Copy the code from the beaconbeanJava.txt file in the labs directory you downloaded earlier, and replace all the code in the JDeveloper file.
The code:
1: Includes two methods for managing the advertising of iBeacon data:
- startAdvertising calls the JavaScript startAdvertising function
- stopAdvertising calls the JavaScript stopAdvertising function
2: Defines the advertising attribute, which holds the advertising status and can be accessed by getter and setter methods.

-
Save all your work.
Now that the plugin is registered, you have JavaScript code to access it, and a Java class that you can access from the page. It's now time to create an application feature and the AMX content.
-
First create a new feature like you did in the beacon client application.
Find and open the maf-feature.xml file and then click the green plus sign on the right to create a new feature.
Name the feature Advertise and click OK.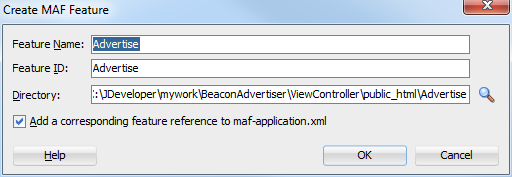
-
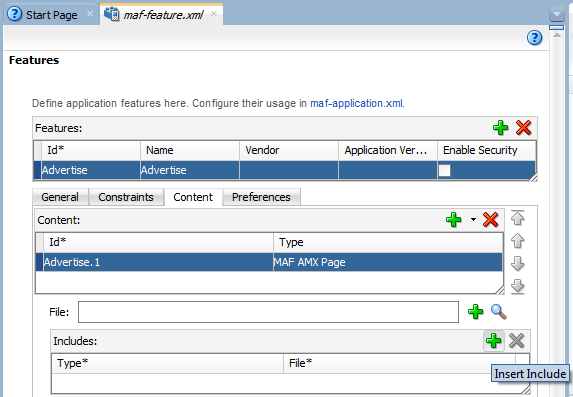
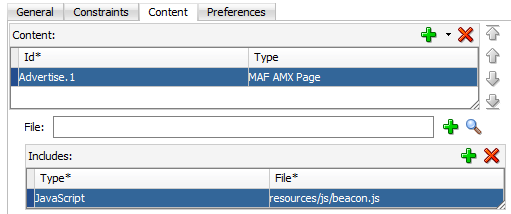
Then, include the JavaScript code in the new feature.
Click the Content tab, scroll down to the Includes area and click the green plus sign.
-
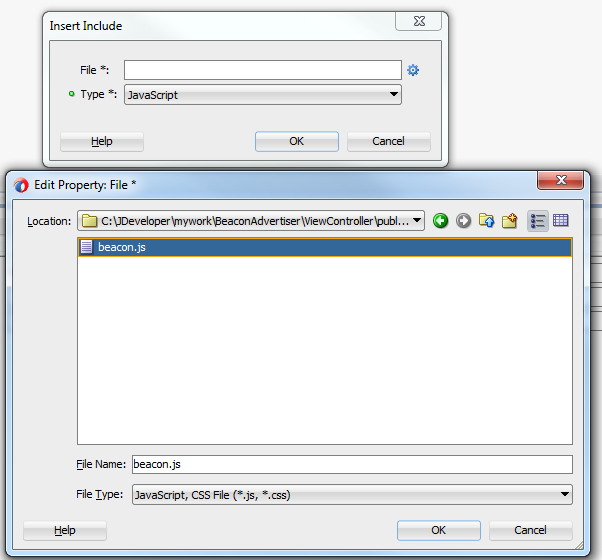
In the Insert Include dialog box, click the blue gear to the right of the File property. Then navigate to the resources\js Directory and select the beacon.js file.
-
Then click OK to close the Edit Property pane and then click OK again to close the Insert Include pane.
-
In the File property, click the green plus sign to create the feature's content.

-
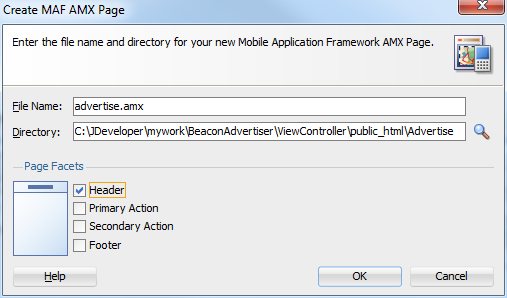
Set the File Name to advertise.amx and only select the Header facet. Then click OK.
-
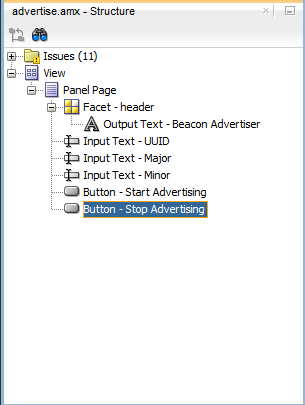
In the page, expand the header facet and select the output text component.
Set the Value property to Beacon Advertiser.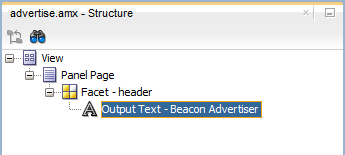
-
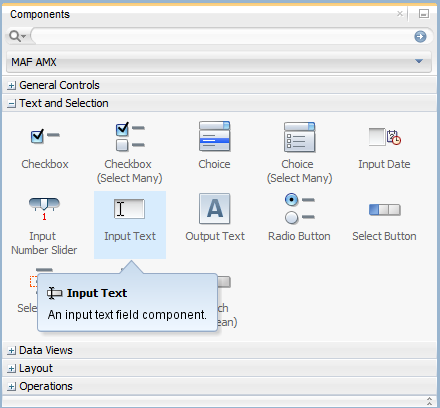
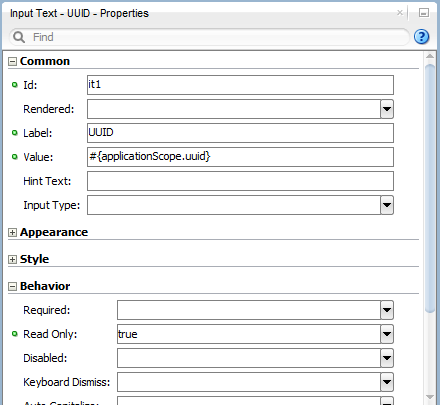
From the Components window, expand the Text and Selection pane and select an Input Text item.
-
Drag it onto the Structure window, and drop it on the Panel Page.
Set the following properties:
Label: UUID
Value: #{applicationScope.uuid}
Read Only: True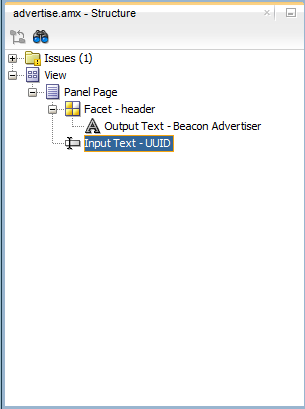
-
Add another Input Text component and set the following properties:
Label: Major
Value: #{applicationScope.major}
Read Only: #{BeaconBean.advertising == true}
Input Type: number
The Read Only property shows its value with a yellow box around it meaning that it's an unreferencable value. We'll fix that a bit later after we've finished the page.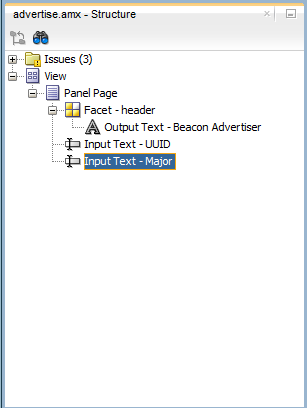

-
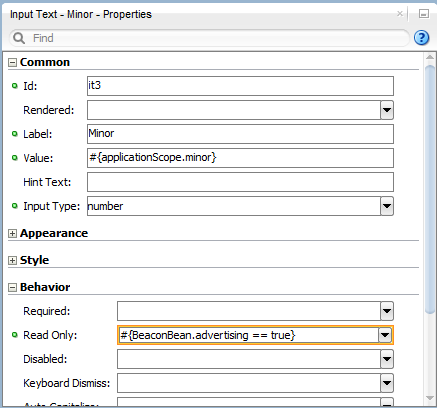
Add a third Input Text component and set the following properties:
Label: Minor
Value: #{applicationScope.minor}
Read Only: #{BeaconBean.advertising == true}
Input Type: number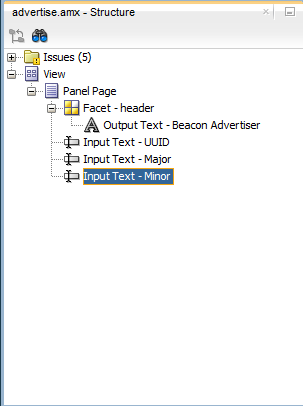
-
Next in the General area of the Components window, drag a Button to the Panel Page.
Set the following properties:
Text: Start Advertising
Action Listener: #{BeaconBean.startAdvertising}
Rendered: #{BeaconBean.advertising != true}

-
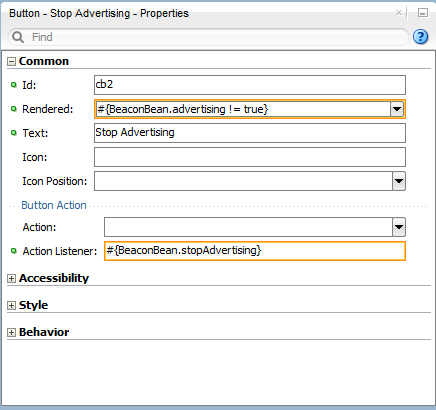
Add one more button to the page and set the following properties:
Text: Stop Advertising
Action Listener: #{BeaconBean.stopAdvertising}
Rendered: #{BeaconBean.advertising != true}
-
Save all your work
-
Next, we need to establish the BeaconBean Java code to be referenced by the AMX page.
In the Applications window, expand the ViewController - Web Content - resources nodes and double click the adfc-mobile-config.xml.
All unbound pages can access beans defined here.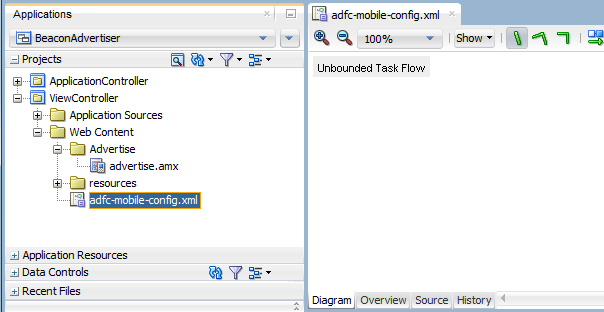
-
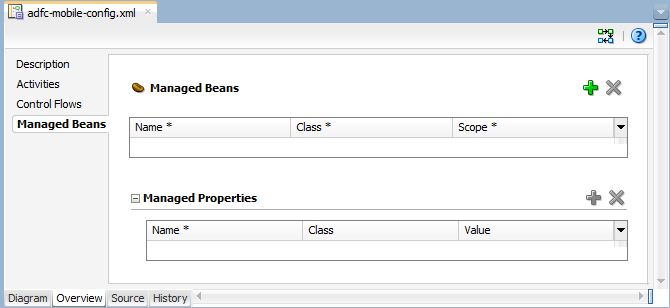
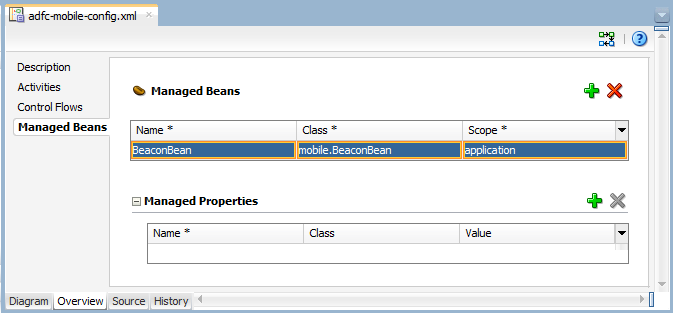
Click the Overview tab at the bottom of the adfc-mobile-config.xml file, and then click the Managed Beans tab.
-
Click the green plus sign and set the following values:
Name: BeaconBean
Class: mobile.BeaconBean
Scope: application
-
Save your work.
Now, deploy the advertising beacon and start advertising. Then you'll be able to test the beacon client functionality. Like with the beacon client, you need to deploy to a real iOS device and not a simulator/emulator. We'll forgo the description of deploying the application, and get right to the testing.
There are two scenarios we can examine. First, seeing how the applications work when they're both active. Then, we can look at how they work if the applications are in the background or the device is asleep.
-
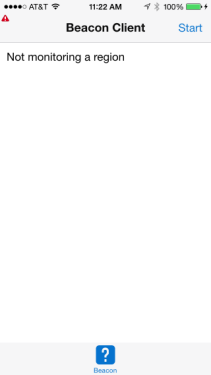
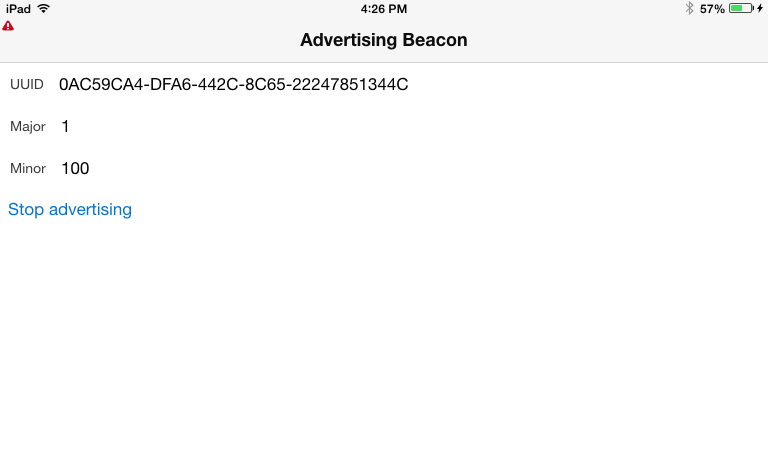
To best understand how the apps work together, let's start with both applications in their default state (not advertising or monitoring). In this tutorial the advertising beacon is deployed to an iPad Mini and the beacon client is deployed to an iPhone. The image below shows both applications open, but not actively working.
Remember the advertising beacon's UUID, Major, and Minor values so that you can recognize them later in the beacon client.

-
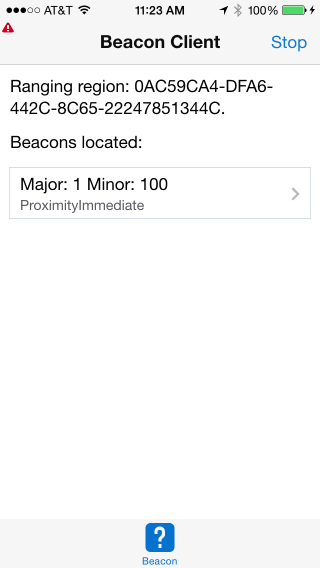
Next, click the Start button on the beacon client application. The screen changes to display a monitoring message that includes the UUID.
-
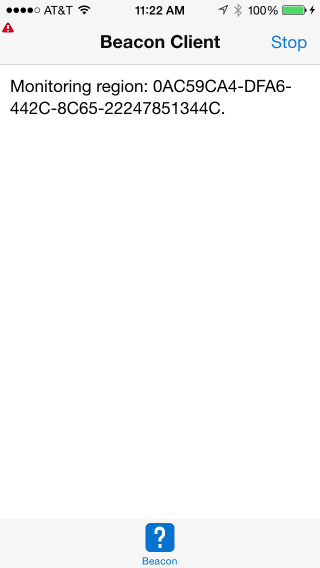
Go back to the advertising beacon and click the Start Advertising button.
-
Back in the beacon client, the screen changes to show that the application is now ranging for a UUID and, in fact, finds one with a Major value of 1 and a Minor value of 100, the same values sent by the advertising beacon.
-
Now, what happens if the device is asleep when it enters or exits a region?
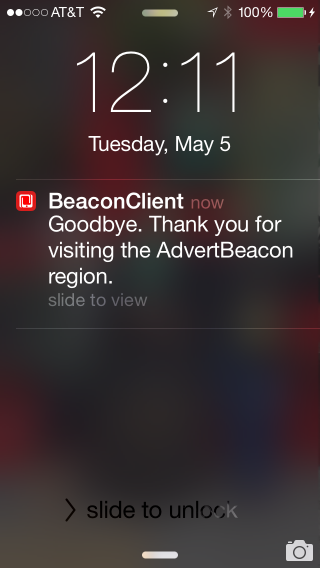
First let's look at what happens if the device is asleep and you leave a beacon region.
In the advertising beacon application, click the Stop Advertising button. Now look at the beacon client application. It continues to look for any beacons. If it has not noticed any beacons for 30 seconds, it determines that the device has left the region. Then the application invokes the "region exited" event, which in turn fires a local notification displaying a message.
-
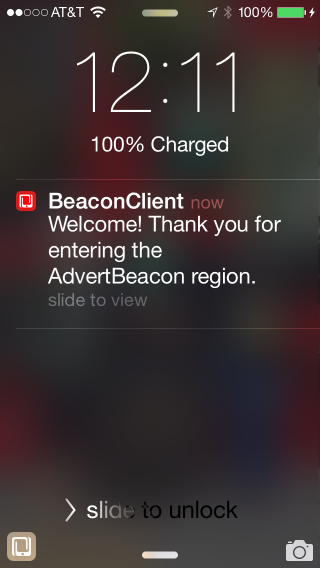
Now lets look at what would happen if the device is asleep and enters a beacon region. Again, make sure the beacon client device is asleep, then back in the advertising beacon, click the Start Advertising button.
Notice the beacon client device will wake up and display another notification.
Tapping or swiping on the notification will launch the client application.
Congratulations, you have completed the tutorial.
Thank you for your efforts.