


In this section, you install the Summit schema, then open and deploy the web service application.
-
Download and unzip scripts.zip file to a directory of your choosing. Logon to SQL Plus as the system user with SYSDBA privileges.
Then start the build_summit_schema.sql script in the unzipped location. This will create the database schema you'll access with the web service.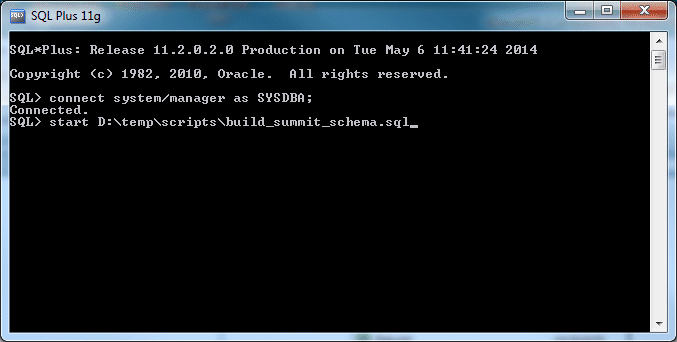
-
Download and unzip the summitservices application. Then open it in JDeveloper.
Expand the Model project and the model package. Notice there are three business components: Countries Entity Object, CountriesView View Object and SummitServices Application Module.
-
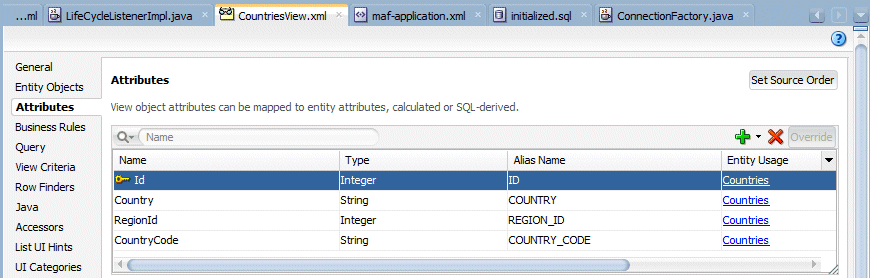
Double click the CountriesView and then select the Attributes tab. Notice there are 4 attributes defined for the VO. We’ll use three of them in our page: Id, Country and RegionId.
-
Double click on the Model project, then select the ADF Business Components node and then click the green plus sign to create a new Connection. This connection is used to provide the data for the web service.
Name the connection MobileSummit and then, set the Username, Password, Host Name and SID to match your connection details.
Then click the Test Connection button.
Click OK twice, and then save your work.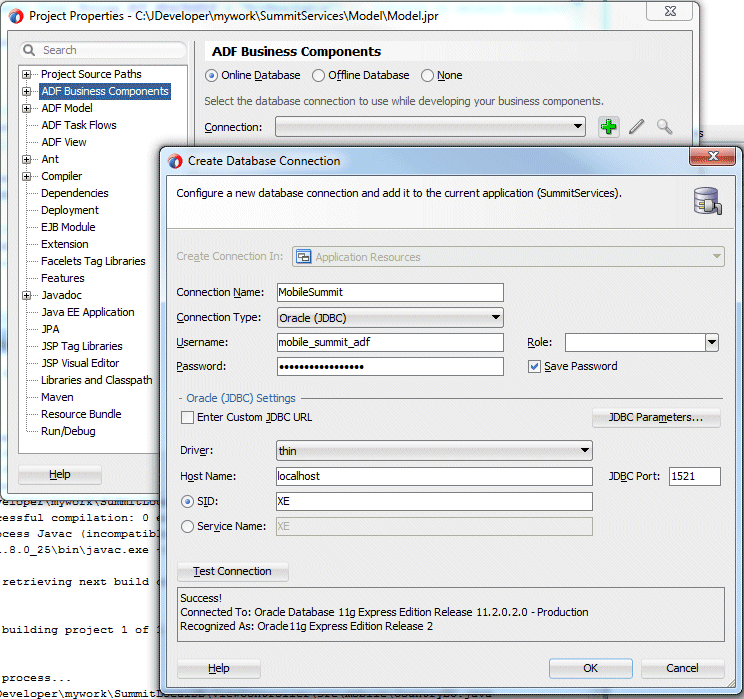
-
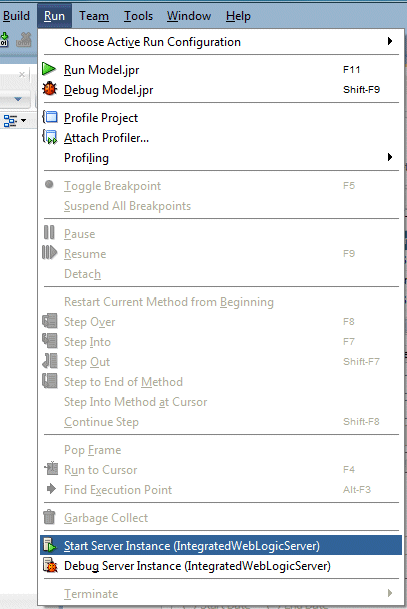
Start the integrated WLS, if it’s not already started. From the menu select Run > Start Server Instance.
-
Expand the SummitServices application module and then expand the serviceinterface node. The four files you see are responsible for the service interface.
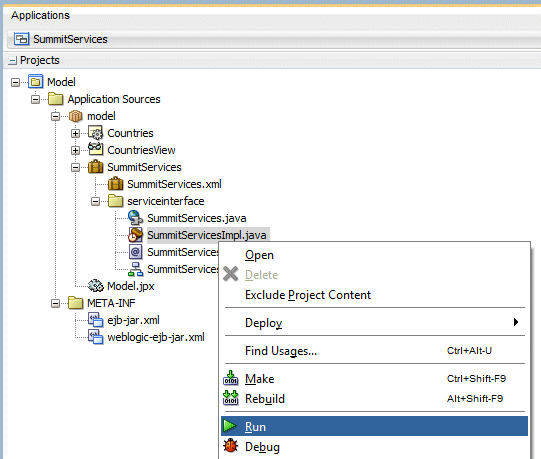
Right click the SummitServicesImpl.java file and select Run form the context menu.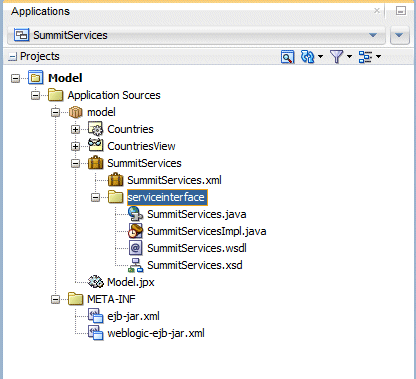
-
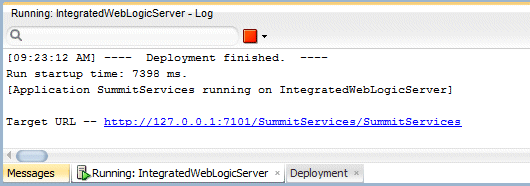
Monitor the progress in the Log window and you should see the target URL when the application has been deployed.
-
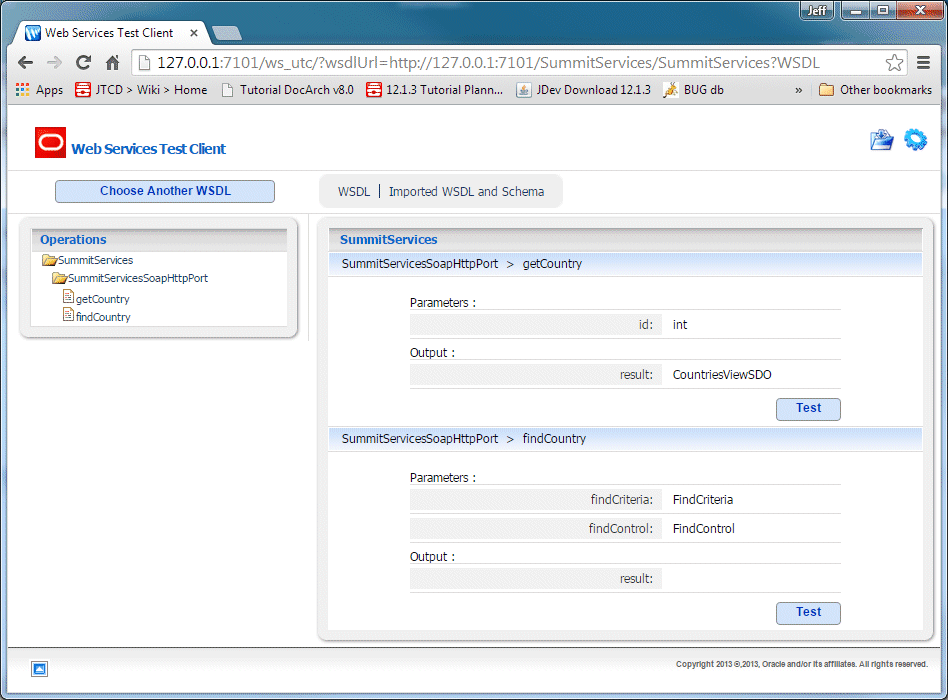
Copy the URL and paste it into a browser window to confirm the service is up and running.
In this section, you create two data controls: one to access the remote web service, the other to access the local database. Before you can create the data controls for the web service, you must deploy it. In the first few steps, download, open and deploy a predefined web service.
-
First, create the data control for the web service you just deployed. In JDeveloper, navigate back to the SummitLocalDB application.
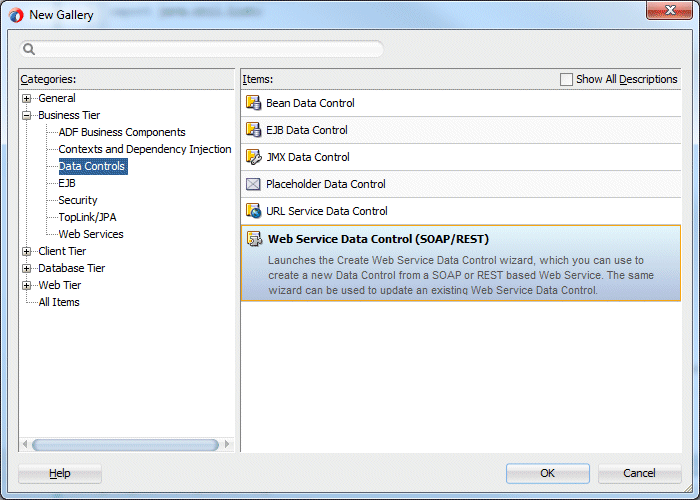
Right click the ViewController project and select New > From Gallery. In the gallery, expand the Business Tier node and select the Data Controls category. Then, select the Web Service Data Control (SOAP/REST) item. Click OK.
-
In the Data Source dialog, set the name to SM_WS and ensure the SOAP radio button is selected.
Then, in the URL property enter the target link for the deployed web service, substituting your IP for the localhost IP. You must use your machine's IP, and not 127.0.0.1. That address is reserved for the Android emulator and the application will fail when accessing the web service.
Append to the end of the URL, ?WSDL and hit tab to continue.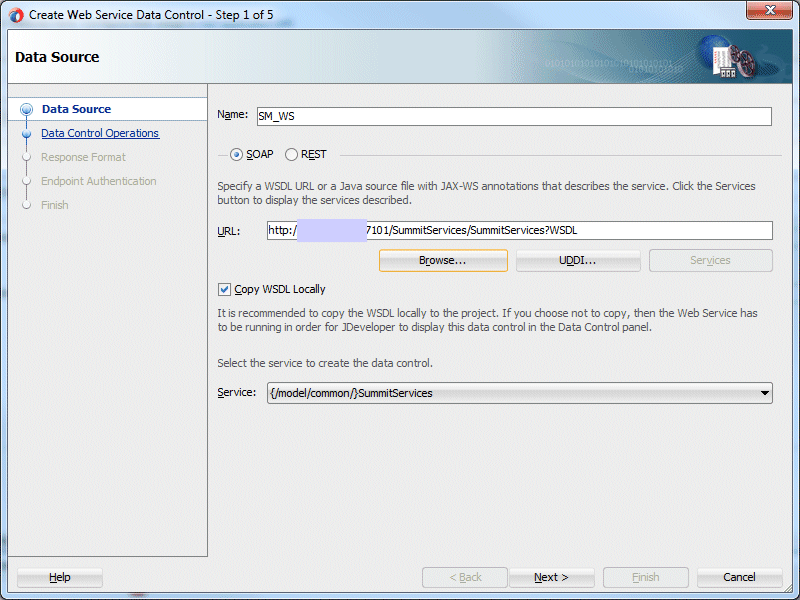
-
Click Next to see the operations that are available and shuttle both of them to the right.
Click Finish and then save all your work.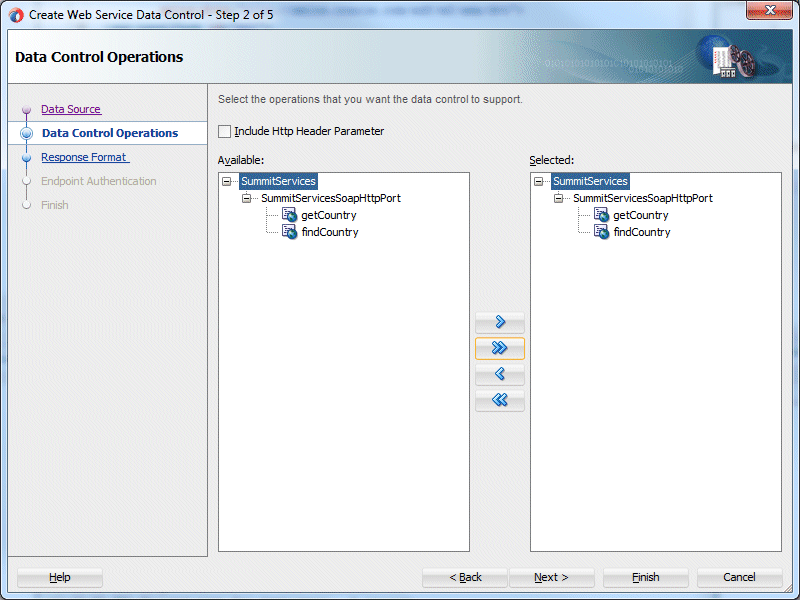
-
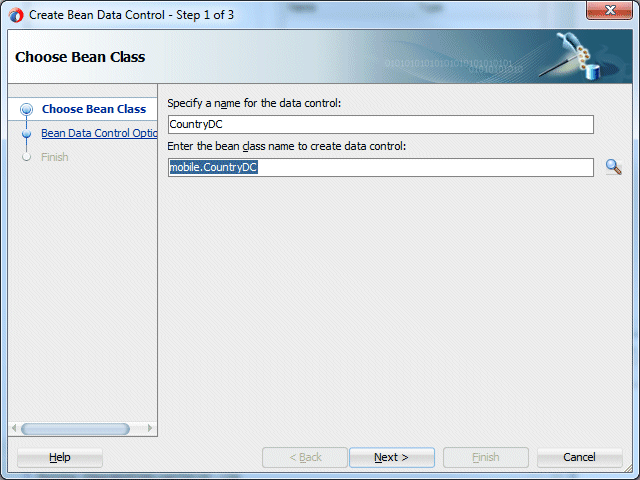
Next, create another data control, this time, for the CountryDC POJO you created earlier.
Expand the ViewController - Application Sources - mobile nodes and right click on the CountryDC. Then, select the Create Data Control menu option.
In the Create Bean Data Control pane, click Next and then Finish.
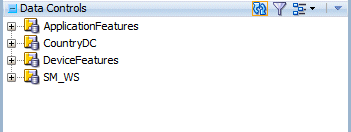
When the process completes the Data Control pane should show the two new data controls you created. If not, you may need to click the refresh button.
With the two data controls available you can now create the page.
-
To fix a bug with how the data controls are created, you need to modify the DataControls.dcx file.
Expand the ViewController – Application Sources – mobile nodes and double click the DataControls.dcx.
On the bottom of the editor, click the Source tab.
Find the dcStructureVersion property and set it to "1", like the image below.
-
Save your work.
In this section,you create a new application. feature and define it's contents to be a task flow. Then you'll create a MAF page on the task flow, and define it's content using the new data controls. All this work in this section is done in the SummitLocalDB application.
-
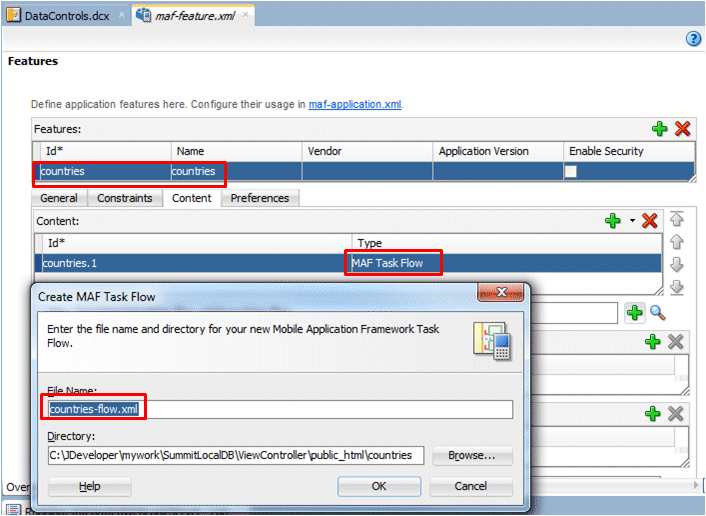
In the maf-feature.xml file, add a new feature named countries and create its content to be a MAF Task Flow and named countries-flow.xml.
-
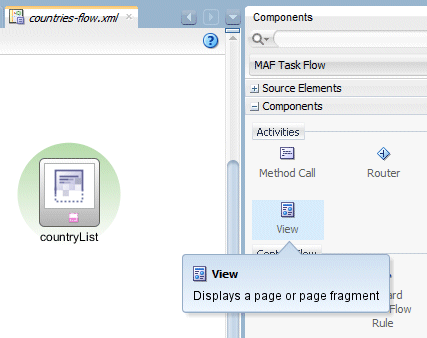
In the opened countries-flow.xml file add a View from the Activities components and name it countryList.
-
Add a Control Flow Case that starts and ends at the countryList. Name the flow refresh. When finished the task flow should look like the image below.
Then, save your work.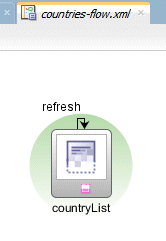
-
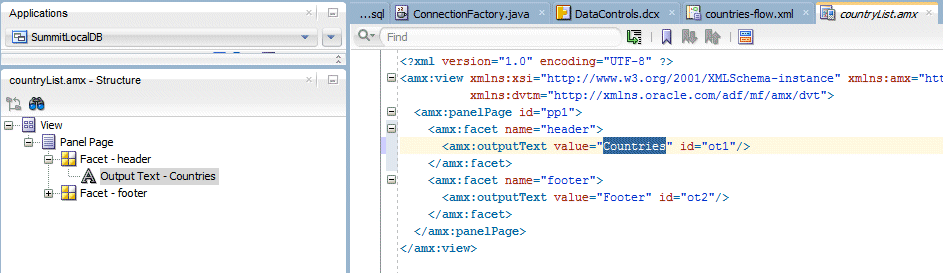
Double click the countryList view and in the create page pane unselect the primary and secondary facet check boxes. Ensure the header and footer facets are selected and then click OK.

-
In the header facet, set the Value property for the outputText to Countries and save.
-
In the footer facet, delete the OutputText.
Then add a Panel Group Layout component.
Inside the panel group layout add a Button and set the Text property to Refresh and the Action property to refresh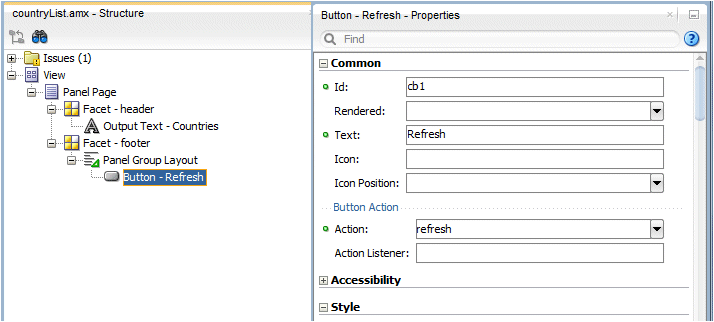
-
In the next steps add data components to the page.
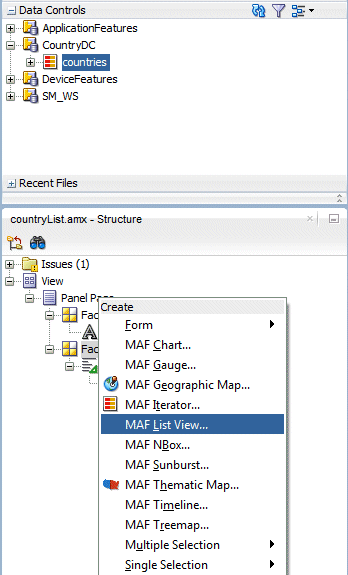
Since the CountryDC contains the code to determine where to retrieve records from, that is the data control we want to add to our page. Expand the CountryDC and drag the countries collection onto the Structure pane, then drop it on the Panel Page.
In the popup menu, select MAF List View…
-
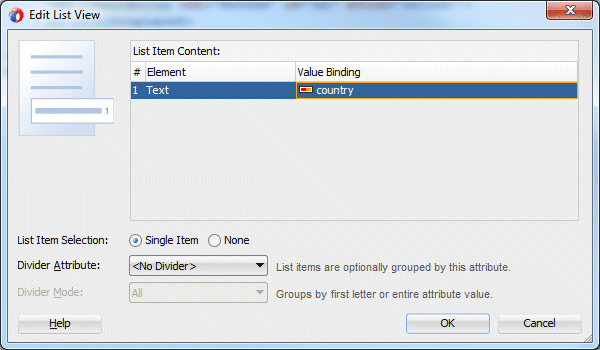
In the ListView Gallery, click OK. Then in the Edit List View pane, set the Value Binding property to country and click OK
-
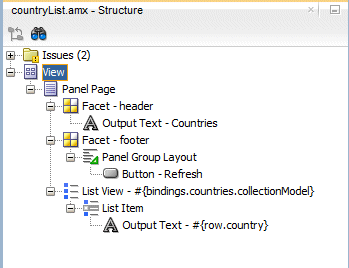
The expanded Structure window should look like the image below.
-
You now have included the data controls to retrieve the structure of the data, now you need to include a binding to the web service.
At the bottom of the page, click the Bindings tab.
-
Click the green plus sign next to the Executables.
In the Insert Item pane, select the iterator binding and click OK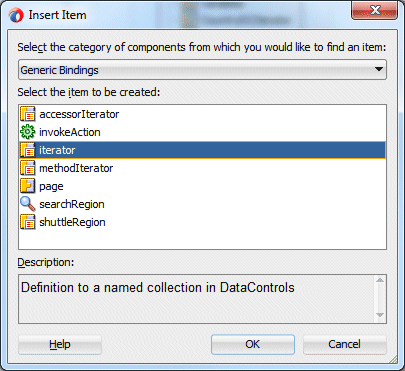
-
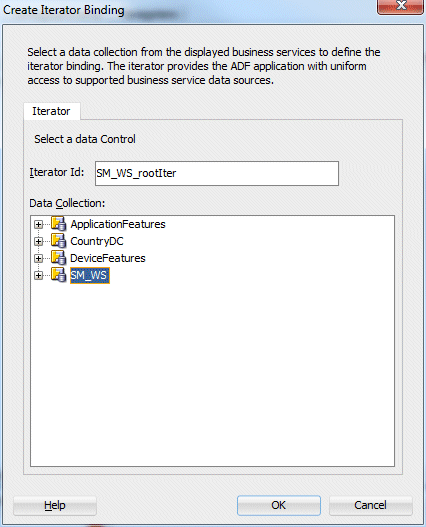
Then in the Create Iterator Binding pane, select the SM_WS data collection and click OK.
-
Save all your work.
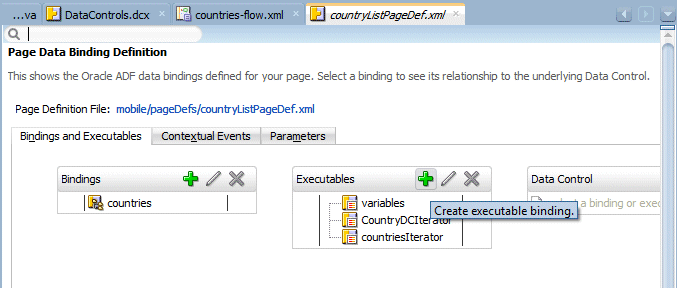
The bindings should look like the image below.
In the next section you’ll deploy and test the application.

 Expand all |
Hide all
Expand all |
Hide all