
 Part 2: Making Changes to an Application
| Requirements: |
|---|
To complete this tutorial, you must have installed Oracle Enterprise Pack for Eclipse 12.1.3.2 or later. You must also have an Oracle Cloud account that includes Oracle Developer Cloud Service and for deployment, Oracle Java Cloud Service. You can download Oracle Enterprise Pack for Eclipse (OEPE) from the OTN OEPE page. You can sign up for a free trial of Oracle Cloud at Oracle Cloud. |
| Purpose | Duration | Application |
|---|---|---|
| This tutorial shows you how to take an application from OEPE and move it to Oracle Developer Cloud Service. The tutorial also takes you through creating tasks, creating a review, and building and deploying an application. To make this process more focused, the tutorial uses a starter application that you need to download and install. To download the starter application, click the Download button, save the file to a location of your choosing, and import it into your workspace, which we will do in the first section of the tutorial. | 2.5 hours |  |
When you work in OEPE, you organize your work in projects that together make an application. For Oracle Developer Cloud Service integration, we'll start with an application, then push it to the Oracle Developer Cloud Service Git repository.
In this first section, you import the starter application into OEPE.
-
Open Eclipse and OEPE. HINT: navigate to where you installed OEPE and double-click eclipse.exe. Select a workspace of your choice and and open Workbench.
-
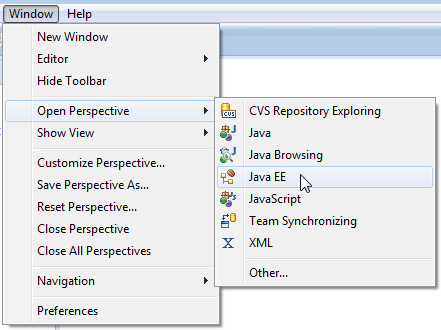
Since we are developing a Java application and using Oracle Developer Cloud Service, we want to use the Java EE perspective. From the menu, select Window > Open Perspective and click Java EE.
-
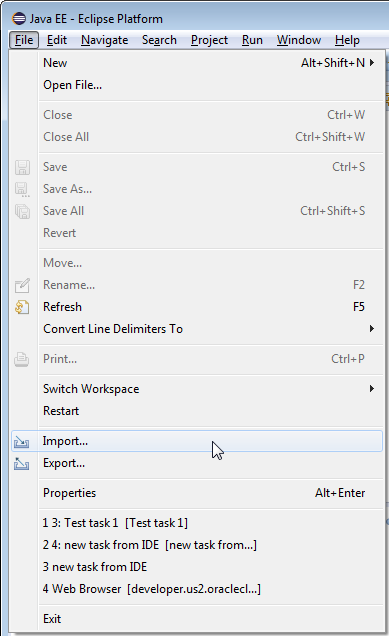
From the Eclipse menu, select File > Import.
-
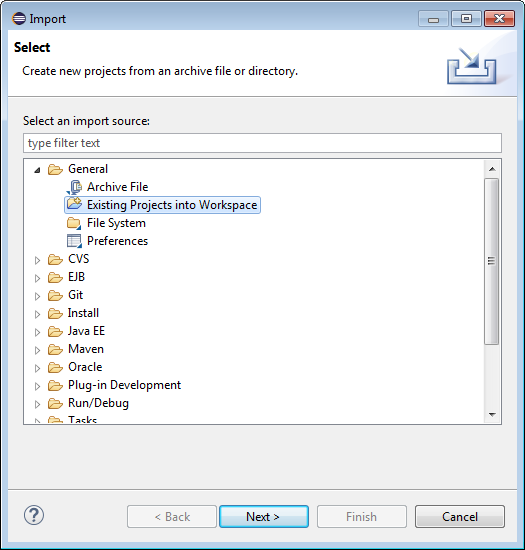
In the Import dialog, select General > Existing Projects into Workspace and click Next.
-
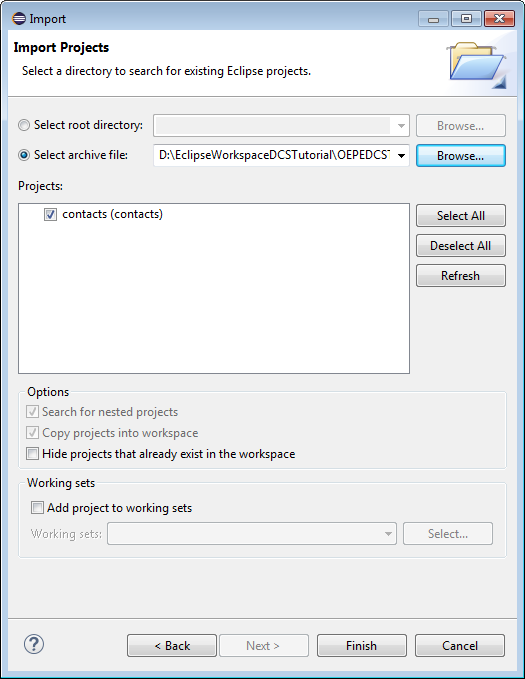
Click Select archive file, then use the Browse button to find and select the zip file you downloaded (oepedcstutorialstarter.zip). Click Finish to import the project. If you have not yet downloaded the starter application, go back to the top of this section to find the download link.
-
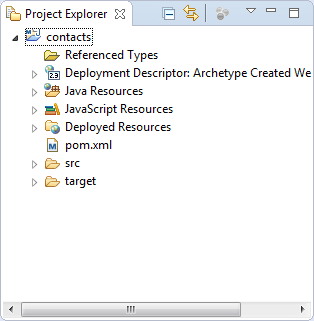
In the Project Explorer, expand the contacts project to see the artifacts within the project.
Now that you have imported the starter application into OEPE, you will create a connection to Oracle Developer Cloud Service and push the project to the cloud.
In Oracle Developer Cloud Service, projects are used to contain artifacts and facilities that represent an application. In this section, you create a project on Oracle Developer Cloud Service to hold your application.
-
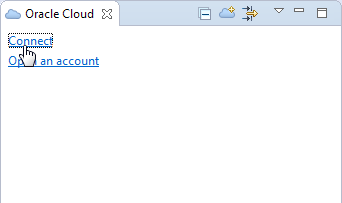
In the Oracle Cloud view, click Connect.
-
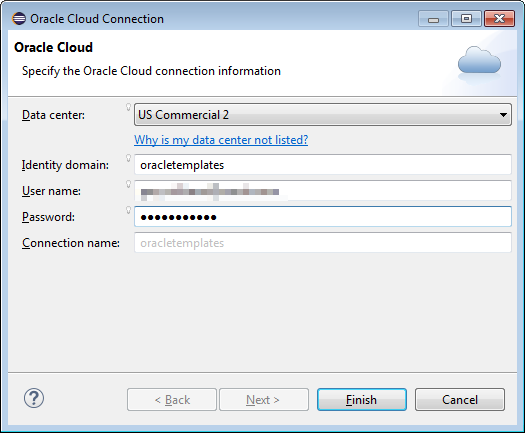
Enter the connection details for your Oracle Cloud account and click Finish.
-
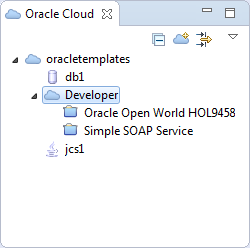
In the Oracle Cloud view, double-click Developer to activate the connection.

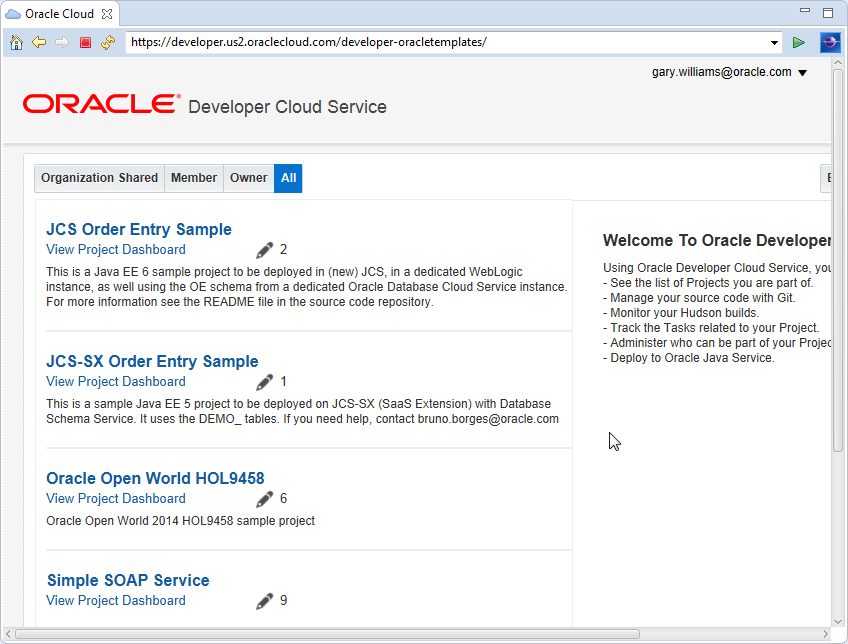
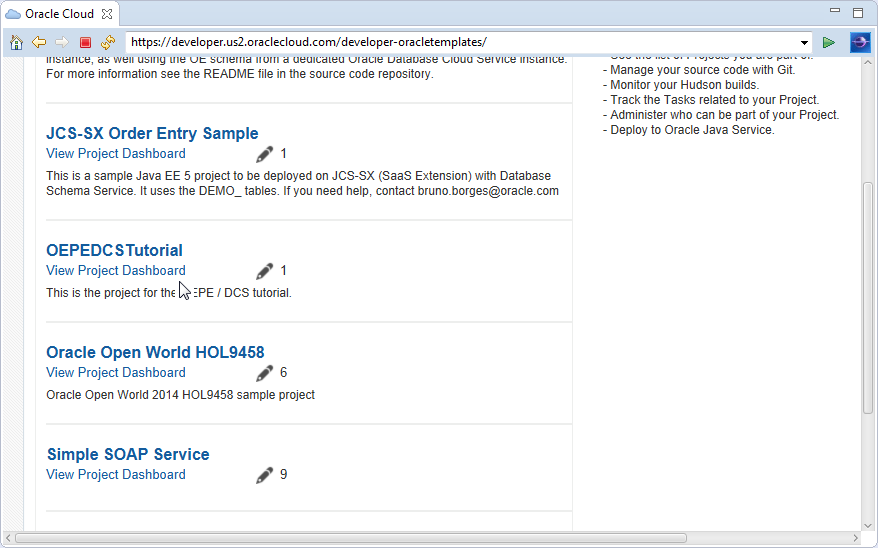
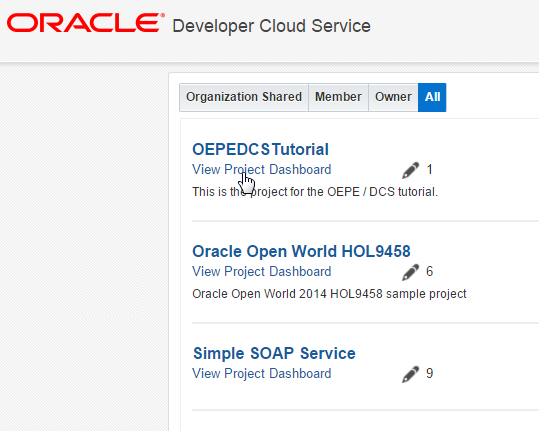
In this example, I have access to two existing projects. In your environment, you may or may not have access to other projects. In either case, you will create your own for this tutorial.
There are two ways to create an Oracle Developer Cloud Service project. One is to use a web browser, connect to Oracle Developer Cloud Service and create the project there. The other is to use the interface (web browser) from within OEPE. During this tutorial, you will be using both for various tasks. For this first task, you will be using the OEPE interface.
-
In the the Oracle Cloud view, right-click Developer and select New Cloud Project.

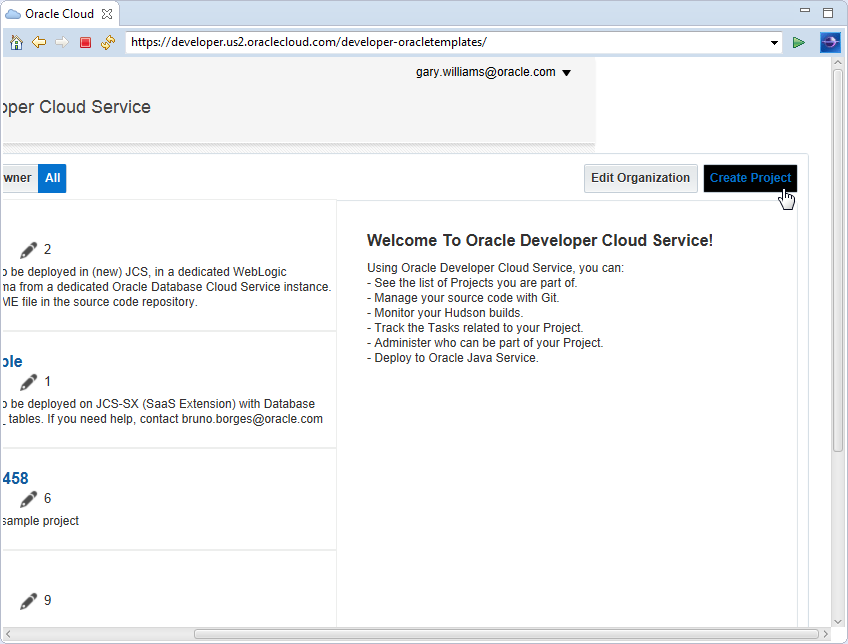
This will open a web browser window within OEPE and log in to the account you created for the connection.You will see any projects to which you have been granted access.
-
Either make the window larger or use the scroll bar to scroll to the far right side of the window and click Create Project.
-
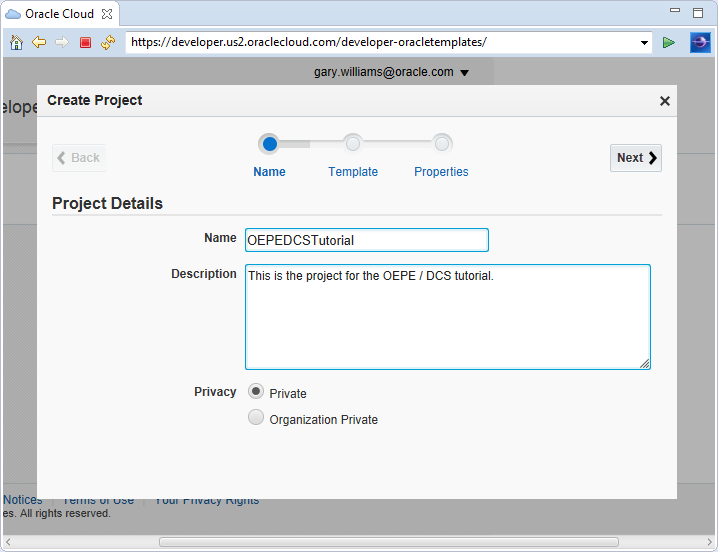
In the Create Project wizard, enter a Name and Description for your project. I am using OEPEDCSTutorial for the project name. Click Next.
-
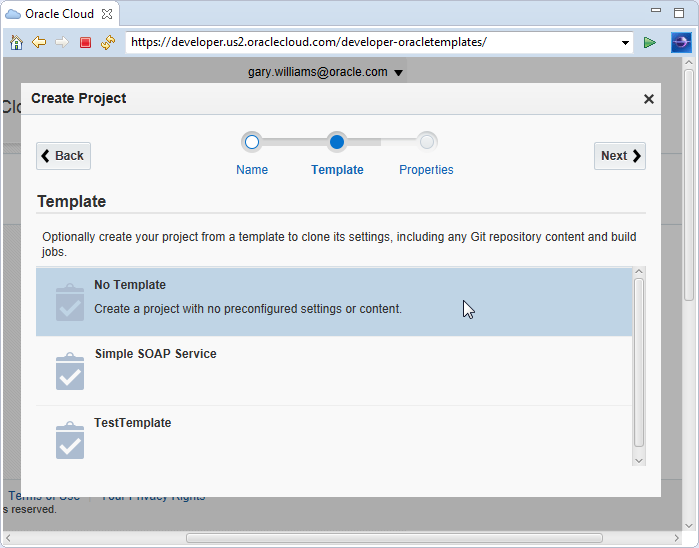
Select No Template and click Next.
-
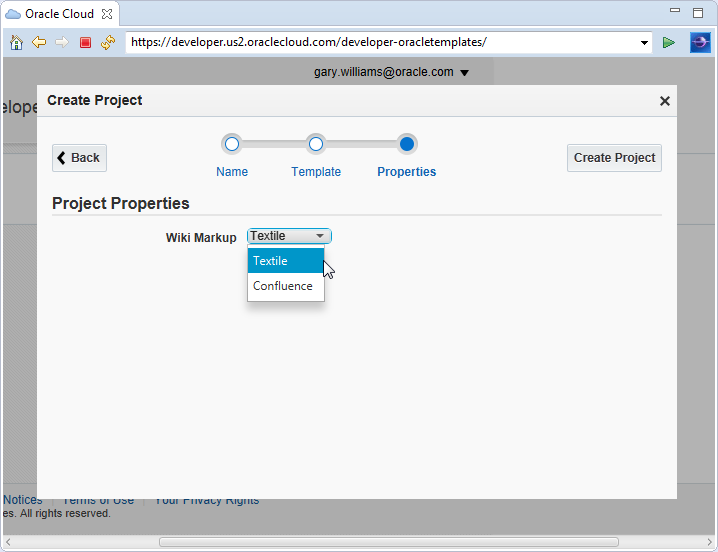
You can choose which type of Wiki Markup you want to use. I chose the default value of Textile. Click Create Project to finish.
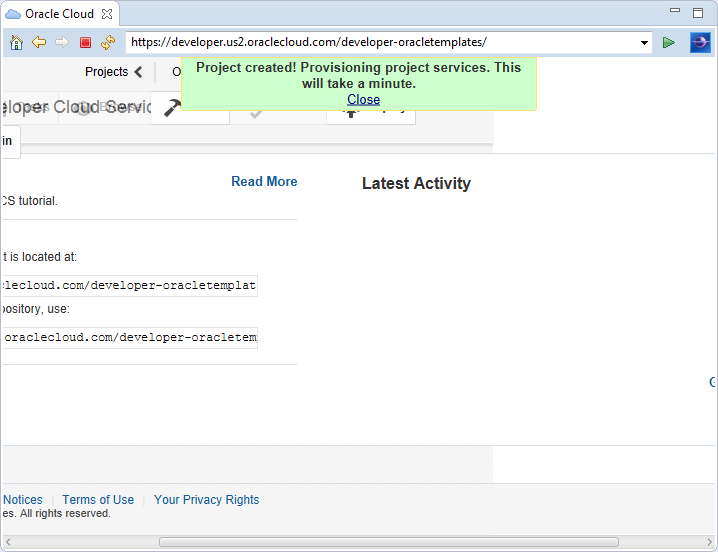
After you click Create Project, Oracle Developer Cloud Service begins the process of provisioning your account. This may take a minute or two. You will see a message similar to the following while it is provisioning.
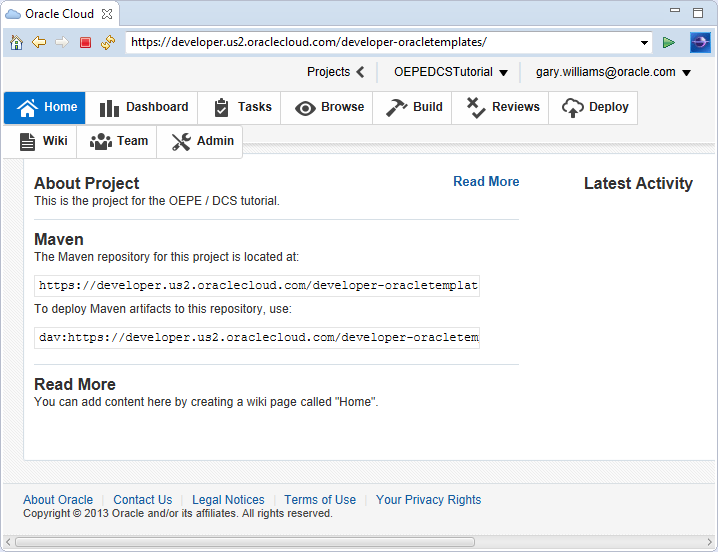
When the project provisioning is complete, you will notice that all the tabs) across the top of the home screen are available.
-
In the Oracle Cloud view, right-click Developer and select Refresh.
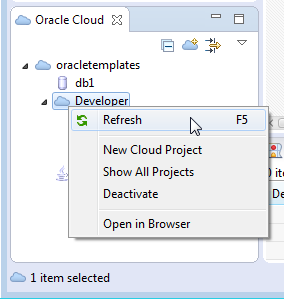
Notice that you now see your new OEPEDCSTutorial project in the view.
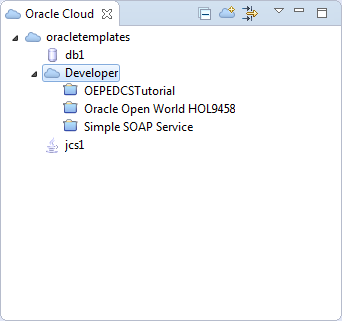
When the Oracle Cloud view connects to your account, it may see multiple projects (as in this example). However, to get access to the project, you have to activate the project. This holds true for all of the parts of the project as well, as you will see later.
OEPE provides a rich set of interfaces to Oracle Developer Cloud Service. To use those tools, you first establish a connection with your account on Oracle Developer Cloud Service.
-
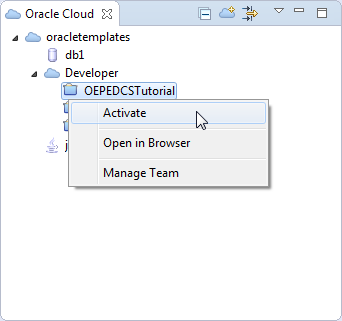
In Oracle Cloud view, either double-click the OEPEDCSTutorial project, or right-click the project and select Activate.
-
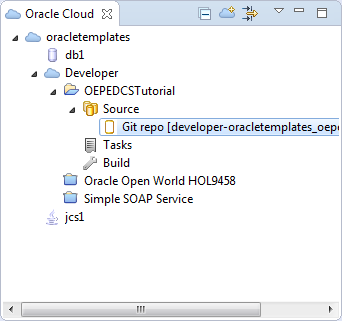
Once the project is activated, expand the Source node to see the Git repository.
-
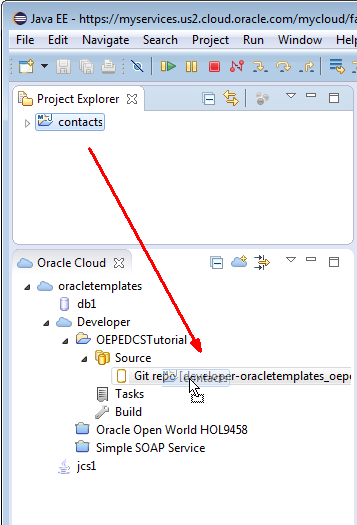
One of the features of OEPE is the ability to move a project into an Oracle Developer Cloud Service Git repository using Drag and Drop. Drag contacts from the Project Explorer to the Git repository in the Oracle Cloud view.
-
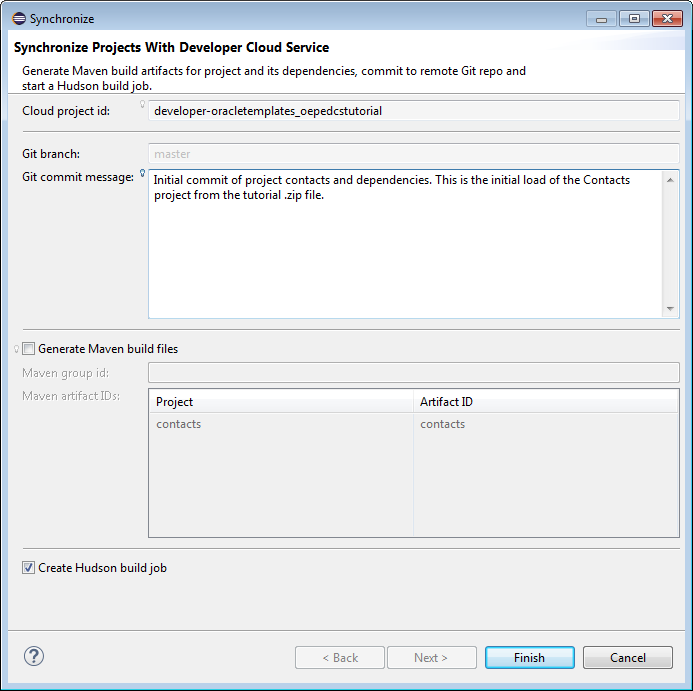
In the Synchronize dialog, enter a Git commit message, make sure the Generate Maven build files is NOT selected and that the Create Hudson build job IS selected and then click Finish. You don't need to generate the Maven build files because the project is already a Maven project and the build files (.pom) already exist in the project.
NOTE: This synchronize wizard does a number of things behind the scenes:
-
Clones the Oracle Developer Cloud Service Git repository, pushes the Eclipse project files to the local repository, and synchronizes with Oracle Developer Cloud Service Git master branch.
-
If selected, the Generate Maven build files generates a maven pom.xml file for the project(s) and pushes Java Build Path library dependencies into the Oracle Developer Cloud Service project Maven repository. In our specific example the pom.xml is already included in the project download files so there is no need to regenerate.
-
Creates new Hudson build job for each project that is being pushed, correctly references the maven pom.xml, and saves the build artifacts.
-
-
Click OK in the Success dialog.

-
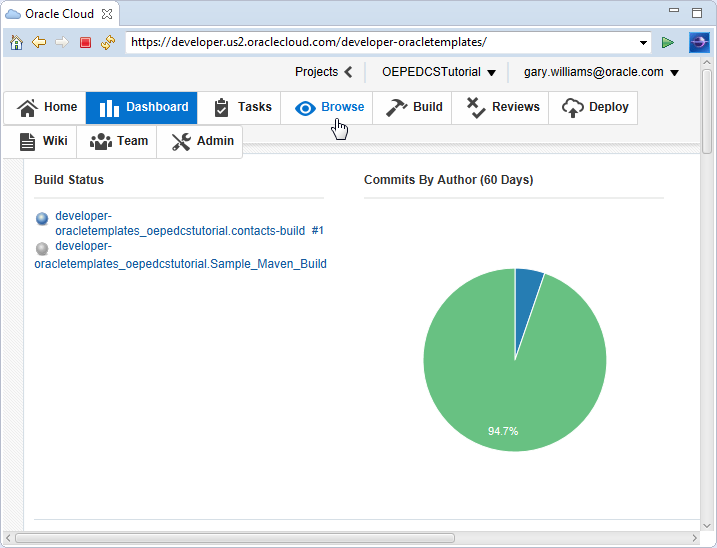
In the Oracle Cloud view (in OEPE), click View Project Dashboard under the OEPEDCSTutorial project.
-
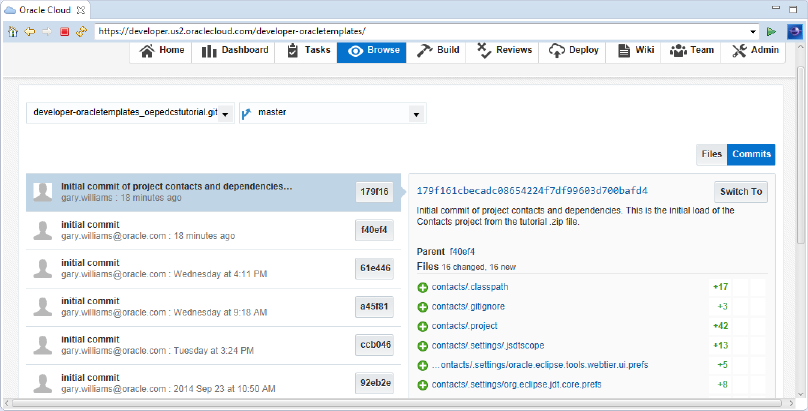
In the project Dashboard, click Browse.
-
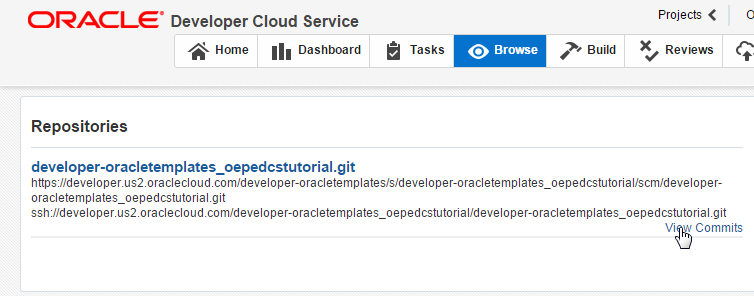
Click View Commits under the repository.
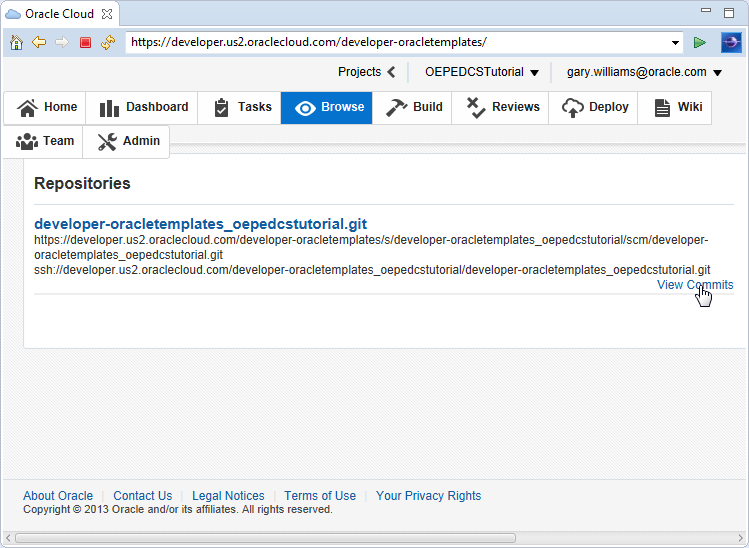
In the Browse tab, you will see the files and commits that you have made to the repository. Notice the list of files that are from the contacts project.
So far, we worked only from within OEPE. In the next few steps, you will connect to Oracle Developer Cloud Service using a browser and look around at the facilities that Oracle Developer Cloud Service provides.
You've already seen Oracle Developer Cloud Service from OEPE. In this section you connect to Oracle Developer Cloud Service in a web browser and explore the Web UI.
-
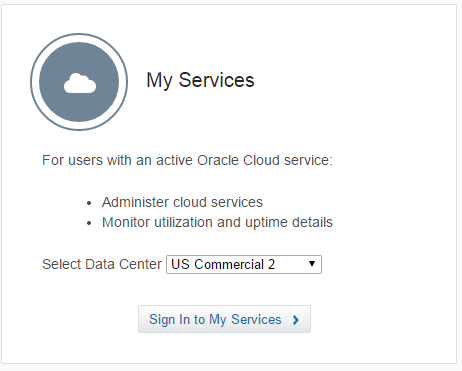
Open a browser and connect to your Oracle Developer Cloud Service service. (https://cloud.oracle.com)
-
Select your Data Center and click Sign In to My Services.
-
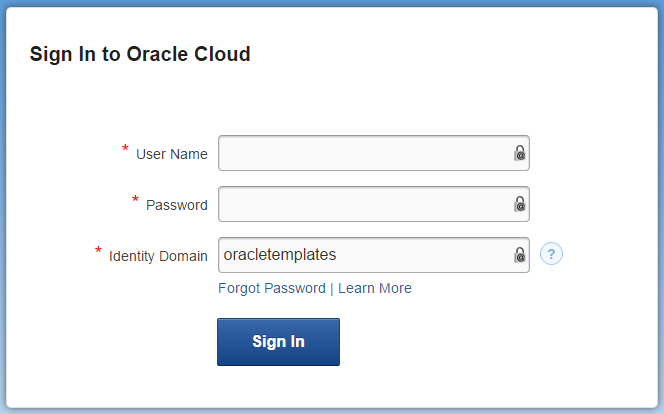
Provide your User Name, Password, and Identity Domain and click Sign In.
-
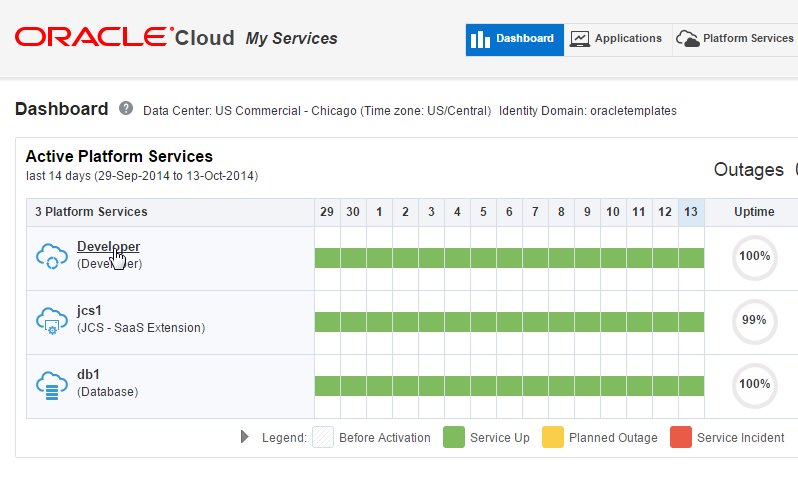
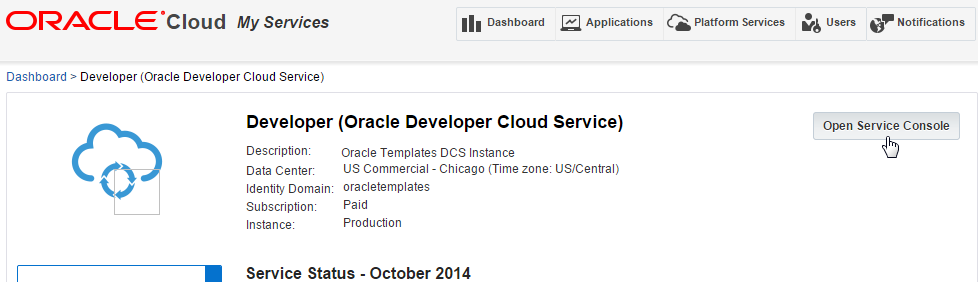
Once you have authenticated, you will see a Dashboard that displays all your active platform services. Click the Developer (Developer) service link.
-
From the Developer Cloud Service Dashboard, click Open Service Console . This will open the Oracle Developer Cloud Service Projects view.
-
In the Projects View, click View Project Dashboard under the OEPEDCSTutorial project.
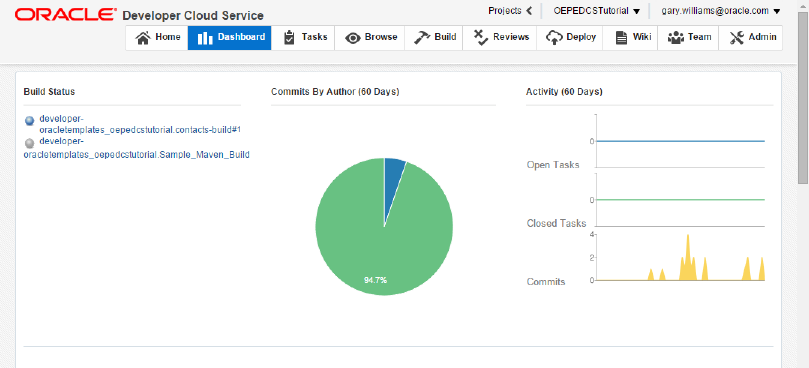
The Dashboard shows the build status, commits, an activity graph, and recent activities that have occurred in the project.
-
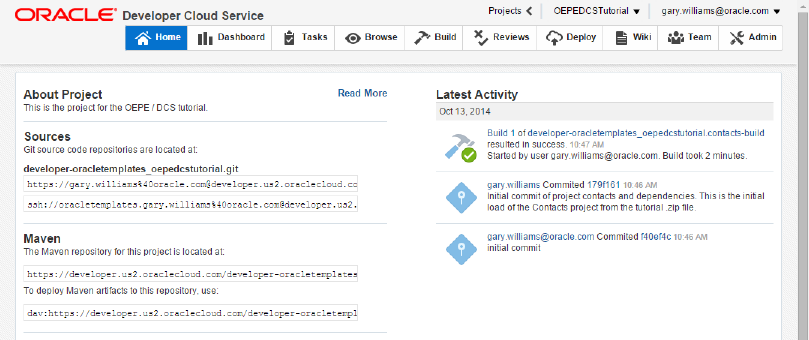
Click the Home tab to see details about the project including the location of the Git source code repositories and the Maven repository. You will also notice new activities within the project as they occur.
-
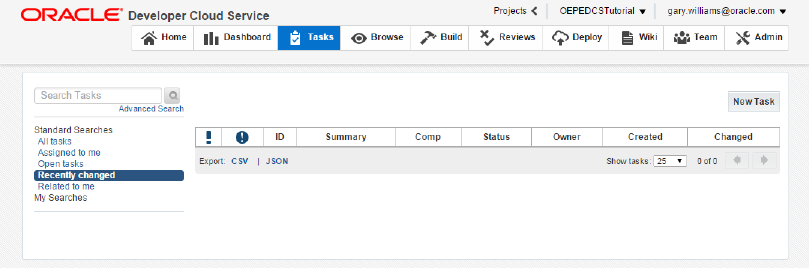
Click the Tasks tab to see where you can create and assign new tasks to team members. You can also search for specific tasks by using the Advanced Search features or the Standard Searches that are provided. Later in this tutorial, you will create some tasks.
-
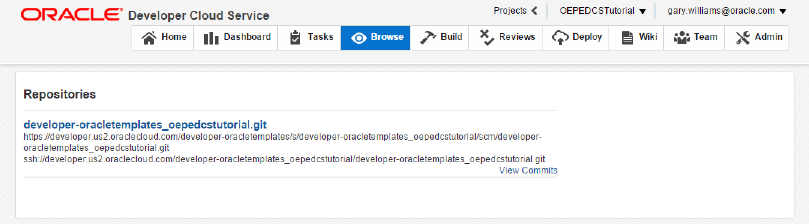
The Browse tab allows you to view the contents of the Git repositories and perform file diffs, etc.. As you saw earlier, you can click View Commits to see the files and commits that have occurred.
-
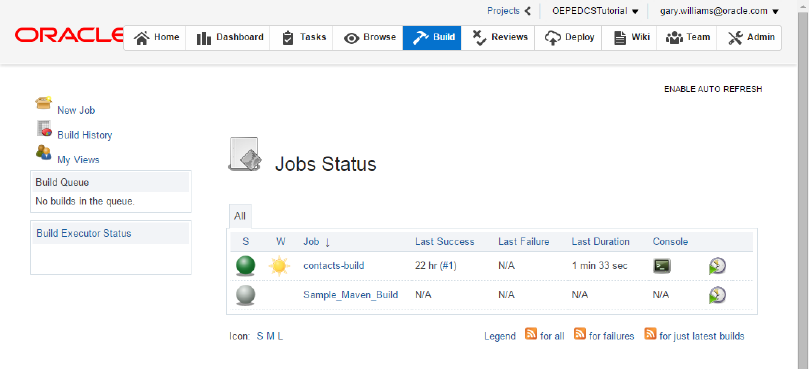
The Build tab allows you to create Hudson build jobs, further configure your jobs, start builds, check the status of builds, view build history, and perform other tasks..
-
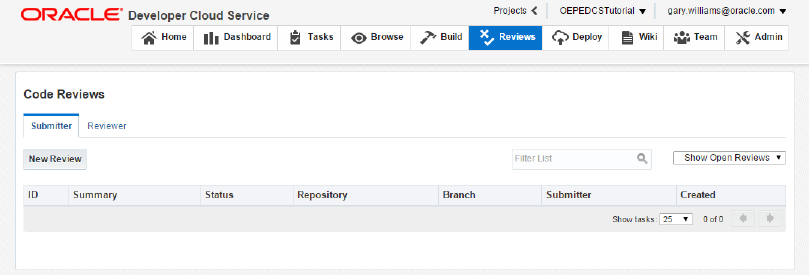
The Reviews tab allows you to create code reviews and invite team members to participate in the code review. Each team member is allowed to approve or reject the code and provide a description of their analysis. The team member that created the code review has the final approval. You can also choose to see only the reviews that are still open or see all the reviews.
-
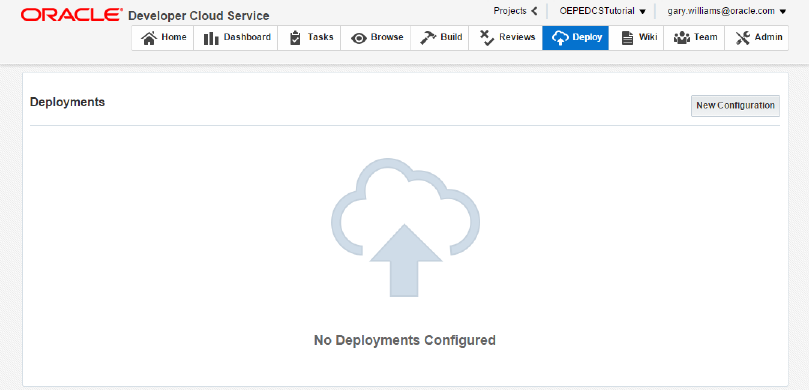
The Deploy tab allows you to create deployment configurations for your project. You can start a deployment, undeploy an application, redeploy an application, edit, or delete a deployment configuration. Later in the tutorial, you will create a deployment configuration to deploy and test your application.
-
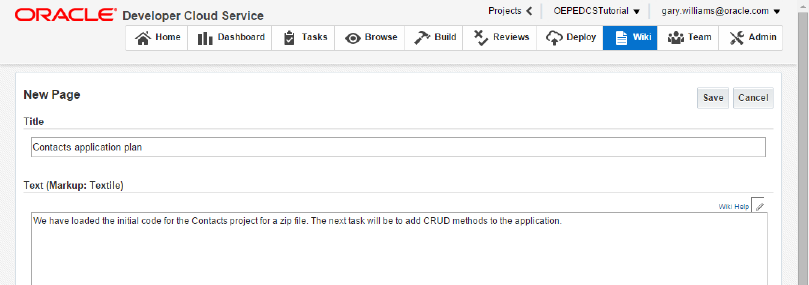
The Wiki tab allows you to create Wiki pages for collaboration with members of your development team. This is a good place to collect use cases and other design documents for your application.

-
Create a Wiki page for your project. Click New Page button and provide some descriptive text for your project. You can use any text you want or you can use the text in the image as a guide. Click Save to create the Wiki page.
-
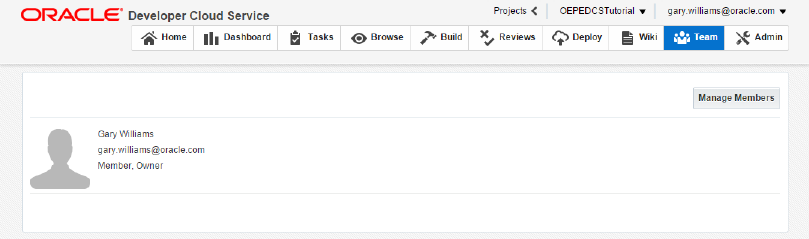
The Team tab allows you to manage your development team.
-
Click Manage Members to open the Admin tab, which is available to the owner of a project. Here you can manage project settings, tasks, source code, and the project team. On the Team page, you can add new members to collaborate on your project. On the Source Code page, you can add new hosted repositories or even external repositories. On the Tasks page you can create new Products, Iterations, Tags and Custom Fields. Explore the various features. In the sample below, you see how you can add a team member to the project.

You have now imported a project into OEPE, pushed the source code to a new Oracle Developer Cloud Service project Git repository and explored Oracle Developer Cloud Service in a browser. In the next section, you will use some of the Oracle Developer Cloud Service facilities to manage your project.
In the next few steps, you will explore the various features of Oracle Developer Cloud Service.
In the previous section, you created a Cloud project and pushed your code to the remote Git repository. However best practices dictate that when you make changes to the code, you make those changes in a Git branch and not in the baseline code. When you pushed your project, it created a ‘master’ branch in the Git repository. In this section, you create a branch specifically for the code changes you want to make.
-
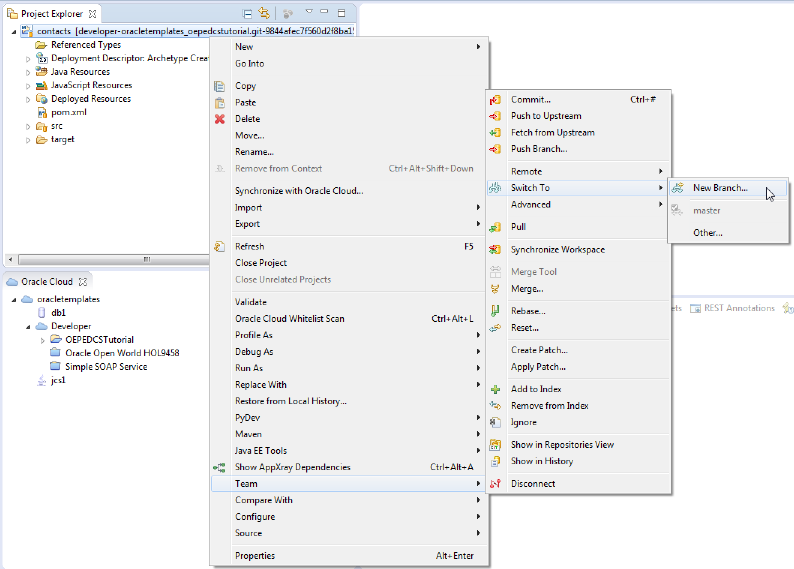
In the Project Explorer, right-click contacts and select Team > Switch To > New Branch.
-
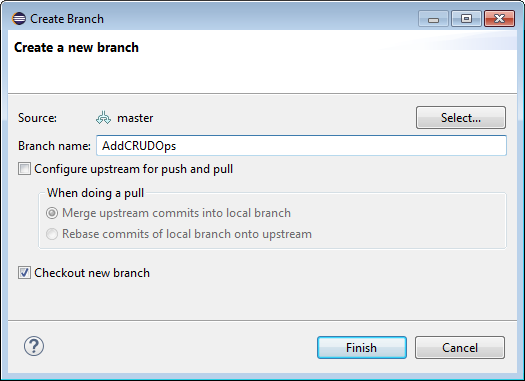
The purpose of the branch is to add code to the application to provide CRUD operations. Name the branch AddCRUDOps and then click Finish.
-
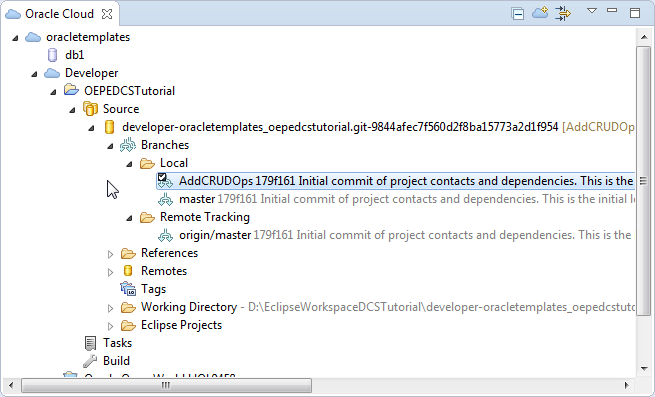
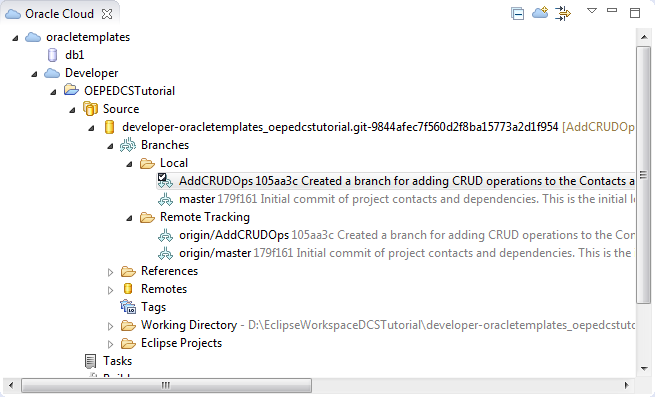
In the Oracle Cloud view, expand the Source node > [Git repo] > Local. You can see that there are now two branches and that the AddCRUDOps branch is selected. Notice also that there is only one branch in the Remote Tracking node.
When you created the branch (using Switch To > New Branch), you created the new branch in your local Git repository. The next step is to push that branch to your project's Git repository in Oracle Developer Cloud Service.
-
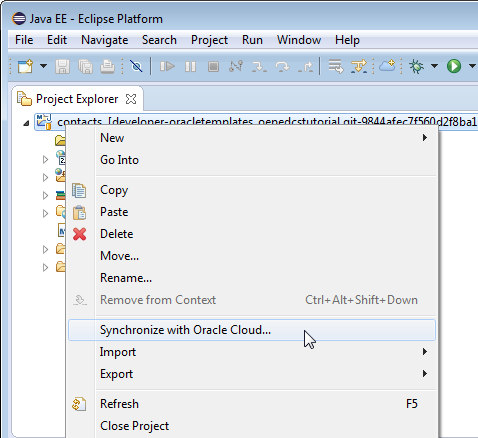
In the Project Explorer, right-click contacts and select Synchronize with Oracle Cloud.
-
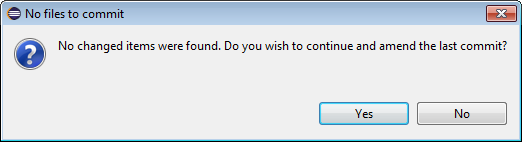
OEPE knows that you haven't made any changes to the code, so it will prompt you to be sure. Click Yes.
-
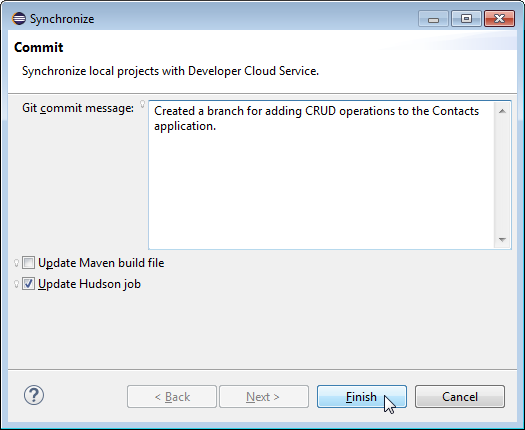
Enter a Git commit message for the new branch, something like "Created a branch for adding CRUD operations to the Contacts application." Select Update Hudson job and click Finish. Selecting Update Hudson job will change the current Hudson job to point to the new branch (AddCRUDOps) rather than the original master branch.
-
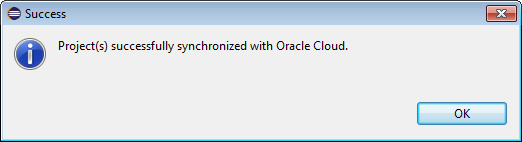
Click OK to dismiss the success message.
-
In the Oracle Cloud view, expand the Local and Remote Tracking nodes and notice that both branches are displayed in both nodes. This shows that the branch was indeed pushed to the remote Git repository on Oracle Developer Cloud Service.
-
Navigate back to your open browser that is pointing to your Oracle Developer Cloud Service project. If it is not already open, click the Browse tab and then View Commits to see the repository contents.
-
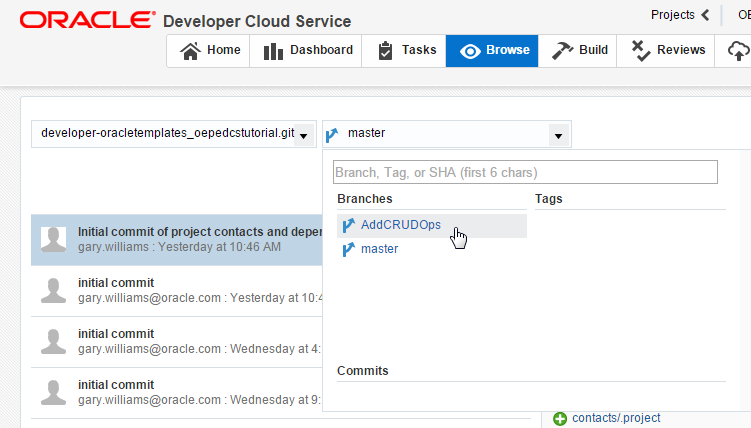
The branch that is currently displayed is master. Use the Drop-down list to select AddCRUDOps as the active branch.
-
Click the Build tab to see that adding the branch and updating the Hudson job caused another build to execute.

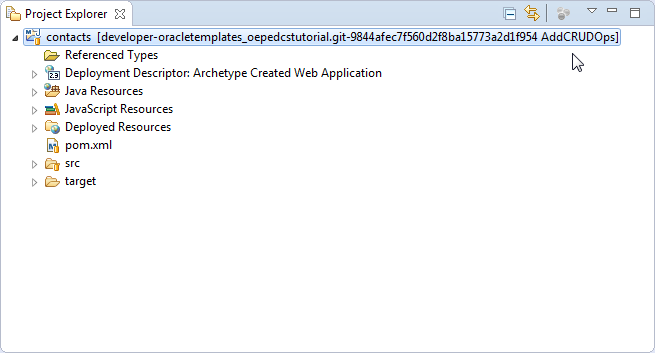
Notice in the Project Explorer that the end of the Git repository name is now AddCRUDOps.
In this part of the tutorial, you have imported a starter application into OEPE and pushed it to Oracle Developer Cloud Service. You also explored the Oracle Developer Cloud Service web UI and created a working branch of your application. In the next part of this tutorial, you will add some code and explore other features of Oracle Developer Cloud Service.

 Expand all | Hide all