
 Part 2:
The application uses a simple Java class to store the data and displays a list of employees on one page and a graph of salaries on another.
In Part 2 of the tutorial, you add specific device integration to your application..
| Assumptions: |
|---|
To complete this tutorial you must have installed Oracle Enterprise Pack for Eclipse12.1.3.4. You must also have the Android SDK version 21.x (min) - API level 21 or above installed. If you choose, you can deploy the application to a connected Android device. The tutorial demonstrates deploying the application to an Android emulator. You launch the emulator using the Android Virtual Device (AVD) Manager, which is part of Android SDK Tools.. If you are using an iOS environment, you can use the following tutorial to set up the development environment: Set Up and Configure an iOS Environment. If you are using an Android environment, you can use the following tutorial: Set Up and Configure an Android Environment. |
| Purpose | Duration | Application |
|---|---|---|
| This tutorial shows you how to develop applications with OEPE and Mobile Application Framework. To see the complete application you will create, click the Download button to download a zip of the finished application, and import it into your workspace.. | 2.5 hours |  |
When you work in OEPE, you organize your work in projects that together make an application.
In this first section, you create a MAF application by using the New MAF Application Wizard. You then create a couple of mobile features that will hold the application you are be building.
-
Open OEPE. HINT: navigate to where you installed OEPE and double-click eclipse.exe
-
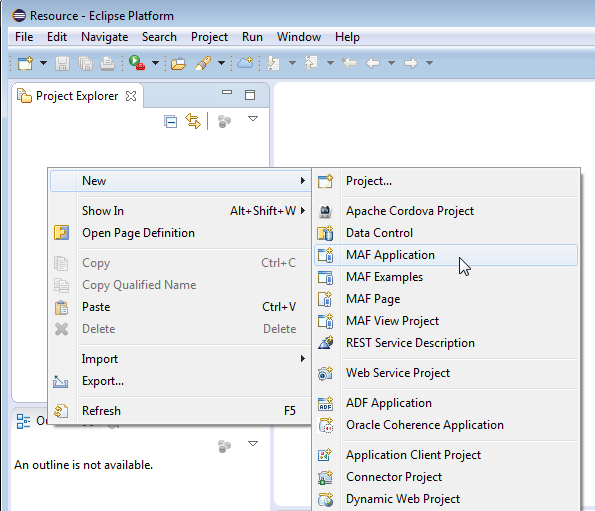
Right-click inside the Project Explorer and select New > MAF Application.
-
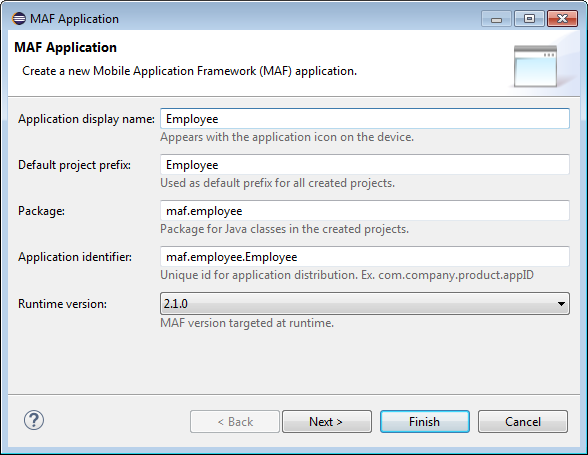
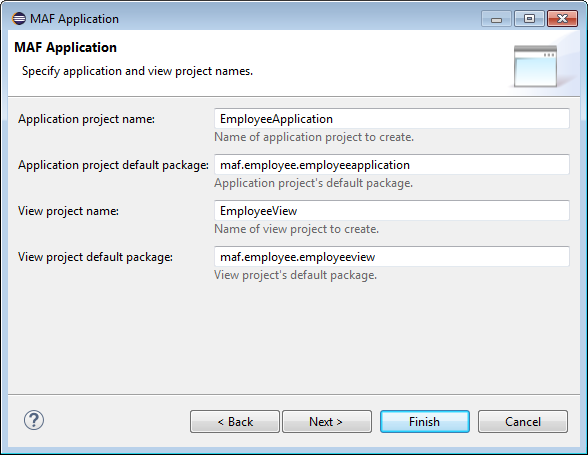
Enter Employee as the Application display name and click Next.
-
Click Next to accept the default values for the Application project name and the View project name.
-
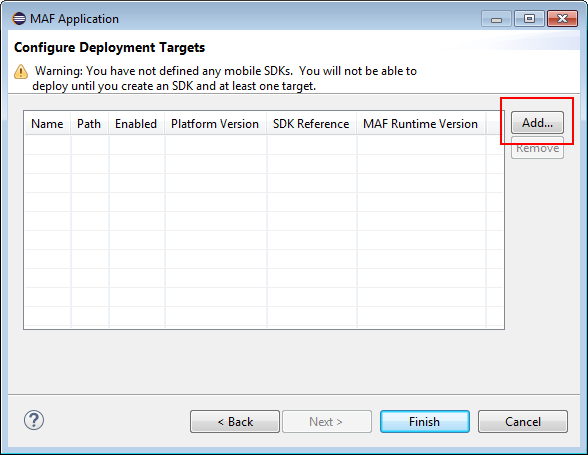
The next pane will show you the MAF runtime version. Click Add to Add a Deployment Target.
-
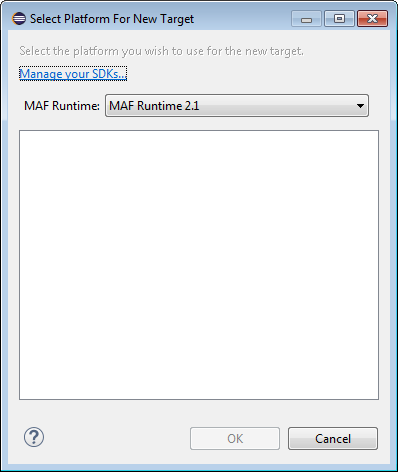
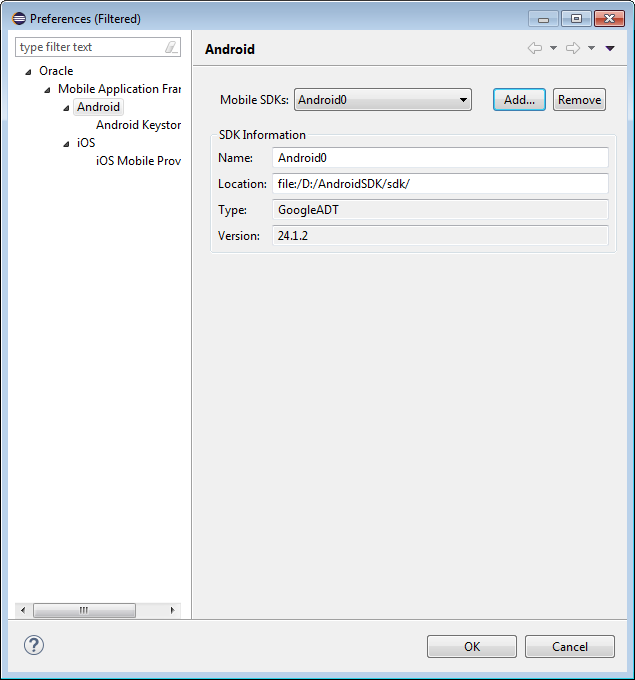
If there are no Targets available, click Manage your SDKs.
-
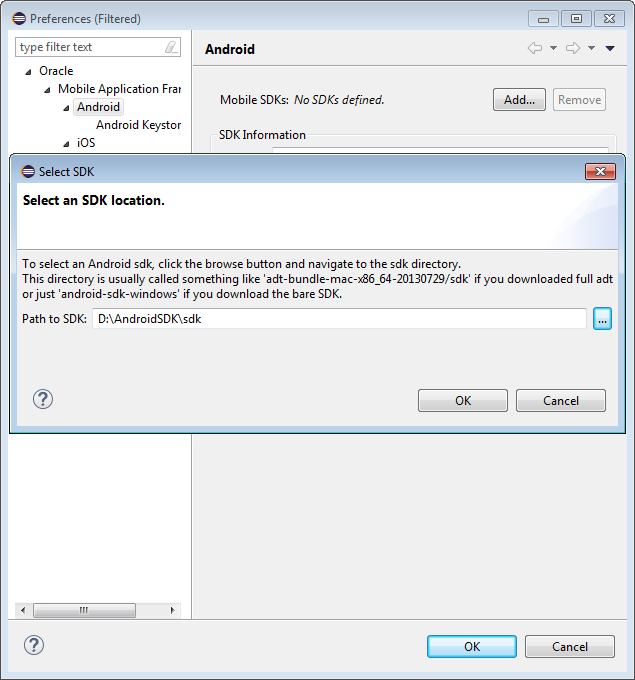
Click Add and select the location of your Android SDK.
-
Click OK to accept the SDK and settings.
-
Select Android 21.0.0 [SDK is Android] and click OK.
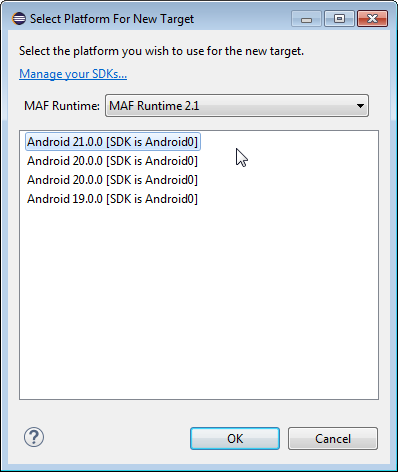
-
The Deployments Target should look like the following. Click Finish..
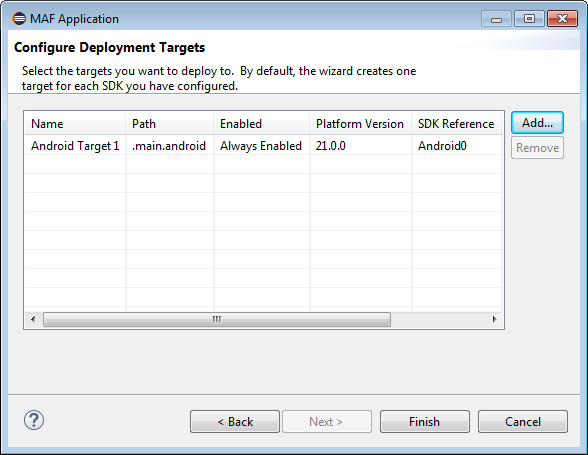
-
After the project is created OEPE will ask you to confirm that you want to open this project with the Oracle MAF perspective. Click Yes to agree and open the project.
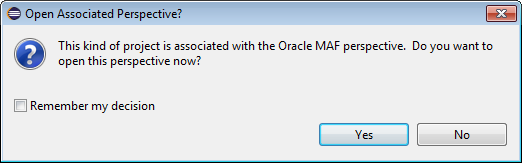
-
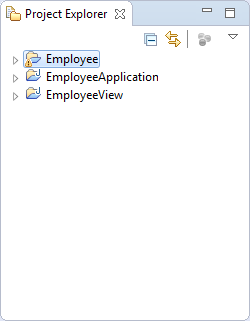
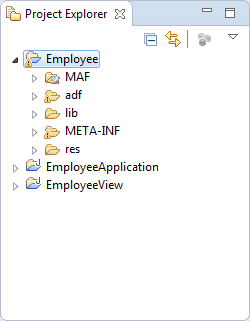
To explore those artifacts, expand Employee in the Project Explorer.
-
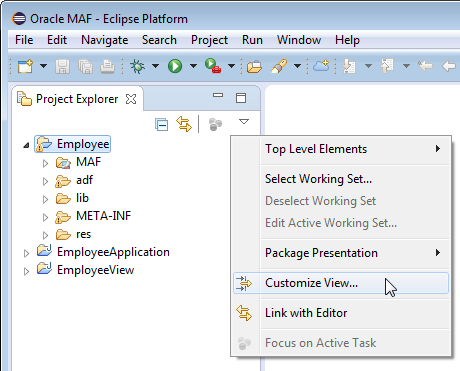
Click the down arrow in the Project Explorer toolbar and select Customize View.
-
In the Customize View dialog, deselect .* resources and click OK.
-
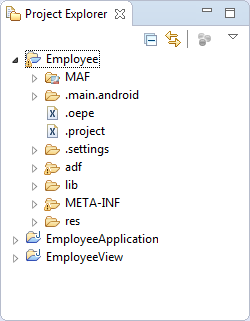
The Project Explorer now shows .main.android as a folder. Expand .main.android to see the package and deploy artifacts.
-
Open the Customizations dialog again, select .* resources and click OK. This will filter the .* resources from the Project Explorer view.
-
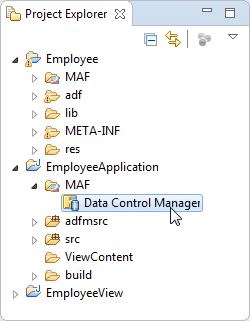
Expand EmployeeApplication > MAF and double-click Data Control Manager.
-
In the Data Control Manager, expand both the DeviceFeatures and the ApplicationFeatures. Notice the features that are automatically available for your application.
The Project explorer should look something like the following.
In the next few steps, we'll explore some of the artifacts that are created as part of the MAF application project.
As you can see, each MAF application will consist of one top-level or assembly project, one application project and one or more view projects. The top-level, or assembly project, holds all of the artifacts required for packaging and deployment of the application.

The EmployeeApplication project contains a Data Control Manager which abstracts the device features and the application features.

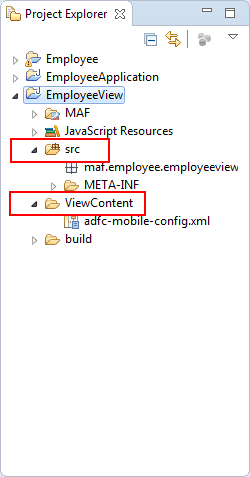
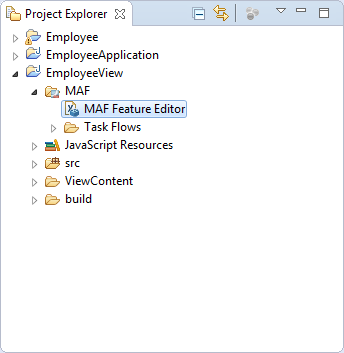
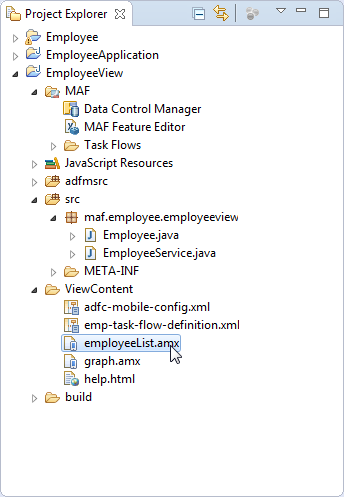
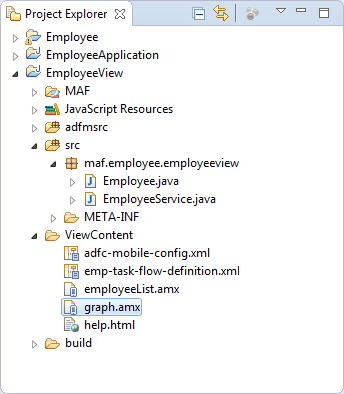
The majority of the work you will do in this tutorial will be in the EmployeeView project. The artifacts you will create will be mainly in the source folder (src) or the in the View Content folder. The image below shows those two folders expanded.
Now you have created the MAF application and explored some of the artifacts, we can get started building a MAF application.
When you deploy an Oracle MAF application, the application will be a single application on the mobile device. The application may consist of several parts. For example, there may be a search component, a document (like a help page), a data entry form, or even a list. Each of these parts is defined as a feature within the application. In this section of the tutorial, you create the features that you will deploy as part of your application.
The features of an Oracle MAF application are defined in the maf-feature.xml file. OEPE provides the MAF Feature Editor to manage the artifacts in this file.
-
Close any open editor tabs by clicking the X on the top-right corner of the tab.

-
In the Project Explorer, expand EmployeeView > MAF and double-click MAF Feature Editor which will open the editor.
-
In the editor, click the Add button (green plus sign
 ) to add a feature.
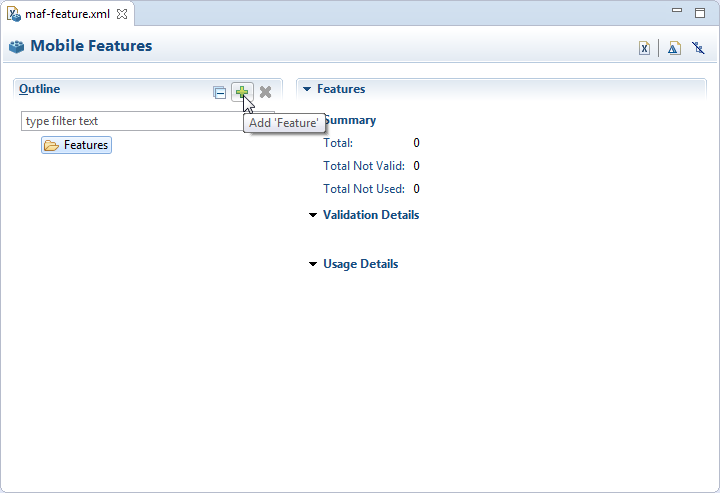
-
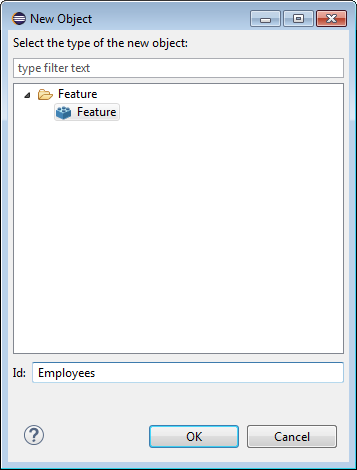
Set the Id of the new feature to Employees and click OK.
-
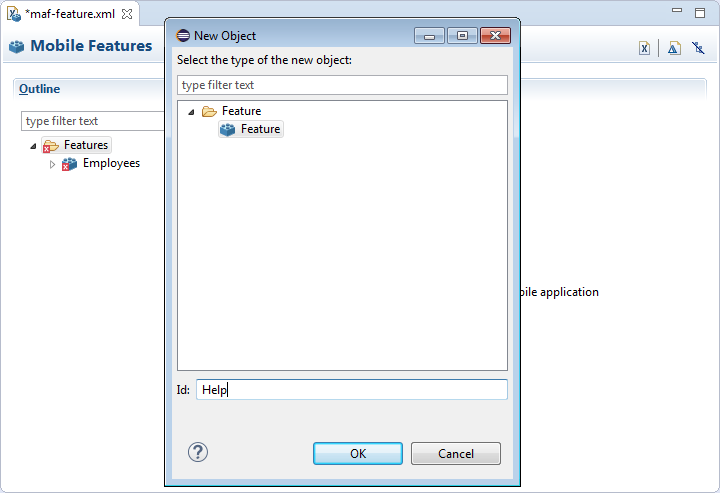
Click the top level Features in the outline, then add a second feature and set its Id to Help. Click OK to create the Feature.
-
Save your work. It is important that as you work, you save your work frequently. There are several ways you can save your work.
1) Click the Save or Save All icons on the toolbar.
2) Use the menu and select File > Save or File >Save All.
1) Use the shortcut keys CTRL + S for save or CTRL + Shift + S for save all.
Whatever method you choose, save often.
-
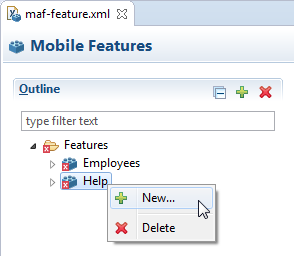
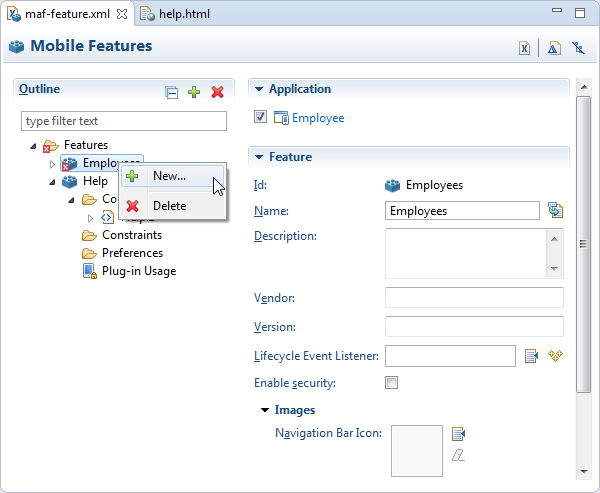
Right-click the Help feature and select New.
-
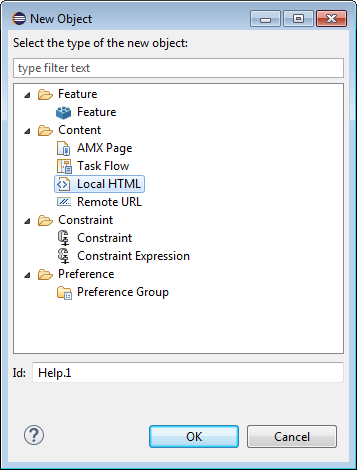
In the New Object dialog, select Content > Local HTML and click OK.
-
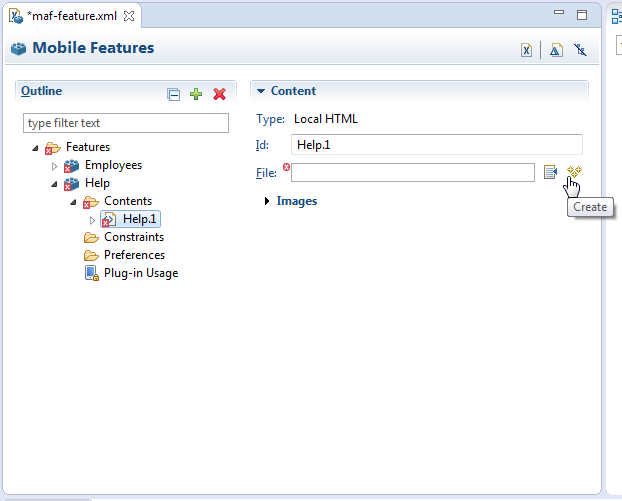
Select Help.1 in the Outline and click the Create icon which is next to the file field.
-
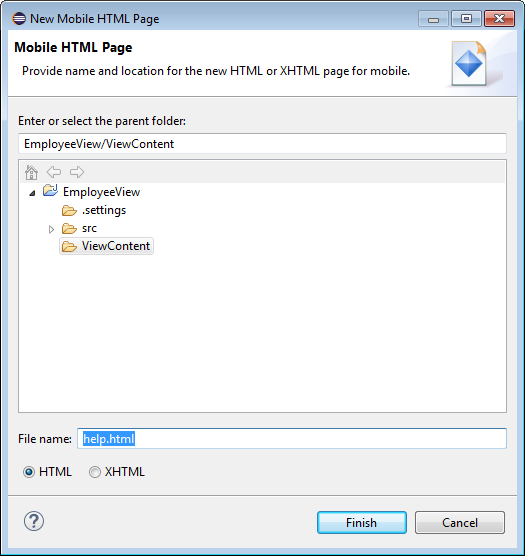
In the New Mobile HTML dialog, make sure the View Content is the selected folder and set the File name to help.html and click Finish to create the page.
-
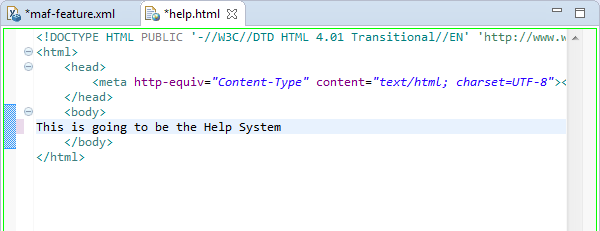
Add the text "This is going to be the Help System" between the opening <body> tag and the closing </body> tag.
-
Save your work.
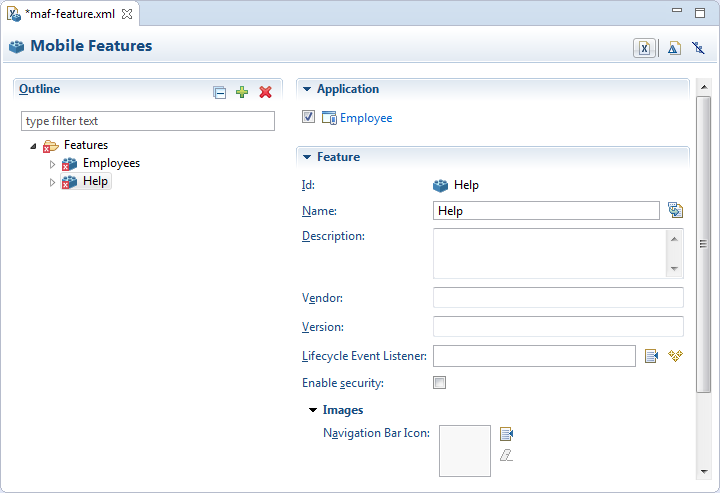
The Mobile Features should look something like:
Each feature is backed by some type of content. You will define the content for the features you just created in the next few steps.
The editor will open for the help.html file.
In this section you create an MAF task flow that will be consumed by the Employees feature. An MAF task flow contains multiple pages that interact with one another. The task flow provides structure to the interaction.
-
Click the maf-feature.xml tab to get back to the MAF Feature Editor.
-
Right-click the Employees feature and select New.
-
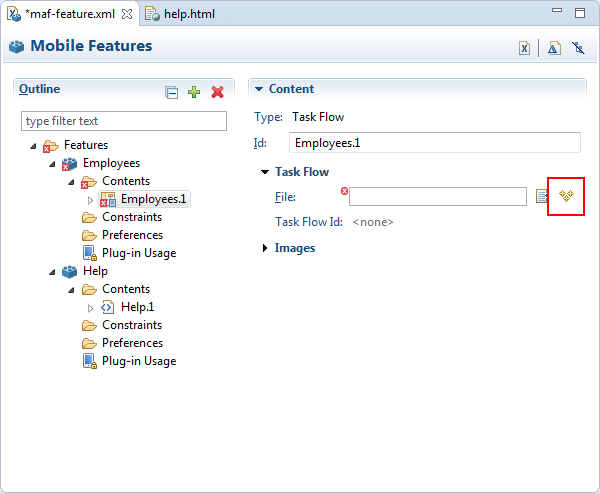
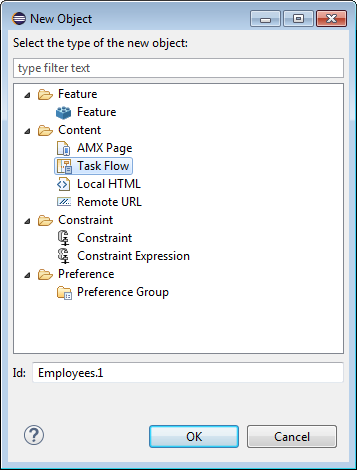
The content of this feature is going to be a task flow so in the New Object dialog, select Content > Task Flow and click OK.
-
In the feature editor, and with Employees.1 still selected, click the create button, next to the Task Flow file name field.
-
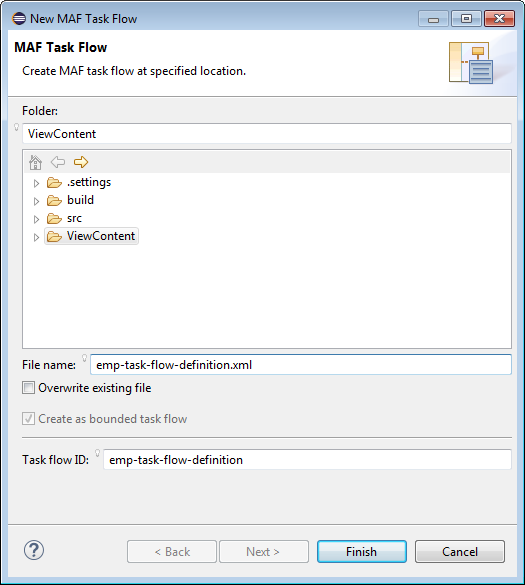
In the New MAF Task Flow dialog, make sure that ViewContent is the selected folder and set the task flow File name to emp-task-flow-definition.xml. Setting the File name will also change the Task Flow ID. Click Finish to create the task flow.
-
Save your work.
-
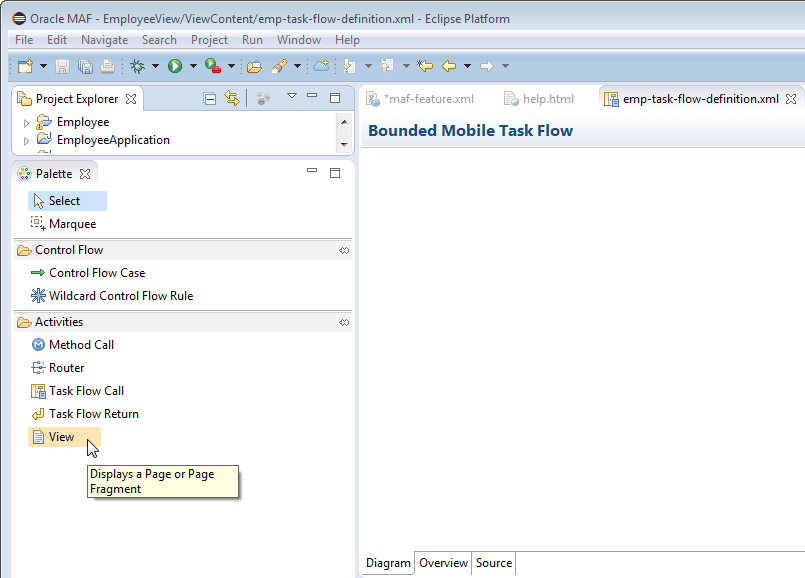
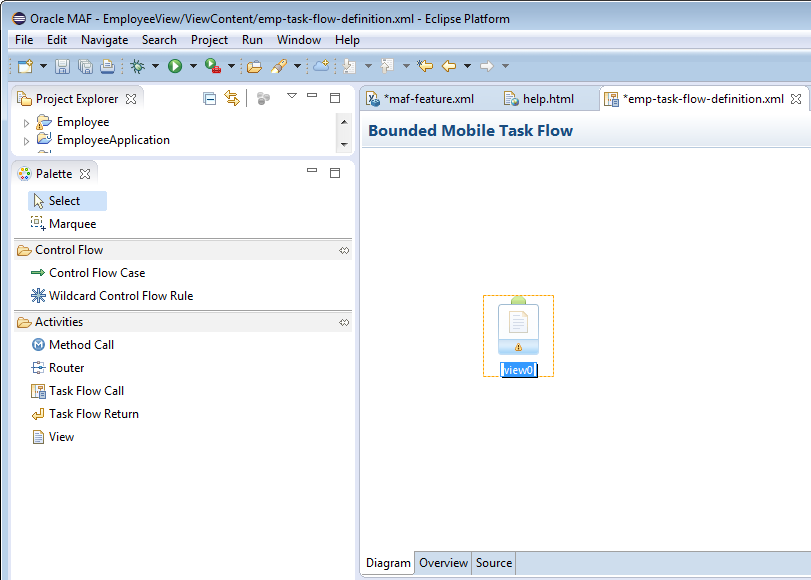
Notice the Activities panel in the Palette located in the bottom-left corner of OEPE. From that panel, drag a view activity to the task flow.
-
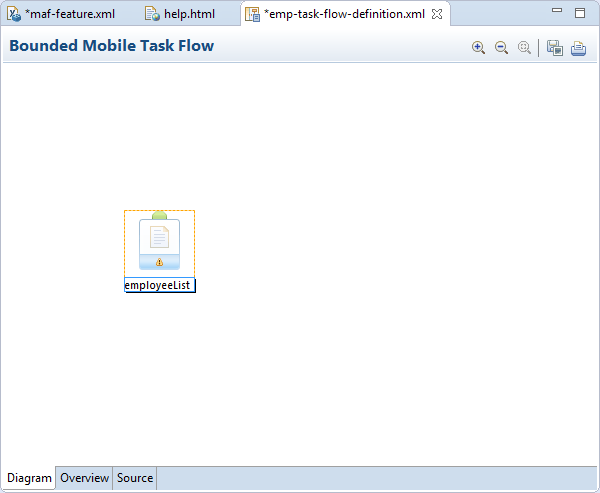
Set the name of the view activity to employeeList.
-
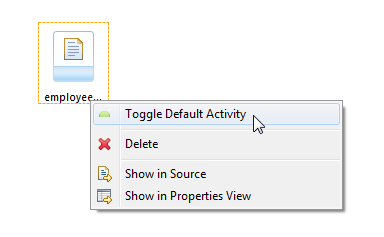
If the employeeList activity does not have a green circle above it indicating it is the default activity, right-click the view and select Toggle Default Activity.
-
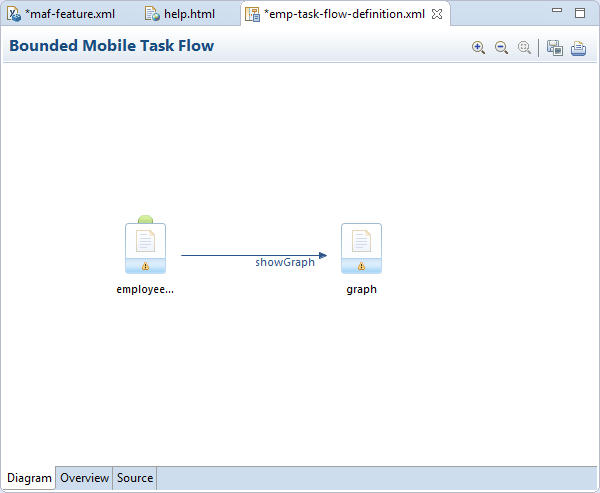
Next, drag a second view activity to the task flow and name this one graph.

-
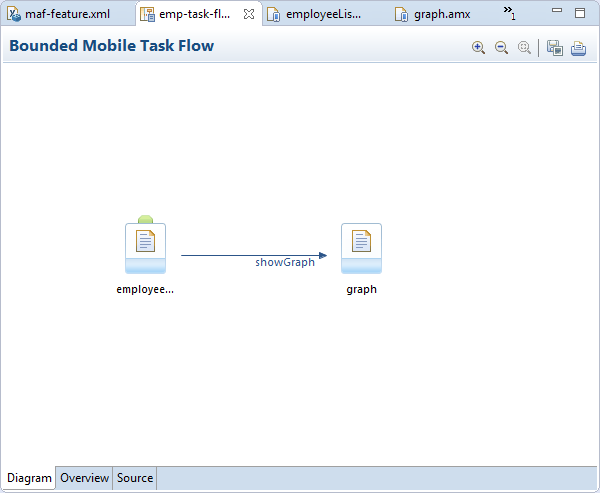
Click the Control Flow panel in the Palette and then click Control Flow Case. Next click the employeeList activity to mark it as the beginning point for the control flow, then click graph to mark it as the destination of the control flow.Set the name of the control flow case to showGraph.
Remember that the view activities you have created are merely pointers to pages. In the next couple of steps, you will create the pages that back these view activities.
-
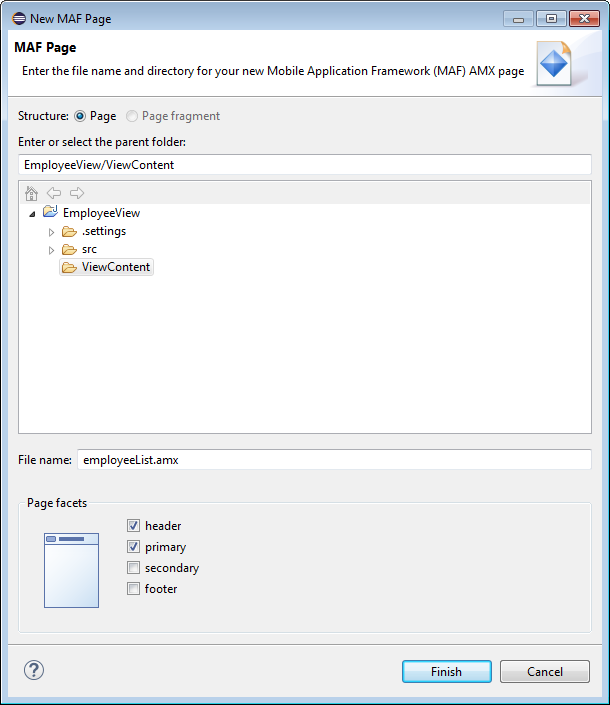
In the task flow editor, double-click the employeeList view activity to open the New MAF Page dialog. Select only the header and primary facets and click Finish to accept the default name and create the page.
Save your work.
-
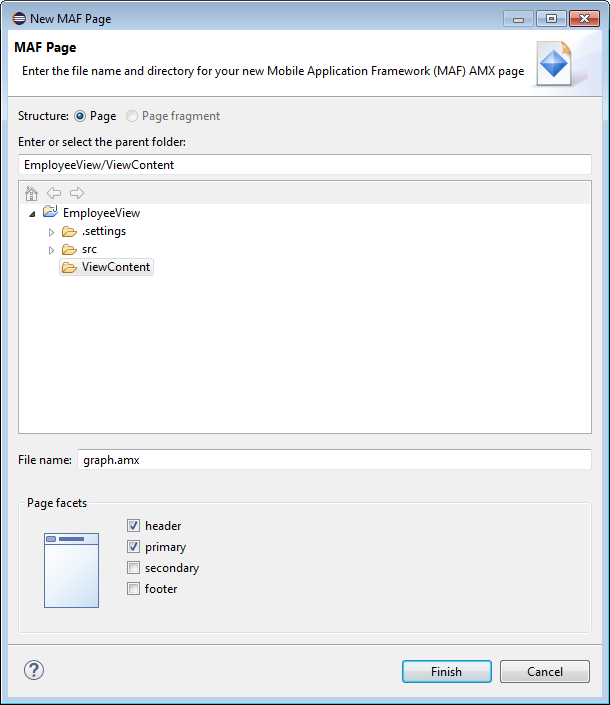
Back in the task flow editor, double-click the graph activity to create a page. As before, select only the header and primary facets and click Finish to accept the default name and create the page.
-
Save your work.
The task flow should now look something like:
Next, we'll create the task flow for this feature.
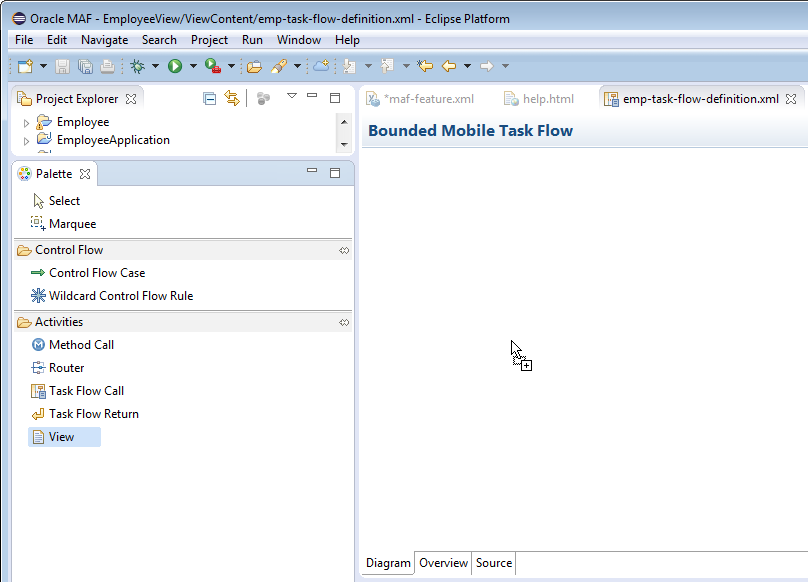
You have now created a task flow and will see the empty task flow open in the editor.
You can now add content to the task flow. The content will consist of view activities (pointers to pages), and control flow cases (navigation controls). In the next few steps, you will create two activities in the task flow.
You now have two view activities on the task flow. The next step is to create navigation rules, or control flow cases, between the view activities.
You have now created a task flow that contains two view activities. You also created the pages that back those view activities.At this point, the pages are just empty shells. In the next section, you create Java classes that will provide data for these pages.
MAF provides an application layer that manages data so that the UI can consume the data without concern about where or how the data is stored. This layer is called the data control layer.
This tutorial uses POJOs (Plain Old Java Objects) for the application data source. In this section, you learn how to create Java classes and then generate data controls that are based on those classes. The user interface portion of the application uses the data controls to present data to the user.
In this section you will create two Java classes. One will be the employee class which contains the employee definition (or structure), and the other will be the employeeService class which provides a collection of the employees. We give you the code to both classes so you can just copy and paste as directed.
First, create the employee class.
-
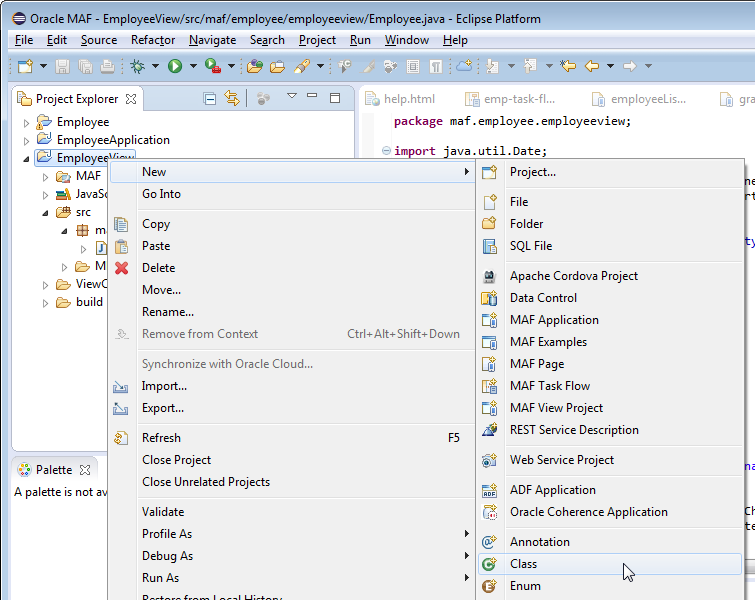
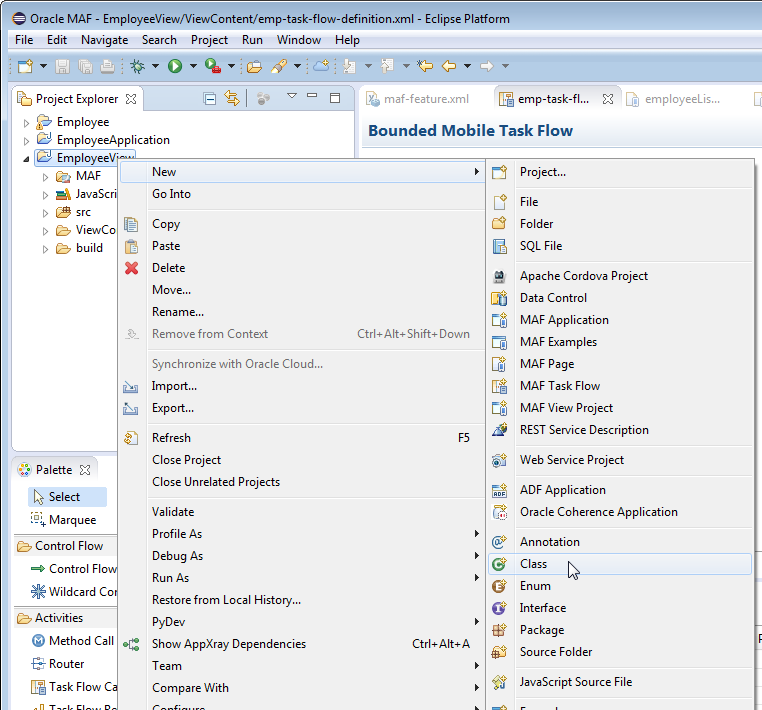
Right-click the EmployeeView project and select New > Class.
-
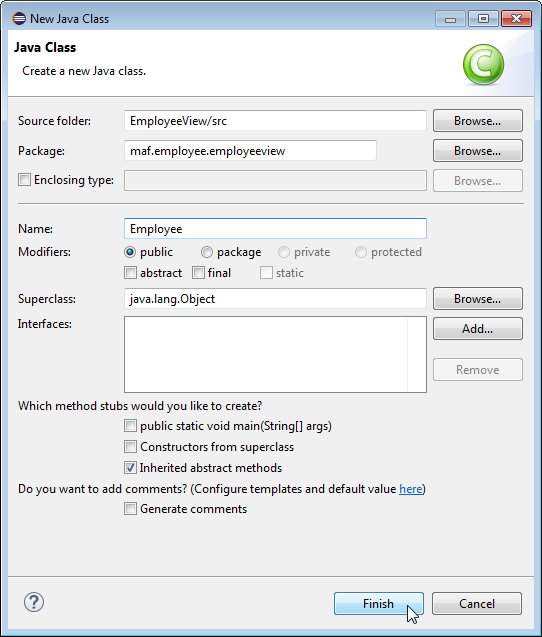
In the New Java Class dialog, set the class Name to Employee and click Finish to create the class.
-
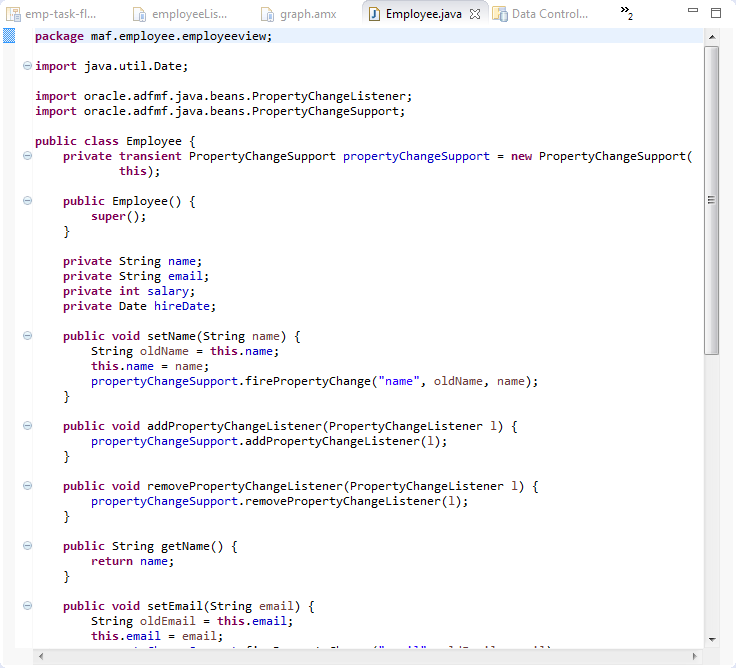
In the code editor, replace all the code after the package statement with the following:
import java.util.Date;
import oracle.adfmf.java.beans.PropertyChangeListener;
import oracle.adfmf.java.beans.PropertyChangeSupport;
public class Employee {
private transient PropertyChangeSupport propertyChangeSupport = new PropertyChangeSupport( this);
public Employee() {
super();
}
private String name;
private String email;
private int salary;
private Date hireDate;
public void setName(String name) {
String oldName = this.name;
this.name = name;
propertyChangeSupport.firePropertyChange("name", oldName, name);
}
public void addPropertyChangeListener(PropertyChangeListener l) {
propertyChangeSupport.addPropertyChangeListener(l);
}
public void removePropertyChangeListener(PropertyChangeListener l) {
propertyChangeSupport.removePropertyChangeListener(l);
}
public String getName() {
return name;
}
public void setEmail(String email) {
String oldEmail = this.email;
this.email = email;
propertyChangeSupport.firePropertyChange("email", oldEmail, email);
}
public String getEmail() {
return email;
}
public void setSalary(int salary) {
int oldSalary = this.salary;
this.salary = salary;
propertyChangeSupport.firePropertyChange("salary", oldSalary, salary);
}
public int getSalary() {
return salary;
}
public void setHireDate(Date hireDate) {
Date oldHireDate = this.hireDate;
this.hireDate = hireDate;
propertyChangeSupport.firePropertyChange("hireDate", oldHireDate, hireDate);
}
public Date getHireDate() {
return hireDate;
}
public Employee(String name, String email, int salary, Date hireDate) {
super();
this.name = name;
this.email = email;
this.salary = salary;
this.hireDate = hireDate;
}
} -
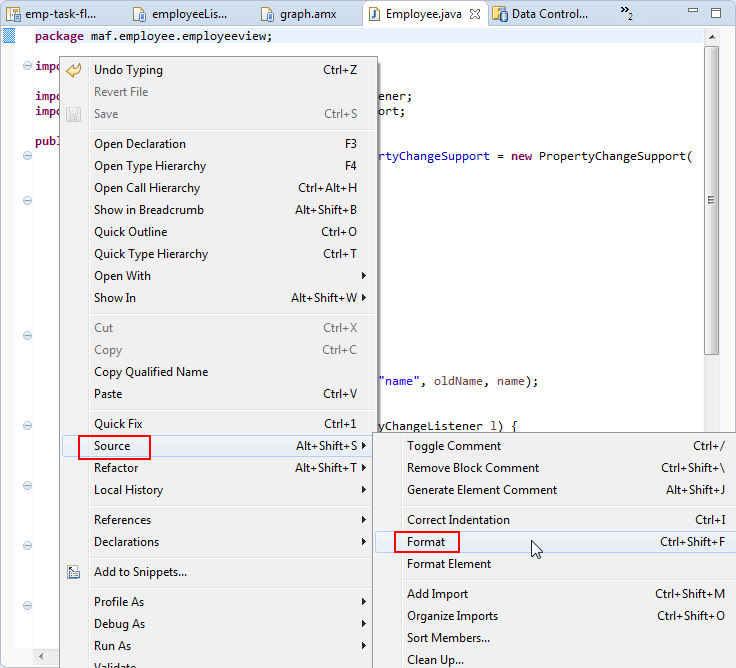
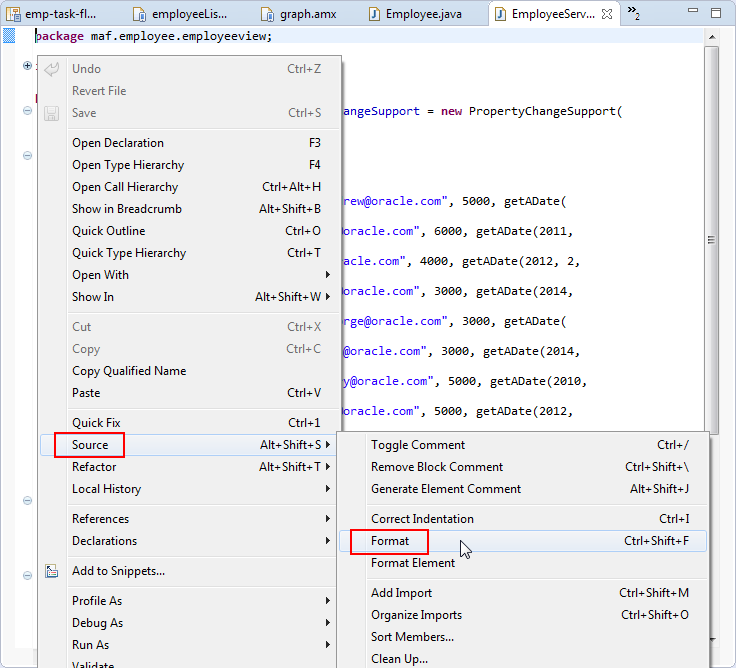
Right-click in the editor and select Source > Format to reformat the code.
-
Save your work.
The Employee class defines the Employee object. The other class you will need is the EmployeeService class which populates the Employee object. It will also serve as the interface to the Employee object.
-
Just as you did before, right-click the EmployeeView project and select New > Class
-
In the New Java Class dialog, set the class Name to EmployeeService and click Finish to create the class
-
Replace all the code following the package statement with the following code:
import java.util.ArrayList;
import java.util.Calendar;
import java.util.Collection;
import java.util.Date;
import oracle.adfmf.java.beans.PropertyChangeListener;
import oracle.adfmf.java.beans.PropertyChangeSupport;
public class EmployeeService {
private PropertyChangeSupport propertyChangeSupport = new PropertyChangeSupport(
this);
public EmployeeService() {
super();
emps.add(new Employee("Andrew", "andrew@oracle.com", 5000, getADate(2010, 5, 4, 5, 0)));
emps.add(new Employee("Bill", "bill@oracle.com", 6000, getADate(2011, 3, 24, 9, 0)));
emps.add(new Employee("Bob", "bob@oracle.com", 4000, getADate(2012, 2, 21, 9, 0)));
emps.add(new Employee("Gary", "gary@oracle.com", 3000, getADate(2014, 3, 14, 4, 0)));
emps.add(new Employee("George", "george@oracle.com", 3000, getADate(2014, 3, 14, 4, 0)));
emps.add(new Employee("Jeff", "jeff@oracle.com", 3000, getADate(2014, 3, 14, 4, 0)));
emps.add(new Employee("Jerry", "jerry@oracle.com", 5000, getADate(2010, 5, 4, 5, 0)));
emps.add(new Employee("Shay", "Shay@oracle.com", 5000, getADate(2012, 3, 4, 6, 0)));
}
private Collection<Employee>emps = new ArrayList<Employee>();
public boolean addEmp(Employee newemp) {
this.getEmployee().add(newemp);
return true;
}
public void setEmployee(Collection<Employee>emps) {
Collection<Employee>oldEmps = this.emps;
this.emps = emps;
propertyChangeSupport.firePropertyChange("emps", oldEmps, emps);
}
public Collection<Employee>getEmployee() {
return emps;
}
public void addPropertyChangeListener(PropertyChangeListener l) {
propertyChangeSupport.addPropertyChangeListener(l);
}
public void removePropertyChangeListener(PropertyChangeListener l) {
propertyChangeSupport.removePropertyChangeListener(l);
}
private Date getADate(int y, int m, int d, int h, int mi) {
Calendar c1 = Calendar.getInstance();
c1.set(y, m, d, h, mi);
Date retDate = c1.getTime();
return retDate;
}
} -
Right-click in the editor and select Source > Format to reformat the code.
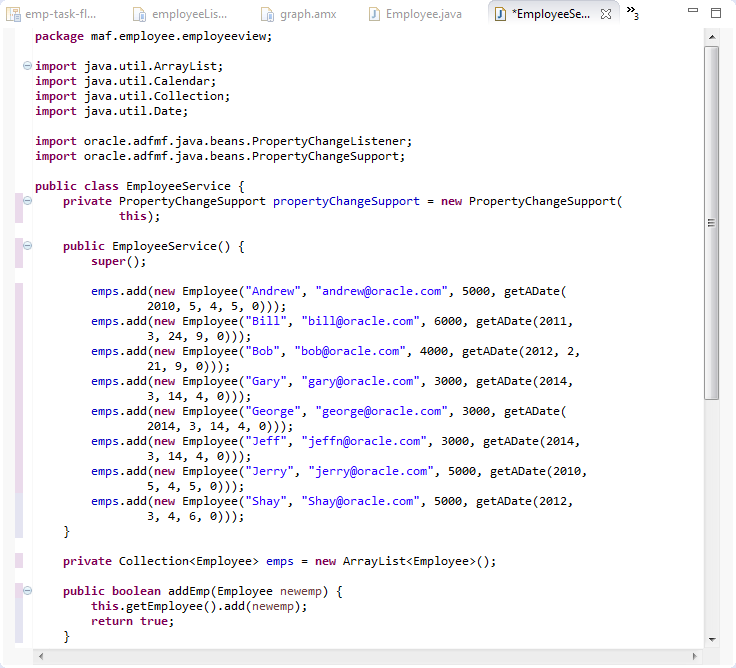
The code should look something like the following:
-
Save your work.
That completes the Employee class. In the next few steps you create the EmployeeService class which contains the employee data.
-
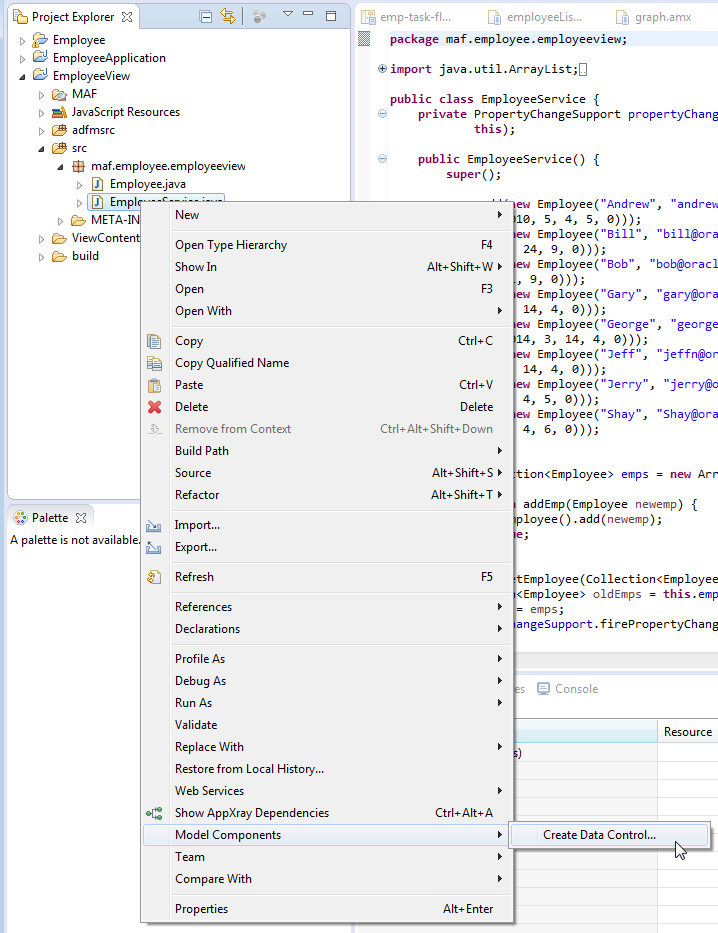
Right-click EmployeeService.java in the Project Explorer and select Model Components > Create Data Control.
-
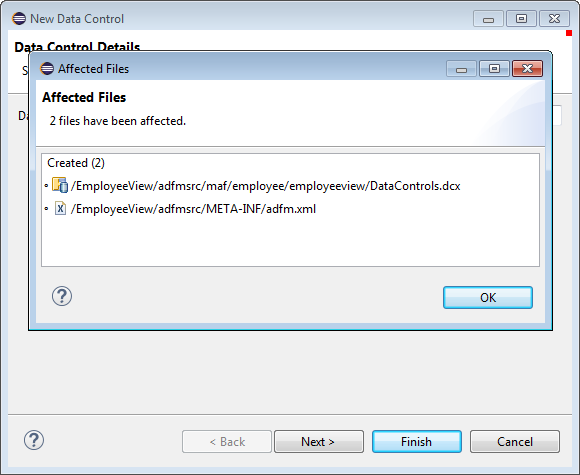
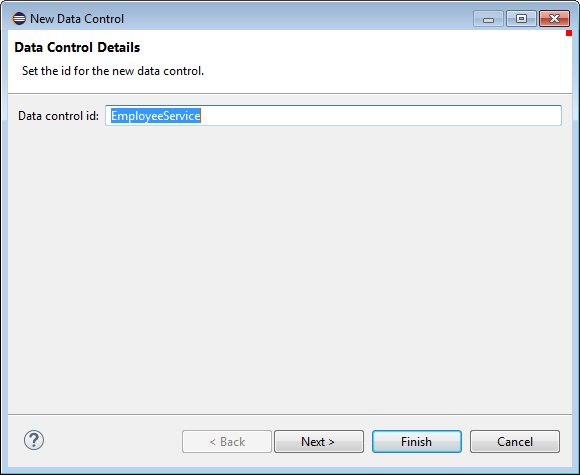
Click Finish to accept the default values and create the Data Control.
-
Click OK on the confirmation dialog and then save your work.
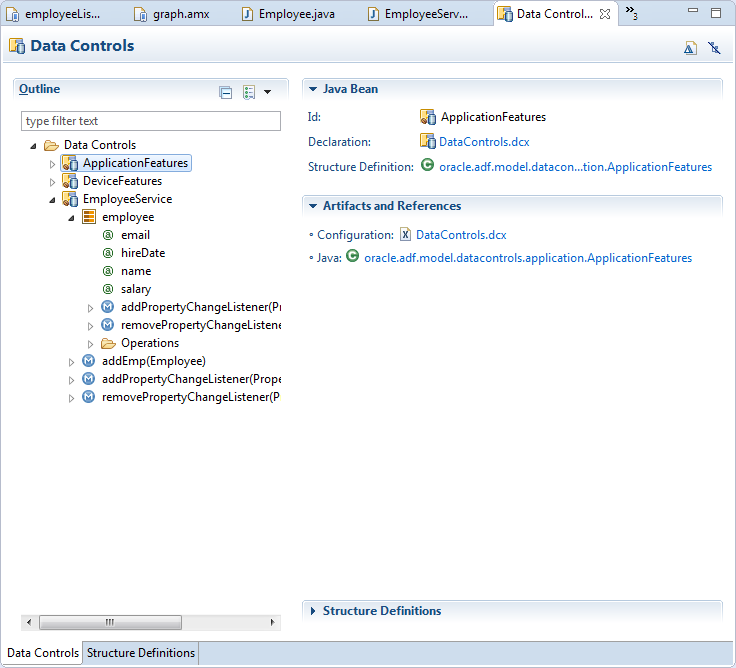
You will now see the Data Control Manager. Notice that it shows the data control you just created along with data controls from the EmployeeApplication view.
-
Save your work.
The code look something like:

In the next few steps we create the data controls that consume the EmployeeService class..
Now that you have a data control defined, you can begin creating the UI portion of the application.
In this section of the tutorial, you add the data controls you just created to the the pages that are associated with the view activities you created on the task flow.
-
Close all the open editor tabs. Although not completely necessary, it may make it easier to navigate between the UI pages you are working on.
-
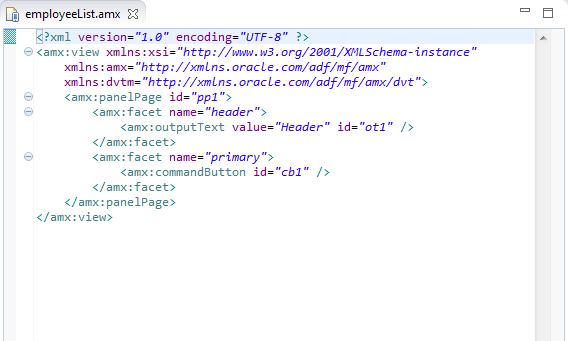
Open employeeList.amx in the editor. (HINT: double-click employeeList.amx in the Project Explorer.)
-
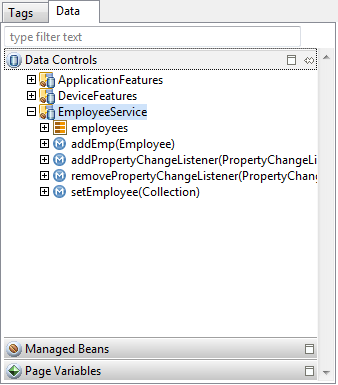
Expand EmployeeService in the Data tab on the Palette.
-
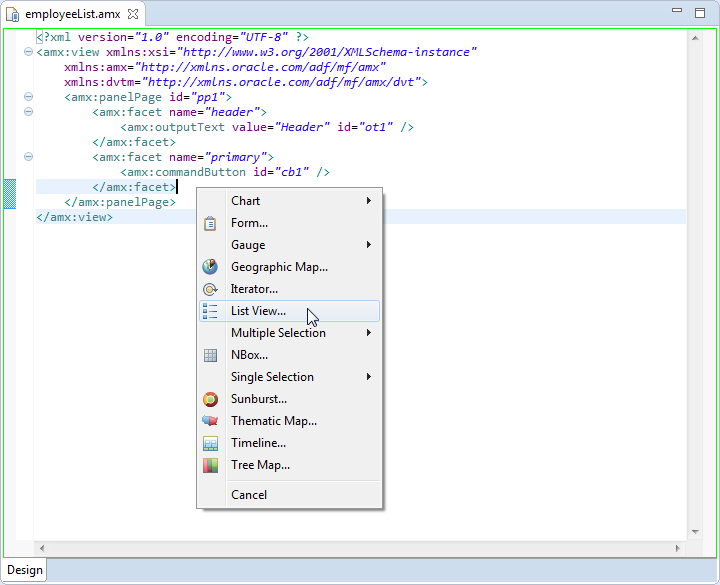
Drag the employees accessor to just after the last </amx:facet> tag and drop it as a List View component.
-
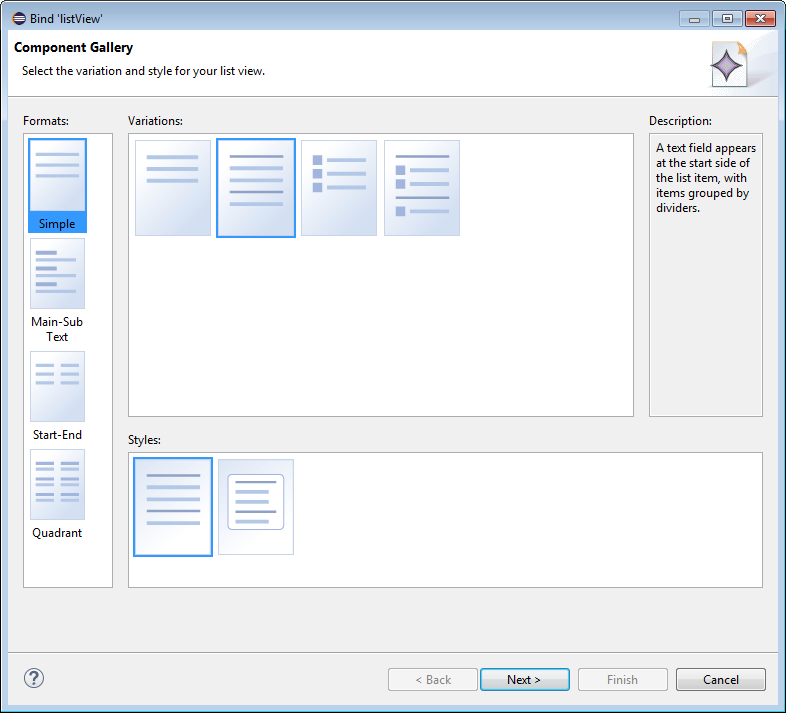
In the Bind 'listView' dialog, select the Simple Format and the second Variation and click Next.
-
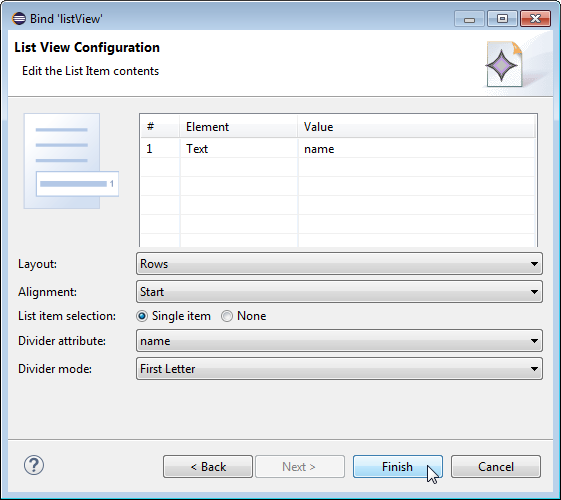
In the List Item Contents section, set the Divider Attribute to name and the Divider Mode to first letter and click Finish.
-
Save your work.
-
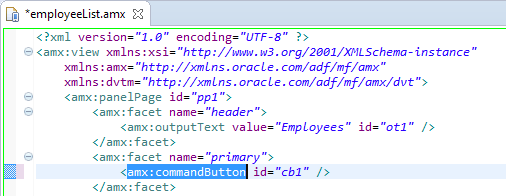
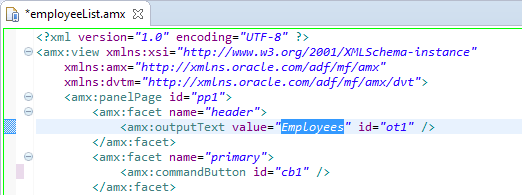
In the code editor, select the value property of the header and change the value to Employees. This will put a title on the runtime feature.
Save your work.
-
In the code editor, click the amx:commandButton in the primary facet.
-
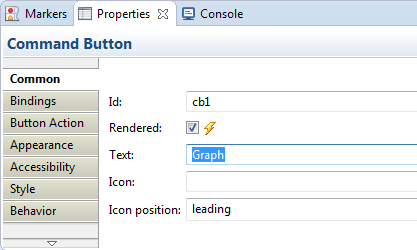
In the Properties tab, set the Text property to Graph. HINT: If the properties tab is not open, right-click the commandButton code and select Properties. The Text is on the Common tab.
-
Click the Button Action tab and set the Action to showGraph. HINT: Use the select value icon to show and select the valid values for Action.
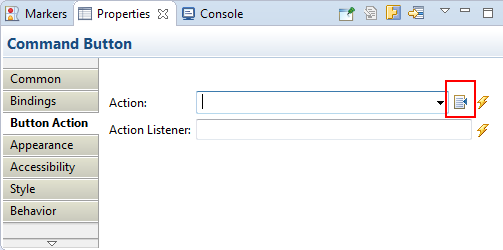
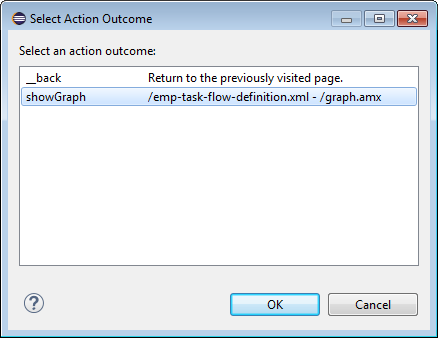
-
Save your work.
Next, you add a bar chart to the Graph page showing the salaries of the employees..
-
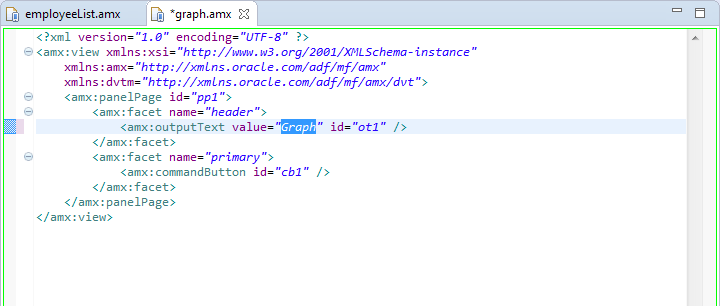
Double-click graph.amx in the Project Explorer to open it in the editor.
-
To set the runtime title of the page, select the header facet and set the value property to Graph
-
Expand EmployeeService in the Data tab on the Palette.
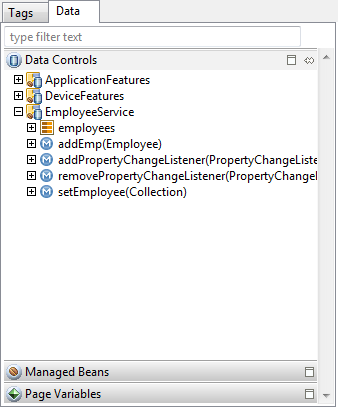
-
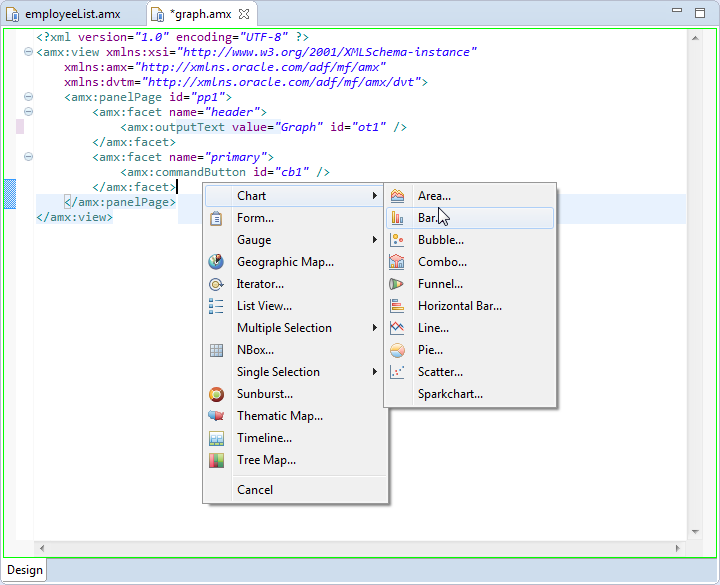
Drag the employees accessor to just after the </amx:facet> tag and drop it as a Chart > Bar component.
-
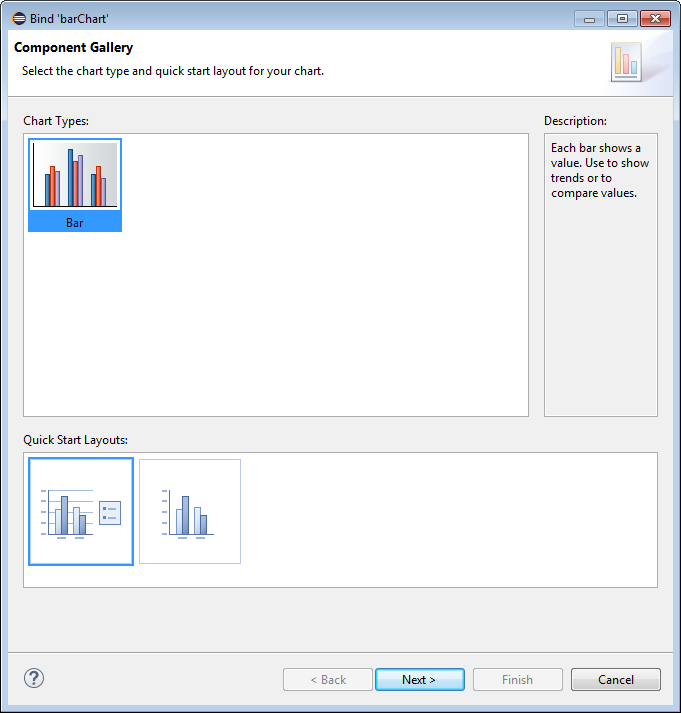
In the Bind 'barChart' Wizard, accept the default layout and style by clicking Next.
-
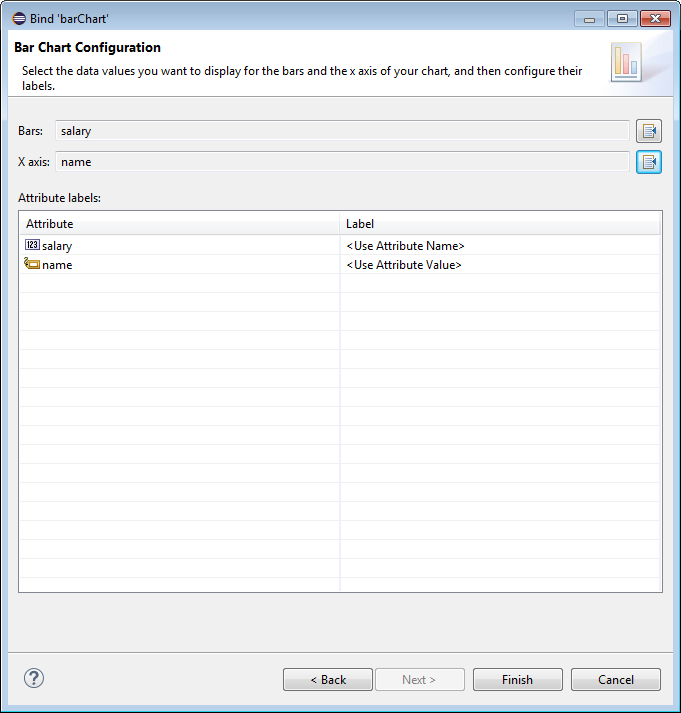
Use the Add Attributes buttons to select salary for the Bars property and name for X Axis property. Click Finish the create the component.
-
We also need to set a button to navigate back to the EmployeeList page. In the code, click the command button in the primary facet and the property panel, set the Action to __back.
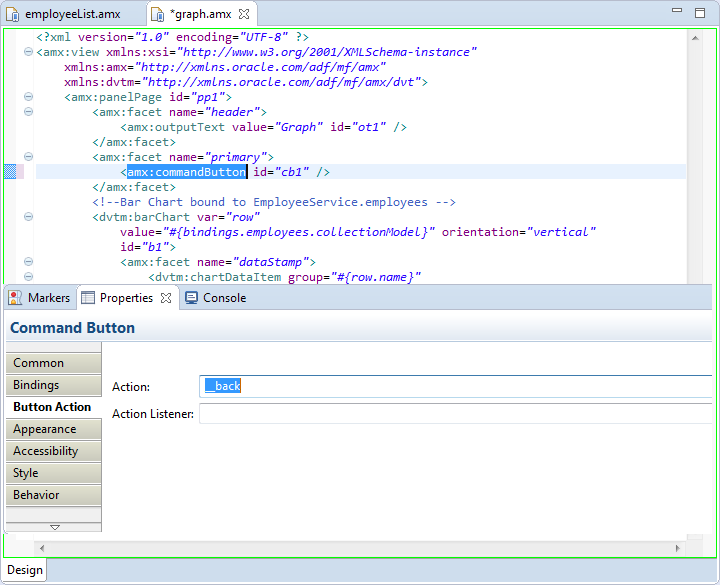
-
Save your work.
-
Close all of the open tabs.
 r
r
So that completes the two pages; EmployeeList and Graph.
You now have now completed all of the steps to build a MAF application in OEPE. In the next section you deploy and test the application.
In these next few steps you create a deployment configuration and deploy your application to the Android emulator.
-
Make sure you have completed the setup and configured the Android environment for developing a MAF application. If not, then complete the Setup tutorial.
If the Android emulator is not running, start it by following these next steps. If it is already running, skip ahead to Step 9.
-
Open Windows Explorer and navigate to the SDK folder. Double-click SDK Manager.exe to open it.

-
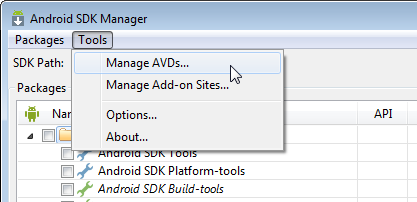
From the Android SDK Manager toolbar, select Tools > Manage AVDs... .
-
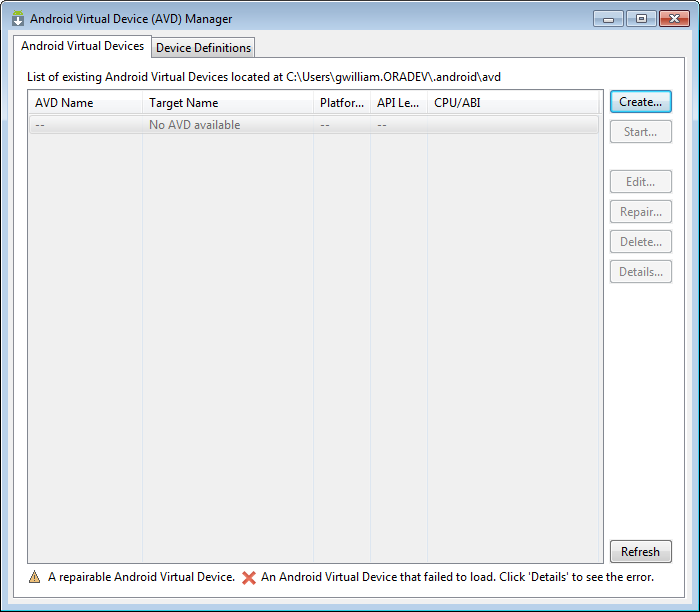
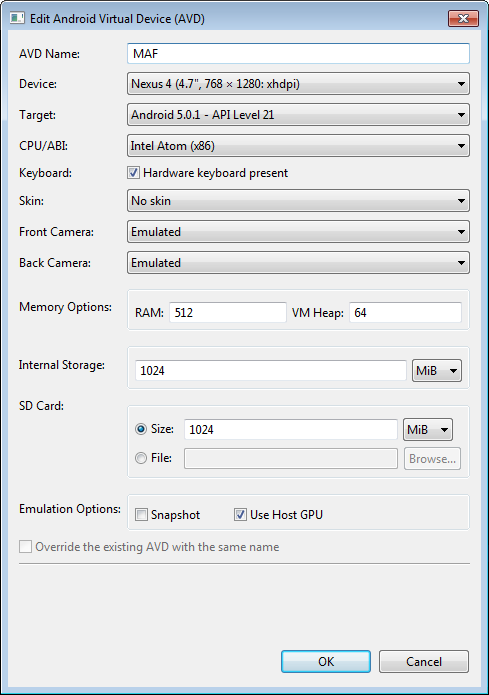
Click Create to create a new Android Virtual Device and specify the following values to the properties.
AVD Name = MAF
Device = Nexus 4 (4.7", 768 x 1280; xhdpi)
Target = Android 5.0.1 - API Level 21
CPU/ABI = Intel Atom (x86)
Skin = No skin
Front Camera = Emulated
Back Camera = Emulated
Memory Options Ram = 512
MiB Internal Storage = 1024 MiB
SD Card = 1024 MiB
Use Host GPU (checked)
-
For the remainder, keep the defaults and click the OK button.
You may choose another device type, keeping in mind that newer devices have greater resource demands and you may run into RAM issues on your own machine.
-
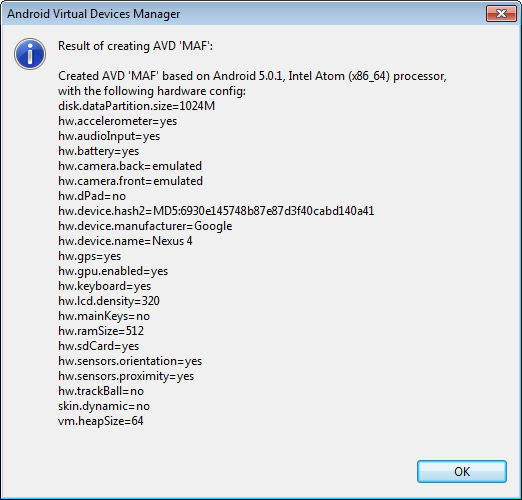
A notification of the new AVD is displayed. Click OK to dismiss it.
-
Select the new AVD and click the Start button.
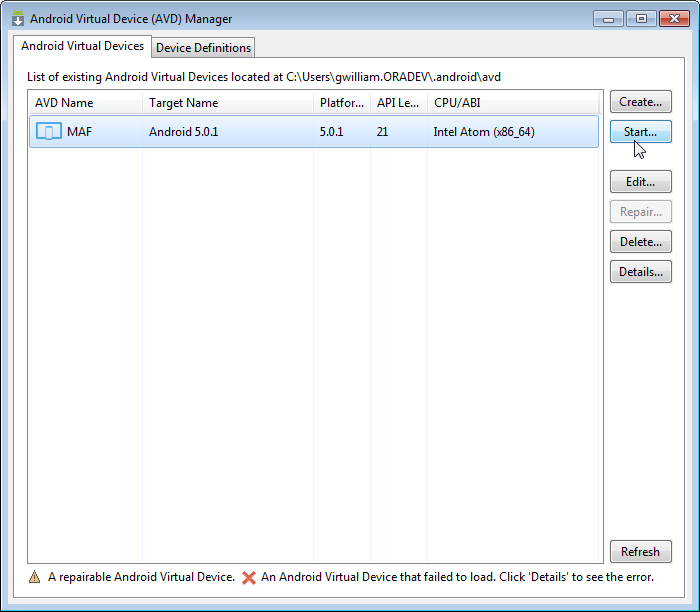
-
Accept the default values in the Launch Options pane, and click Launch.
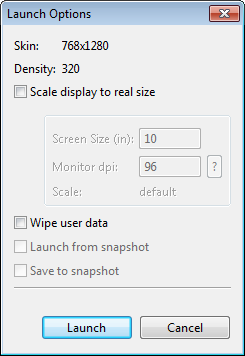
It may take a while for the emulator to be invoked and start running. Depending on the speed of your CPU, 2 minutes is possible.
The Android Debug Bridge (adb) provides a communication channel between OEPE and the emulator. It is started automatically when you deploy to the emulator from OEPE. The following steps are for your information only. You do not need to perform them.
-
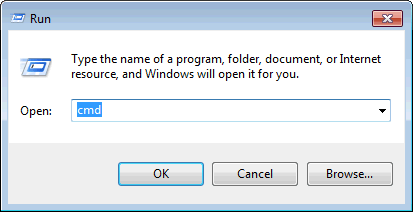
Start the emulator by opening a command window. (Start > Run cmd)
-
In the command window, navigate <YourAndroidSDK>\sdk\platform-tools.
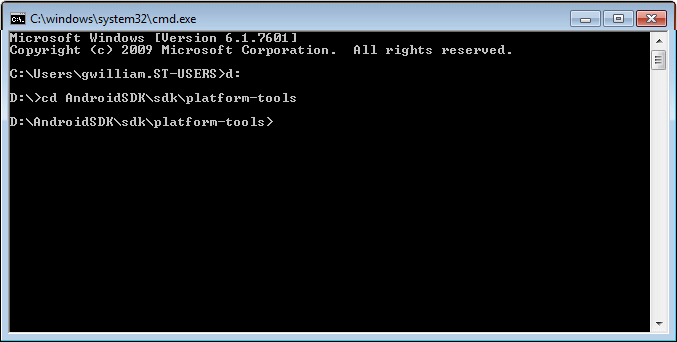
-
Enter adb start-server and hit Enter.
-
When the command returns *daemon started successfully *, the process has started and you are ready to deploy.

-
In OEPE, click the debug button and select Debug Configurations.
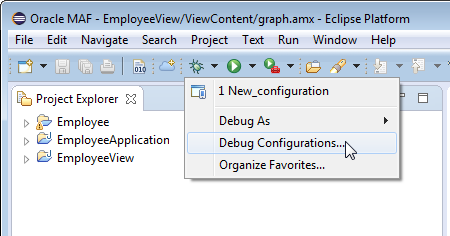
-
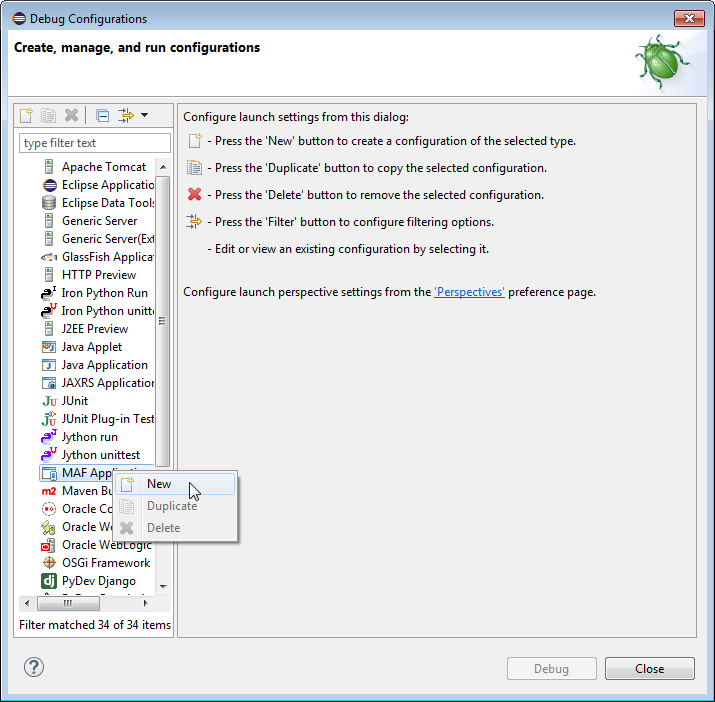
Right-click MAF Application and select New.
-
Set the properties of the new configuration to the following:
Name = MAF
Assembly Project = Employee
Target = Android Target [MAF Runtime 2.1 on Android 21.0.0]
Device Emulator: (pick from the list) If an emulator is not available, click Refresh. If it is still not available, make sure it is running.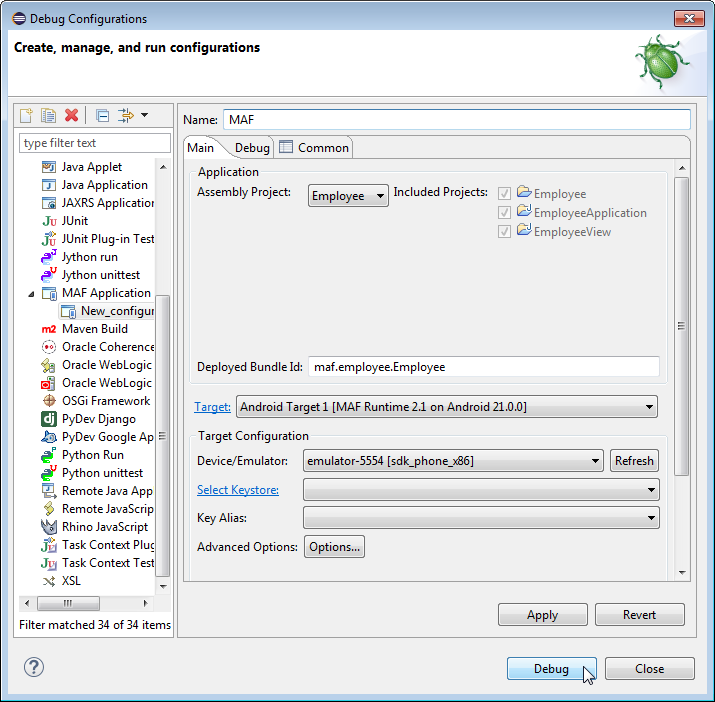
-
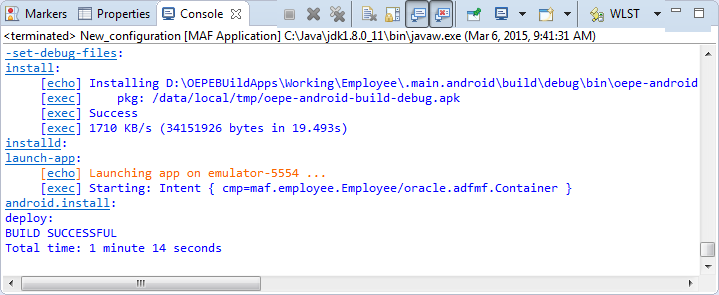
Click Debug to deploy the application to the emulator. Depending on your system and the size of the application, it will take several minutes to deploy. When the deployment is complete, you will see a BUILD SUCCESSFUL message in the Log window.
-
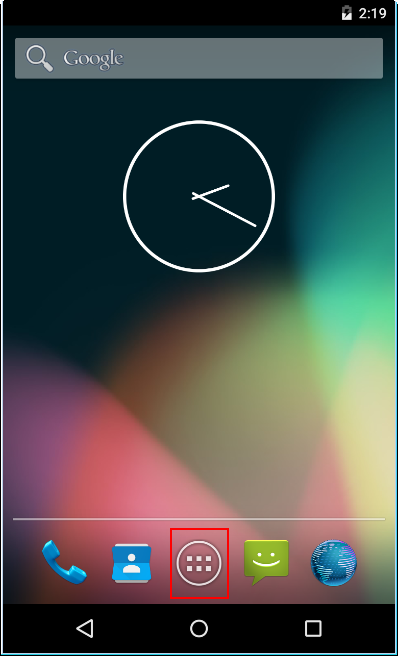
Navigate to the emulator and follow any instructions to unlock the screen if it is locked. Your application should run automatically, but if not, click the Application button in the middle bottom of the Home screen to open the list of available applications.
-
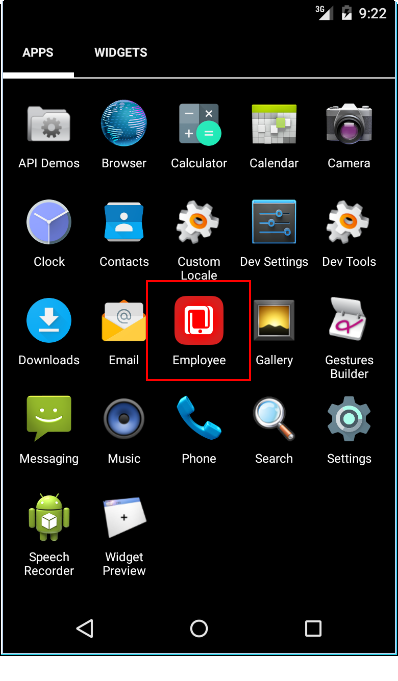
In the Application page, click the Employee application to open the application you just built and deployed.
-
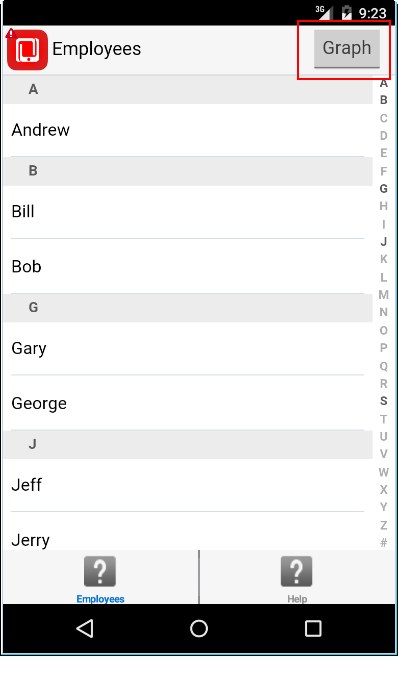
The application will start with the employeeList page, which shows a list of employees from your data source. NOTE: The emulator may be slower than an actual device and it may take a while for the application to load. Click Graph to see the Graph page.
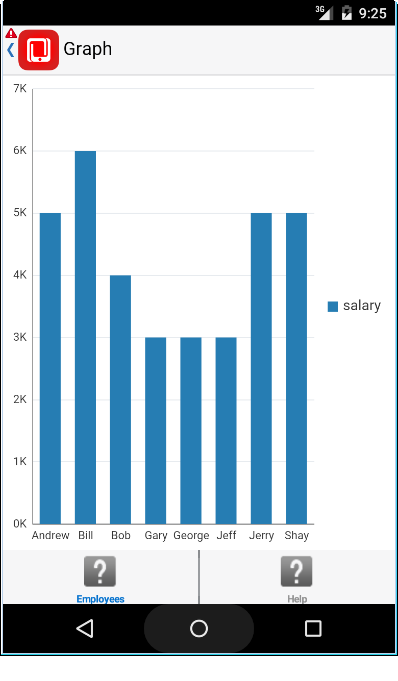
You should see the Graph page which displays a graph of all the employee salaries.
You have now completed the first part of this tutorial. In the next section, you add features to your application that integrate directly with device features.

 Expand all | Hide all