
 Part 2: Creating a UI
In this tutorial, you use Oracle Enterprise Pack for Eclipse and Oracle Mobile Application Framework to build and deploy an application that uses a REST service as the source of data. OEPE includes a REST service editor that you will use to inspect and test the service before you build the application. You can use any accessible REST Service but for this tutorial, we provide a Java class that mimics a REST service and runs as a local Java application.
You will see how to inspect a REST service as well as how to create a data control that provides data access to the service from your MAF application.
| Requirements: |
|---|
Oracle Enterprise for Eclipse version 12.1.3.5 or later. You can download Oracle Enterprise Pack for Eclipse (OEPE) from the OTN OEPE page. Download the Mock REST Service from here. You will import this service into OEPE in the first section of the tutorial. |
When you work in OEPE, you organize your work in projects that together make an application. For Oracle Developer Cloud Service integration, we'll start with an application, then push it to the Oracle Developer Cloud Service Git repository.
In this first section, you import the Rest Service into OEPE.
-
Open Eclipse and OEPE. HINT: navigate to where you installed OEPE and double-click eclipse.exe. Select a workspace of your choice and and open Workbench.
-
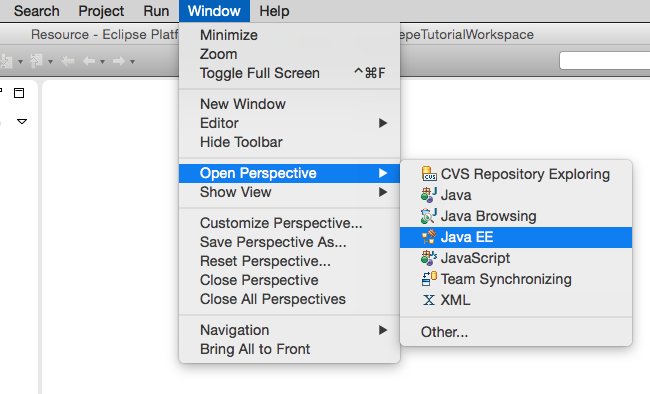
Since we are developing a Java application and using Oracle Developer Cloud Service, we want to use the Java EE perspective. From the menu, select Window > Open Perspective and click Java EE.
-
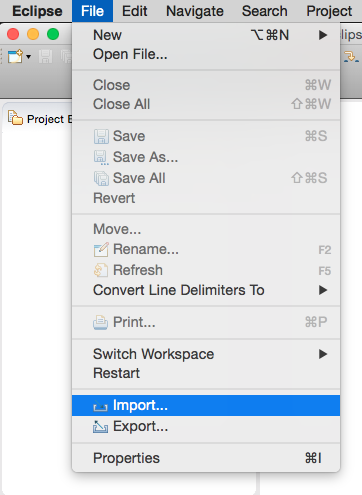
From the Eclipse menu, select File > Import.
-
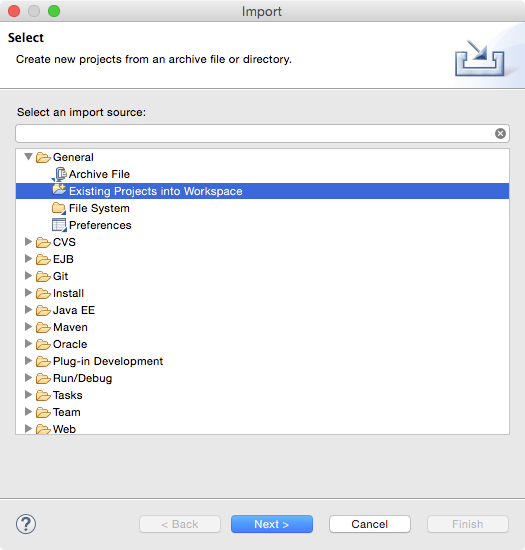
In the Import dialog, select General > Existing Projects into Workspace and click Next.
-
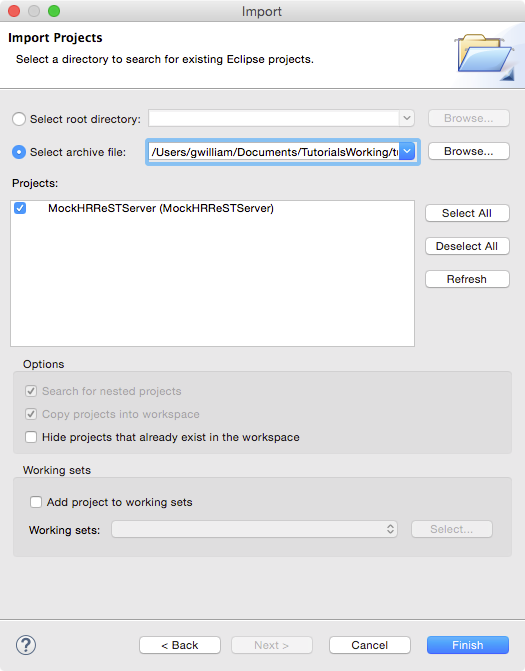
Click Select archive file, then use the Browse button to find and select the zip file you downloaded (MockHRRestServer.zip). Click Finish to import the project. If you have not yet downloaded the starter application, go back to the top of this section to find the download link.
-
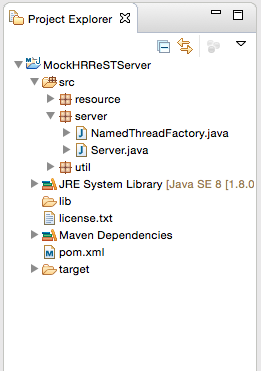
In the Project Explorer, expand the MockHRRestServer project to see the artifacts within the project.
Now that the mock server is in OEPE, you can run it as an application.
-
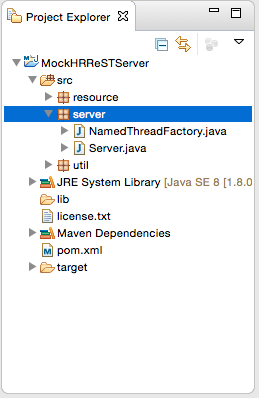
If it is not already expanded, expand MockHRRestServer > src > server.
-
Right-click Server.java and select Run As > Java Application.

-
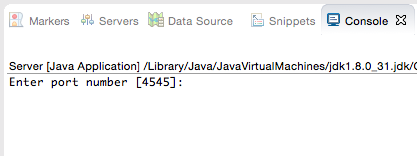
In the console window, the application asks for a port number with the default of 4545.
-
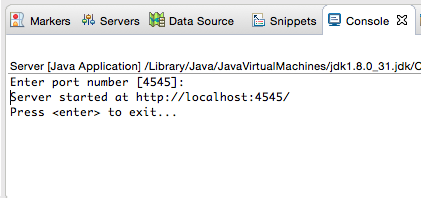
Hit enter to accept the default value and start the server.
Now that you have imported the starter application into OEPE, you will create a connection to Oracle Developer Cloud Service and push the project to the cloud.
The REST Service editor provides an iterative process for consuming REST services. The editor allows you to explore existing REST services. You can test or review the service directly from the editor.
In the service we are using for the tutorial, there are 5 main services.
- Get Departments – which is a read
- Get Departments by ID – which is also a read but returns a single department
- Put Department by ID – which is an update method
- Post Department – which is a create method
- Delete Department by ID – which of course is a delete method
-
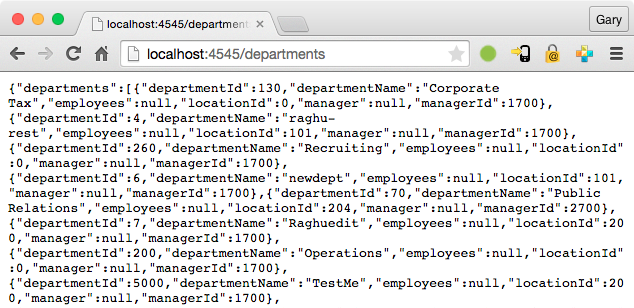
To show that the REST service is running locally, open a browser of your choice and enter localhost:4545/departments and hit enter.
-
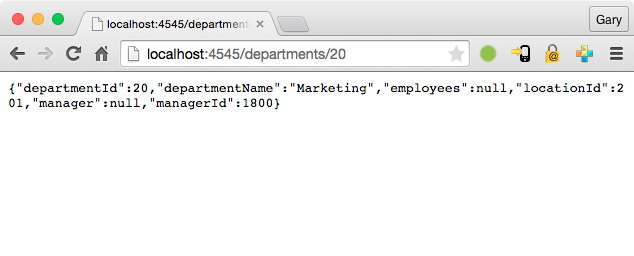
To show that the getDepartmentById service works, add /20 to the URL and hit enter.
Before you can test a REST service, you need to create a MAF application.
-
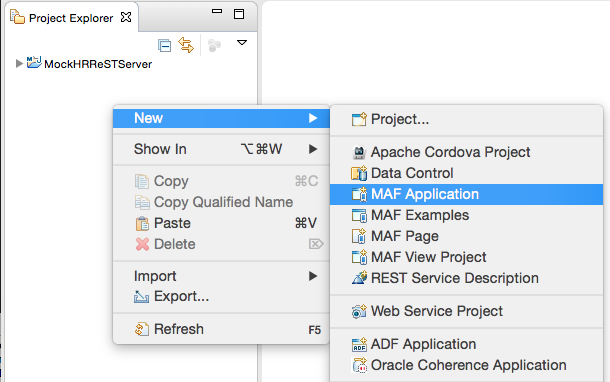
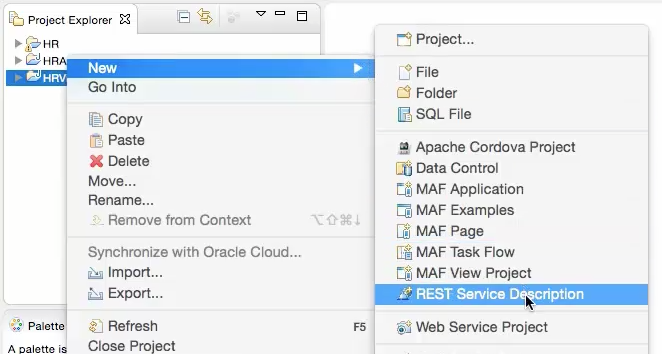
In the Project Explorer, Right-click and select New > MAF Application.
-
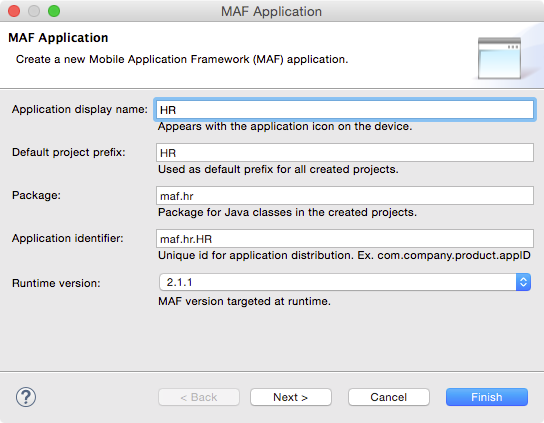
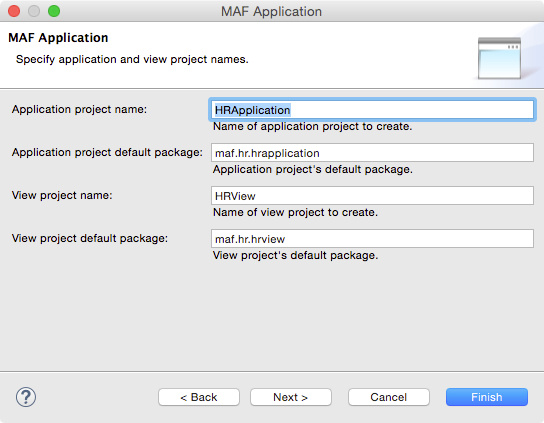
In the MAF Application dialog, set the Application display name to HR and click Next.
-
Click Next to accept the Project names.
-
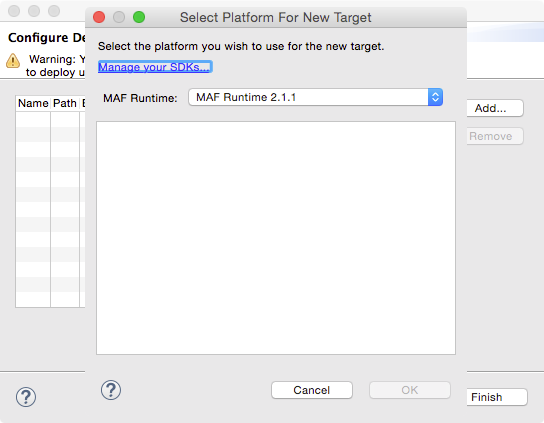
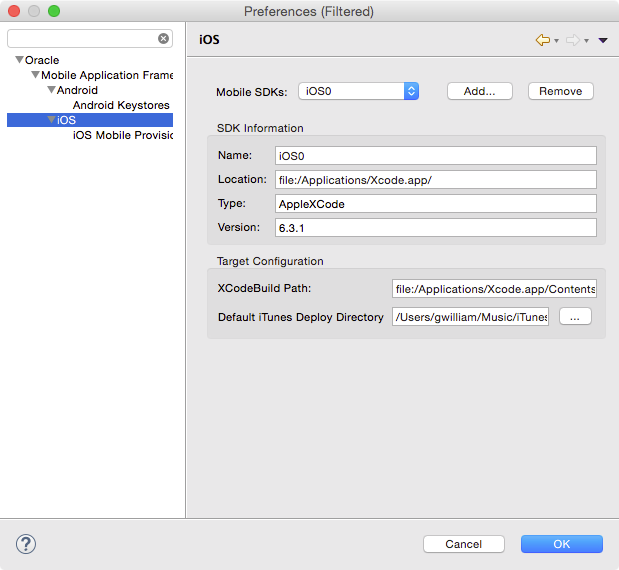
Click Add to define a Mobile SDK for deployment.

-
On the Select Platform dialog, click Manage your SDKs... .
-
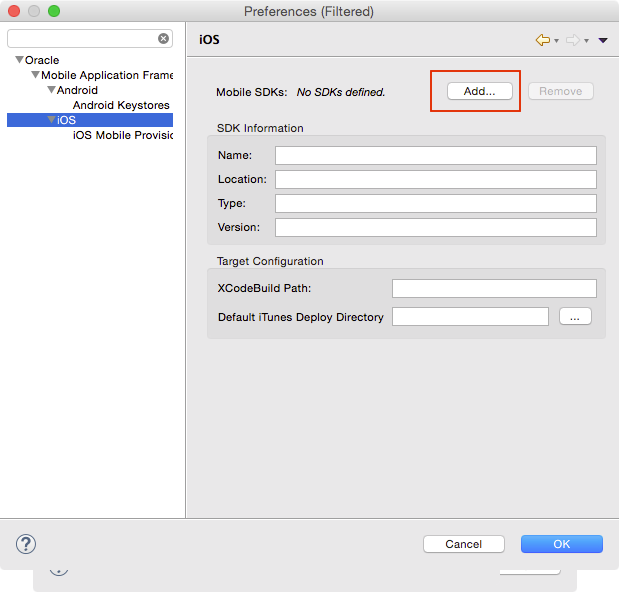
Click Add to define a Mobile SDK.
-
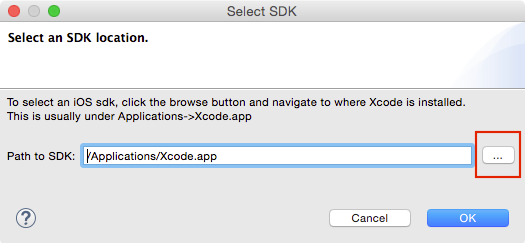
Use the browse button to select the path to your SDK and click OK.
-
Click OK to accept the changes you made.
-
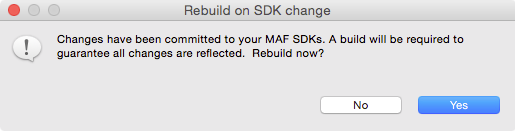
Click Yes to allow OEPE to rebuild the projects.
-
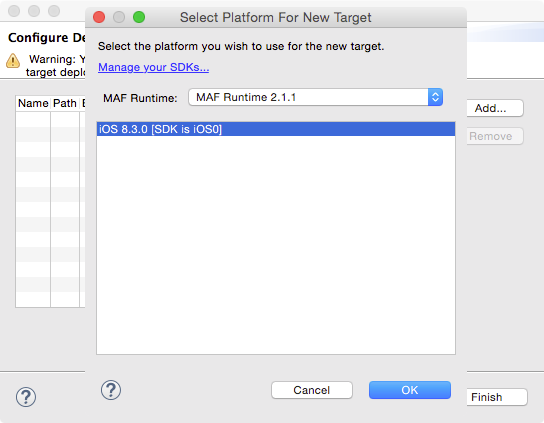
Click OK to accept the SDK and then click Finish.
-
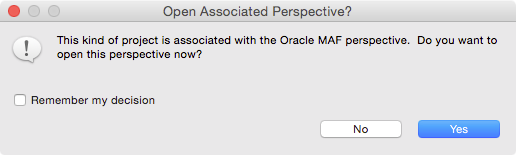
OEPE will advise you that this application type is associated with the Oracle MAF Perspective. Click Yes to change the perspective.
Now you can begin creating REST Service Descriptions.
-
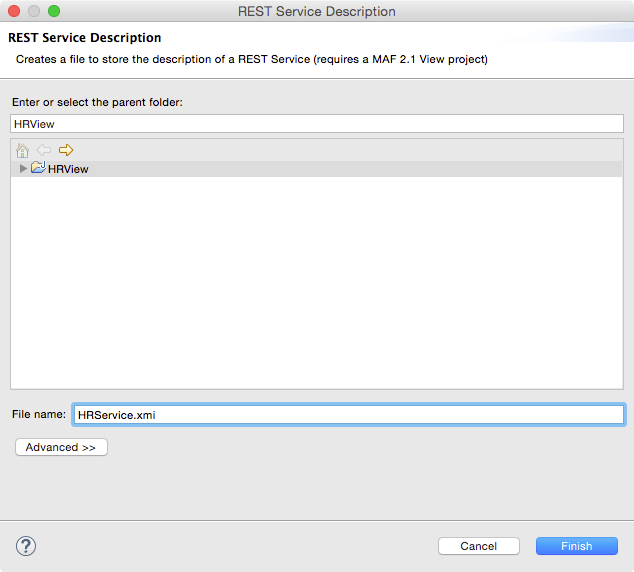
Right-click HRView and select New > REST Service Description.
-
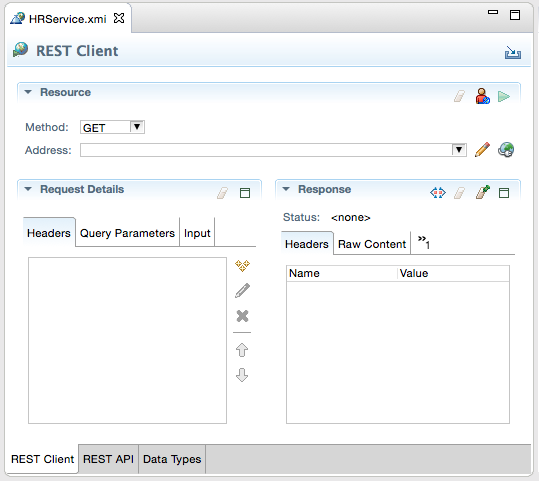
Name it HRService and click Finish.
This creates the REST Service Description and opens the editor.
-
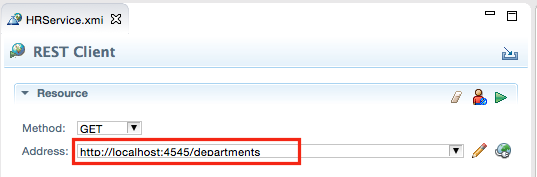
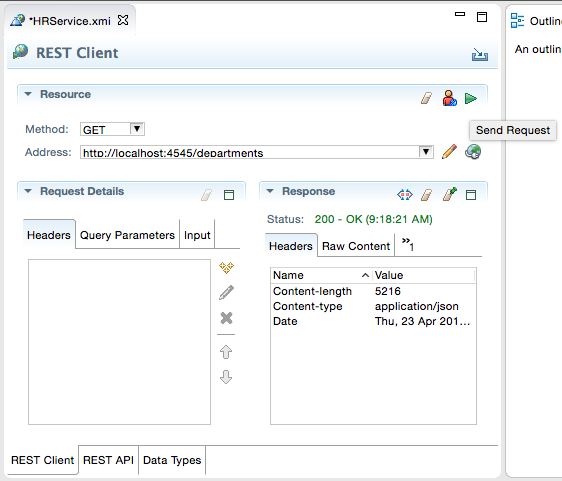
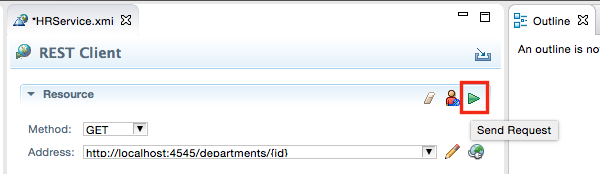
In the Rest Client editor, enter the URL you just used to test the Departments service as the Rest Client Address. (http://localhost:4545/departments)
-
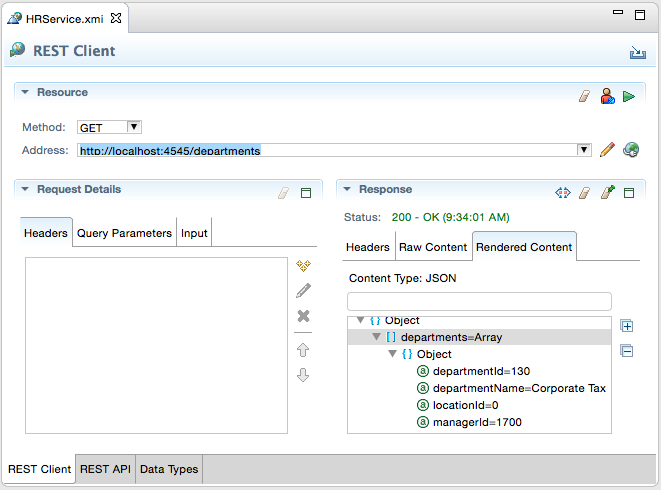
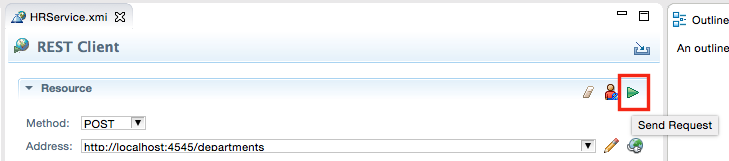
Make sure the Method is set to GET and click the Send Response icon.

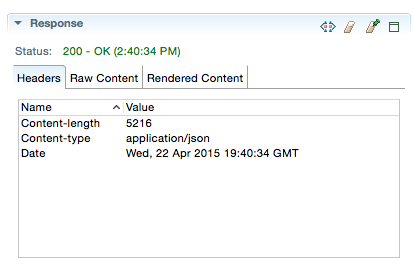
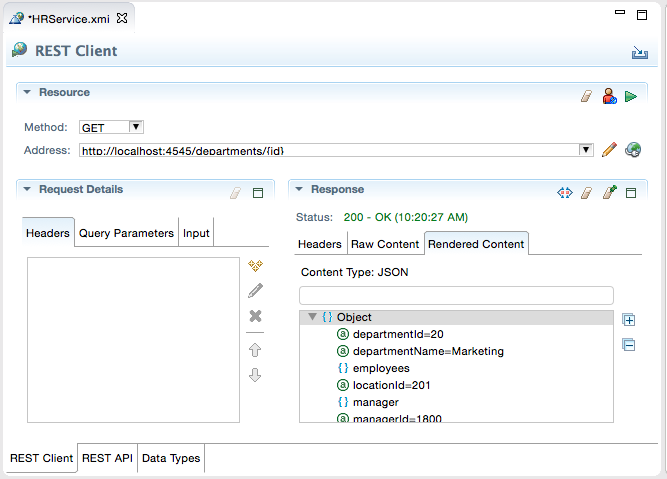
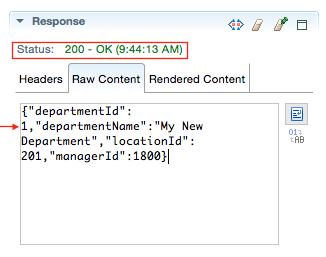
When the editor receives the response, you will see the Status change to the results of the request. In this case you will see 200 - OK, which means the request worked.
-
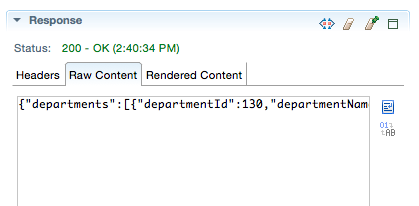
Click the Raw Content tab to see the data in raw form.
-
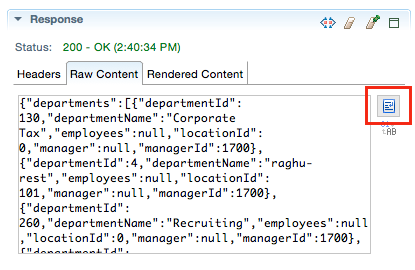
Click the Word Wrap icon to force the data to wrap within the viewing pane.
-
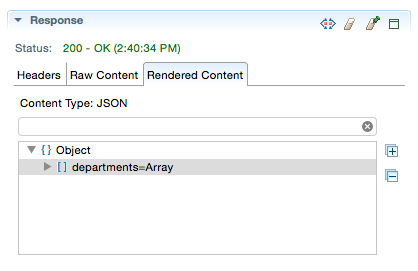
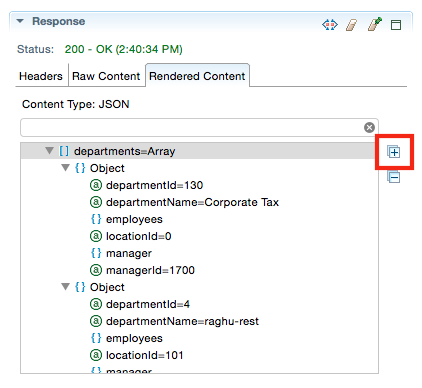
Click the Rendered Content tab to see the data rendered as objects.
-
Click the Plus sign to expand the object nodes to see the rendered data.
So now that you have tested access to a REST JSON service, the next step is to create and explore the API.
In this section, you take the REST JSON service you just tested and create a REST API. You can create an API from the REST Client that you just created or you can create the API first and then use the REST Client to test it.
In this first section, you will create the API from the REST Client you just tested.
-
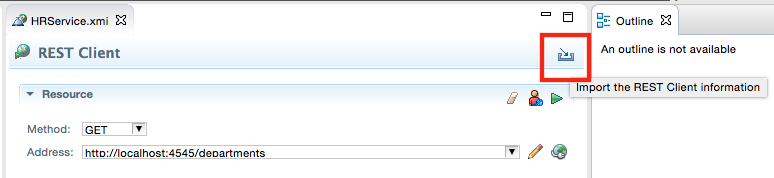
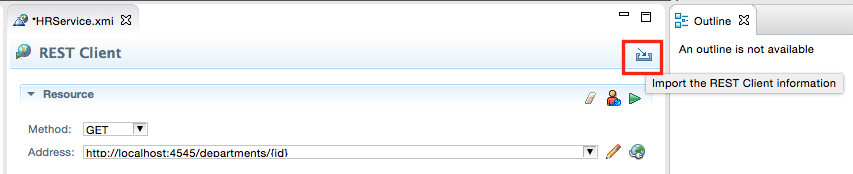
On the REST Client tab, click the Import Rest Client icon.
-
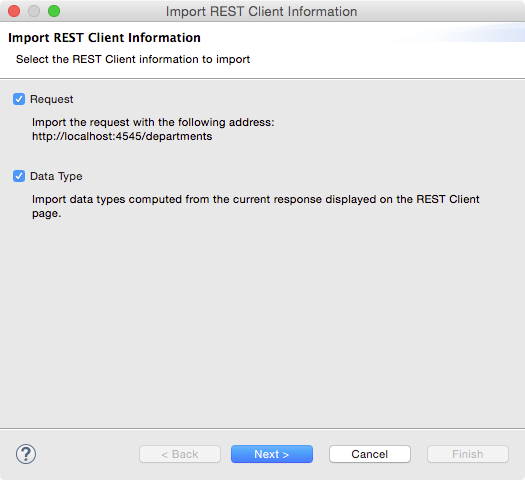
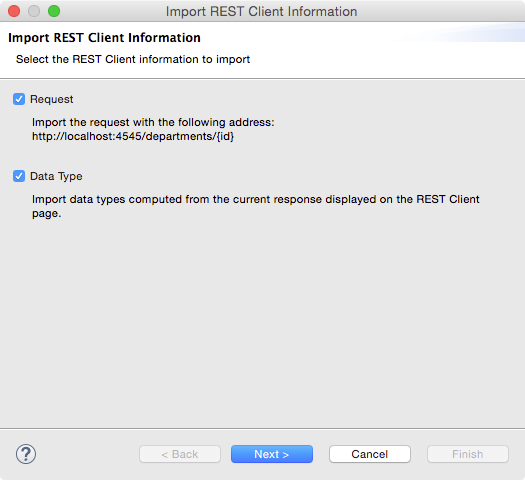
On the Import Rest Client Information dialog, make sure the Request and Data Type are selected and click Next.
-
On the Import Request, remove /departments from the Root Path and set the Request Name to getDepartmentList. As you saw when you tested the service, it returns a list of departments, which is why we set the name to getDepartmentList. Click Finish.

Now that you have created the API, let's examine the definition.
-
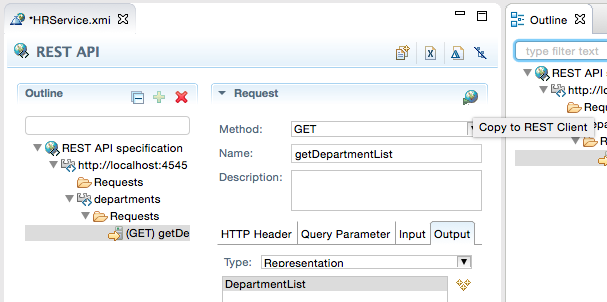
Click on each of the tabs and notice that they are all empty except the Output tab.
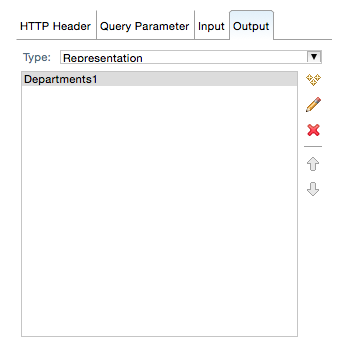
Notice the name of the Output Representation is Departmeents1. This is the default name that was derived JSON payload that was in the response.
-
Click the Data Types tab.
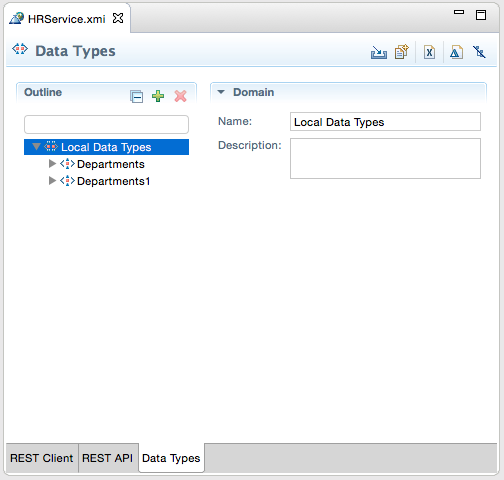
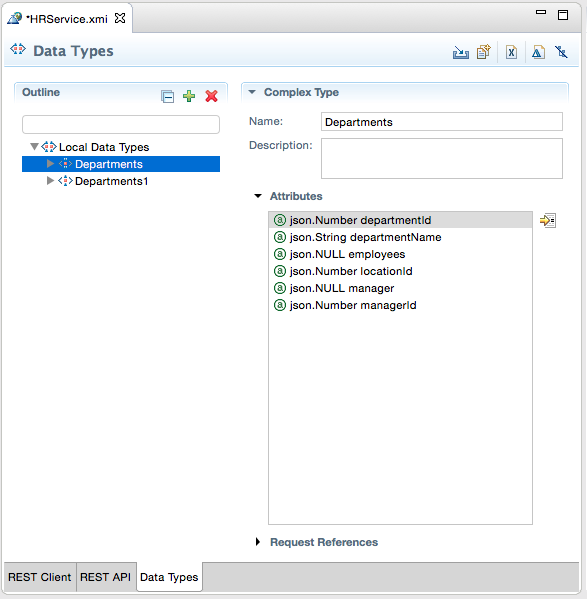
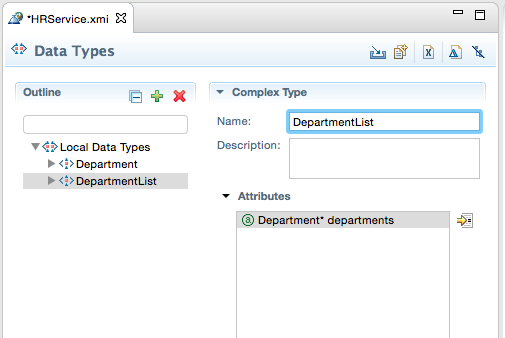
There are two Local Data Types defined to support the service; Departments and Departments1.
-
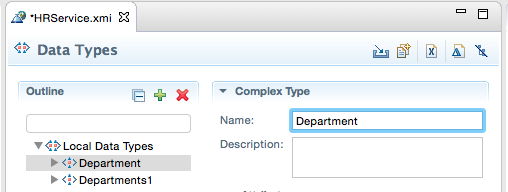
Click Departments. Notice that this is the definition of the Department object.
-
Change the name to Department.
-
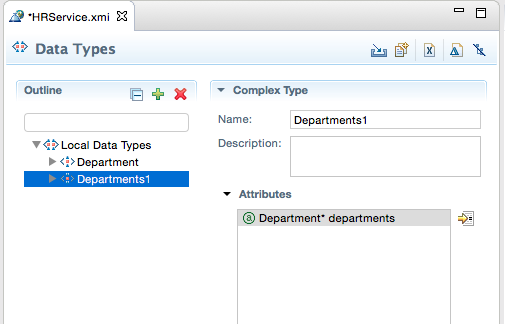
Click Departments1. Notice that this is the definition of a collection of Departments.
-
Change the name to DepartmentList.
Now that you have created a REST API, you can copy the definition back to the REST Client to test it.
-
Click the Copy to REST Client icon.
-
On the REST Client tab, click Send Request and see the results in the Response panel.
In the previous steps, you created a REST API that returns a list of departments. In the next few steps you create another REST API that returns a single department based on department Id.
-
Save your work.
-
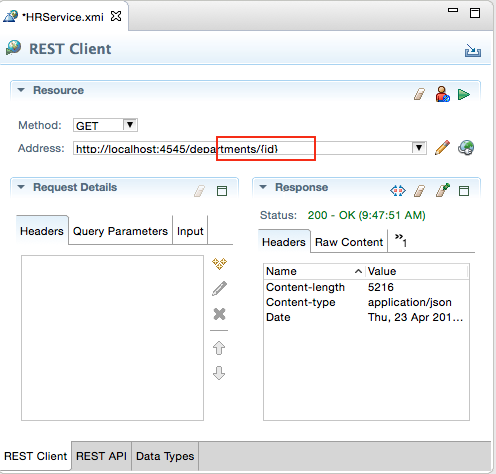
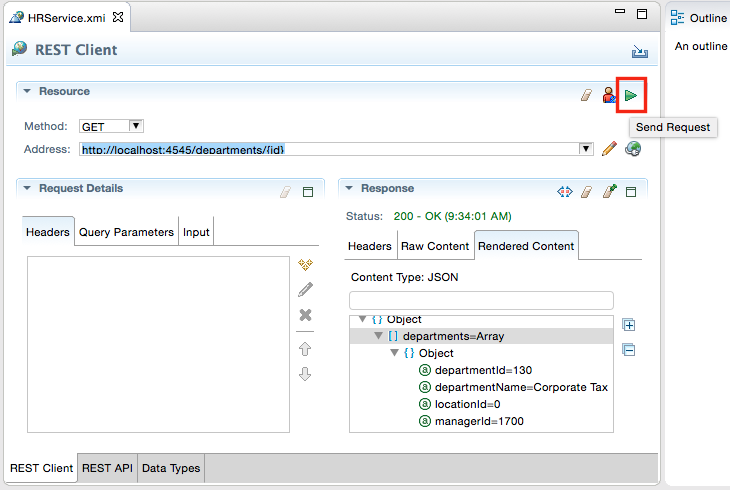
Still on the REST Client tab, add /{id} to the Address of the REST Service.
-
Click Send Request.
-
Because of the argument in the URL, you will be prompted to enter a value for the argument. Enter 20 and click OK.

-
Click the Rendered Content tab and notice that the only row returned is for Department 20.
-
Save your work.
Now that you have seen the REST Client work, you can import it as a REST API.
-
Click the Import REST Client Information icon.
-
Make sure Request and Data Type are selected and click Next.
-
Set the Request Name to getDepartmentById and click Finish.

-
Save your work.
-
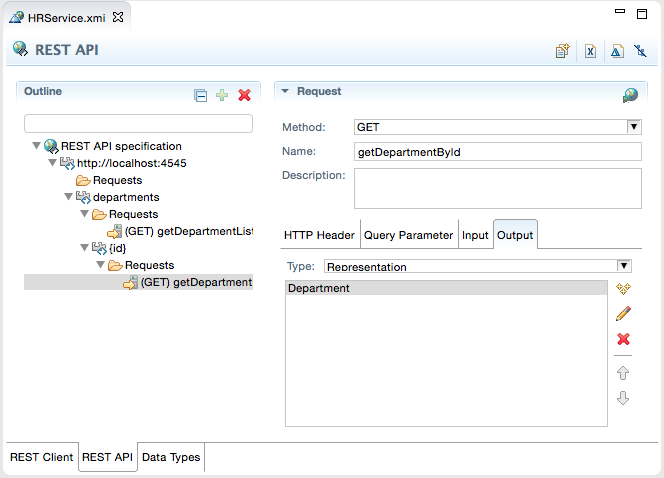
Click the Output tab and notice that it has an output Representation of Department.
-
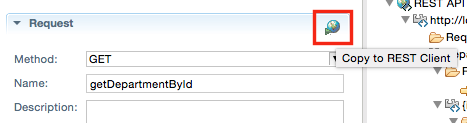
As you did before, click the Copy to Rest Client icon.
-
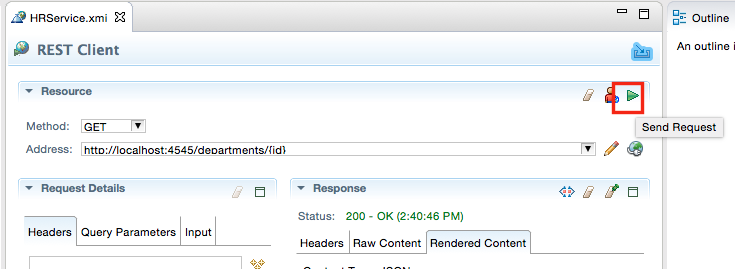
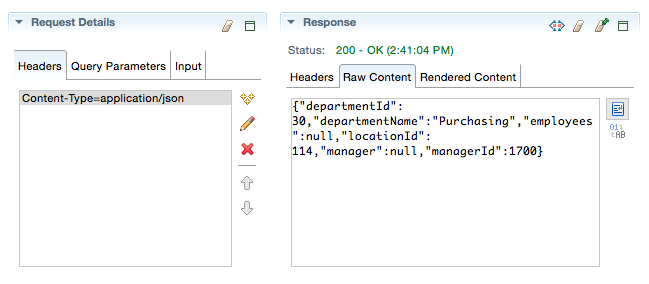
Click the Send Request icon and enter 30 as the department Id.

-
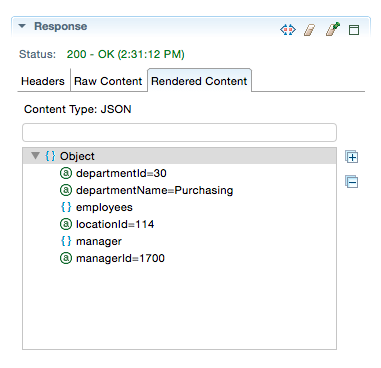
If it is not already open, click the Rendered Content tab to verify the response includes only the department 30 JSON payload object.
In this section, you took a REST JSON service that you tested in the REST Client editor and created REST APIs from them. You created REST APIs for two services. One service returns a collection of Departments while the second one returns a specific Department based on a supplied argument.
In the previous sections, you saw how to create 'read' APIs from a REST JSON service. In this section you create and test several other APIs including and create, update, and delete APIs.
So far, you have created APIs by using the REST Client editor, finding and testing the REST service, then importing it as an API. For this next API, you will create the API directly, and then test it.
-
Click the REST API tab.
-
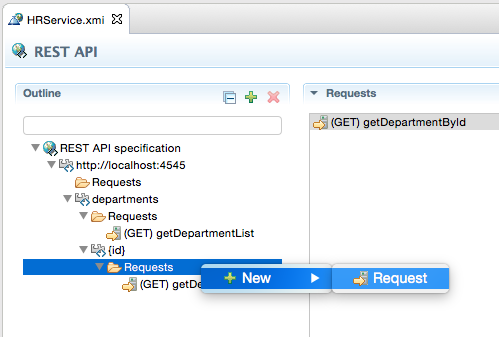
You are going to create an Update API, so you start by creating the Request within the {id} path variable path segment. Click Requests within the {id} path segment.

-
Either right-click Requests and select New > Request, or click the Plus sign in the Outline header to add a request.
-
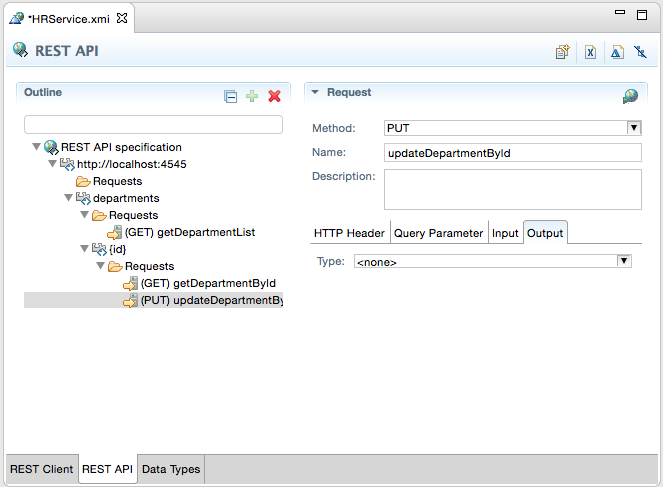
Since this will be an update, set the Method to PUT and the Name to updateDepartmentById.
-
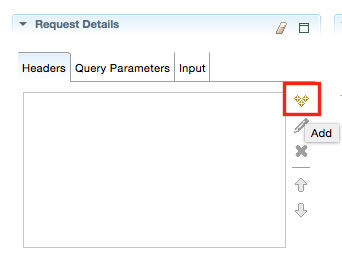
Because you will be sending content with the request, you will need to add a Content Header. Click the HTTP Header tab and click the create icon.
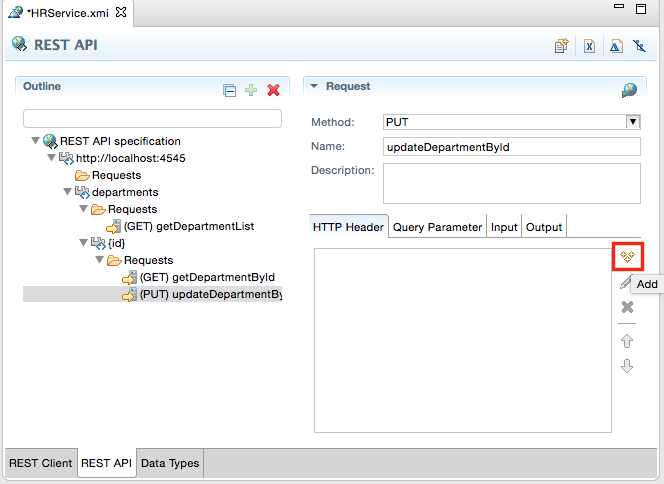
-
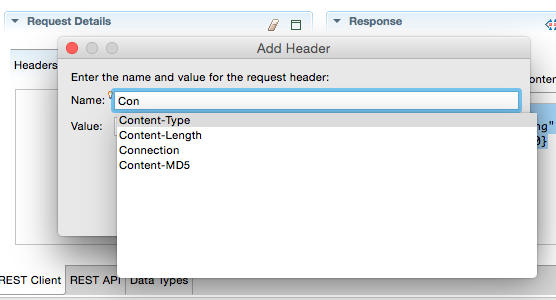
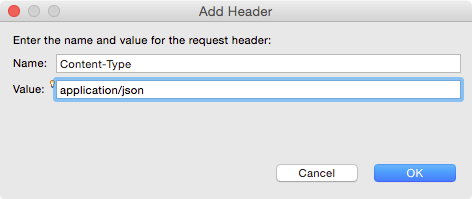
In the Add Header dialog, enter Content-Type as the Name and application/json as the Value. Click OK to create the header.

-
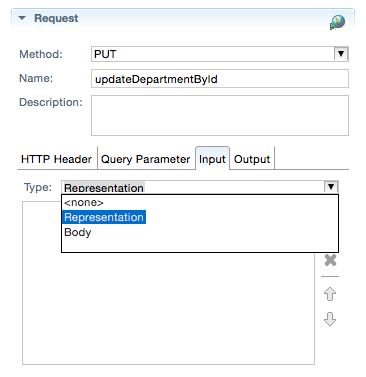
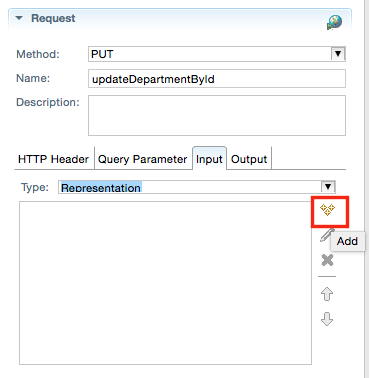
Again, because you are creating an update, you will also need to send input to the service. Click the Input tab.

-
Set the Type to Representation.
-
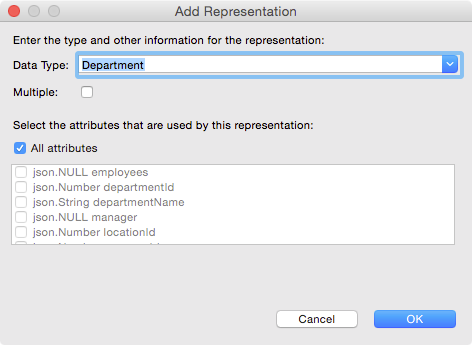
Click the Add icon and select Department as the Data Type.

The Output will also be a Representation Type of Department.
-
Click the Output tab, set the Type to Representation.
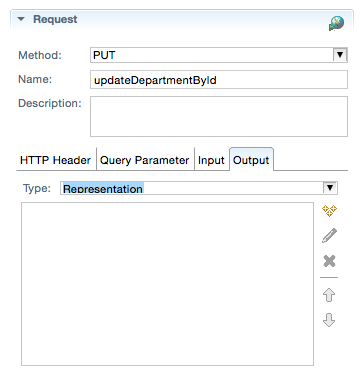
-
Click the Add icon. Set the Data Type to Department and click OK.
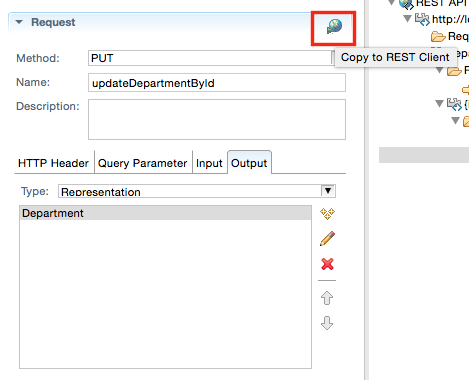
That's all there is to creating an Update API for a REST JSON service. In the next few steps, you will test the API.
-
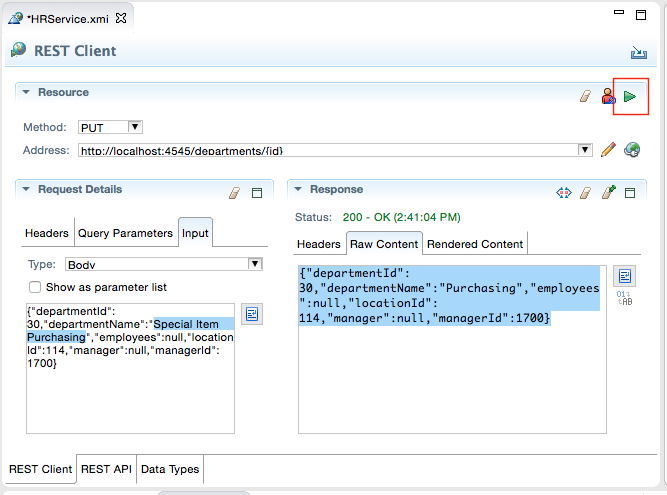
Just as you did before, click the Copy to Rest Client icon.
Remember that the update service requires a Department object. You will add a Department to the Input of the Request Details. You will copy the object from the Response for the last request you sent an paste it into the Input of the new request.
-
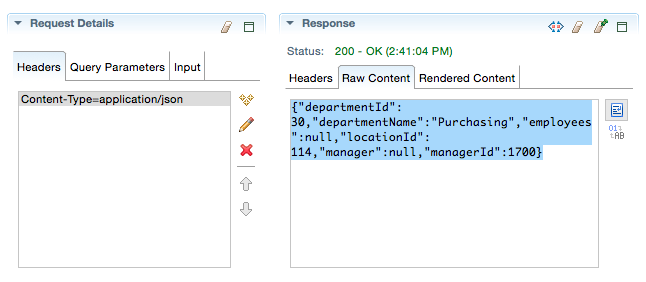
Click Raw Content in the Response panel.
-
Select all of the text and copy it to your clipboard. HINT: Ctrl+C on Windows or Command+C on Mac.
-
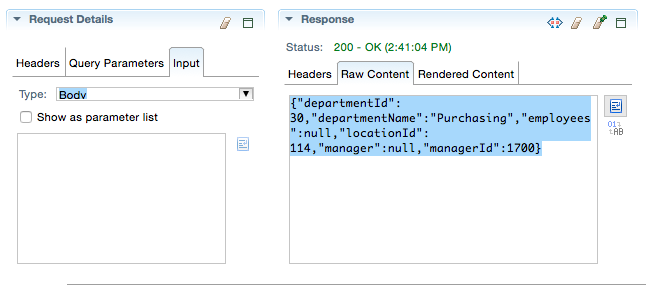
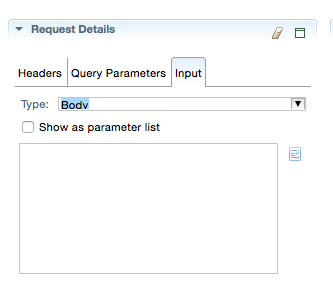
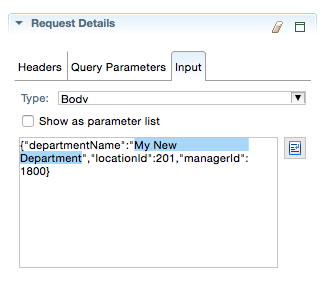
Click the Input tab in the Request Details panel and set the Type to Body.
-
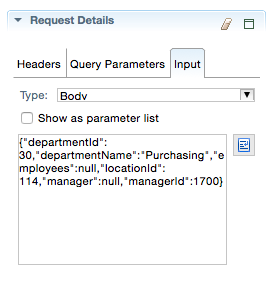
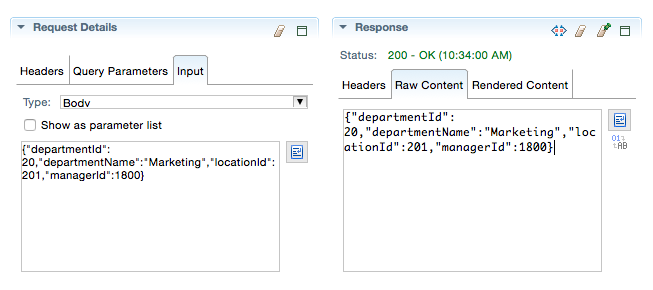
Paste the text you copied from the Raw Content to the Input Body and click the Word Wrap icon.
-
Click inside the Input Body text box and change the value of the departmentName to something of your choice.

-
Click Send Request to call the update service.
-
Enter the Id of the Department you copied from the response. In this example it is 30. Click OK.

-
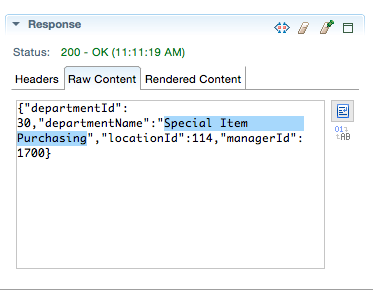
Notice the response Status is OK and the Raw Content shows the new departmentName.
-
Navigate back to the REST Client tab.
-
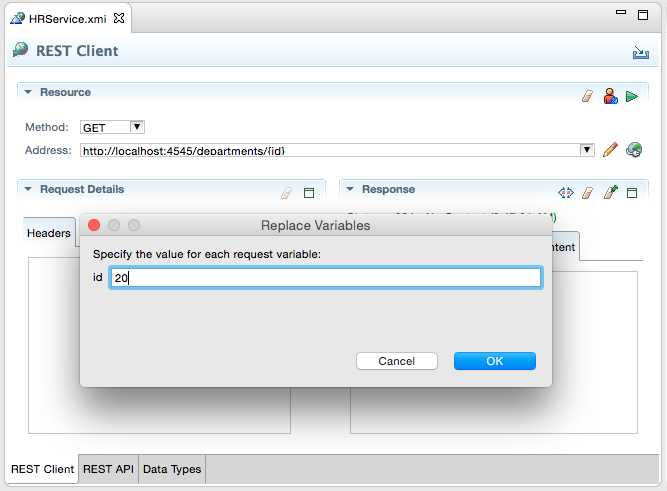
Set the Method to Get and the Address to http://localhost:4545/departments/{id} and click Send Request. This is just to get a department and make sure the service is working.
-
Enter 260 for the id and click OK.

-
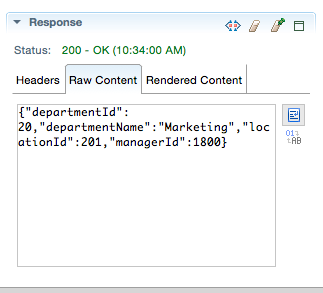
Click the Rendered Content tab and notice that the single department 260 is returned.
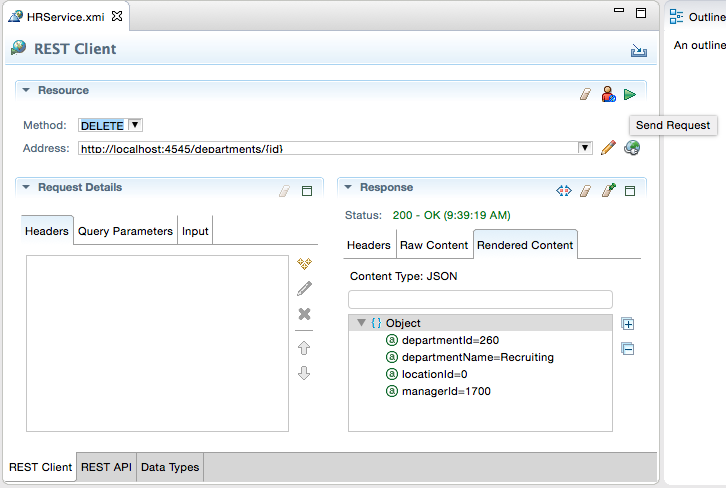
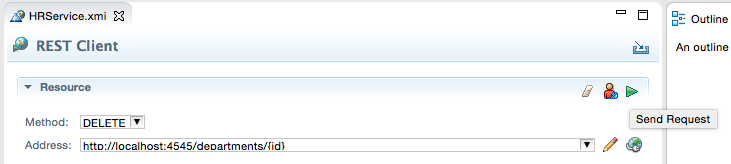
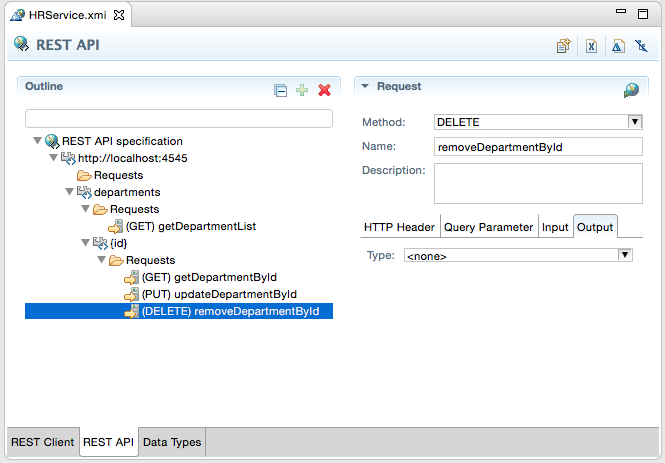
The Delete in the REST service requires the Method to be a Delete and the path segment include a path variable for the Id.
-
Set the Method to Delete and since the Address still includes the {id} path segment, click Send Request.
-
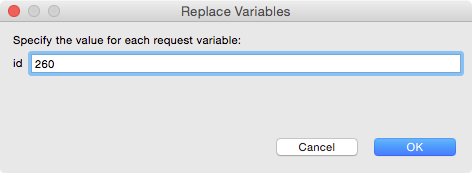
Enter 260 for the id and click OK.
-
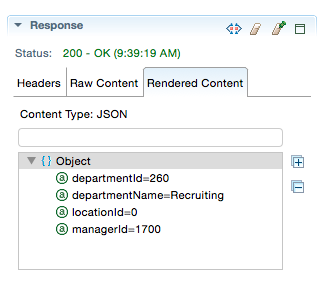
In the Response, notice that the Status is 200 - OK and the departmentId is set to 0.

-
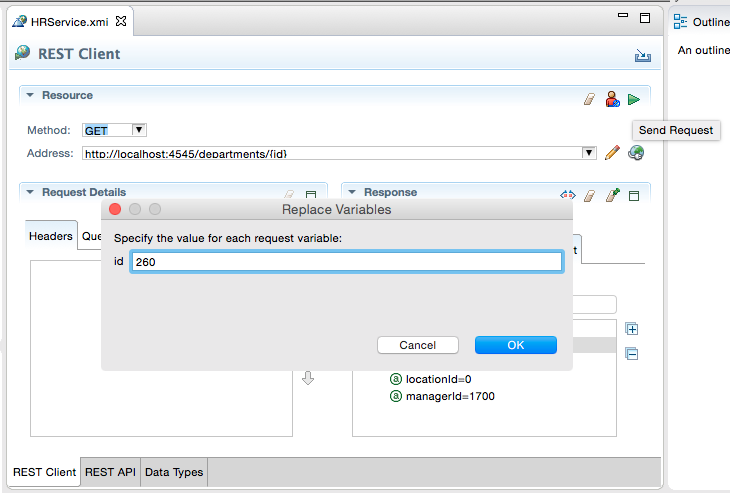
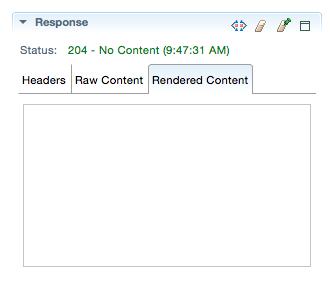
To make sure the department is really deleted, set the Method to Get and click Send Request. As before, enter 260 as the id and click OK.
-
Notice the Status is 204 - No Content, which proves that Department 260 was successfully deleted.
-
Set the Method back to Delete and click the Import icon to create the API.
-
On the Import REST Client Information dialog, click Next.
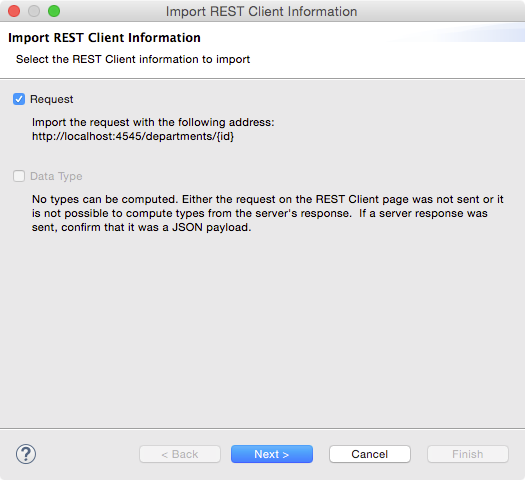
-
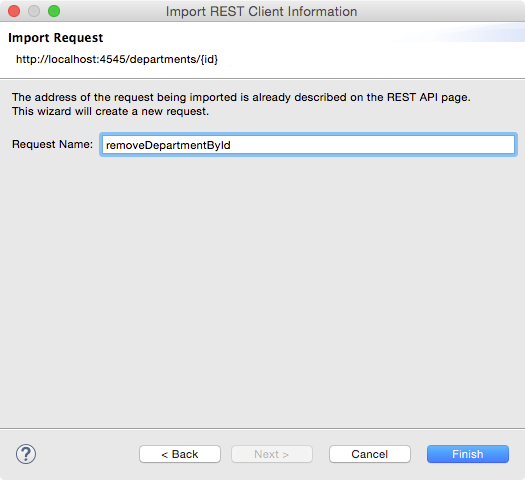
Set the Request Name to removeDepartmentById and click Finish.
-
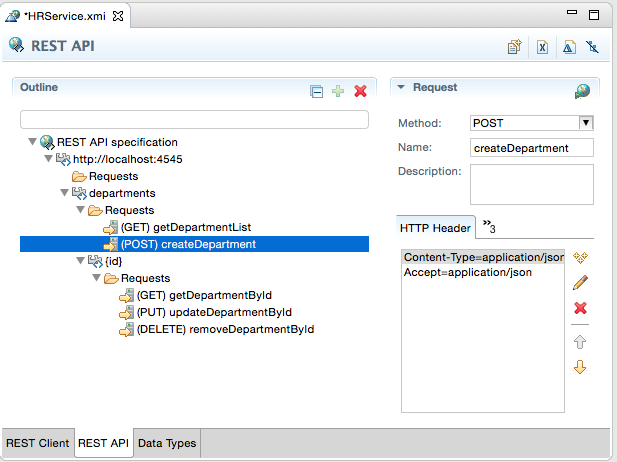
On the Rest API tab, notice the method is added to the departments/{id} path segment.
-
Save your work.
In the next few steps you will test and import a Create method. The create method requires a department object to be sent with the request. Just like you did for the update, you will copy a payload from the Raw Content, change some of the values and use it as the new Department.
-
Back on the Rest Client tab, run a Get method and set the ID to 20, to retrieve department 20.
-
Click the Raw Content tab.
-
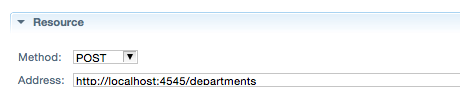
Set the Method to Post and the Address to http://localhost:4545/departments. The Create method does not require the Id as an argument.
-
Click the Input tab on the Request Details and set the Type to Body.
-
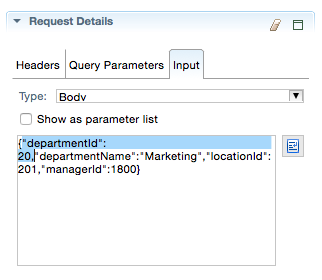
Copy the content from the Raw Content tab and paste it into the Body text box.
-
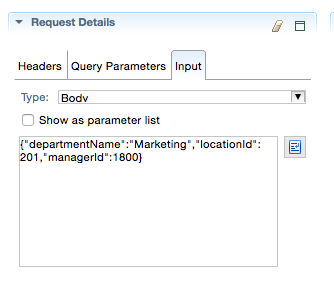
In the Body text box, remove "departmentId": 20, from the content. The create method does not require (or allow) a departmentId as part of the payload.
The content should look like the following:
-
Change the departmentName to a new departmentName to something of your choice.
Before you can send the request, you need to add Headers to the request.
-
Click the Headers tab in the Request Details.
-
Click the Add icon to add a header to the request.
-
Set the Name of the header to Content-Type and the value to application/json. HINT: You can use Control + Space to use type down to help complete the values.
-
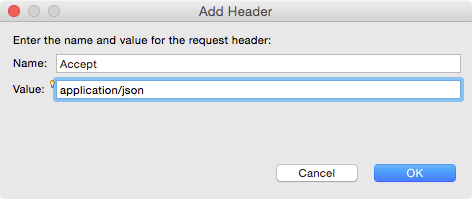
Add a second header with the Name as accept and the Value as application/json.
-
Click Send Request to test the create REST Service.
-
In the Response panel, notice the Status 200 - OK message and in the Raw Content, notice the new department record with a generated Id.
Now you have defined and tested the request, you import it as an API.
-
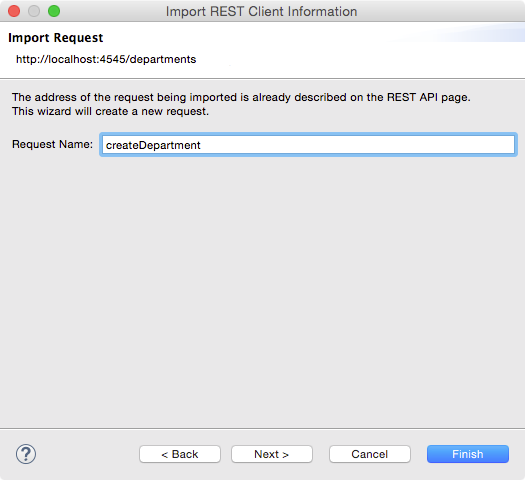
Click the Import icon and on the Import dialog click Next the accept the defaults.

-
Set the Request Name to createDepartment and click Finish.
You can now see all of the APIs you have created on the REST API tab.
-
Save your work.
Now that you have created an update API, you repeat the basic steps to create a delete API.
Now that you have all the APIs created, you can generate the Artifacts that provide programmatic access to the REST services.
In the previous section, you created and tested all the REST Service APIs you need for your application. In this section, you generate the Artifacts that you will use to access the REST services from your application.
-
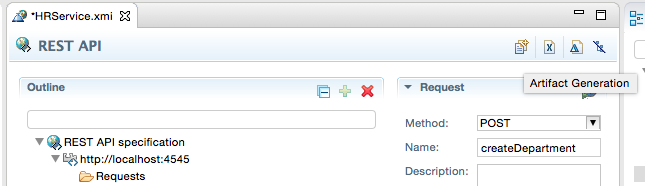
From the REST API tab, click the Artifact Generation icon.
-
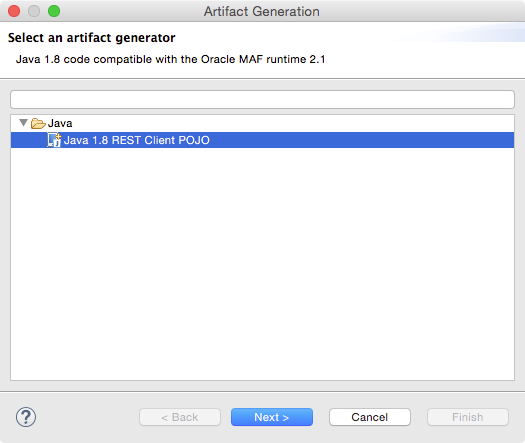
In Select and artifact generator, select Java 1.8 REST Client POJO and click Next.
-
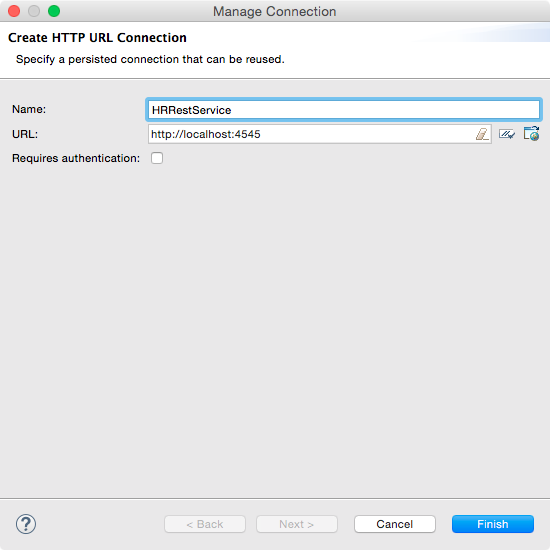
Click Create Connection to create a named connection.
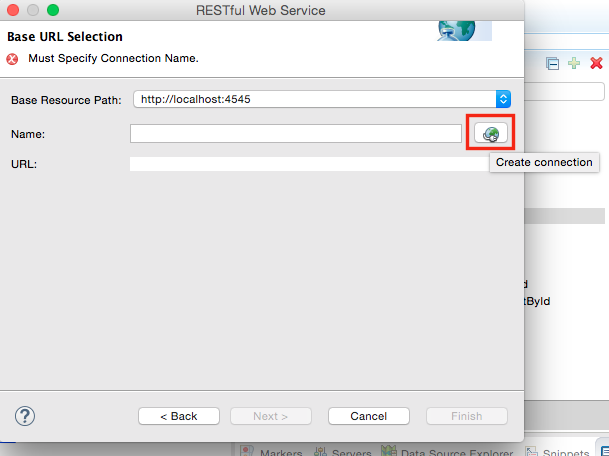
-
Name the connection HRRestService and click Finish.
-
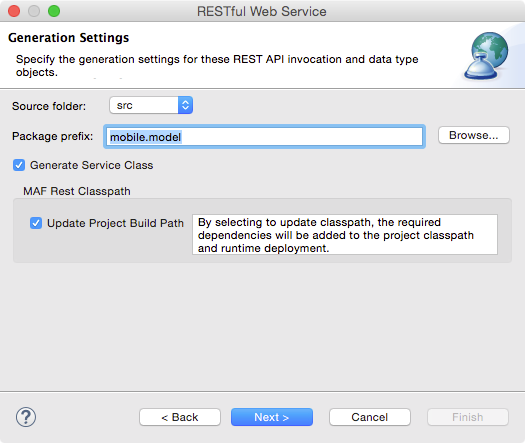
In the Java Class and Package Names dialog, set the Java Name to hrservice and click Next.

-
Click Next to accept the defaults for the Generation Settings.
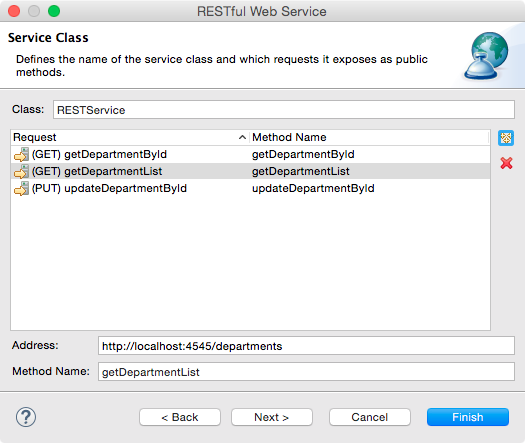
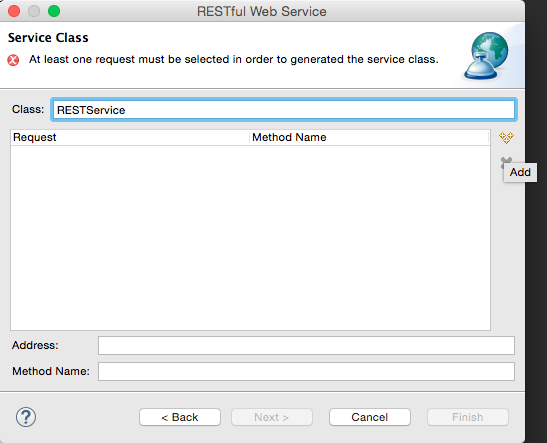
In the next part of the Generation wizard, you pick which APIs you want to use.
-
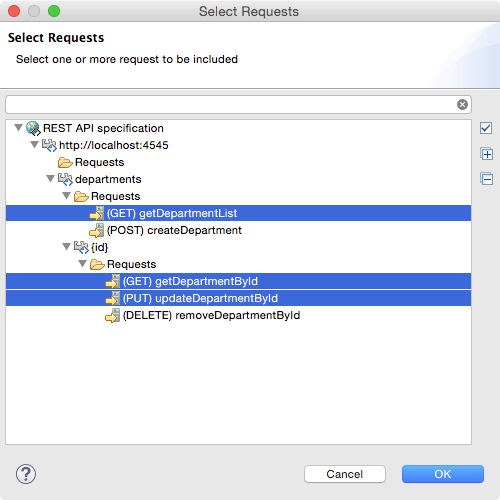
Click the Add icon.
-
In the Select Requests dialog, select getDepartmentList, getDepartmentById, and updateDepartmentById and click OK.
-
The Service Class dialog now shows the selected APIs. Click Finish the generate the artifacts.
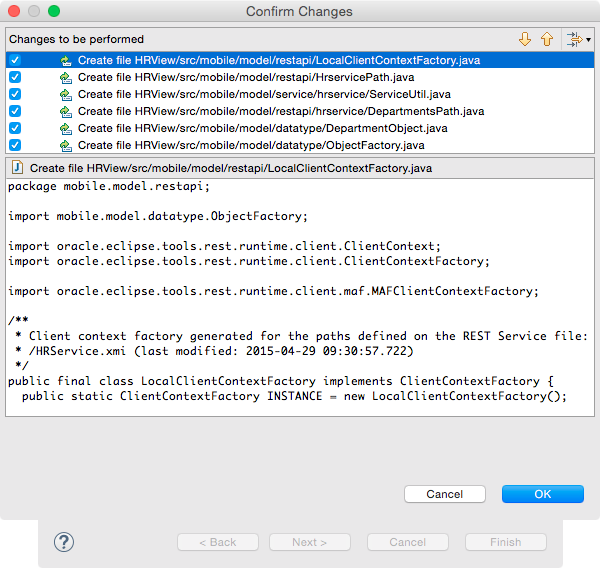
-
Because you are generating (or even updating) artifacts within your application, OEPE will show the list of files affected. If these were changes, OEPE would show the files and the bottom panel would show before and after panes. Click OK to accept the changes.
-
Expand HRView > src to see the artifacts that were generated.
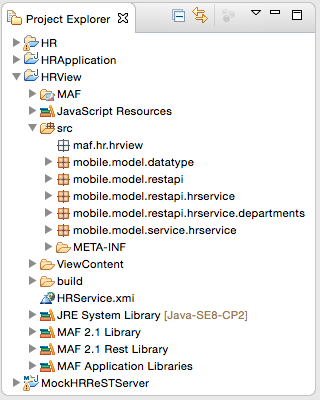
-
Expand mobile.model.service.hrservice and double-click RESTService.java.
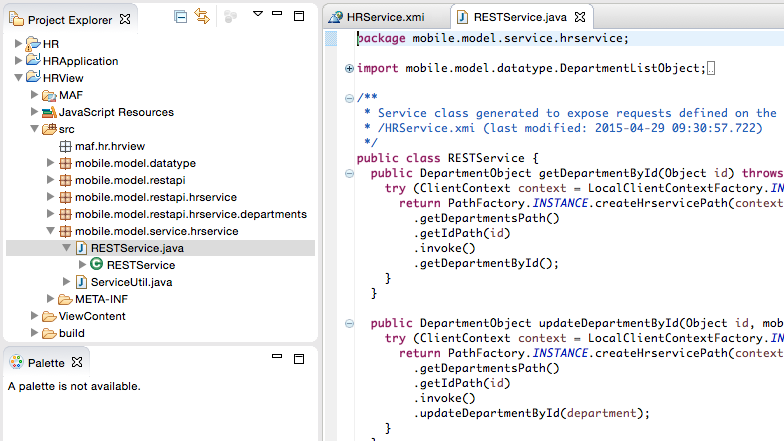
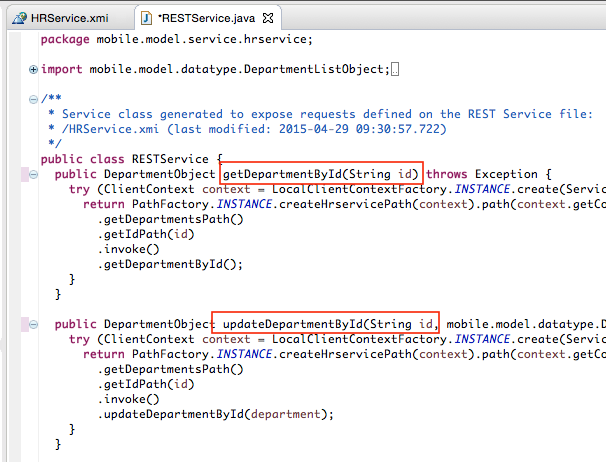
When OEPE generated RESTService.java, it generated some of the methods expecting an Object as an argument. When the application calls the REST service, it expects a String instead of an object.
-
Change the getDepartmentById and the updateDepartmentById method signatures to (String id) instead of (Object id).
-
Save you work.
In this part of the tutorial, you have used the REST Service Editor to test and create APIs to REST Services. You created a few from developing a REST Client and importing as an API. You also created an API directly in the editor.
You then chose a few of the APIs and generated POJO artifacts to support your application.
In the next part of this tutorial, you create Data Controls based on the REST POJOs and consume them with a MAF application.

 Expand all | Hide all