Processing Transcripts for Individuals or Small Groups of Students
This section provides an overview of the Request Transcript Report component, lists prerequisites, and discusses how to:
Create transcript request headers.
Specify students for evaluation.
Enter transcript recipient information.
View process messages for transcript requests.
Use the Request Transcript Report component to process application engine based transcripts for individuals or small groups of students.
Note: The pages of the Transcript Request component (TSCRPT_RQST) still exist in the system: SA_REQUEST_HEADER, SA_REQUEST_DETAIL, SA_REPORT_RESULTS, and SA_REQ_REPORT_ERR.
Use this component to process the COBOL based transcripts.
Use the Request Transcript Report component (application engine) to create and update transcript requests for an individual student or a small group of students. A small group of students is defined as a group of fewer than 20. Process the request, and you can view the transcripts online and print them. You can also use the Request Transcript Report component to create transcript requests for processing on future dates or events. For example, a student can request that a transcript be processed after they are awarded a degree, after their grades are posted for a term, or when a specific date arrives. When the future transcript request is saved, the system generates a report request number. You can then use a single report request number, a range of report request numbers, or requested print dates to process these requests.
Complete these steps to create a transcript request by student ID:
Select the transcript type and enter other general parameters on the Transcript Request Header page.
Enter IDs for students requesting transcripts, as well as recipient information, on the Transcript Request Detail page.
Submit your request by clicking the Process Request button on the Request Detail page.
View results in .PDF format by clicking the View Report link that appears for each student.
If no link appears, view any process errors on the Report Errors page.
Print all results by clicking the Print button.
Before you can create an online transcript request, you must create a transcript type.
|
Page Name |
Definition Name |
Navigation |
Usage |
|---|---|---|---|
|
Transcript Request Header |
SSR_TSRQST_HDR |
|
Select the type of transcript you want to process and set general parameters for the request. |
|
Transcript Request Detail |
SSR_TSRQST_DTL |
|
Enter the IDs that you want to process and the number of copies you want to create. Run the Flexible Transcript generation process. |
|
Send To Information |
SA_REQUEST_DTL_SEC |
Click the Send To button on the Transcript Request Detail page. |
Specify an address to which to send a student's transcript. |
|
Report Messages |
SA_REQ_REPORT_ERR |
|
Review messages about any problems the system encounters while processing the transcript request. |
Access the Transcript Request Header page ().
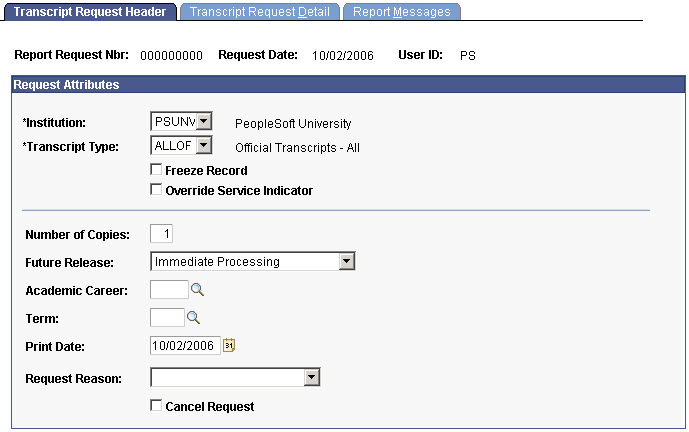
Image: Transcript Request Header page
This example illustrates the fields and controls on the Transcript Request Header page. You can find definitions for the fields and controls later on this page.
|
Field or Control |
Definition |
|---|---|
| Institution |
The system populates this field by default. You can change this value before you enter a transcript type. |
| Transcript Type |
Select a transcript type with the correct detail organization that you want to appear on the transcripts. The system populates this field by user default, but you can change this value. Transcript type values are defined on the Define Transcript Type - Basic Data page, and the Transcript Type default is defined on the User Defaults 4 page. |
| Freeze Record |
Select to protect the request from being purged during the transcript purge process. Because requests build up quickly in your system, the application provides a purge process to delete them. If you select this check box, the purge process does not delete the request. |
| Override Service Indicator |
Select this check box to have the system process transcripts for all students, regardless of whether their service indicators match those specified for this transcript type on the Basic Data page. For instance, some service impacts—if listed on the Basic Data page and attached to the student through a service indicator—might prevent a student from receiving a transcript. See Defining Transcript Type Basic Data. See Using Student Records Service Impacts. See Viewing, Assigning, or Removing Service Indicators If you do not select this check box, the system enforces the service indicator rules and does not generate transcripts for students with negative service indicators that match the service impacts on the Basic Data page for this transcript type. |
| Future Release |
Select a value to indicate that you want the system to print the transcript at a later date. Values for this field are delivered with your system as translate values. Do not modify these values in any way. Any modifications to these values require a substantial programming effort. Values are:
|
| Academic Career and Term |
If available for entry, select the appropriate academic career and term values. Later, you can issue a transcript on the fully graded date (future release value of Grades Post) or after you award degrees for the students (future release value of Degree Confer Date). The system populates the Print Date field with either the fully graded date from the Academic Term Calendar 3 page or the degree confer date from the Academic Term Calendar 3 page. Term values are defined on the Term Table page. To create transcripts for future release, enter the request parameters and save the request without processing it. To later process and print the future release request, enter a single or range of report request numbers or requested print dates on the Transcript Generation page (if running COBOL transcripts) or Process Transcripts (if running application engine transcripts). The system processes requests for all transcripts due to print within the range you specify. After you process a transcript request, the system marks the report request ID as complete and excludes it from further processing. |
This table lists how the Future Release field values affect the Academic Career, Term, and Print Date fields:
|
Field Value |
Academic Career |
Term |
Print Date |
|---|---|---|---|
|
Degree |
Available for entry |
Available for entry |
Unavailable for entry (default is Degree Confer Date for Term). |
|
Grades |
Available for entry |
Available for entry |
Unavailable for entry (default is Fully Graded Date for Term). |
|
Hard Date |
Unavailable for entry |
Unavailable for entry |
Available for entry (default is the system date). |
|
Hold |
Unavailable for entry |
Unavailable for entry |
Available for entry (default is the system date). |
|
Imed Proc (immediate processing) (default) |
Unavailable for entry |
Unavailable for entry |
Unavailable for entry (default is the system date). |
|
Transfr Cr (transfer credit) |
Unavailable for entry |
Unavailable for entry |
Available for entry (default is the system date). |
|
Field or Control |
Definition |
|---|---|
| Request Reason |
Select a request reason. The reason appears on the transcript if the transcript type is set to display request reason information. Values for this field are delivered with your system as translate values. You can modify these values. |
| Cancel Request |
Select this check box to cancel a future-dated transcript request before it is processed. |
Using the Request Header Page (COBOL Based Transcripts Only)
These additional fields appear on the Request Header page (Records and Enrollment, Transcripts, Transcript Request, Request Header):
|
Field or Control |
Definition |
|---|---|
| Output Destination |
Select the output destination of the transcript. This determines where the system electronically sends the results of the process. Values for this field are delivered with your system as translate values. Do not modify these values in any way. Any modifications to these values will require a substantial programming effort. Values are: Page: Sends the transcripts to the Report Results page to be viewed online before printing. You can then click the Print button to initialize Crystal, viewing and printing transcripts through a new window. Printer: Like the Page option, sends the transcripts to the Report Results page to be viewed online before printing. You can then click the Print button to initialize Crystal, viewing and printing transcripts through a new window. |
| Report Format |
With a transcript type that includes an advising report, the Report Format field becomes available for entry. A single report request can have multiple report formats. Values for this field are delivered with your system as translate values. Do not modify these values in any way. Any modifications to these values will require a substantial programming effort. Values are: Standard Report Format: Indicates that the report is delivered to a page or printer. Analysis Database: Indicates that the results of the report are written to the analysis database. The results are stored in computer-readable format so application programs can be written against the tables to create user configurable reports. (This is the only field value that refreshes the database tables.) Completed Only: Indicates that the report contains only those requirement groups that have been wholly completed. (Usually, the advising report bolds incomplete requirement groups and requirements while completed requirement groups are not bold.) Incompleted Only: Indicates that the report contains only those requirement groups that have not been wholly completed. (This field value can help a counselor determine exactly what a student needs to satisfy in order to graduate.) |
Access the Transcript Request Detail page ().
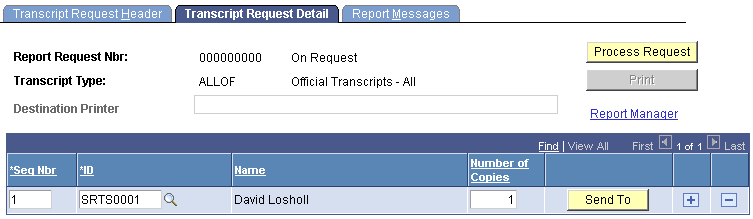
Image: Transcript Request Detail page
This example illustrates the fields and controls on the Transcript Request Detail page. You can find definitions for the fields and controls later on this page.
|
Field or Control |
Definition |
|---|---|
| Seq Nbr (sequence number) |
The system determines the sequence number, and the number is the order in which the transcripts are processed. |
| ID |
Enter IDs of students for whom you want to process transcripts. The system populates the name by default after you enter the ID and tab out of the field. |
| Number of Copies |
Although you can indicate the overall number of copies on the Transfer Request Header page, you can override the number on a student-by-student basis by changing the value in this field. |
| Send To |
Before you process the transcript request, click to enter recipient information for each ID. |
| Process Request |
Click when you are ready to submit the request for processing. An Application Engine process commences. When the process is complete, the system displays the View Report link next to the student's ID. If no View Report link appears, access the Report Errors page to investigate what went wrong during the process. |
| View Report |
Click this link to view the transcript as a PDF file. Each student ID has a link to view its report. |
|
After you successfully complete the transcript request process, the Print button becomes available. Click the button to submit all of the transcripts on this request to the printer. |
Using the Request Detail Page (COBOL Based Transcripts Only)
Here is some information about the Request Detail page (Records and Enrollment, Transcripts, Transcript Request, Request Detail):
|
Field or Control |
Definition |
|---|---|
| Process Request |
Click when you are ready to submit the request for processing. A COBOL/SQL process commences and, when complete, the system displays the results on the Report Results page and automatically opens that page. |
|
After you have successfully completed the transcript request process, the Print button on the Request Detail page becomes available. Click the button to submit the Crystal to the Report manager. Use the Report Manager link to view and print the Crystal output, which the system sorts by Student Name within Transcript Request ID. Click the Print button on the Crystal window and choose whether you want to print all pages or a range of pages. When you have large groups of transcripts to print, clicking the Print All button significantly reduces the time it takes you to print them. You can also print transcripts by individual student ID by clicking the Print button on the Report Results page. |
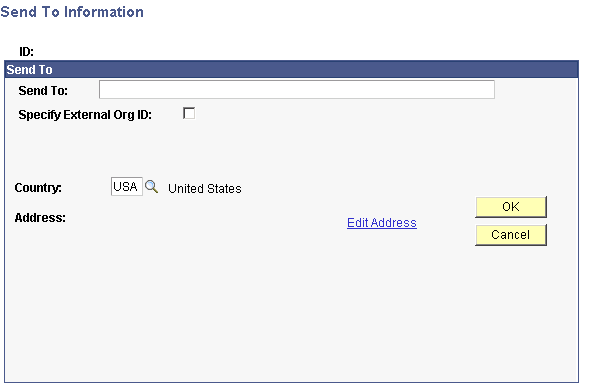
Access the Send To Information page (click the Send To button on the Transcript Request Detail page).
Image: Send To Information page
This example illustrates the fields and controls on the Send To Information page. You can find definitions for the fields and controls later on this page.
|
Field or Control |
Definition |
|---|---|
| Send To |
Enter the name of the addressee. |
| Specify External Org ID (specify external organization ID) |
Select to send the transcript to an external organization that you already have in your database. |
| Org ID (organization ID) |
Select the appropriate external organization ID number. If you do not select the Specify External Organization ID check box, enter the name and address of the recipient in the available address fields. |
| OK |
Click to save and exit the page. |
| Cancel |
Click to exit the page. |
| Edit Address |
Click this link to enter or update the address where the transcript will be sent. |
Access the Report Messages page ().
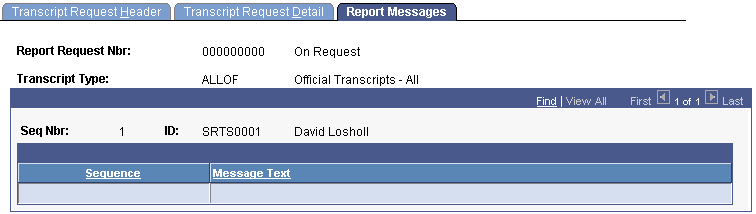
Image: Report Messages page
This example illustrates the fields and controls on the Report Messages page. You can find definitions for the fields and controls later on this page.
|
Field or Control |
Definition |
|---|---|
| Sequence |
After you run the process, the system displays the sequence number in the Sequence column. |
|
Field or Control |
Definition |
|---|---|
| Message Text |
The message text explains the message or error, if any. |
Using the Report Results Page (COBOL)
Here is some information about the Report Results page (Records and Enrollment, Transcripts, Transcript Request, Report Results):
|
Field or Control |
Definition |
|---|---|
|
Click to submit the Crystal to the Report manager. Use the Report Manager link to view and print the Crystal output. Click the Print button on the Crystal window and choose whether you want to print all pages or a range of pages. When you have large groups of transcripts to print, clicking the Print All button significantly reduces the time it takes you to print them. You can also print transcripts by individual student ID by clicking the Print button on the Report Results page. To print transcripts for multiple students whose transcripts you have processed within this report request number, click the Print button on the Request Detail page then click Print All from the Crystal window. If necessary, you can save the transcript request and both process and print the request at a later time. |
To view messages about any problems that the system encounters while processing the transcript request (COBOL), use the Report Errors page (Records and Enrollment, Transcripts, Transcript Request, Report Errors).