Producing Enrollment Verification Reports
The Enrollment Verification feature enables you to produce enrollment verification reports for students. You can produce these reports for individual students on-demand or through a batch process using PeopleSoft Process Scheduler. This feature also enables you track the production of enrollment verifications for individual students, enter enrollment verification requests for future dates, and prevent production of enrollment verifications for students with specific service indicators.
This section discusses how to:
Restrict service indicators from enrollment verification.
Enter enrollment verification requests.
Enter recipient address for enrollment verifications.
Add notes to enrollment verifications.
Process enrollment verifications in batch.
|
Page Name |
Definition Name |
Navigation |
Usage |
|---|---|---|---|
|
Enrollment Verification Req (enrollment verification request) |
ENRL_VER_REQUEST |
|
Enter the content of a student's enrollment verification request. Also view the history of a student's enrollment verification requests. |
|
Address |
ENRL_VER_REQUEST_2 |
|
Enter the destination address of the enrollment verification and the number of copies to be sent. Direct each request to multiple recipients and addresses. For each recipient, either enter a free-form address or select existing address information already stored in the system. |
|
Notes |
ENRL_VER_REQUEST_3 |
|
Add an optional free-form message to be included on the student's printed enrollment verification report. The message can be unique to each recipient of the report. |
|
Enrollment Verification Print |
RUNCTL_ENRL_VER |
|
Process and print enrollment verification reports for students in batch based on the academic institution, request date, and whether the report has been previously printed. |
As you can with academic transcripts, you can set up the system to hold the processing of enrollment verification requests when students have certain negative service indicators. In order for the enrollment verification processes to hold these students' requests, you must first associate the delivered service impact ENVER with a service indicator.
Access the Enrollment Verification Req page ().
Image: Enrollment Verification Req page
This example illustrates the fields and controls on the Enrollment Verification Req page. You can find definitions for the fields and controls later on this page.
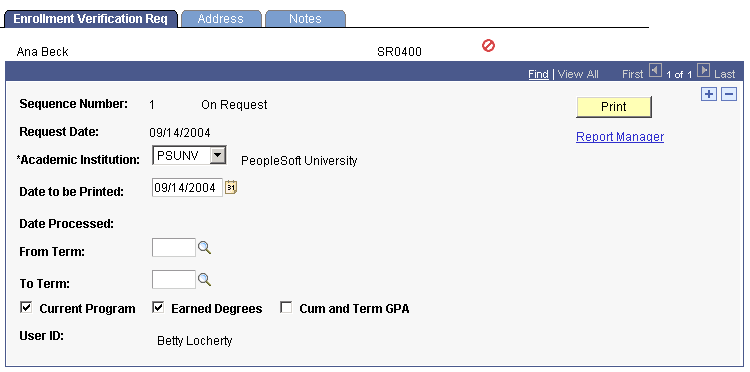
For each request, you can process and print it immediately, process and print it in batch with other requests for a range of days, or hold it for batch processing and printing on a future date. The page displays the student's requests in descending order according to the sequence number of each request, the most recent request appearing on top.
|
Field or Control |
Definition |
|---|---|
| Sequence Number |
The number assigned to each request that has been entered for the student. |
| Request Date |
The date on which the request was entered into the system. If you are entering a new request, the system defaults this date to today's date. |
| Academic Institution |
Select the academic institution for which you want to print the request. The system defaults to the academic institution defined for you on the User Defaults component. |
| Date to be Printed |
The system defaults to today's date the date this request is to be printed. If you want to print the request on a future date through the batch enrollment verification process (COBOL program SRPCENVB), select a new date. The enrollment verification process does not print the request until the system date matches this date and the date range of your batch request includes this date. |
| Date Processed |
If the request has already been processed, the system displays the date that the processing occurred. |
| From Term |
To report all terms for which the student has enrollment history, leave this field blank. To print an enrollment verification report for a single term, select the term. To print an enrollment verification report for a range of terms, select the beginning term in the range. The system defaults the value you select to the To Term field. |
| To Term |
This field value defaults from the From Term field value. If you want to print an enrollment verification report for a range of terms, select the latest term in the range. |
| Current Program |
Select to include the student's current academic career, academic program, academic plan, and academic subplan in the printed report. The system selects this option for you by default. Note: To print the student's current program, academic plan, and academic subplan, the Transcript Level field on the Academic Program page, Academic Plan Table page, and Academic Sub-Plan Table page (respectively) must be set to a value other than Not Print. |
| Earned Degrees |
Select to include the student's earned degrees in the printed report. The enrollment verification process prints degrees in degree sequence number order and their associated degree plans in plan sequence number order. If you select this option and the student has no earned degrees, the process excludes this section of information from the printed report. |
| Cum and Term GPA (cumulative and term grade point average) |
Select to include the student's GPA by term and cumulative GPA by academic career on the printed report. Note: To print the student's cumulative GPA by academic career on the request, you must also select the Current Program option. |
| User ID |
If the request has already been processed, then for tracking purposes, the system displays the user ID of the person who entered the request. |
| Status (not labeled) |
The current status of the request, either On Request or Completed. |
|
Click this button to process the request immediately and send the report directly to your default printer. All of the student's academic careers appear on the same report, listed separately by term. The COBOL program SRPCENVR extracts the student data from the STDNT_CAR_TERM table for all academic careers and applicable terms. After this is done, the process updates the request Status field to Completed. Also click this button to reprint a request. The system keeps no record of reprinted enrollment verifications. If the student has no enrollment history based on the request parameters, the system prints a report with the enrollment history header and the message Enrollment History Unavailable. If the student has a service indicator with an attached service impact of ENVER, the system displays the Service Indicator page, indicating that enrollment verification has been prevented due to negative service indicators. |
Technical Information
The COBOL program SRPCENVR writes data to two tables, and this data gets printed by Crystal on report SR802---.rpt. One table holds the header data and another table holds the detail data. The COBOL process first outputs the header records—one for each request detail and copy requested. For example, if three copies are requested for address A, three header records are produced with address A. The COBOL process then produces the detail records one time for the whole request. The two tables are joined using the query tool and Crystal, producing the right number of copies for each requested address. You can alter the enrollment verification headers by modifying the SRCCENVR Program ID on the Strings Table page (PeopleTools, Utilities, Use Strings Table).
You can also change the date format for the Enrollment Verification Report (SR802). Access the Define Personalizations page (PeopleTools, Personalization, Personalization Options, Format tab, DFRMT option). You can set the date separator options on the same page, under the DTSP option. These settings control the following fields that appear on the SR802 report:
Enrollment Verification As of date
Expected Completion Date
Declare Dt
Begin Date
End Date
Access the Address page ().
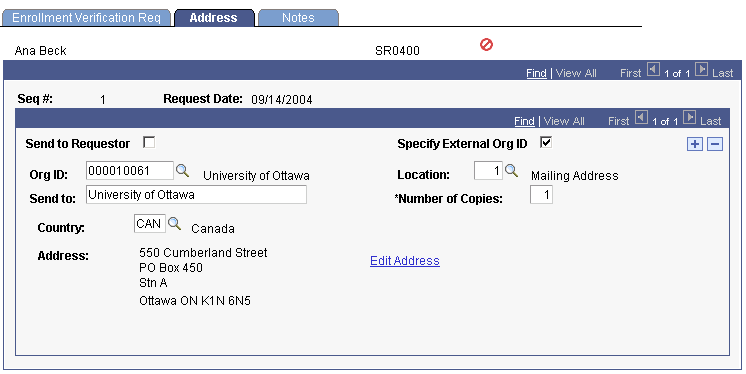
Image: Address inquiry page
This example illustrates the fields and controls on the Address inquiry page. You can find definitions for the fields and controls later on this page.
|
Field or Control |
Definition |
|---|---|
| Send to Requestor |
Select to automatically populate the Send To field with the requestor's name and the address fields with the requestor's home address. |
| Specify External Org ID |
Select to be able to choose an existing external organization. The system makes available the Org ID and Location fields for this purpose. |
| Org ID (organization ID) |
This field becomes available when you select the Specify External Org ID check box. Select the organization to which you are sending the enrollment verification request. The field prompts against the Organization Table record. Define external organizations on the Organization Table page. After you press Tab to move out of the field, the system automatically populates the Send To field with the organization's name. |
| Location |
This field becomes available when you select the Specify External Org ID option. Select the location code of the organization to which you are sending the enrollment verification request. After you press Tab to move out of the field, the system automatically populates the address fields with the location address. |
| Send to |
Enter the name of the recipient to whom you are sending the enrollment verification report. If you select either the Send to Requestor check box or the Specify External Org ID check box, then this value populates automatically according to your selection; however, you can overwrite it. You can also enter multiple recipients. |
| Number of Copies |
Enter the number of enrollment verification reports that you want to produce and send to this recipient and address. |
| Country |
Select the country of the recipient's address. After you press Tab to move out of this field, the system displays the address format associated with that country. Enter all of the necessary address information in the address fields that appear. If you select either the Send to Requestor check box or the Specify External Org ID check box, then these fields populate automatically according to your selection. When you process and print the report, either through the Print button on the Enrollment Verification Req page or through the batch process, the address prints so that it appears properly through the window of a #10 envelope. |
Access the Notes page ().
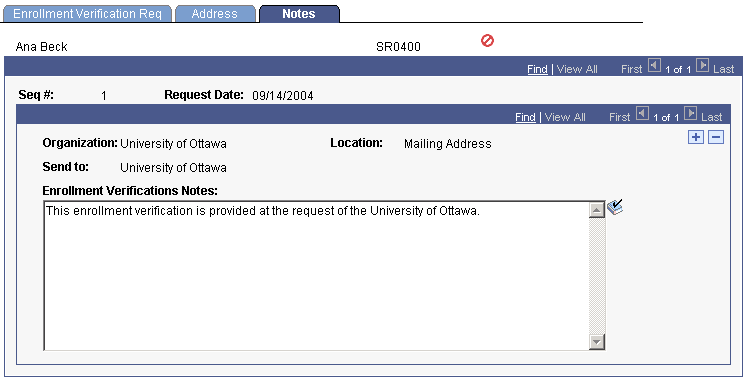
Image: Notes page
This example illustrates the fields and controls on the Notes page. You can find definitions for the fields and controls later on this page.
|
Field or Control |
Definition |
|---|---|
| Send To and Organization |
The system displays the name of the recipient in these fields. |
| Enrollment Verification Notes |
If you want to include a message on the enrollment verification report, enter it in this text box. |
Access the Enrollment Verification Print page ().
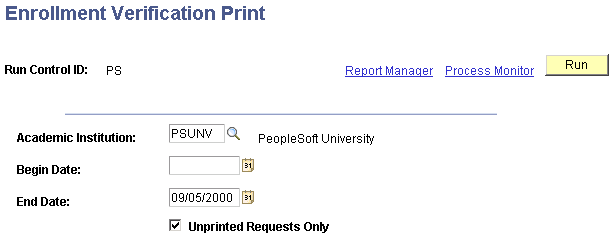
Image: Enrollment Verification Print page
This example illustrates the fields and controls on the Enrollment Verification Print page. You can find definitions for the fields and controls later on this page.
|
Field or Control |
Definition |
|---|---|
| Academic Institution |
Select the academic institution for which you want to print enrollment verification reports. |
| Unprinted Requests Only |
Select if you want the process to print only the request records that have a status of On Request, as displayed on the Request process page in the Enrollment Verification Req component. The process excludes all previously printed enrollment verification reports. The system selects this check box by default. Note: If you clear this check box, the process reprints any request with a status of Completed. The new report contains all information as of the run date. |
| Begin Date and End Date |
In the Request Date group box, select a range of dates to process only the request records entered into the system on or within these dates. By default, the system populates the End Date field with today's date. If you want to print the academic institution's request records for all dates, leave these fields blank. Note: The process does not print request records where the date to be printed value is set to a future date. It prints these records after the date to be printed is on or before the system date and falls within the date range your request for the batch process. |
First run the COBOL process SRPCENVB to populate the results tables. PeopleSoft Process Scheduler runs the process at user-defined intervals. Then run the Crystal report SR803---.rpt to generate the enrollment verification reports from the results tables. Each report prints in alphabetical order by the student's name (last name, first name) and displays data according to the criteria selected on the Enrollment Verification Req component. The process extracts the student data from the STDNT_CAR_TERM table for all academic careers and applicable terms. After this is done, the process updates the request status to Completed. Run the PSJob only if you are running the process on a server.
If you have set up negative service indicators with a service impact of ENVER and students have one of these service indicators, the SRCENVB process creates error records for these students. If you want to see the list of students who the process excluded due to negative service indicators, then run the Crystal report SR804---.rpt. The report includes the student's name, ID, request number, and the service indicator that has the service impact ENVER.
Technical Information
The COBOL program SRPCENVB writes data to two tables, and Crystal prints this data. One table holds the header data and another table holds the detail data. The COBOL process first outputs the header records, one for each request detail and copy requested. For example, if three copies are requested for address A, three header records are produced with address A. The COBOL process then produces the detail records one time for the whole request. The two tables are joined using the query tool and Crystal, producing the right number of copies for each requested address.