A riser board assembly provides network and data-path connections for network or read and write operations. If the assembly fails, read and write operations carried by the HBAs will fail as well.
- Prerequisites:
Before handling a component, touch a grounded surface to discharge any static electricity.
Attach an electrostatic discharge (ESD) wrist strap to your wrist, and stand on an ESD mat while replacing components.
Disconnect any cables connected to the PCIe cards in the riser that must be replaced.
Each Controller contains three PCI-express (PCIe) risers that are located side by side at the back of the Controller. The three risers, though similar, are not interchangeable. Each riser hosts two PCIe3 slots and can accommodate two PCIe3 host bus adapters (HBAs). The risers are customer replaceable units (CRUs). Replacing a riser assembly requires you to bring the Controller offline. The following figure shows the location of the three risers.
Note: By design, the risers are mechanically dependent upon each other. Even if there are no PCIe3 HBAs installed, all risers must be installed.
Figure 1 Riser locations
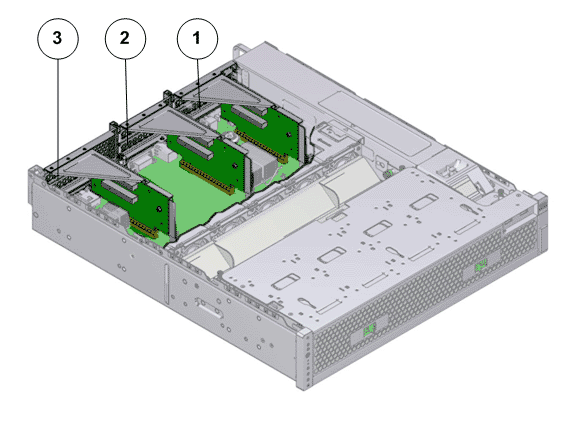
- Legend
1 Riser 1 2 Riser 2 3 Riser 3 with latch
Note: The risers can be accessed only after removing the top cover over the Controller chassis.
Note: To replace a riser, you do not need to remove the Controller from the rack but extend it along the Controller rails using the cable management arm (CMA).
Note: Ensure that all power is removed from the Controller before replacing the riser. Disconnect the power cords before performing the riser replacement procedure.
Procedure Overview