使用本地或远程介质安装 Oracle VM
在开始之前,查看开始之前中的安装先决条件。
-
访问主机控制台。
有关说明,请参见访问主机控制台。
-
确保安装介质可引导。
有关说明,请参见准备引导介质。
-
打开服务器电源或者复位服务器。
例如,要复位服务器,请执行以下操作之一:
-
在本地服务器中,按服务器前面板上的电源按钮(大约 1 秒钟)关闭服务器电源,然后再次按该电源按钮打开服务器电源。
-
在 Oracle ILOM Web 界面中,选择 "Host Management" -> "Power Control",然后从 "Select Action" 列表框中选择 "Reset"。
-
在 Oracle ILOM 命令行中,键入 reset /System。
服务器将开始引导过程。

注 - 后续事件会很快发生,因此执行以下步骤时需要格外注意。请密切注意这些消息,因为它们在屏幕上的显示时间很短。您可能需要拉大屏幕尺寸消除滚动条。 -
-
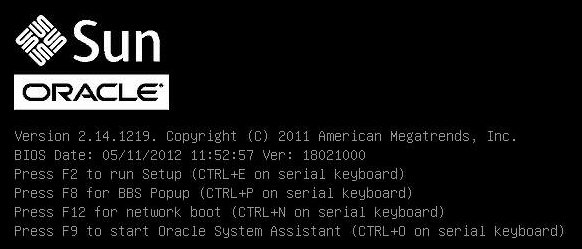
在 BIOS 屏幕中,按 F8 键指定用于安装 Oracle VM 的临时引导设备。
此时将显示 "Please Select Boot Device" 菜单。
-
在 "Please Select Boot Device" 菜单中,选择外部或虚拟 CD/DVD 设备作为引导设备,然后按 Enter 键。
"Boot Device" 菜单上列出的设备字符串的格式如下:设备类型、插槽指示符和产品 ID 字符串。
几秒钟后,将显示 Oracle VM 的过渡屏幕。

-
按 Enter 键开始安装。
如果未按任何键,则一分钟后安装程序将自动启动。安装程序仅在文本模式下可用。
-
请参阅《Oracle VM Installation and Upgrade Guide for Release 3.3》(《Oracle VM 安装和升级指南,发行版 3.3》),网址为 http://docs.oracle.com/cd/E50245_01/index.html。
《Oracle VM Installation and Upgrade Guide for Release 3.3》提供了对 Oracle VM 安装的逐步说明。
- 按屏幕提示安装 Oracle VM 和 Oracle VM Agent。
-
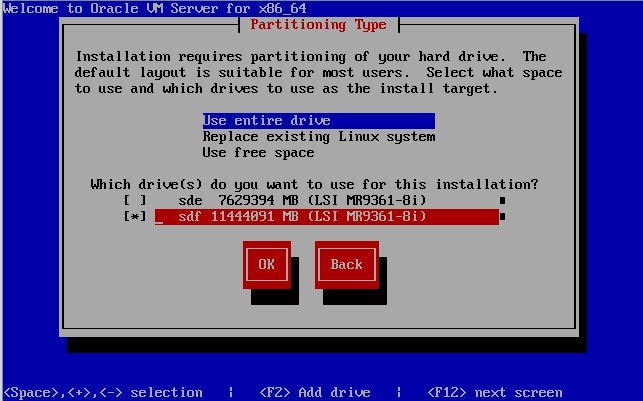
按屏幕提示进行操作时,会显示 "Partitioning Type" 屏幕。

注 - 尽管《Oracle VM Installation and Upgrade Guide for Release 3.3》(《Oracle VM 安装和升级指南,发行版 3.3》)(网址为 http://docs.oracle.com/cd/E50245_01/index.html)中介绍了下一步骤,下面也列出了这些内容,因为在选择要安装 Oracle VM Server 的驱动器时必须谨慎。 -
在 "Partitioning Type" 屏幕中,执行以下操作:
-
选择以下分区布局之一:
-
Use entire drive
-
Replace existing Linux system
-
Use free space
-
-
选择您要用于此安装的驱动器。

Caution - 在 "Partitioning Type" 屏幕中,Oracle SSM 驱动器为 Oracle System Assistant USB 闪存驱动器。您可能需要滚动到屏幕底部才能看到此驱动器。绝不可将 Oracle SSM 驱动器选作软件安装驱动器。将 Oracle VM Server 安装到 Oracle SSM 驱动器将覆盖 Oracle System Assistant 软件,导致需要恢复 Oracle System Assistant。有关恢复 Oracle System Assistant 的说明,请参见《Oracle X5 系列服务器管理指南》,网址为:http://www.oracle.com/goto/x86AdminDiag/docs。
- 选择 OK 继续安装。
-
选择以下分区布局之一:
-
要完成安装,请参阅 Oracle VM 安装文档并按说明进行操作。
请参阅《Oracle VM Installation and Upgrade Guide for Release 3.3》(《Oracle VM 安装和升级指南,发行版 3.3》),网址为 http://docs.oracle.com/cd/E50245_01/index.html。
注 - 安装 Oracle VM 需要两个密码:一个用于 Oracle VM Server root 帐户,一个用于 Oracle VM Agent。 -
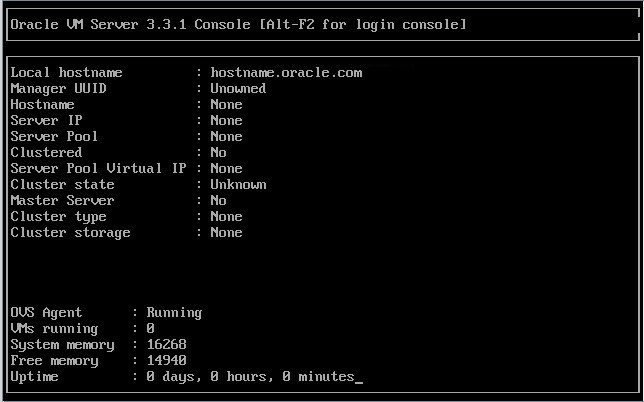
完成 Oracle VM Server 和 Oracle VM Agent 安装后,执行以下操作之一:
-
如果您没有配置为对 Oracle VM 进行管理的 Oracle VM Manager,则需要在转至Oracle VM Server 的安装后任务之前安装该软件。
有关安装 Oracle VM Manager 的说明,请参阅《Oracle VM Installation and Upgrade Guide for Release 3.3》(《Oracle VM 安装和升级指南,发行版 3.3》),网址为 http://docs.oracle.com/cd/E50245_01/index.html。
-
如果您已有配置为对 Oracle VM 进行管理的 Oracle VM Manager,请转至Oracle VM Server 的安装后任务。
-