B Importing Batch Data into the System
This appendix contains these topics:
The batch import process enables you to import data from a Comma-Separated Values (CSV) file directly into a JD Edwards World database file. To preserve system integrity, the system controls which files it allows for batch import. These files are usually Z files or EDI files; a file that you process to validate the information in a batch mode before updating other files in the database.
In the Purchase Card (PCard) and Travel and Expense systems, you can use the batch import process to upload information into the following files instead of entering it manually:
-
Employee Card Information (F01P01)
-
Merchant Information (F01P02)
-
Travel and Expense, Expense Report Header (F01P17)
-
Travel and Expense, Expense Report Detail (F01P171)
-
Purchase Card Bank Transmissions (F01PBKZ)
To use the batch import process you download a template (spreadsheet) that corresponds to the file you want to update and save it as a CSV or Extensible Markup Language (XML) file. The template contains the field headers, field names, and descriptions to identify the columns that you complete. For employee card and merchant information, you provide the spreadsheet to the bank for them to update. Once you receive the updated spreadsheet, you use the import process to upload the appropriate Z file:
-
Employee Purchase Card (F01P01Z)
-
PCard Merchant (F01P02Z)
-
Expense Report Detail (F01P17DZ)
-
Expense Report Header (F01P17HZ)
After you upload information to the Z file, you run one of the following batch import program to process the records to the files:
-
Purchase Card Revisions - P01P01Z into F01P01
-
Merchant Revisions - P01P02Z into F01P02
-
Expense Report Revisions P01P17Z into F01P17 and F01P171
Additionally, you can use the import process to update changes to existing records in F01P01 or F01P02 and F01P17 and F01P171.
To import employee credit card information, you must provide the address book number and alpha name of the employee. Similarly, if you track merchants, you must provide the address book number and alpha name of the merchant. You can use the batch export process to create a spreadsheet that provides the address book information that you need to include on the spreadsheet.
Set up an IFS (Integrated File System) directory and map it to your PC; otherwise, you must create a custom program to update the desired Z files directly.
B.1 Creating the Template for the Z File
You must download a template (spreadsheet) that corresponds to the file you want to update and save it as a CSV or XML file. In the Batch Import File field you choose Field Sensitive Help (F1) and then enter F01P in the Skip To Code field to choose the appropriate Z File program:
-
Employee Purchase Card Z File (F01P01Z)
-
PCard Merchant Z File (F01P02Z)
-
Purchase Card - Bank Transmissions (F01PBKZ)
-
Expense Report Detail BatchZ (F01P7DZ)
-
Expense Report Header BatchZ (F01P7HZ)
The system stores the template on your PC in the directory that is mapped to your IFS directory.
B.2 Exporting Address Book Information
The template (spreadsheet) that you use for importing the data into the Z files includes the fields for address book number. Instead of manually entering the data, you can export the Reports by Address report (P01301) using the One Line per Address format, and then copy and paste the address book number and alpha name into the fields of the template.
Use a category code, search type, or a value in some other field to identify the employee and supplier (merchant) address book records that you want to export.
From Periodic Processes (G0121), choose Reports by Address
To export the Address Book Report
-
Review the runtime message and choose Execute (F6).
-
On the Reports by Address, add a new version of XJDE0001.
-
On Additional Parameters, choose Batch Export Parameters (F6).
-
On Spooled File Export Parms, complete the fields according to the following screen using your import/export file name and IFS path:
Figure B-1 Spooled File Export Parameters screen
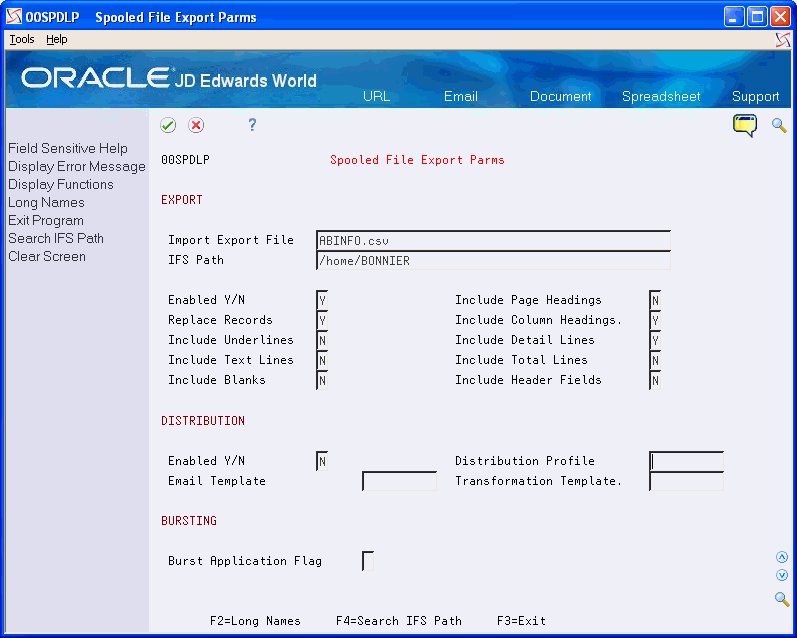
Description of "Figure B-1 Spooled File Export Parameters screen"
-
On Processing Options Revisions, enter 2 in the Address Book Reports w/out Who's Who processing option.
-
On Data Selection, set up the criteria to print a report of the suppliers (merchants) that you use.
-
Run the report to export the data to the spreadsheet.
B.3 Updating the Z-File Template (Spreadsheet)
You must complete the spreadsheets to process information into the appropriate Z File program. See Appendix C, "Field Specifications for the Bank Transmissions File (F01PBKZ) for Processing PCard Transactions" for information about completing the template for the Purchase Card Bank Transmissions file (F01PBKZ).
After you complete the spreadsheet, you can send it to your bank to update:
-
The credit card information for each employee.
-
The merchant ID and merchant category code fields for each supplier.
-
Access the template for the import process (for example, ccinfo.csv or merchantinfo.xml) and cut and paste the values for the Address Book Number and Alpha Name from the address book report spreadsheet to the template.
-
Complete the following fields for each copy of an address book record. You can use the same value for ZZEDUS, ZZEDBT, and ZZEDTC; however, the value for Transaction Number (EDTN) must be unique.
-
ZZEDUS - Enter a user ID
-
ZZEDBT - Enter a batch number
-
ZZEDTN - Enter a unique transaction number
-
ZZEDTC - Enter A
-
-
Perform one of the following:
-
For employee card information, complete the following required fields:
-
ZZBUE - Enter the employee's business unit. If you leave this field blank, the system uses the value from the Responsible Business Unit field (MCU) from the employee's address book record (F0101).
-
ZZAN8 - Enter the address book number of the employee.
-
ZZCARD - Enter the credit card type, such as AMEX or VISA. The credit card type you specify must exist in UDC 00/CA (Credit Card Type).
-
ZZBANK - Enter the address book number of the bank.
-
-
For merchant information, complete the following required fields:
-
ZZCARD - Enter the credit card type, such as AMEX or VISA. The credit card type you specify must exist in UDC 00/CA (Credit Card Type).
-
ZZAN8 - If you track merchants, enter the address book number of the merchant.
-
ZZALPH - Enter the alpha name of the merchant.
-
ZZMID# - Enter the bank's merchant ID. You can coordinate with the bank to update the Merchant ID by sending them the spreadsheet. They can update the merchant ID based on the name or any other information you can provide to them to identify the merchant.
-
All other fields are optional or your bank provides the information. You can delete columns from the spreadsheet if you are not using them. You can reorder the columns any way you want, but the first row of data must be on line 5.
Following is an example of how you might update the spreadsheet for Merchant Information:
Figure B-2 Merchant Information Spreadsheet
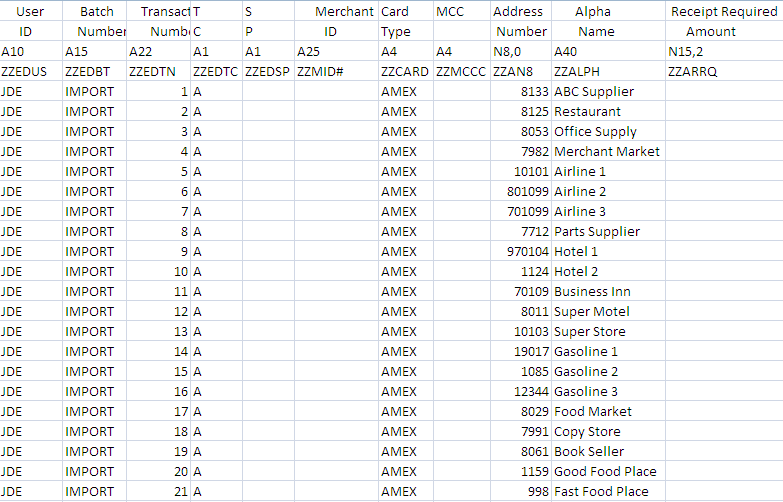
Description of "Figure B-2 Merchant Information Spreadsheet"
-
-
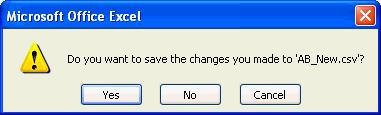
Save the spreadsheet.
When you click Save, the system displays the following message.
Figure B-3 Microsoft Excel Message on Save screen

Description of "Figure B-3 Microsoft Excel Message on Save screen"
-
Click Yes.
When you exit the spreadsheet, you might receive the following message, depending on your Excel File settings:
Figure B-4 Microsoft Excel Message on Exit screen
Description of "Figure B-4 Microsoft Excel Message on Exit screen"
-
Click No.
The CSV format does not retain cell formatting; therefore, if you choose Yes, the system prompts you to save the spreadsheet in an xls or alternate format.
B.4 Uploading the Z-File
When you receive the spreadsheet from the bank or if you are ready to upload the information, you run the Batch Import-CSV or Excel XML program (P00BUL) to generate the records in the F01P02Z file.
After you upload F01PBKZ, you are ready to process transactions and statements; you do not need to run an additional program.
From Import/Export (G00PCIE), choose Batch Import-CSV or Excel XML
-
On Batch Import-CSV or Excel XML, complete the following fields and click Add:
-
Batch Import File - Enter the appropriate F01P Z file.
-
Import Name - Enter a name to assign to the format.
-
Import Export File - Enter the name of the template (spreadsheet) that you updated (for example, ccinfo.csv or merchant.csv).
-
Excel XML (Y/N)
-
IFS Path
-
-
Choose Continue (F6).
The system uploads the information from the spreadsheet to the Z-File.
B.5 Processing Transactions to Files
From PCard and T&E Z File Processes (G01P01Z), choose the appropriate option
After you upload the information from the spreadsheet to Z-File, you must process the information to the F01P01 or F01P02 and the F01P17 and F01P171 files using the corresponding program:
-
Purchase Card Revisions (P01P01Z)
-
Merchant Revisions (P01P02Z)
-
Expense Report Revisions (P01P17Z)
The programs do not provide a proof mode; however, if the system encounters errors, it does not process the transaction.
Review the processing options for each program.
B.6 Uploading Changes to Files
Instead of manually changing information, you can use the batch import process to upload changes. The only difference between adding new records and changing existing records is that you use C, instead of A, in the Transaction Action field (EDTC) on the spreadsheet (template).
For example, if you decide to process updates to the Employee Card Information file (F01P01), the Employee/Card Revisions program (P01P01) includes the processing option for Z-File Processing that you use to specify a special character to indicate that you want to clear a field. For example, suppose you use category code 01 to track the employee's job and the employee moves to another position that no longer requires use of a credit card. If you attempt to clear a value using the Z-file, the system does not distinguish that you are changing the value of the field. You assign a special character to the fields that you want to clear on the F01P01Z spreadsheet and then enter that character in the processing option for Z-File Processing. The system locates all fields with the special character that you specify in the processing option and clears the value in the field.