21 Set Up DRP, MPS, and RCCP
This chapter contains these topics:
-
Section 21.2, "Setting Up Supply and Demand Inclusion Rules,"
-
Section 21.3, "Setting Up Message Types for DRP, MPS and RCCP,"
-
Section 21.4, "Setting Up Time Fence Rules for DRP, MPS and RCCP,"
21.1 Setting Up DRP, MPS and RCCP
Before you can successfully generate DRP, MPS, and RCCP output, you must define the information to use during processing. The system uses setup information to determine how to select and display data.
You must set up some of this information in other systems, such as Shop Floor Control and Inventory Management.
Complete the following tasks:
-
Setting Up Supply and Demand Inclusion Rules
-
Setting Up Message Types for DRP, MPS and RCCP
-
Setting Up Time Fence Rules for DRP, MPS and RCCP
-
Setting Up Forecast Consumption Periods
-
Setting Up a Rough Cut Capacity Display
21.2 Setting Up Supply and Demand Inclusion Rules
From Material Planning Operations (G34), enter 29
From Material Planning Setup (G3440), choose Requirements Planning Setup
From Material Planning Setup (G3442), choose Supply/Demand Inclusion Rules
You set up supply and demand inclusion rules to display the supply, demand, and available quantities for an item. The source of these quantities in supply and demand equations are as follows:
| Quantity Source | Description |
|---|---|
| On-hand inventory | Quantity on hand
- Hard commits - Quantity on sales orders - Quantity on work orders |
| Purchase orders | + Open quantity on purchase orders |
| Manufacturing work orders | + Quantity entered on work order
- Quantity shipped |
| Safety stock | + Safety stock |
| Sales orders | + Quantity entered on sales order
- Quantity shipped - Quantity canceled |
| Work order requirements | + Quantity required
+ Quantity issued |
| Co-/by-products supply from work orders | + Quantity ordered
- Quantity completed |
| Co-/by-products supply from rates | + Quantity Ordered
- Quantity completed |
To set up supply and demand inclusion rules
On Supply/Demand Inclusion Rules
Figure 21-1 Supply/Demand Inclusion Rules screen
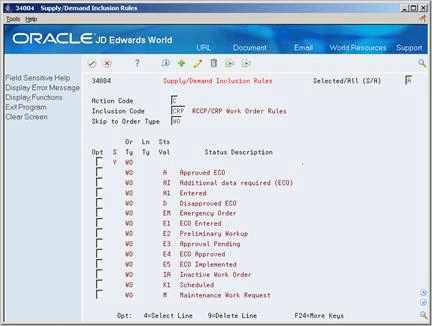
Description of ''Figure 21-1 Supply/Demand Inclusion Rules screen''
-
To locate the status values for your inclusion code, complete the following fields:
-
Inclusion Code
-
Skip to Order Type
-
-
Choose the work order statuses to include in supply and demand calculations.
| Field | Explanation |
|---|---|
| Inclusion Code | This identifies a group of items that the system can process together, such as reports, business units or subledgers. |
| Skip to Order Type | A user-defined code (00/DT) that identifies the type of document. This code also indicates the origin of the transaction. JD Edwards World has reserved document type codes for vouchers, invoices, receipts, and time sheets, which create automatic offset entries during the post program. (These entries are not self-balancing when you originally enter them.)
The following document types are defined by JD Edwards World and should not be changed: P – Accounts Payable documents R – Accounts Receivable documents T – Payroll documents I – Inventory documents O – Purchase Order Processing documents J – General Accounting/Joint Interest Billing documents S– Sales Order Processing documents Form-specific information If you are using the Skip to Order Type field, you can enter an order type code and press Enter to display only rules about that order type. To see the whole set of order types included in the resource rules, leave this field blank and use the Roll keys. |
| Sts Val | The helps behind the program state that the program uses the document type, line type and NEXT status. However the program actually reads and uses the LAST status (TRTY). TRTY is also the field displayed in the screen. |
21.3 Setting Up Message Types for DRP, MPS and RCCP
From Material Planning Operations (G34), enter 29
From Material Planning Setup (G3440), choose Requirements Planning Setup
From Material Planning Setup (G3442), choose Action Messages
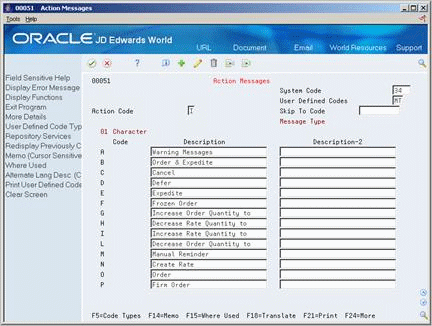
Message types are already defined for all the messages that the system can create when you generate DRP, MPS, and so on. Because the character code is hard coded, you can change the description, but not the function of the message type.
To set up message types for DRP, MPS and RCCP
-
Complete the following fields:
-
Code
-
Description
-
-
To locate the action messages for RCCP, enter 33 in the following field:
-
System Code
-
Figure 21-3 Action Messages (RCCP) screen
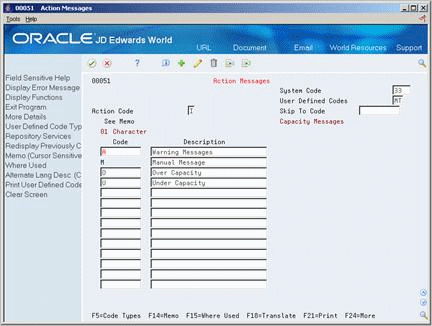
Description of ''Figure 21-3 Action Messages (RCCP) screen''
| Field | Explanation |
|---|---|
| System Code | A user-defined code (98/SY) that identifies a JD Edwards World system. |
21.4 Setting Up Time Fence Rules for DRP, MPS and RCCP
From Material Planning Operations (G34), enter 29
From Material Planning Setup (G3440), choose Requirements Planning Setup
From Material Planning Setup (G3442), choose Time Fence Rules
Time fences are points of time at which you can make changes to either policy or operating procedures. The system supports three time fences:
| Fence Type | Description |
|---|---|
| Freeze Fence (F) | Within this time period, orders are neither created nor replanned. |
| Planning Fence (P) | Within this time period, the system uses demand from the forecast and customer orders to calculate ending available product. |
| Message Display Fence (D) | After this time period, messages are neither created nor displayed. |
To set up time fence rules for DRP, MPS and RCCP
On User Defined Code Revisions/Time Fence Rules
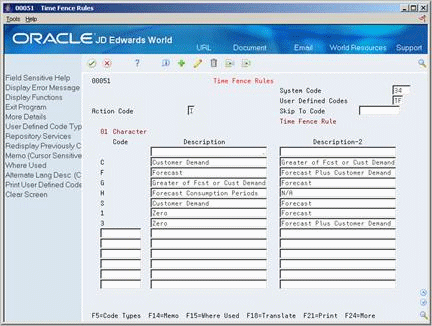
Complete the following fields:
-
Code
-
Description
-
Description-2
21.5 Setting Up Forecast Consumption Periods
From Material Planning Operations (G34), enter 29
From Material Planning Setup (G3440), choose Requirements Planning Setup
From Material Planning Setup (G3442), choose Forecast Consumption Periods
You define the end date for each forecast consumption period on Forecast Consumption Periods. The system stores this information in the Forecast Consumption Periods table. The periods apply system-wide. You cannot have different forecast consumption periods for different locations or branch/plants.
The system adds the forecast consumption time periods to the number of time series periods that you specified in the processing options for the DRP/MPS generation program. The total for all time periods cannot exceed 52.
21.5.1 Before You Begin
-
Verify that the following information has been set up:
-
Planning fence rule H in user-defined code table 34/TF
-
The order types in user-defined code list 40/CF, to include in shipped order calculations
-
The -SHIP quantity type in user-defined code list 34/QT, to calculate shipped orders quantity
-
The order types in user-defined code list 40/IU, to update inventory (includes order type SO)
-
The Planning Fence Rule field on Plant Manufacturing Data, with a value of H
-
The Planning Fence field on Plant Manufacturing Data, with a value beyond the end of the planning horizon
-
The appropriate processing options in the DRP/MPS generation program
-
|
Note: You must set up the planning fence field on Plant Manufacturing Data with a value beyond the end of the planning horizon. (JD Edwards World recommends a planning fence of 999). If you do not set the planning fence beyond the planning horizon, the batch programs (DRP/MPS/MRP Regeneration and Net Change) will not work properly. |
To set up forecast consumption periods
On Forecast Consumption Periods
Figure 21-5 Forecast Consumption Periods screen
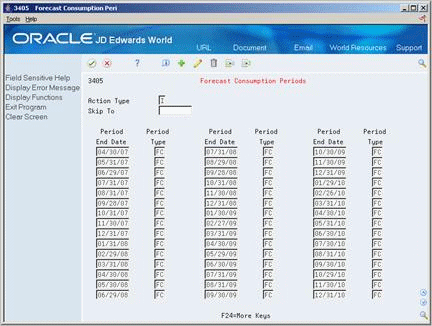
Description of ''Figure 21-5 Forecast Consumption Periods screen''
Complete the following fields:
-
Period End Date
-
Period Type
| Field | Explanation |
|---|---|
| End Date | A date on which the defined period ends. |
| Period Type | A type of record to be used in conjunction with Forecast Consumption. Valid values are:
FC – Forecast consumption period TS – Time series bucket |
21.6 Setting Up a Rough Cut Capacity Display
From Resource & Capacity Planning (G33), enter 29
From Resource/Capacity Planning Setup (G3341), choose Rough Cut Capacity Display
Use Rough Cut Capacity Display to specify row descriptions for RCCP displays and reports. The digit code is hard-coded.
To set up a rough cut capacity display
Figure 21-6 Rough Cut Capacity Display screen
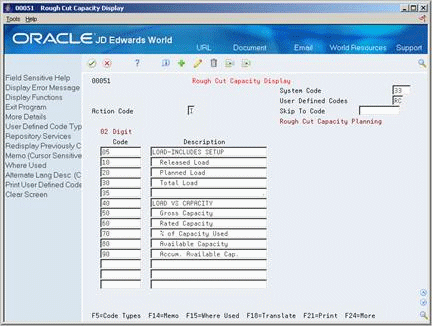
Description of ''Figure 21-6 Rough Cut Capacity Display screen''
Complete the following fields:
-
Code
-
Description