50 Set Up a Language for a System or User Overview
This chapter contains these topics:
|
Note: In order to utilize alternate languages, other than English, you must first install the appropriate language tapes. Then proceed to set up a language on the system. |
50.1 Setting Up a System Language
From Master Directory (G), choose Hidden Selection 27
From Advanced & Technical Operations (G9), choose Security and System Admin
From Security and System Administration (G94), choose System Administration
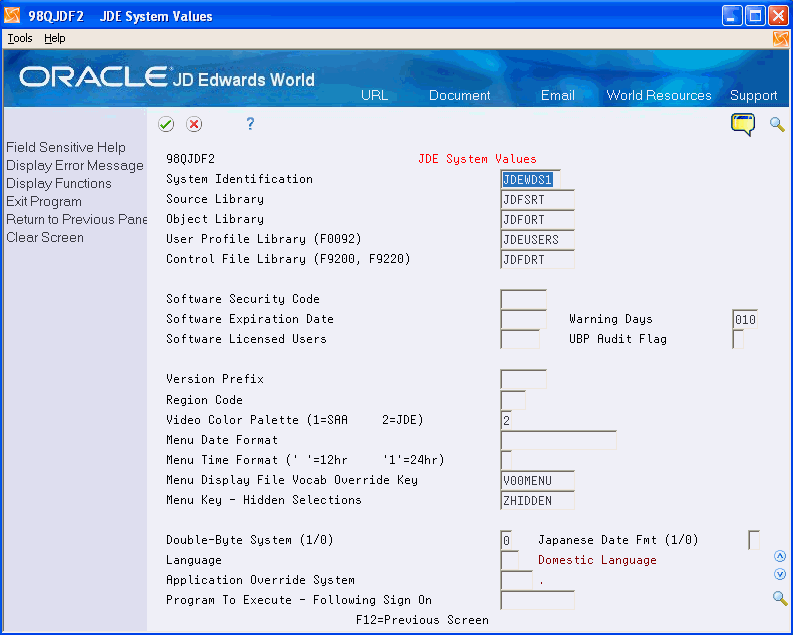
FromSystem Administration (G944), choose JDE System Values
50.2 Setting Up a User Language
From Master Directory (G), choose Hidden Selection 27
From Advanced & Technical Operations (G9), choose Security and System Admin
From Security and System Administration (G94), choose Security Officer
From Security Officer (G9401), choose User Information
On User Display Preferences Revisions, you set up a language for each user. Either add a record for each user profile or change an existing record. Press F1 in the language field to view a list of available language codes. If available, menus and screens display in the user's preferred language. You must perform these steps in each environment where you need to change the language.
You must sign out of the environment and sign back in for the changes to take effect.
Hidden selection 85 will also display user defaults.
On User Information, access User Display Preferences Revisions (F6).
Figure 50-2 User Display Preferences Revisions screen
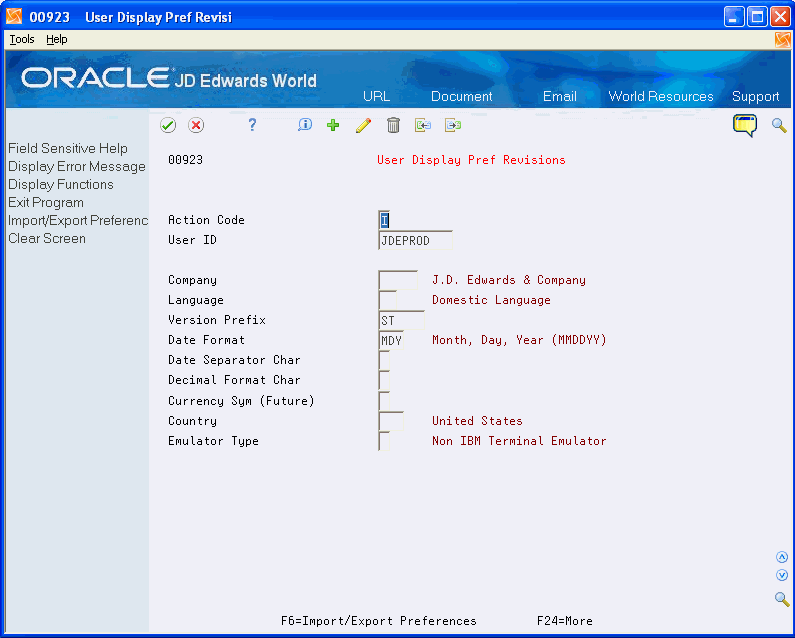
Description of "Figure 50-2 User Display Preferences Revisions screen"
50.3 Creating Language-Specific Menus
From Master Directory (G), choose Hidden Selection 27
From Advanced & Technical Operations (G9), choose Run Time Setup
From Run Time Setup (G90), choose Menus
From Menus (G901), choose Revisions
To create language-specific menus
-
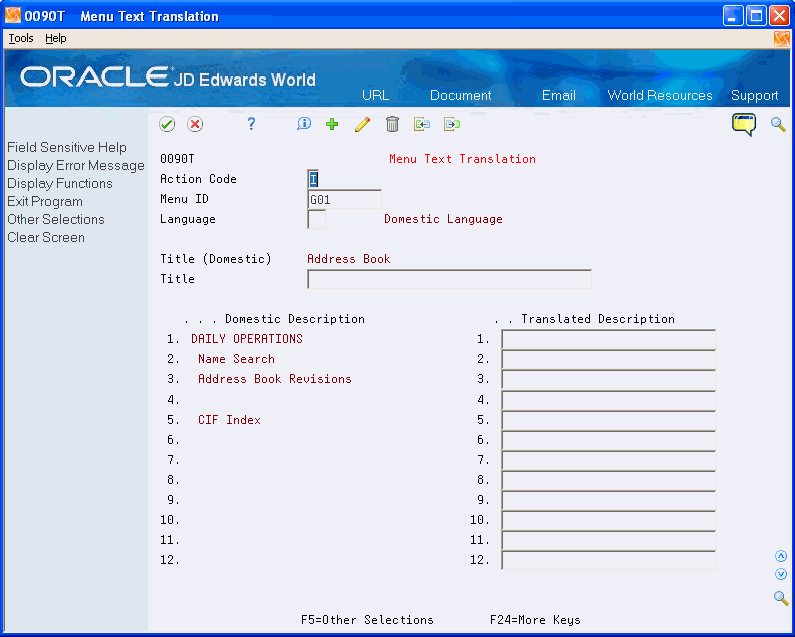
On Revisions, choose Menu Translation (F15) to display the Menu Text Translation screen.
-
If not displayed from Revisions, enter the menu ID of the menu you want to translate.
The base language displays on the left side of the screen and the alternate language displays on the right side of the screen.
-
Complete the following fields.
-
Language
-
Title
-
-
Customize the menu with the language.
Choose Other Selections (F5) to toggle between rows 1 through 12 and 13 through 24.
-
Add the menu.
50.4 Setting Language-Specific User Defined Codes
From Master Directory (G), choose Hidden Selection 27
From Advanced & Technical Operations (G9), choose Run Time Setup
From Run Time Setup (G90), choose User Defined Codes
To set language-specific user defined codes
-
On User Defined Codes, locate the user defined codes for which you want to set as language specific.
Figure 50-4 General User Defined Codes (Language-Specific) screen
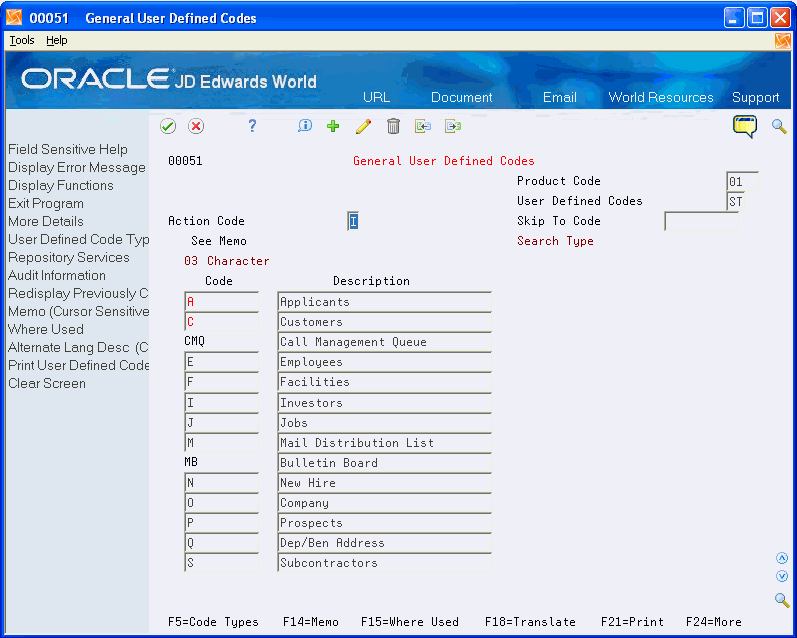
Description of "Figure 50-4 General User Defined Codes (Language-Specific) screen"
-
Place the cursor next to the code you want to translate and choose Alternate Language Description (F18).
Figure 50-5 Translate User Defined Codes screen
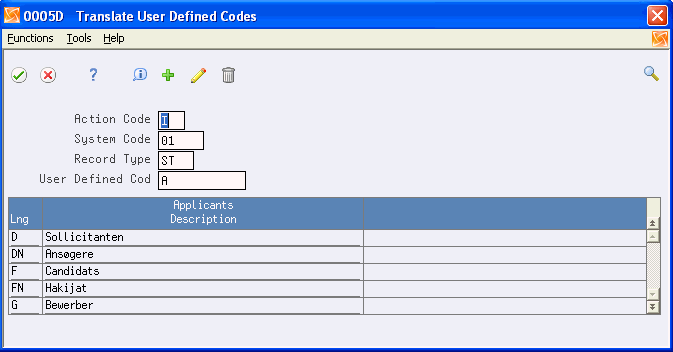
Description of "Figure 50-5 Translate User Defined Codes screen"
-
On User Defined Codes, choose User Defined Codes Types (F5) to change descriptions on User Defined Codes Types.
Figure 50-6 User Defined Code Types screen
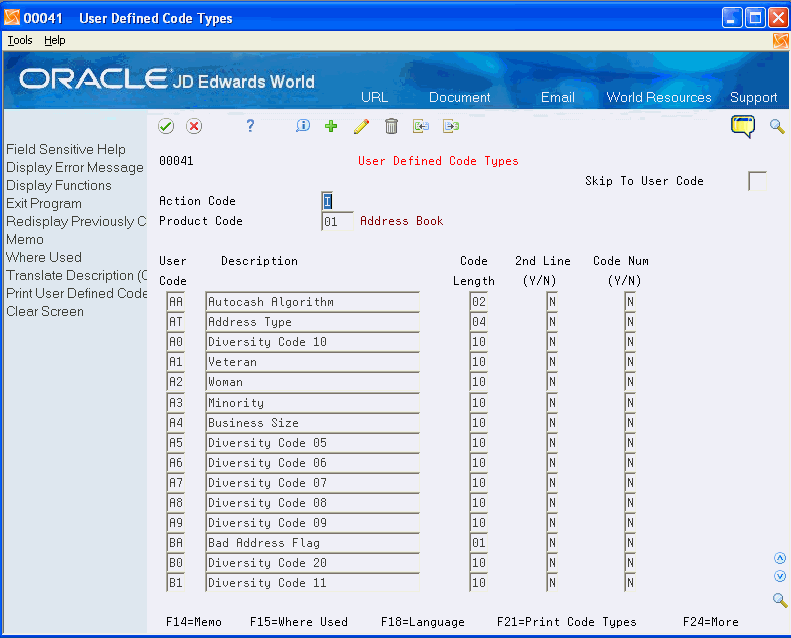
Description of "Figure 50-6 User Defined Code Types screen"
-
To translate the description, place cursor on the appropriate code and choose Translate Description (F18).
Figure 50-7 Translate UDC Code Types screen
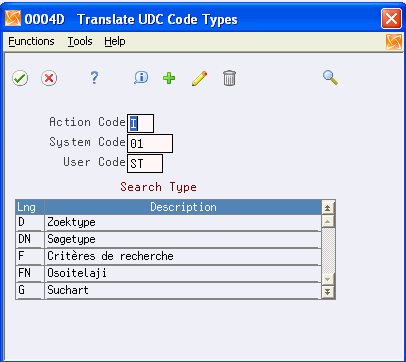
Description of "Figure 50-7 Translate UDC Code Types screen"
-
Enter language code and translated description.
50.5 Setting Language-Specific Function Keys
From Master Directory (G), choose Hidden Selection 27
From Advanced & Technical Operations (G9), choose Run Time Setup
From Run Time Setup (G90), choose Function Key Definitions
Use the Translate Function Key Description functionality to change the language in the function key screen that displays when you press F24 from a screen.
To set language-specific function keys
-
On Function Key Definitions, place the cursor next to the description you want to translate and choose Translate Description (F18).
Figure 50-8 Function Key Definitions screen
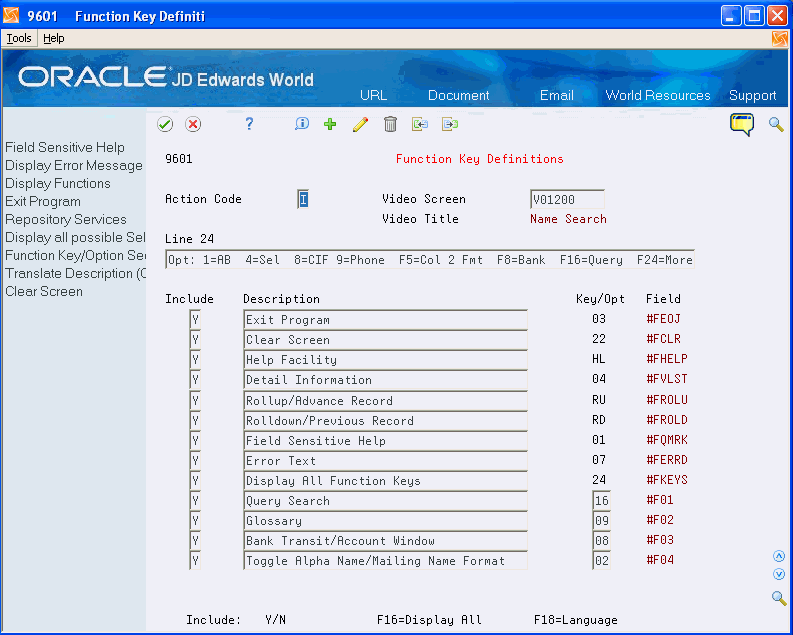
Description of "Figure 50-8 Function Key Definitions screen"
-
On Translate Function Key Descriptions, enter the language code and translated description.
Figure 50-9 Translate Function Key Descriptions screen
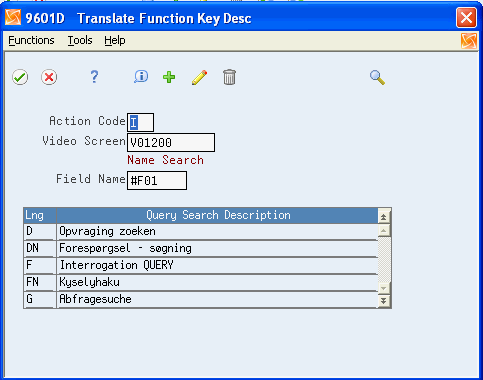
Description of "Figure 50-9 Translate Function Key Descriptions screen"
