| Oracle® Retail Xstore Point of Service Mobile User Guide Release 20.0 F35714-03 |
|

 Previous |
 Next |
| Oracle® Retail Xstore Point of Service Mobile User Guide Release 20.0 F35714-03 |
|
Previous |
Next |
After items have been added to a sale transaction, adjustments can be made to the items through the sale screen.
After selecting an item in the sale screen (see Basic Transaction Entry), the following options are available:
Modifying Line Items in a Sale
Changing the Item Quantity - Change the quantity of an item in a transaction.
Changing the Item Price - Change the price of an item.
Discount an Item - Add a discount to an item.
Changing Item Taxes - Change the tax on an item.
Voiding an Item - Remove an item from a transaction.
Changing the Commissioned Associate - Change the associate who receives the commission on an item.
Adding/Editing a Line Item Comment - Add/remove a comment to a line item.
|
Note: Changes made to individual lines and items may require supervisor or manager privileges, along with reason codes. |
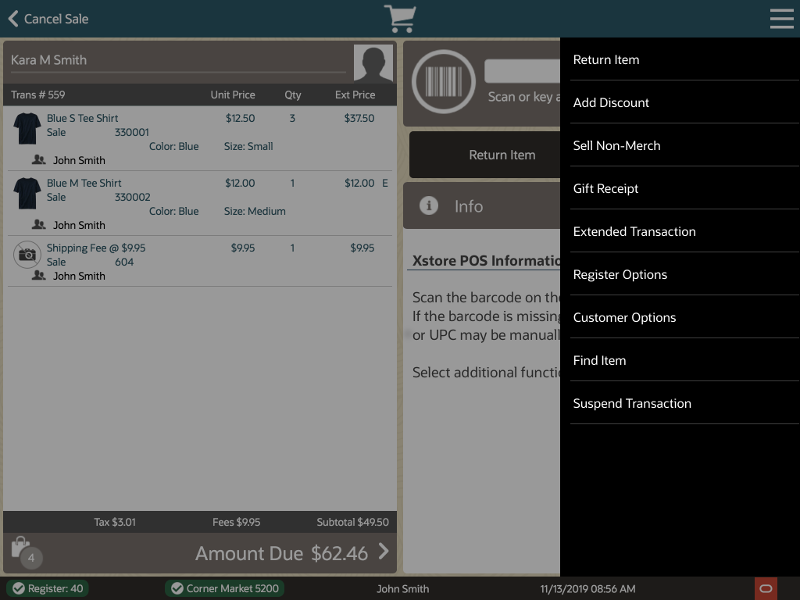
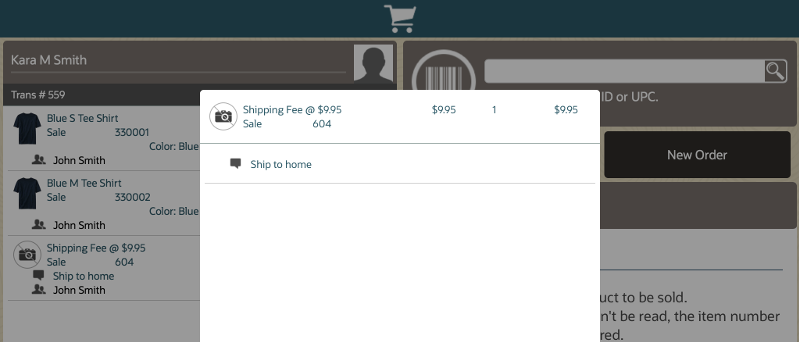
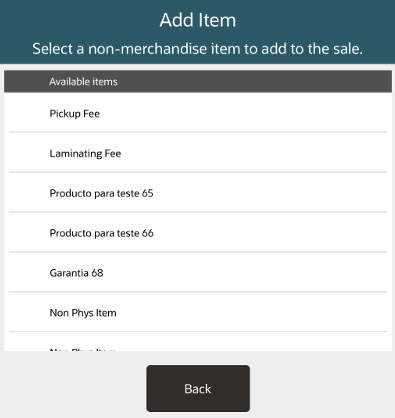
Non-merch items such as gift cards or gift wrapping can be added to the item.
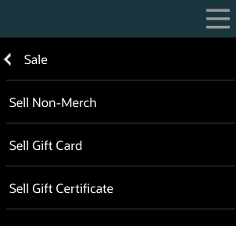
At the Sale screen, select Sell Non-Merch from the Sale menu to display the list of non-merchandise items.
Figure 10-2 List of Non-Merchandise Options
|
Note: Because each Xstore Mobile menu is configurable, the non-merchandise items shown on your system may be different than the options shown in this guide. Depending upon your item choice, you may be prompted for additional information (such as a price). |
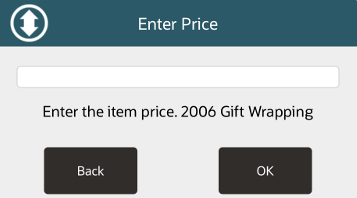
Select an item from the list.
If prompted, select a non-merchandise item from the list to add the item to the sale.
Figure 10-3 List of Non-Merchandise Items
Depending upon your item choice, you may be prompted for additional information. If prompted, enter the information as required.
Xstore Mobile adds the non-merchandise item to the sale and the non-merchandise information is shown.
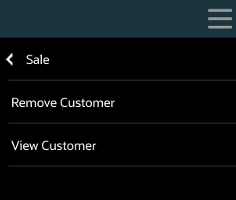
Perform the following steps to remove the customer from a transaction:
From the Sale screen, select Customer Options in the Context Menu.
Select Remove Customer. The transaction sale screen displays with the customer removed.
|
Note: To add a different customer to the transaction, select Customer Options and then Assign Customer. |
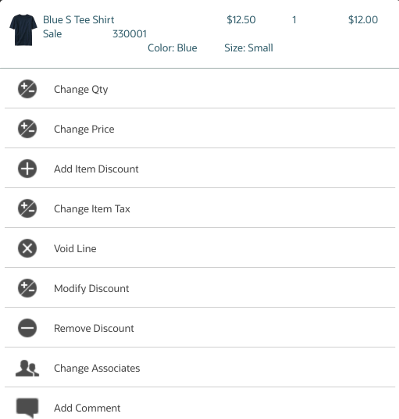
From the sale menu, select an item line to change or modify a line item.
Select an option from the menu.
The following options are available:
Change the item quantity - See Changing the Item Quantity.
Change the item price - See Changing the Item Price.
Add a discount to an item - See Discount an Item.
Change the item tax - See Changing Item Taxes.
Void a line item - See Voiding an Item.
Modify Discount - This option is only available when a discount is on the transaction. After selecting this option you are prompted to select the discount you want to change. See Adding a Discount to a Transaction or Group of Items.
Remove Discount - See Removing Discounts.
Change the commissioned associate - See Changing the Commissioned Associate.
Add/Edit line item comments - See Adding/Editing a Line Item Comment.
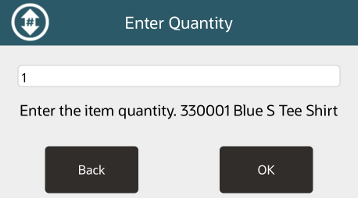
To change the quantity of a selected item (see Adjusting an Item):
Select Change Qty. See Figure 10-6.
Enter the new quantity for the item.
Select the OK button.
Return to the transaction screen.
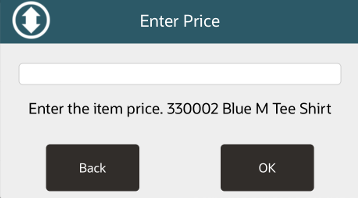
To change the price of a selected item (see Adjusting an Item):
Select Change Price. See Figure 10-6.
Enter the new price for the item.
Select OK.
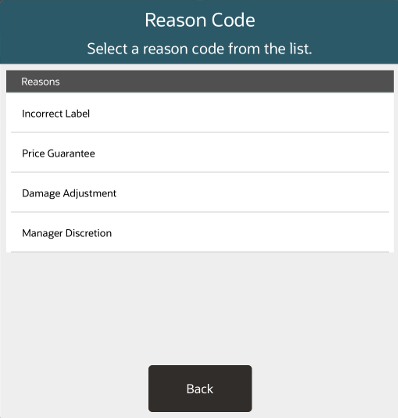
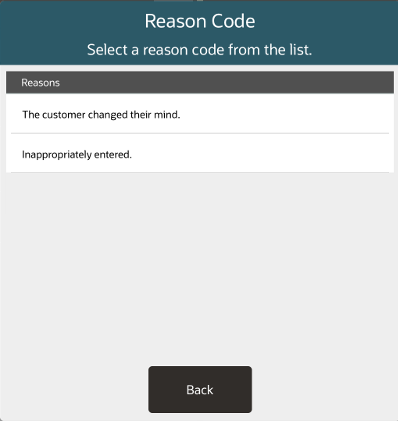
Select the proper reason for the price change.
Return to the transaction screen.
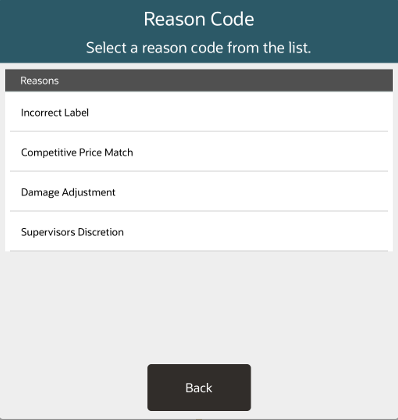
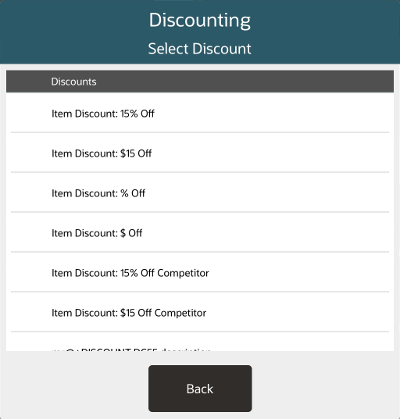
To add a discount to a selected item (see Adjusting an Item):
Select Add Item Discount. See Figure 10-6.
Select the proper discount.
Select the proper reason for the discount.
If prompted to enter an amount:
Enter the discount amount or percentage.
Select OK.
Return to the transaction screen.
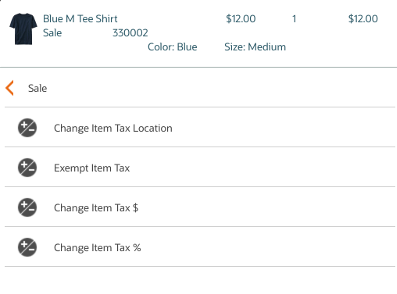
To change the tax on a selected item (see Adjusting an Item):
Select Change Item Tax. See Figure 10-6.
Continue with the proper procedure:
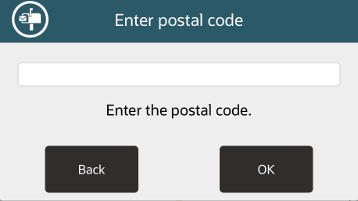
To change the location used to determine the tax on an item:
Select Change Item Tax Location in the Change Item Tax menu. See Figure 10-14.
Enter the postal/zip code for the new location.
Select OK.
The tax location for the item is changed and Xstore Mobile returns to the item entry screen.
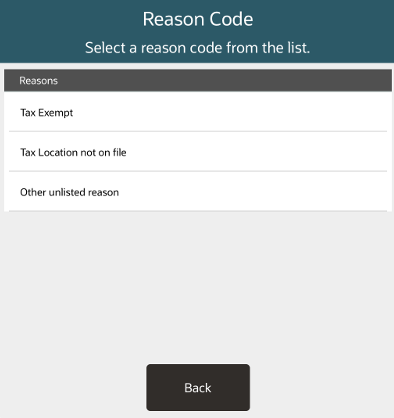
To exempt an item from tax:
Select Exempt Item Tax in the Change Item Tax Menu. See Figure 10-14.
Figure 10-16 Customer Tax Exempt Entry Form
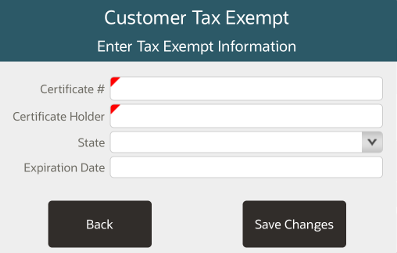
Enter the information about the customer's tax exemption certificate.
Select Save Changes.
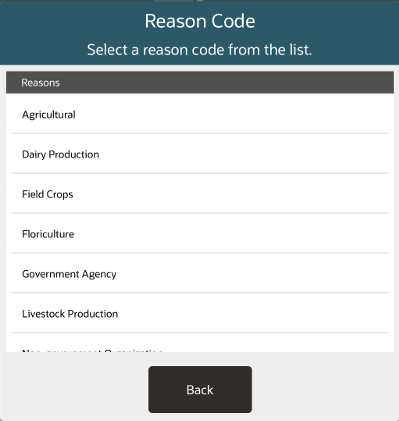
Select the reason for the tax change.
The tax exemption is applied to the item and Xstore Mobile returns to the item entry screen.
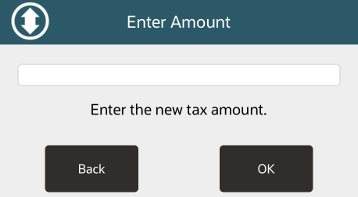
To change the amount of the item tax:
Select Change Tax $in the Change Item Tax Menu. See Figure 10-14.
Enter new tax amount.
Select OK.
Select the reason for the tax change.
The amount of the tax for the item is changed to the new value and Xstore Mobile returns to the item entry screen.
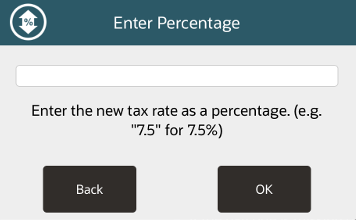
To change the percentage of the item tax:
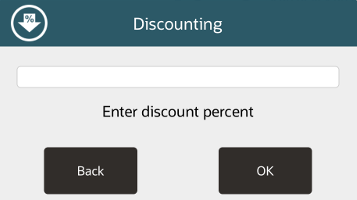
Select Change Tax% in the Change Item Tax Menu. See Figure 10-14.
Enter new tax percentage.
Select OK.
Select the reason for the tax change.
The percentage of the tax for the item is changed to the new value and Xstore Mobile returns to the item entry screen.
To void a selected item (see Adjusting an Item):
Select Void Line. See Figure 10-6.
Select the proper reason for voiding the line.
Return to the transaction screen.
To change the associate receiving a commission on a selected item (see Adjusting an Item), do one of the following:
To select the new commissioned associate from a list of associates:
Select Change Associates. See Figure 10-6.
Select the proper associate(s) in the list.
Return to the transaction screen.
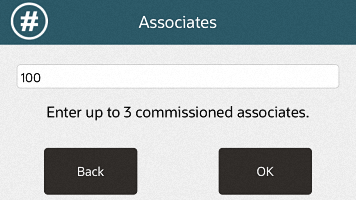
To select the new commissioned associate by entering an associate ID, do the following:
Select Change Associates. See Figure 10-6.
Select the Select By Associate ID button. See Figure 10-23.
Enter Associate ID. The ID of the current user is the default value.
Select OK.
Return to the transaction screen.
When you are finished adding associates:
Leave the associate ID field blank.
Select OK.
This section describes how to add or edit line item comments.
|
Note: Multiple comments can be entered on one item. |
To add a comment to a selected item (see Adjusting an Item):
Select Add Comment. See Figure 10-6.
Figure 10-25 Line Item Comments Entry Form
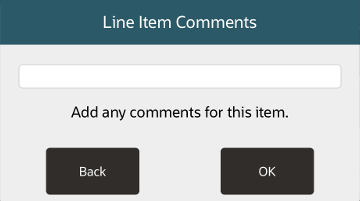
Enter the comment.
Select OK.
Return to the transaction screen.
To remove a comment from a selected item (see Adjusting an Item):
Select Remove Comment. See Figure 10-6.
Select the comment to remove.
The comment is removed and Xstore Mobile returns to the transaction screen.
This section deals with changing transaction taxes.
To change the tax applied to a transaction:
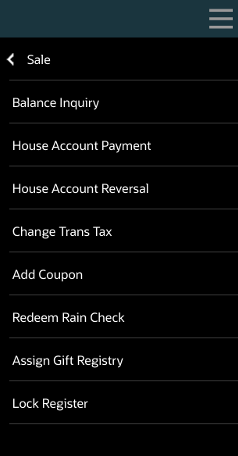
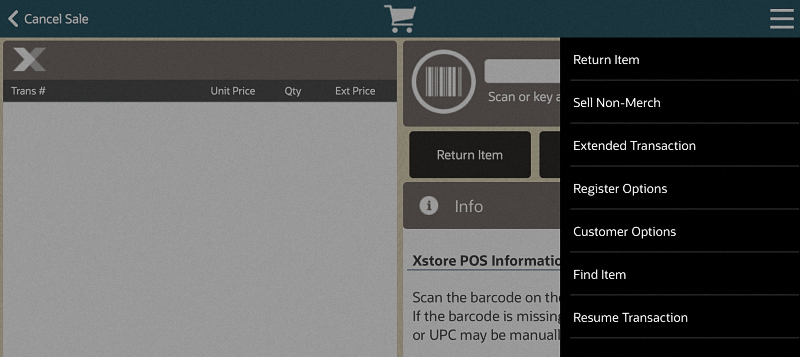
Select Register Options in the Context Menu. See Figure 10-1.
Select Change Trans Tax in the Register Options Menu.
Continue with the proper procedure:
To change the location used to determine the tax on a transaction:
Select Change Trans Tax Location in the Change Trans Tax menu. See Figure 10-28.
Enter the postal/zip code from the new location.
Select OK.
The transaction tax location is changed and Xstore Mobile returns to the item entry screen.
To exempt a transaction from tax:
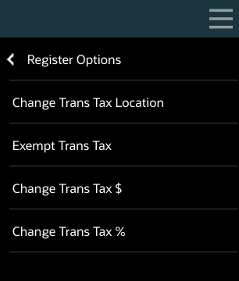
Select Exempt Trans Tax in the Change Transaction Tax menu. See Figure 10-28.
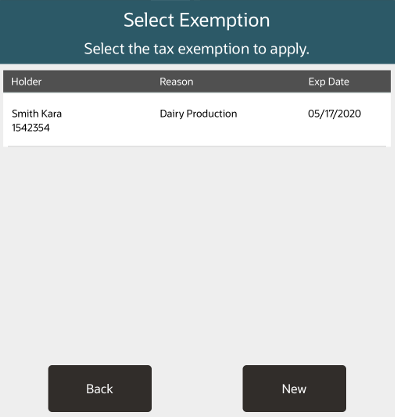
Select the exemption or create a new customer's tax exemption certificate.
Select the reason for the tax change.
The tax exemption is applied to the transaction and Xstore Mobile returns to the item entry screen.
To change the amount of the transaction tax:
Select Change Tax $ in the Change Transaction Tax Menu. See Figure 10-28.
Enter new tax amount.
Select OK.
Select the reason for the tax change.
To change the percentage of the transaction tax:
Select Change Tax % in the Change Transaction Tax Menu. See Figure 10-28.
Enter new tax percentage.
Select OK.
Select the reason for the tax change.
The percentage of the tax for the transaction is changed to the new value and Xstore Mobile returns to the item entry screen.
This section describes how to suspend and resume a transaction.
To suspend a transaction:
Whilst in a sale, select Suspend Transaction in the Context Menu. See Figure 10-1.
Xstore Mobile returns to the Main Menu.
|
Note: A transaction must have no customer assigned and no items added for it to be used for resuming a suspended transaction. |
To resume a suspended transaction:
Select Resume Transaction in the Context Menu.
Xstore Mobile opens a list of suspended transactions.
Select the proper transaction to resume.
If the system is an airside location, scan the customer's boarding pass.
The transaction resumes. Xstore Mobile returns to the sale screen.