| Oracle® Retail Xstore Point of Service Mobile User Guide Release 20.0 F35714-03 |
|

 Previous |
 Next |
| Oracle® Retail Xstore Point of Service Mobile User Guide Release 20.0 F35714-03 |
|
Previous |
Next |
After logging in at the Home screen (See Mobile Device Login), the Start Sale option in the Main Menu provides you with the ability to perform sale transactions.
This chapter covers the following functions:
To start a sale transaction:
Select Start Sale in the Main Menu to start a new transaction.
Depending on your store configuration, pre-sale screens that display after login may include:
Associate Flight Information. See Chapter 20, "Airside Store Transactions" for more information.
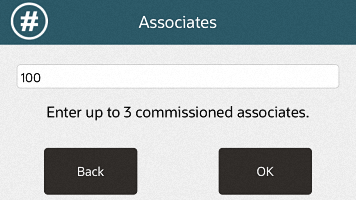
If your store tracks the associates' sales for commissions and sales goals, you may be prompted to select a commissioned associate (or associates) to be linked to the items in a sale transaction. There are two ways to select a commissioned associate for a transaction:
Select the sale associate(s) for this transaction from the list by touching the name and select OK.
Alternatively, select the Select By ID option.
For each associate to add to the transaction:
Enter Associate ID. The ID of the logged-in user is the default value.
Select OK.
When you are finished adding associates, leave the associate ID field blank.
Select OK.
Continue the transaction with:
<OR>
Use the options on the Register Sale menu to enter items, add discounts, and to add non-merchandise items such as gift certificate sales. Refer to Adding a Discount to a Transaction or Group of Items, Email Receipt Options, Modifying Line Items in a Sale, Adding Non-Merchandise Items to the Sale and Gift Registry for more information about these activities.
You may also be able to enter extended transactions such as:
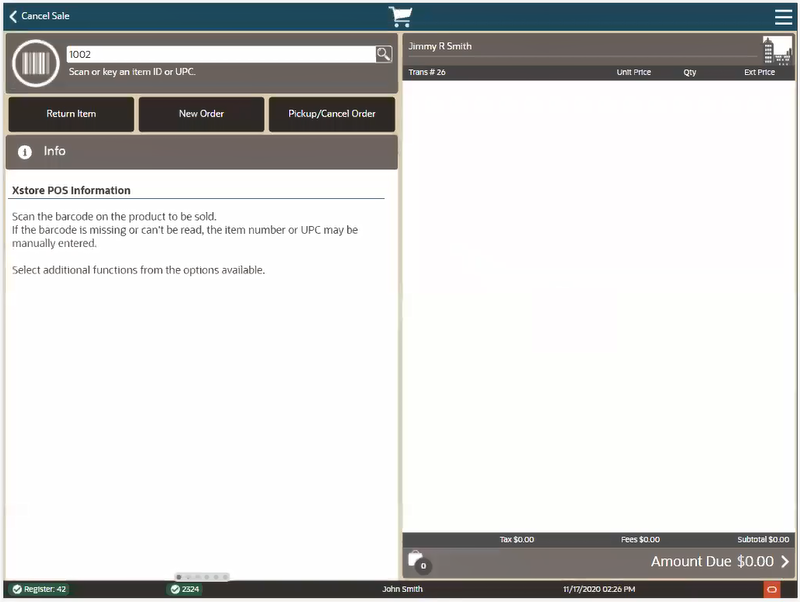
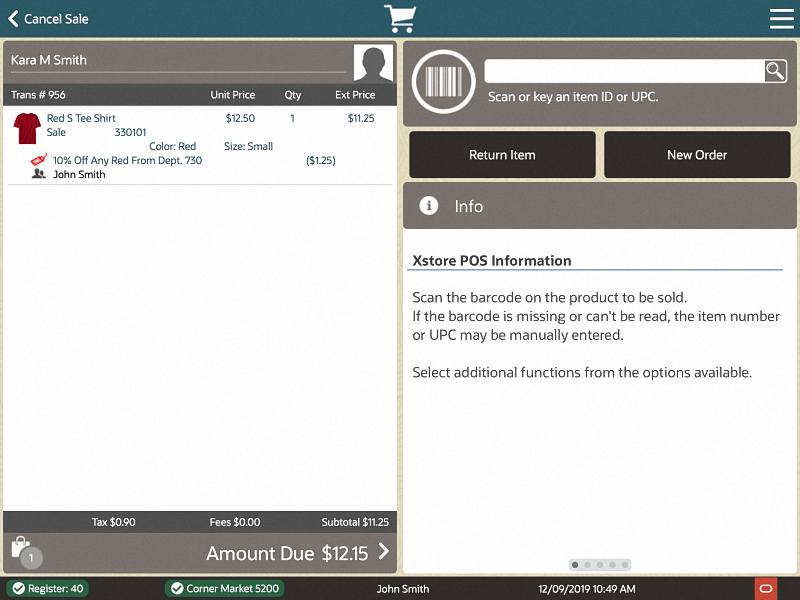
To add an item to a transaction from the sale screen:
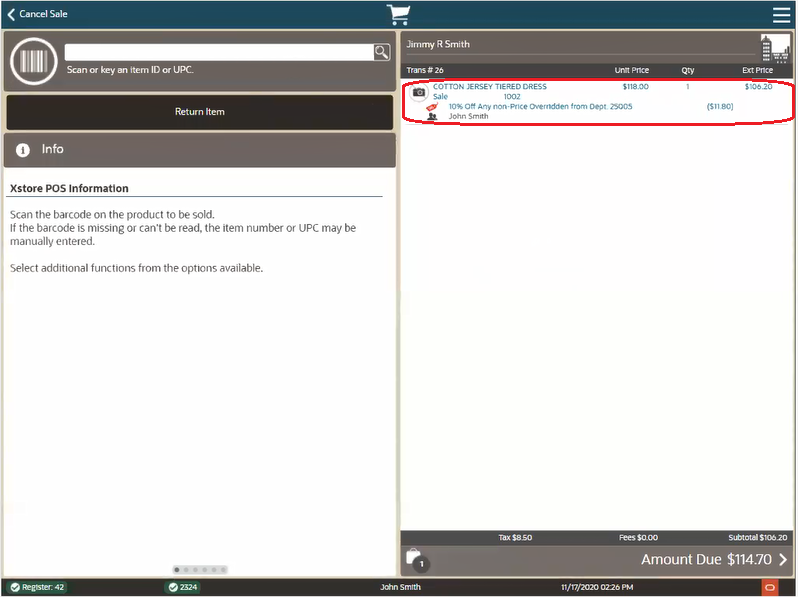
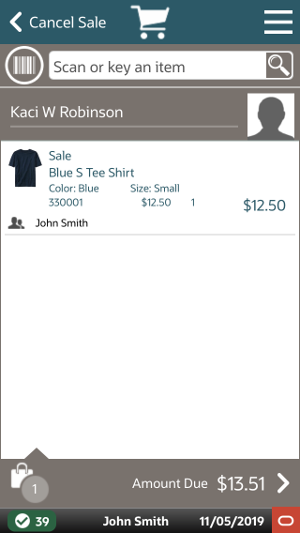
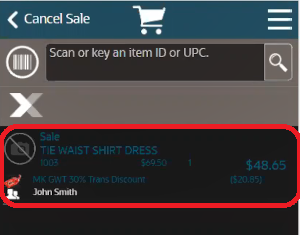
Scan an item barcode to add it to the transaction or enter an Item ID manually. Repeat as needed per item. As items are added, Xstore Mobile POS automatically applies any promotions and/or discounts that may be relevant to that item. It also shows the unit price, the extended price, and the tax that is relevant on that particular transaction item.
Figure 4-4 Mobile Handheld Sale Screen - Item Line
|
Note: Performing a long press on the item line within a transaction, takes you to that item's product detail screen. |
The Quick Items tab contains items that are frequently purchased. This option allows you to add frequently purchased items more easily. You can select multiple items if required.
To add an item to the sale transaction by using the quick items tab, follow the steps below.
Select the Quick Items tab. Frequently purchased items are displayed.
Select an item to add to the transaction.
The item is displayed on the Sales Display Panel and on the customer display.
To support RFID (radio-frequency) scanning, Xstore Mobile POS can be integrated to the MagLinQ devices. These devices scan the EPC (Electronic Product Code), which includes scanning and retrieving both the product ID and RFID Reference Tag Number simultaneously.
Scan the RFID tag on the item.
Xstore Mobile reads the RFID Electronic Product Code (EPC) tag whilst the product barcode provides the product ID and the RFID tag extracts the unique reference number of the product.
If the scanner is not working, manually enter the product ID.
When certain items are selected, restrictions may apply. These include the following:
Xstore Point of Service allows you to configure customer age verifications to determine whether a customer meets the age requirements to buy certain items. You can set different age levels for verification (for example, 18 years and 21 years).
An additional age verification is only requested, if an item with a higher restriction is added to the transaction. For example, if the first purchased item has an age limit of 21 and the second item has an age limit of 18, there is only an age verification for the first item, but not for the second one.
To sell an item with an age verification, follow the steps below.
Enter an item where an age verification is necessary. Xstore Mobile Point of Service displays a prompt relating to the date of birth of the customer is before a specified date.
Select Yes to confirm the prompt. The item is shown on the Sales Display Panel. For additional items requiring an age verification 18 years, no prompt is displayed.
Select No. The item is not added to the Cart. If additional items with an age verification are entered, the prompt is shown again.
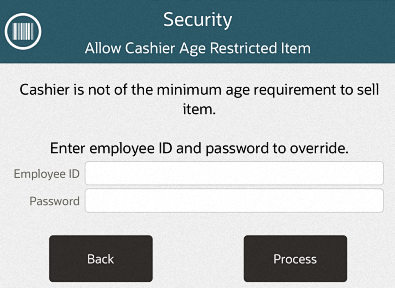
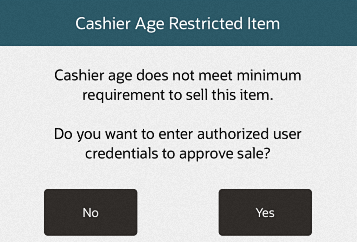
Xstore Mobile Point of Service allows you to configure cashier age restrictions to determine whether a cashier has the permission to sell certain items. You can activate/deactivate the cashier age restriction per store.
An additional age verification is only requested if an item with a higher restriction is added to the transaction. For example, if the first purchased item has an age limit of 18, there is only an age verification for the first item, but not for the second one.
If the cashier age restriction is activated and there is no date of birth entered for the cashier, the system displays the cashier age restriction prompt.
Enter an item with a cashier age restriction. Xstore Mobile POS displays a prompt requesting authorization of the transaction.
Select Yes to authorize the transaction. If No is selected, the item is not added to the sale.
Users holding the required security privileges must:
Enter their user name.
Enter their password.
The item is added to the sales transaction and shown on the Sales Display Panel.
Xstore Point of Service allows you to configure a time frame in which certain items cannot be sold and/or returned, for example, alcohol. If this function is enabled, items with a restricted time frame can only be sold during authorized hours and days. You can activate/deactivate the time frame restriction by item, department and sub-department.
To sell an item with a time restriction, follow the steps below.
Enter an item with a restricted time frame.
Xstore Point of Service validates the system time and day against the configured restricted time frame.
The system displays the prompt, that the item is currently restricted and not available for sale.
Press OK to close the prompt.
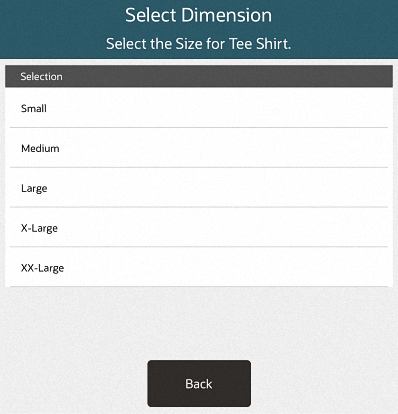
Style Items
A style is an entry in the item database that has properties such as size, color, and width, and so on. Multiple regular items may be associated with a style ID. If you enter a Style ID, the system prompts for additional information.
Select the dimension such as the color required.
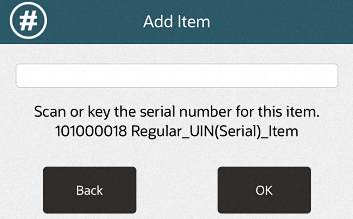
Serial Numbers
If prompted for an item serial number:
Enter the item serial number and select OK.
To adjust an item, see Adjusting an Item.
When you are finished entering/adjusting items, tender the transaction. See Tendering the Transaction.
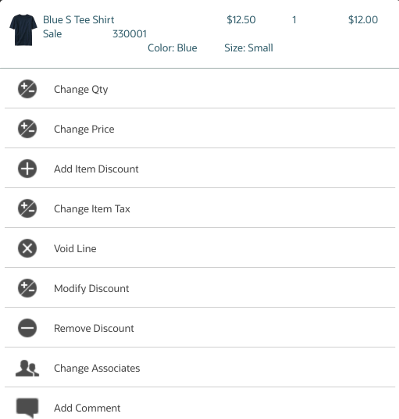
To adjust an item that has been added to a transaction:
Select the item in the item list. A popup is displayed showing the item adjustment menu.
Select the change to make to the item.
See Chapter 10, "Modifying a Transaction" for information about the changes that can be made to an item.
To make another item adjustment, repeat these steps.
To add another item to the transaction, see Adding an Item.
When you are finished entering/adjusting items, tender the transaction. See Tendering the Transaction.
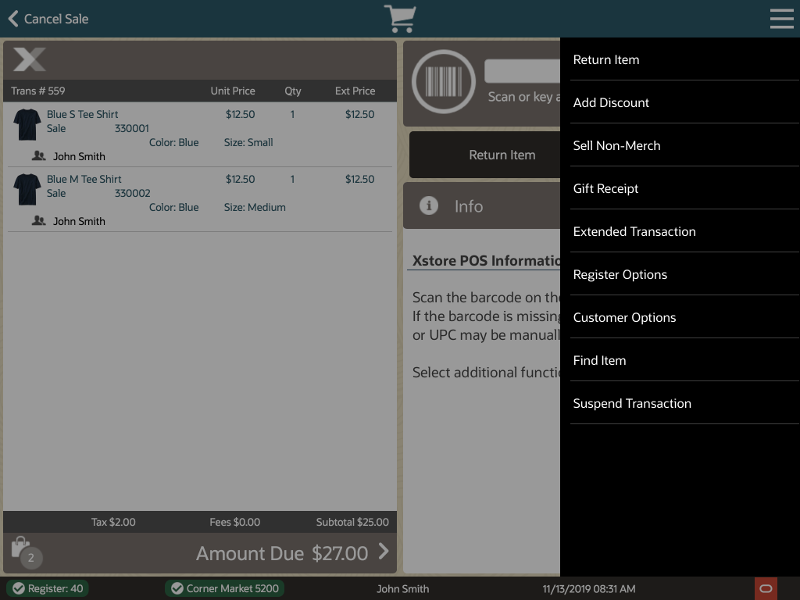
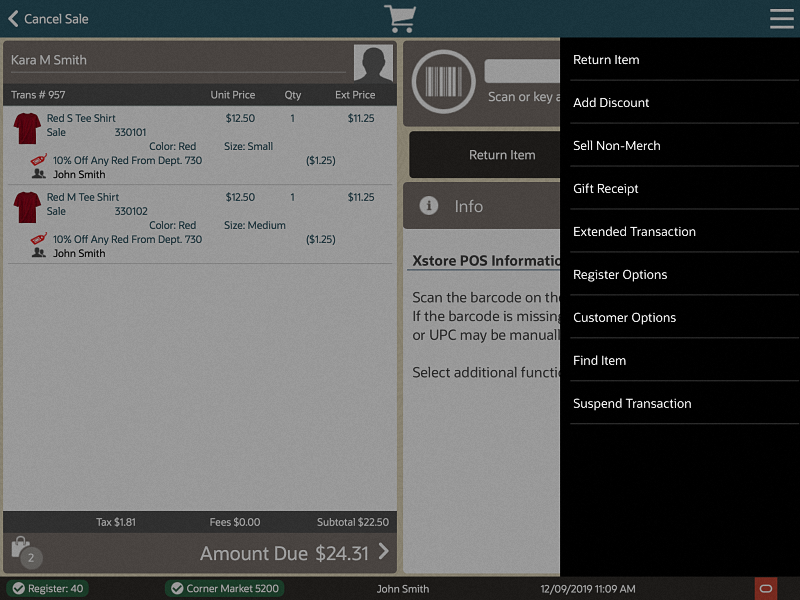
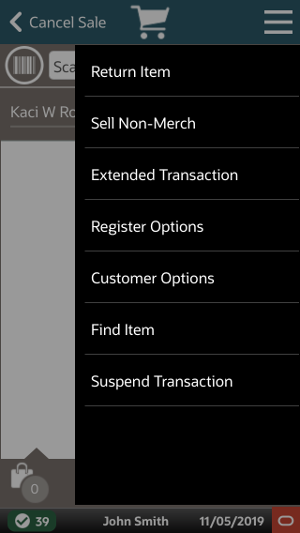
To access all additional transaction options through the Context Menu, select the icon in the upper-right corner of the transaction screen. This opens the context menu for transactions.
Figure 4-13 Mobile Handheld Context Menu - Sale Mode
To add a coupon to a transaction:
Figure 4-14 Mobile Handheld Register Options
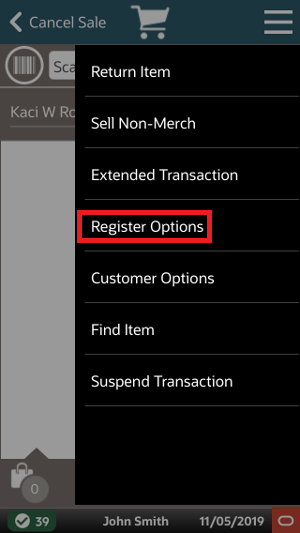
Select Register Options in the Context Menu.
Select Add Coupon in the Register Options Menu.
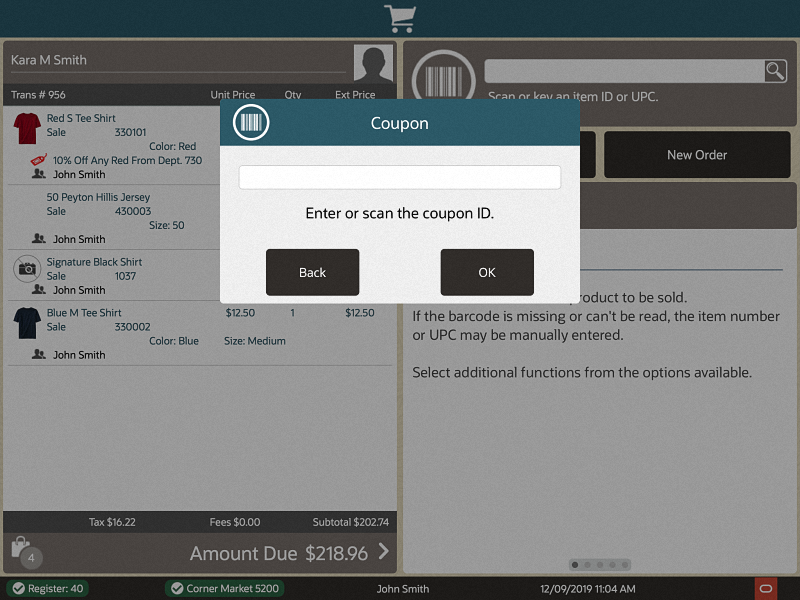
Figure 4-17 Mobile Handheld Coupon ID Prompt
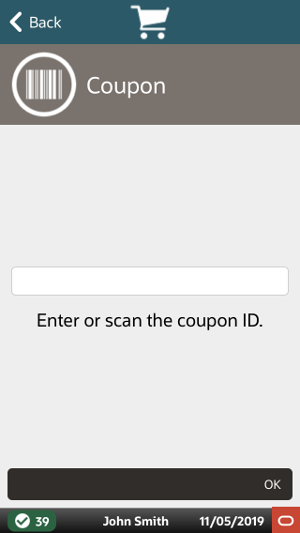
Scan the coupon or enter the ID of the coupon.
Select OK.
The coupon is applied to the transaction and Xstore Mobile returns to the item entry screen.
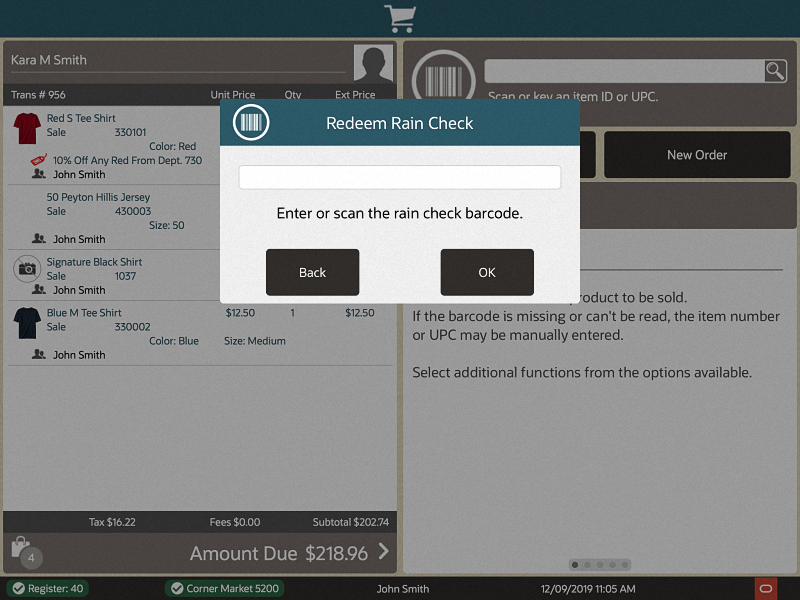
Rain Check is an optional feature that allows customers to purchase out of stock items for the same price at a later date.
To redeem a rain check:
Select Register Options in the Context Menu. See Figure 4-12 and Figure 4-14.
Figure 4-18 Mobile Handheld Redeem Rain Check
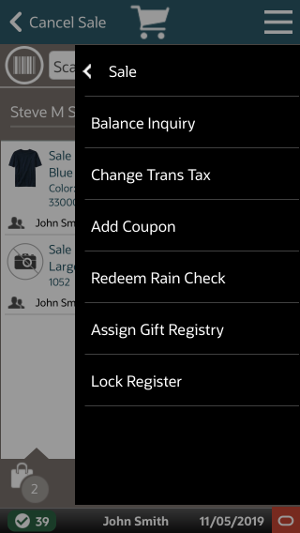
Select Redeem Rain Check in the Register Options menu.
Figure 4-20 Mobile Handheld Redeem Rain Check Prompt
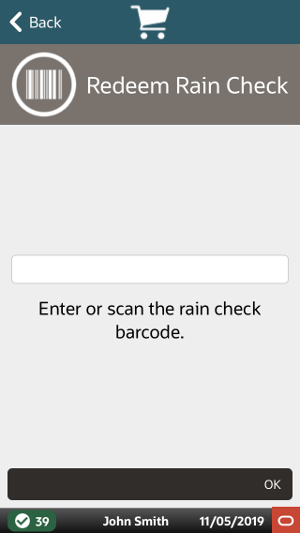
Scan the rain check or enter the ID of the rain check.
Select OK.
The rain check is applied to the transaction and Xstore Mobile returns to the item entry screen.
If you sell non-merchandise items such as gift cards or services such as gift wrapping, refer to Adding Non-Merchandise Items to the Sale for more information.
If you do not know the item number and cannot scan the item, use the "Item Lookup" option to find the item number. Refer to Searching for Items Using Item Lookup for more information.
If the item is not found in the current inventory at this store, use the "Inventory Lookup" option to locate the item at another location. Refer to Locating Items: Inventory Lookup for more information.
To add a discount, refer to Adding a Discount/Award to an Item or Transaction for more information.
To change the tax (both item and transaction), refer to Changing Item Taxes or more information.
If your system is configured to support awards and the customer's accumulated rewards can be applied to this transaction, select the Add Discount menu option. Refer to Adding a Discount/Award to an Item or Transaction for more information.
The tendering process requires that you select or enter two basic items of information:
Form of payment (also called tender type-cash, check, credit card, gift card, foreign currency, and so on)
Amount paid with that tender type
Depending upon the form of payment and your store's policies, you may have to enter or select additional information; for example:
Credit card account number, CID number, and expiration date
Additional tender types if the first tender type did not pay the total due
Additional forms of customer ID (driver's license number, birth date, credit card number, or other ID)
Customer name
Customer address
Security approval for large sales or refunds
Refer to Chapter 6, "Processing Tenders" for additional information about specific tenders.
When you are ready to complete the transaction, you can touch the Amount Due button at the bottom of the screen, or select the Add Tenders option to display a list of tender types. You can also swipe a credit card in a MSR or in a signature capture device.
If prompted to round up the amount for a charitable donation:
Click No to continue with tendering without adding the amount.
Click Yes to add the charitable donation to the transaction, then continue with tendering.
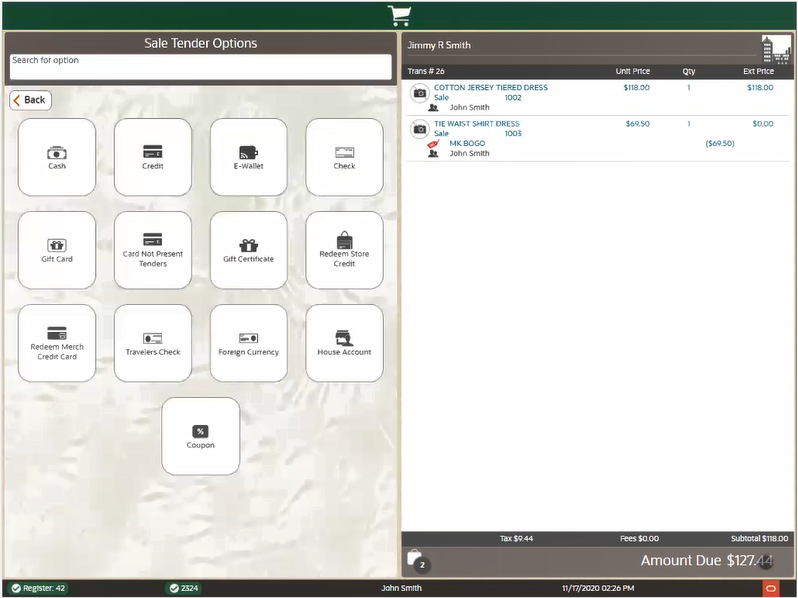
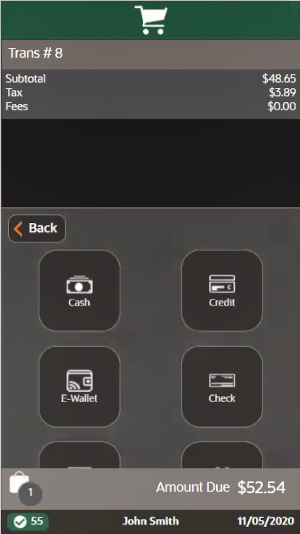
The screen changes to the green phase to indicate tendering. The available tender types are shown.
At the tender list, touch the tender type.
Figure 4-23 Mobile Handheld List of Tender Types
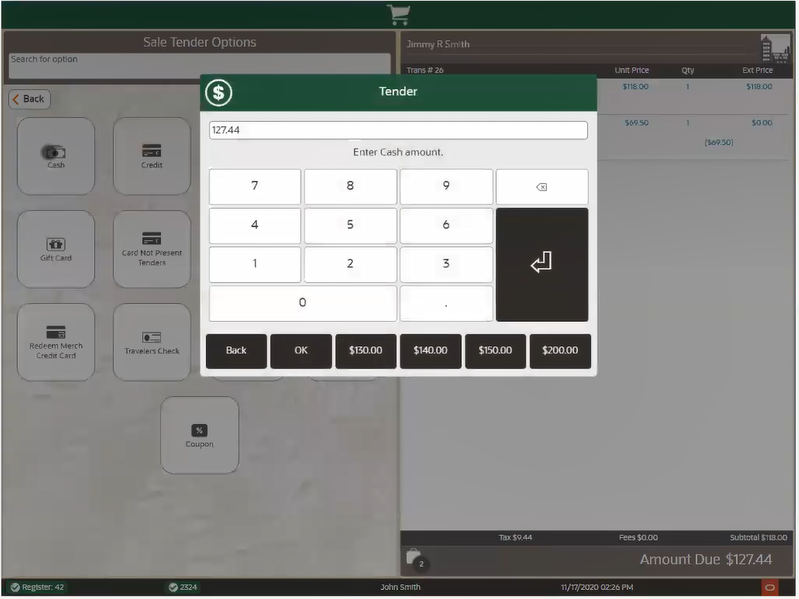
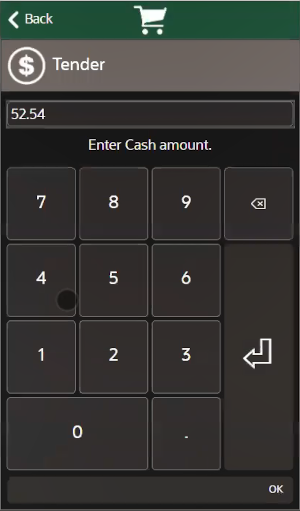
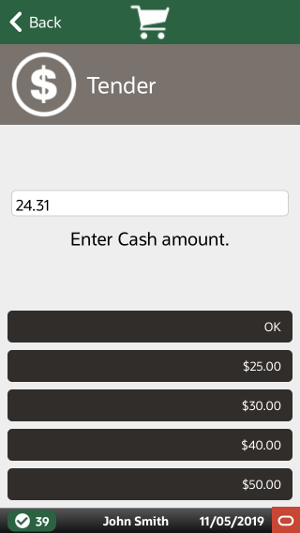
At the tender amount prompt, enter the amount of the tender. Depending upon the tender type you selected, the tender amount prompt may default to the total amount due for the sale transaction.
|
Note: Split Tenders: You may enter a partial amount if the purchase is paid with more than one tender type. After selecting a tender type, entering the amount and pressing OK, the system automatically prompts for the remaining balance due and you may select any of the valid tender types. |
<OR>
Select one of the Quick Cash buttons.
Figure 4-26 Mobile Handheld Quick Cash Buttons
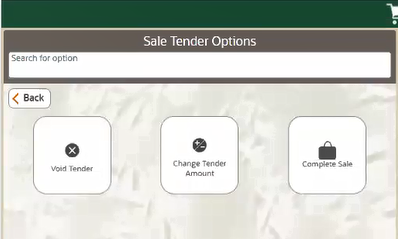
A prompt may display asking if the sale is complete or to void a tender, or to change a tender amount.
|
Note: Your system may print receipts without prompting you to confirm that the sale is complete. In that case, the system prints receipts as soon as the total of all tenders selected equals or exceeds the amount due. |
If prompted, select to complete the transaction.
The system prints receipts as required. If you are utilizing shared printers, select a specific printer.
|
Note: If your store issues email receipts, additional/different prompts display. Refer to Email Receipt Options for more information about sending email receipts. |
|
Note: See Printing a Gift Receipt for information about printing Gift Receipts.The Airside store receipt prints the Flight number, Destination, Zone, and tax exemption (if applicable). 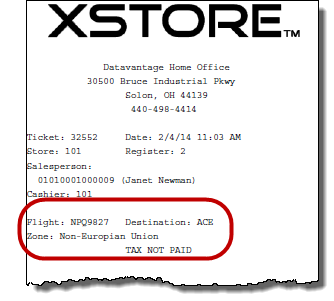 |
Depending upon the configuration of your system, you may be prompted to scan a cash drawer. Scan the appropriate cash drawer for your system.
|
Note: Note: If you are prompted that the cash drawer is unavailable, either wait for the cash drawer to become available, or scan a different cash drawer. |
If required, provide change to the customer and close the cash drawer to complete the transaction.
On occasion, upon completing a transaction, a prompt may open asking whether to apply a system update.
|
Note: If you agree to perform the system update, you will not be able to create any new transactions for a certain grace period. Existing transactions can be completed during the grace period.Once the system is not in a transaction or if the required period has expired, the update will be automatically applied without asking the user. You cannot use the system during system updates. |
Select No to be asked again after a period of time.
Select Yes to apply the update. A confirmation prompt opens:
Select Apply to perform the update.
Select Cancel to cancel the update and be asked to perform the update after a period of time.
If your store issues email receipts, you may be prompted for more information after the sale is tendered. Any receipts that have been set up for email delivery are generated as PDF documents and sent to the customer's email address as an email attachment. This email receipt process assumes the customer has an active email address and has given permission to receive email from the store.
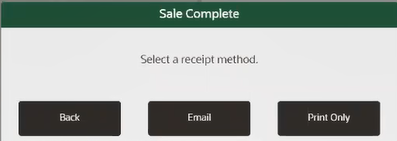
After tendering the sale or return, you are prompted to select a receipt method, unless the customer has been set up to automatically receive email receipts, in which case go directly to the next step.
|
Note: The choice you make here applies to all receipts. For example, if you choose to email receipts, then all receipts such as Gift and Customer receipts are sent in an email. You cannot print one but email the other.However, any receipt types that are not supported for distribution in an email, per your store policy, automatically print on the receipt printer. |
To print the receipt(s), select Print Only. All receipts are printed on the receipt printer and the transaction is complete.
To email the receipt(s) to the customer, select Email and continue with step 2 below.
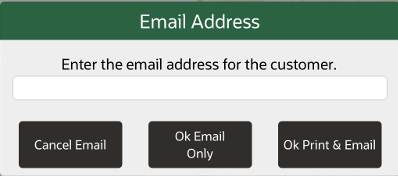
If you chose to email the receipt(s), you are prompted for the customer's email address:
If no customer is associated with the sale, enter the customer's email address.
If a customer with an email address on file is associated with the sale, verify the customer's email address is correct as shown on the prompt. You can change the address if needed.
Select a receipt option:
To email the receipt(s) to this email address, select Ok Email Only and the transaction is complete.
To both print the receipts and send an email copy to this email address, select Ok Print and Email and the transaction is complete.
If you decide not to send an email receipt, select Cancel Email to return to the Sale Complete prompt (Figure 4-29) where you can choose to print the receipts.
|
Note: The customer may have indicated that they wish to have email receipts as their default. If this is the case, you will not be prompted for the customer's email address.Email addresses are validated for proper format. If the email address does not have proper formatting, a warning message displays. Press Enter to acknowledge the message and return to the Email Address prompt where you can correct the error. If you make any changes to a customer's email address on file, you may be prompted whether or not the customer's profile should be updated with this new email address:
If there are multiple receipts on the transaction, they are sent as multiple PDFs in one email. |
This section describes the Receipt functions.
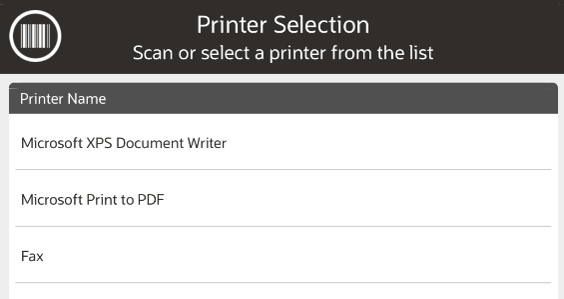
Stores that have multiple receipt printers can select a printer from a list of available printers or scan a QR Code and the receipt prints to that selected printer. If only one printer is available, the receipt prints directly to that printer and no selection is required.
In addition to selecting a printer from a list, you can scan a QR code placed on the front of an IP enabled receipt printer to select that particular printer.
Select Print or Print and Email receipt method to print a receipt.
From the list of printers displayed, select the barcode icon (shown on the top left of the Printer Selection list) to open the device camera.
Scan the QR code on the front of the printer.
When a QR code is valid and the receipt printer is configured, Xstore will send the data to the scanned printer. The printer list closes automatically.
When the QR code does not contain the information expected an 'Invalid Scan' message is shown.
When a QR code is scanned and Xstore finds it has valid information but is not part of the available printers, the message 'Receipt printer is not configured' is shown.
|
Note: Retailers are responsible for creating QR codes for printers and placing them on the appropriate printers. They are also responsible for configuring available printers. |
During a transaction, items may be selected for a gift receipt before a tender is selected, or between adding tenders. Gift receipts can also be issued immediately after a completed sale transaction, or from the Electronic Journal for eligible items in a transaction. Eligible items include regular sale items, special order pickup items, and layaway pickup items.
While a sale transaction is being performed, you may use the following steps to select items to be issued gift certificates:
Figure 4-33 Mobile Handheld Gift Receipt Option
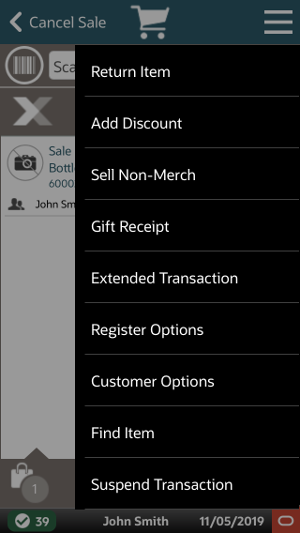
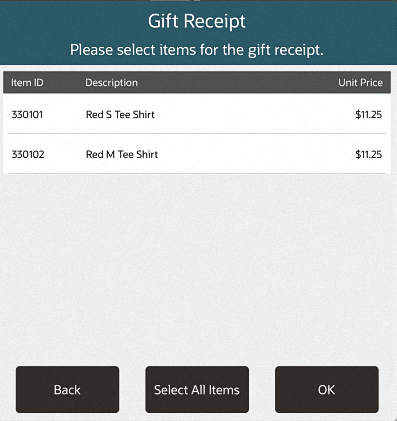
During a sale transaction, select Gift Receipt in the Context Menu. Xstore Mobile POS displays a list of items eligible for gift receipts.
Figure 4-35 Mobile Handheld Gift Receipt Items
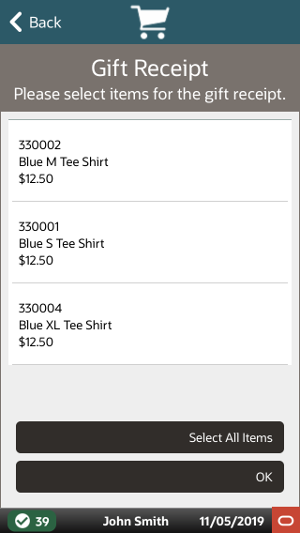
Select Select All to print gift receipts for all items and select OK.
<OR>
Select the gift certificate items for which to print a gift receipt and select OK.
Click OK.
The gift certificate items are labeled in the View Port with a gift icon. Gift certificates will be printed at the end of the transaction.
At the end of the transaction, if you are prompted whether to group gift certificate items, see Group Gift Receipt Items.
At the end of the transaction, you may be prompted whether to print a gift certificate for each item:
Figure 4-36 Mobile Handheld Print Separate Gift Receipt Prompt
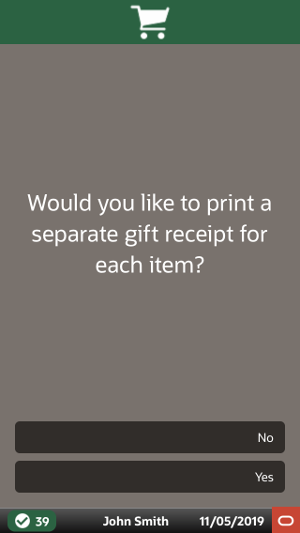
Click Yes to print a gift certificate for each item.
Click No to print one gift certificate for all items.
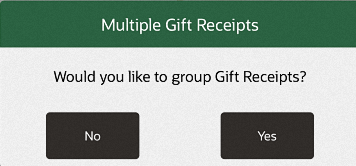
After tendering the sale, if there are multiple items that have been labeled as requiring a gift receipt, you may be prompted whether to group items on separate gift receipts. For example, you can group 2 items on one receipt, and 3 items on another receipt.
To group items on gift receipts:
Figure 4-38 Mobile Handheld Group Gift Receipts Prompt
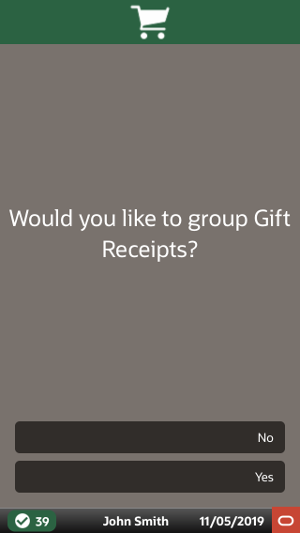
If you are prompted whether to group gift receipts, select an option:
Click Yes to group gift receipt items. A gift receipt grouping window opens.
Click No to continue the transaction without creating gift receipt groups.
Select the items to group on one gift receipt.
Click Add Grouping.
The selected items are grouped into one gift receipt and removed from the list.
Repeat Steps 2 to 3 for each gift receipt group.
Click Finish and Print to print the gift receipts and complete the transaction.
The reprint options provide a way to recover when there is a printer error or the printer jams. They allows you to reprint a receipt or a rebate offer for the customer.
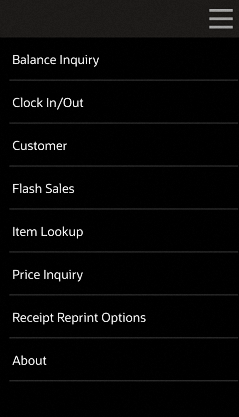
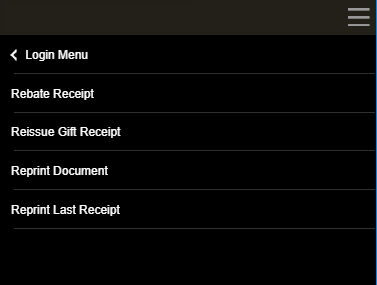
Go to the login screen and select the Context Menu.
Select Receipt Reprint Options from the Context menu.
The following options are available:
Rebate receipts may be offered to customers so that they can retain the original receipt for a purchase, and mail in the rebate receipt as proof of purchase.
Select Rebate Receipt (See Figure 4-40). The system prompts for transaction information.
Figure 4-41 Mobile POS Transaction Lookup
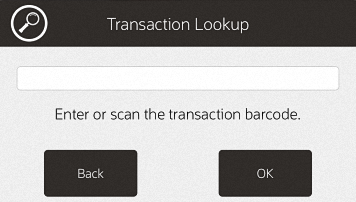
Enter the transaction information by doing one of the following:
Scan the barcode on the original sale receipt.
Enter the barcode information and press Enter. The rebate receipt prints on the receipt printer.
|
Note: The receipt is clearly labeled as a rebate authorization receipt. |
This receipt cannot be used for merchandise returns.
To create gift receipts for a previously completed transaction:
Select Reissue Gift Receipt (See Figure 4-40). The system prompts for transaction information.
Figure 4-42 Mobile POS Transaction Lookup
Enter the transaction information by doing one of the following:
Scan the barcode on the original transaction receipt.
Enter the barcode information and press Enter.
Xstore Mobile displays a list of items eligible for a gift receipt.
Select the gift receipt items using the appropriate procedure:
Xstore Mobile prints the receipt.
To reprint a document (such as a rebate offer):
Click Receipt Document. (See Figure 4-40).
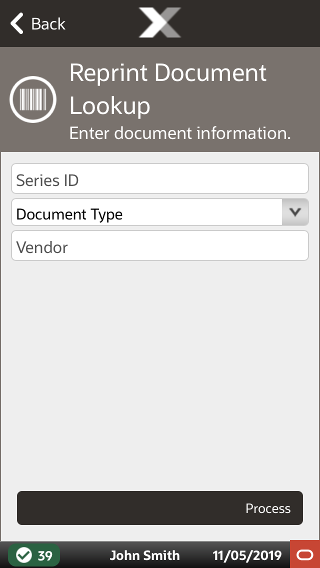
The Reprint Document Lookup window opens.
Figure 4-43 Mobile POS Reprint Document Lookup
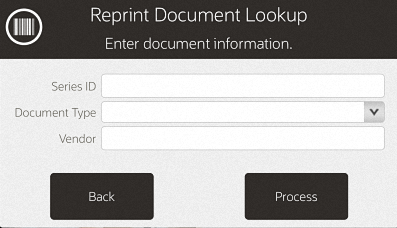
Enter the search information for the document:
Series ID: Enter the ID for the document series.
Document Type: Select the type of document.
Vendor: Enter the name of the vendor who produced the document.
Click Process.
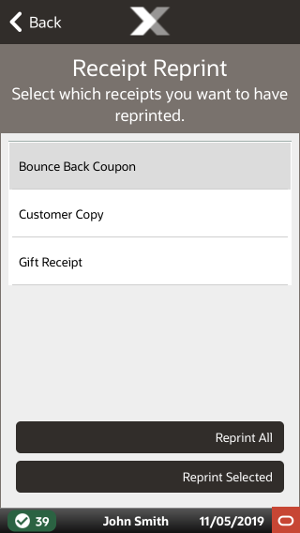
Xstore Mobile POS displays a list of documents matching the search criteria.
Click the correct document.
Select Reprint Selected or Reprint All.
Xstore Mobile POS reprints the document on the report printer.
To reprint the last receipt created by the register:
Click Reprint Last Receipt (See Figure 4-40).
Xstore Mobile Point of Service prompts whether to reprint the last receipt.
Click Yes to reprint the last receipt.
|
Note: The receipt is clearly labeled as a reprinted receipt. |
In the event that connection to all mobile servers is lost, it is possible to enter in basic sales and return transactions manually in Xstore Mobile, if your system is configured to do so.
Select Change Server from the Connectivity Problem screen.
Select Offline POS from the Change Server screen.
See Offline Transactions for more information.
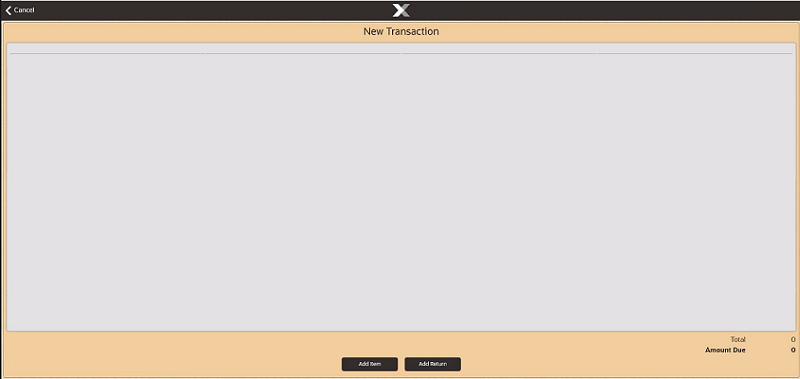
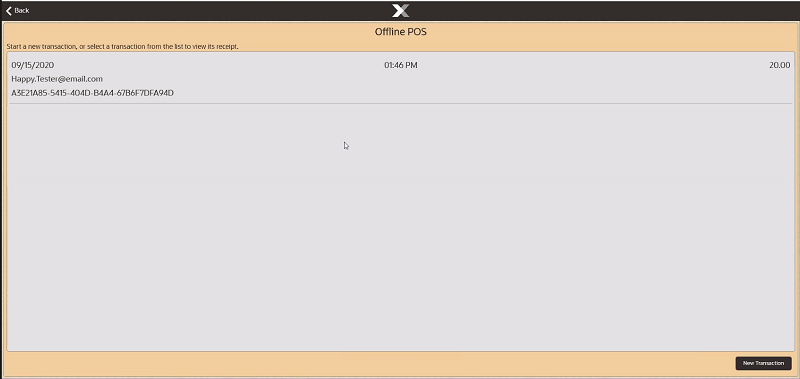
Select New Transaction from the Offline POS screen.
Two options are available:
Add Item - goes to the manual sales transaction entry screen.
Add Return - goes to the manual return screen to prompt for receipt data. See Entering Returns when in Offline Mode for more information on return transactions.
To perform a sale in offline mode:
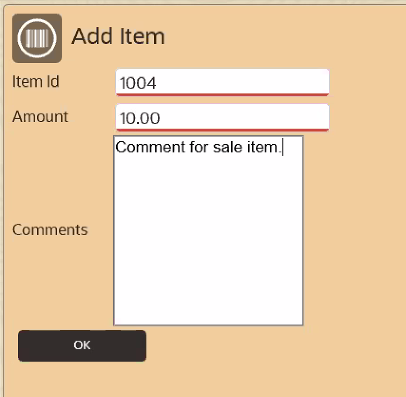
Select Add Item.
Scan an item barcode to add it to the transaction or enter an Item ID manually.
Change item price if needed.
Optionally, add a comment for the sale item.
Select OK.
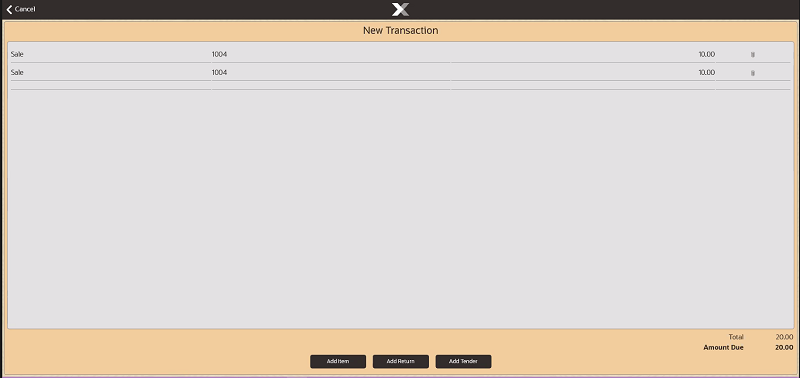
Repeat the steps above as needed to add each item.
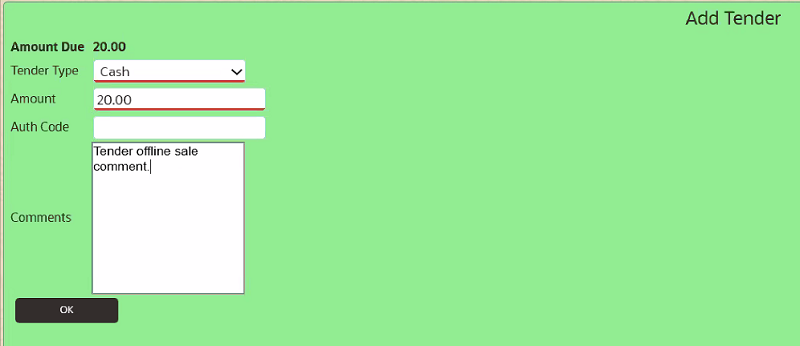
When done, select Add Tender.
Select a tender type from the dropdown list. Not all tender types are available.
Optionally, add a comment for the tender.
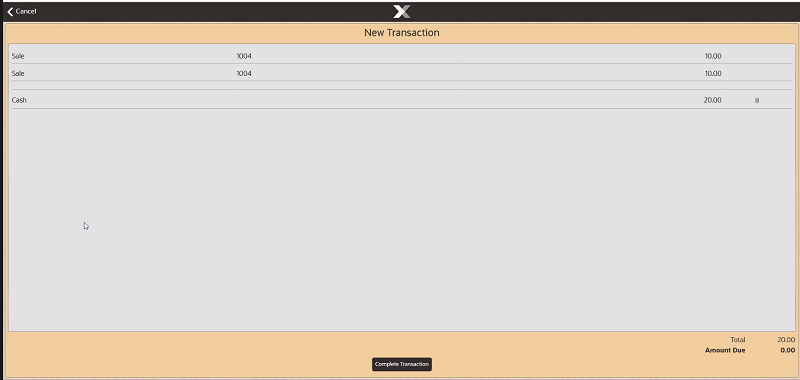
Select OK when done.
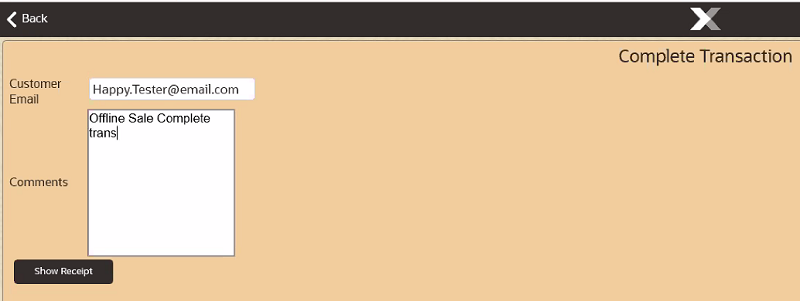
Select Complete Transaction and enter an email address for the receipt.
Optionally, enter a comment.
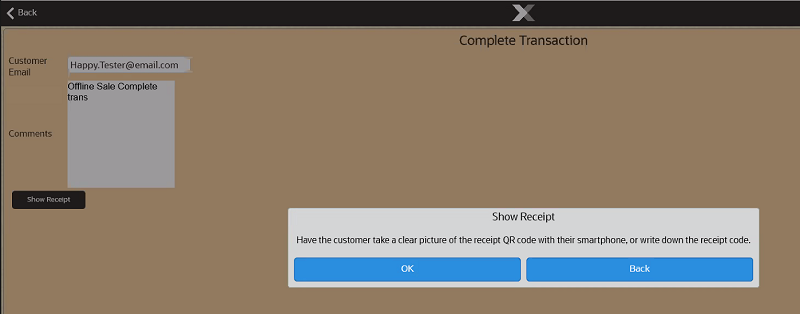
Select Show Receipt.
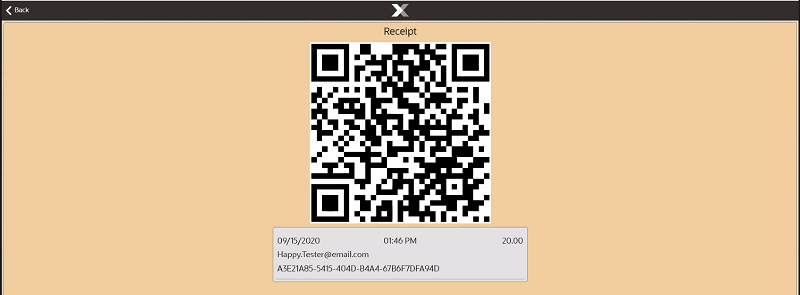
Select OK. The UUID QR code is printed.
Ask the customer to take a picture of the code with their mobile phone or to write down the receipt code.
This UUID QR code can be used for returning the items or to get a transaction receipt when the store is back online. See Printing a Transaction Receipt for more information.
At the end of each transaction the system checks to determine if the mobile server is back online:
If the mobile server the device was configured to use is back online, then the device returns to the Xstore Mobile login screen.
If another server in the list is online, you are taken to the Change Server configuration screen. The offline mode will then be disabled. See Offline Transactions for more information.
If no servers are available, you go to the list of offline transactions and can choose to conduct another one or return to the Change Server screen.
See Reviewing Offline Transactions when the mobile server is back online to approve or reject the transactions performed whilst offline.
|
Note: All offline transactions need approving/rejecting before store close. |