| Oracle® Retail Xstore Point of Service Mobile User Guide Release 20.0 F35714-03 |
|

 Previous |
 Next |
| Oracle® Retail Xstore Point of Service Mobile User Guide Release 20.0 F35714-03 |
|
Previous |
Next |
Returns allow you to create transactions for returned merchandise and to associate the reason the item was returned with the transaction. Oracle Retail Xstore Mobile allows you to create return transactions both with and without the original receipt.
Depending on your store policy, you may not be able to return merchandise purchased in another country. If your store restricts cross-border returns, a message displays indicating that cross-borders returns cannot be processed.
This section covers the following topics:
Verified Returns (With Original Receipt or Credit Card)
If the customer has the original receipt or credit card, the system verifies that the receipt that accompanies the return, or the original credit card used in the sale, is found either on the local system or the home office system. When the original transaction is found, the system displays the original sale information. A return using the customer's original sale receipt or credit card to locate the transaction information stored in the database is a verified return.
If you scan the transaction barcode at the Sale screen:
At the Sale screen, scan the barcode on the customer's original receipt. The system recognizes that this is a sale receipt barcode rather than an item identifier. If the original transaction is found in the database, the system immediately transitions to return mode and the original transaction information is shown. Refer to What happens if the original transaction is not found or is missing data for the return process if the original transaction cannot be found.
If a customer record was associated with the original sale transaction, the customer's record is automatically associated with the return.
If a customer record was not associated with the original sale transaction, you may be prompted to associate a customer record with the return transaction before continuing.
Skip to step 6.
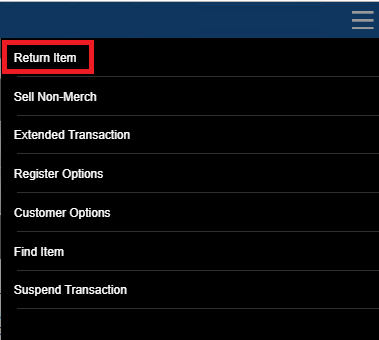
If you select the Return Item menu option from the Context Menu or Sales screen. See Figure 1-6, perform the following steps to create a verified return.
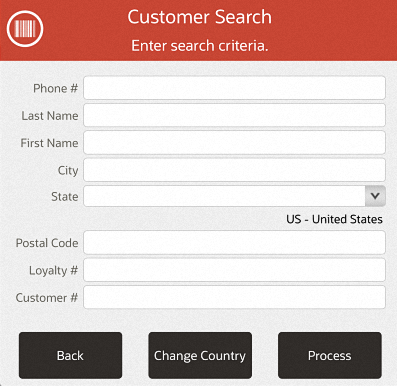
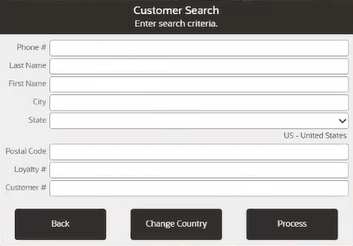
Depending upon your system's configuration, you may be prompted for customer information if a customer has not been associated with the current transaction. Enter the customer's information and select Process. When the customer information is found or added, the customer record is associated with this transaction.
|
Note: For more information about the Change Country option on the Customer Search form, see Change Country. |
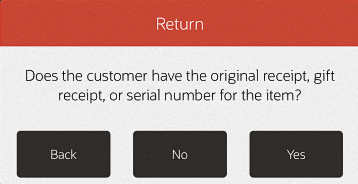
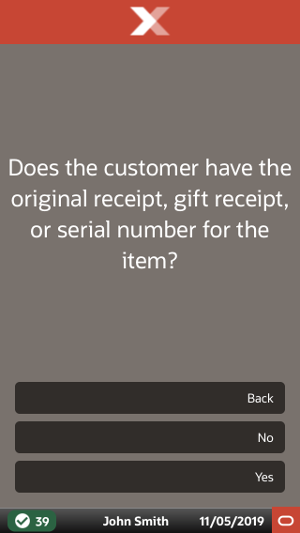
The system displays a prompt asking if the customer has the original receipt, gift receipt or serial number for the item. Press Yes.
Figure 5-5 Mobile Handheld Original Receipt Prompt
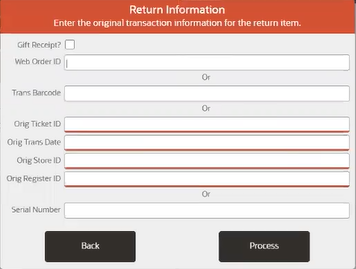
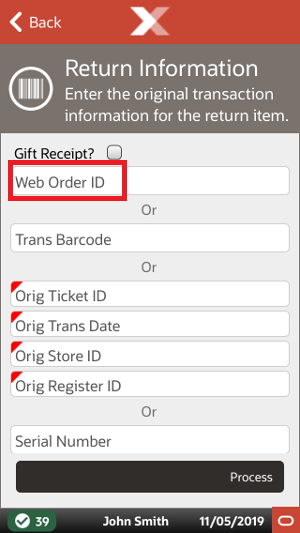
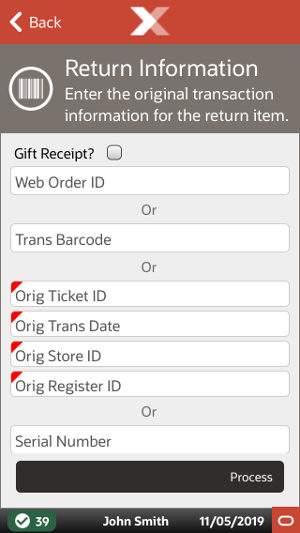
The system displays a prompt asking for the original transaction information for the return item. Scan the transaction barcode on the receipt, swipe the credit card, or manually enter the required receipt information and select the Process option to continue.
|
Note: Depending on your payment system, the credit card search field may not be available. |
Figure 5-7 Mobile Handheld Original Transaction Return Information
Xstore Mobile searches the database for the original transaction information.
If you swiped or entered the customer's credit card number, enter or scan the item ID. If more than one transaction is found, select the transaction from the Available Transactions list when prompted.
Xstore Mobile displays the original item information.
If you entered the receipt information, Xstore Mobile displays the original item information.
If the original receipt is not found in the database, this prompt displays.
Figure 5-8 Original Transaction Information Not Found Prompt
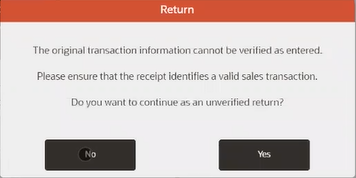
Select No to enter/scan the receipt information again.
Select Yes to process the return as an unverified return.
See Entering Returns without Original Receipt for processing information. If you want to search for the original transaction using the customer's credit card, go to step 1.
If the original receipt is found in the database, but is missing any data required to process the return, a message displays indicating the transaction must be processed as an unverified return.
See Entering Returns without Original Receipt for processing information.
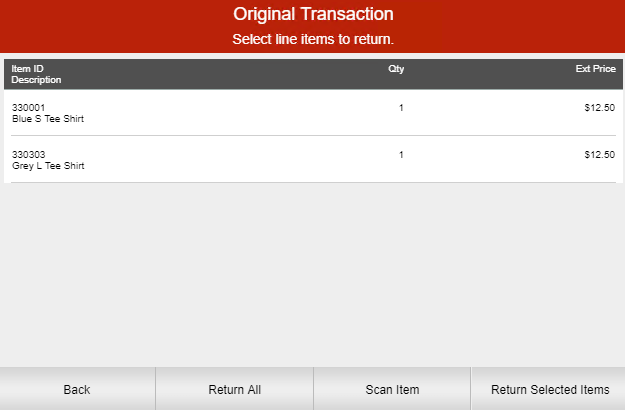
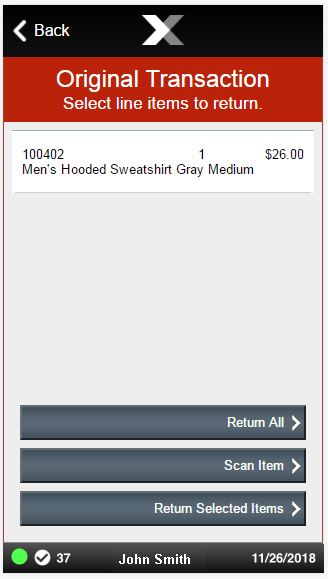
With the original transaction information displayed, select the return item from the list and then select either the Return All or the Return Selected Item(s) option. You can also scan or type the item ID for the return item.
Figure 5-10 Mobile Handheld Original Transaction Information
|
Note: Depending upon your system's configuration and the number of items in the transaction, you may be prompted for the item quantity to be returned. If prompted, enter the quantity and press OK to continue.Serialized items within a kit can be exchanged. See Exchanging Serial Numbers for more information. |
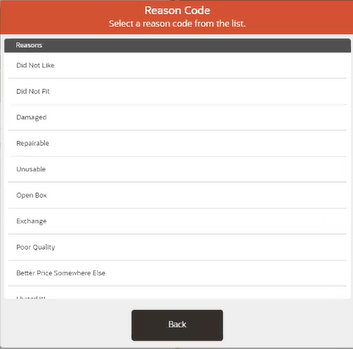
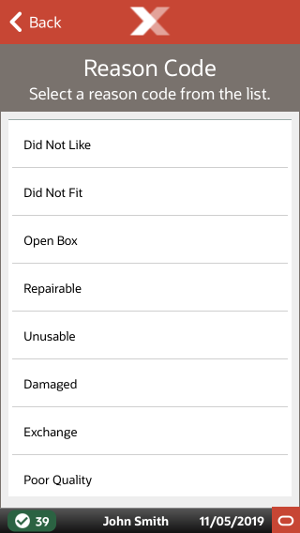
Xstore Mobile prompts for a reason for the return. Select a reason for the return.
Figure 5-12 Mobile Handheld List of Return Reasons
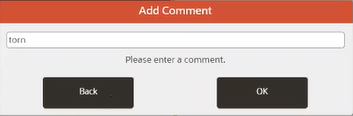
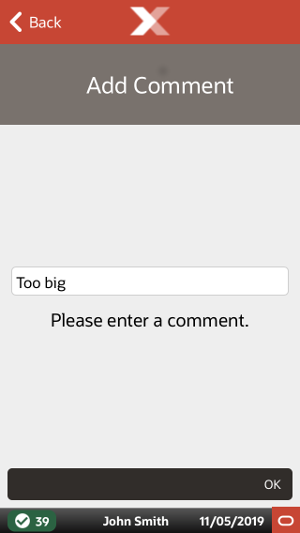
Depending upon the return reason you chose, you may be prompted for additional information as shown in Figure 5-13 and Figure 5-14 below. Enter the required information and press OK to continue.
Figure 5-14 Mobile Handheld Return Comment Form
If you are prompted for a serial number, enter the serial number and press OK to continue.
|
Note: If you the item being returned is a kit that includes one or more serial numbers, you will be prompted for a serial number for each serialized item in the kit. |
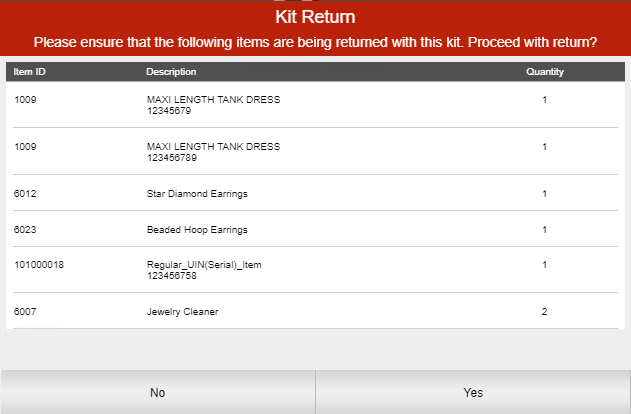
If the return item is a Kit composed of multiple items, all items that make up the kit must be returned. You may be prompted with a list showing all items that make up the Kit. See Figure 5-19 and Figure 5-20.
If prompted, choose No if all component items are not available. The current return item entry is cancelled and the system goes back to the return item prompt.
Choose Yes to continue with the return process to return all component items from the Kit.
Depending upon your store policy, you may be prompted with additional information about the return transaction. If prompted, press OK to acknowledge the message.
|
Note: Depending upon your return policy, certain items may be returned at a prorated value from their original purchase price. If so, the amount refunded for these prorated items is determined by the number of days between the original date of purchase and the date of return. For example, some store return policies offer a full refund if the item is returned within 30 days. After 30 days, a reduced refund (declining over time following the purchase date) is calculated automatically. |
Xstore Mobile returns to the Return screen. Note that the return item quantity has been decremented by the quantity returned. In the example below, the original purchase quantity was 1 and 1 item was returned; 1 - 1 = 0.
When all of the return items are selected, perform one of the following functions to complete the process:
Select Add Tenders or press OK to tender the refund.
Select Exit Return to return to the Register Sale screen to continue selling items.
Select New Return if the customer would like to return additional items that do not appear on this original receipt.
When the transaction is complete, the system prints receipts.
This section describes the return process without the original receipt.
A blind return is a return without a receipt. An unverified return is a return where the customer has a sale receipt, but it cannot be found in the database. These two return procedures are essentially the same.
If the customer does not have the original receipt for the return item, or the customer's receipt cannot be verified, perform the following procedure to complete the return transaction.
|
Note: If your store is set up to use customer purchase history to determine return item pricing, see Entering Returns without Original Receipt, Using Customer Purchase History. |
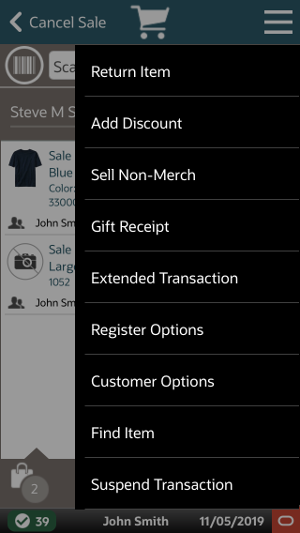
Select the Return Item option from the Context Menu or Sales screen. See Figure 1-6 and Figure 5-2. Use the following steps to perform a blind (or unverified) return.
Depending upon your system's configuration, you may be prompted for customer information if a customer has not been associated with the current transaction. Enter the customer's information and select the Process option. See Figure 5-3.
A prompt displays asking if the customer has the original receipt or a gift receipt for the item. Press No. See Figure 5-4 and Figure 5-5.
|
Note: Depending on your payment system, original credit card may not be listed as an option. |
Scan the item's barcode, or enter the item ID manually and then press Enter.
If prompted for the quantity, enter the item quantity and then press Enter.
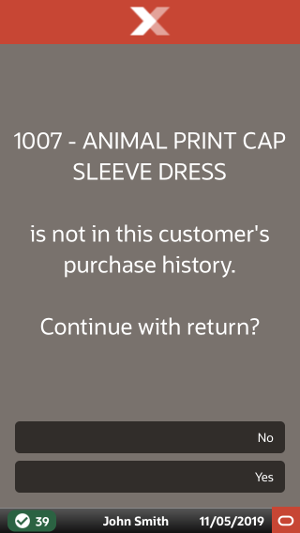
If prompted that the item was not found in the customer's purchase history, select Yes to continue with the blind return.
Figure 5-16 Mobile Handheld Item Not in Customer's Purchase History Prompt
Go to step 7 below.
If the item is found in the customer's purchase history, select a transaction from the list and press Enter to create a verified return. Continue with step 6 of With Original Receipt or Credit Card.
<OR>
Press Esc and continue with the blind return. Go to step 7 below.
Select a reason for the return. See Figure 5-11 and Figure 5-12.
Depending upon the return reason you chose, you may be prompted for additional information as shown in Figure 5-13 and Figure 5-14. Enter the text of your comment.
Depending upon your system's configuration:
You may be prompted with additional information about the return transaction. Press OK to acknowledge the message.
The price history window may display a list of previous promotional prices. Select the correct price for the return item to continue.
A prompt may appear stating that a restocking fee has been added based on the item returned. This amount is deducted from the amount of the refund. Press OK to continue.
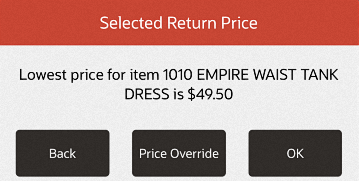
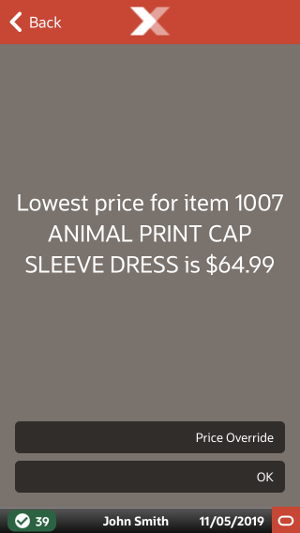
The lowest price for the item may display. To override the price, select Price Override. A manager will need to enter an Employee ID and Password to override.
Figure 5-18 Mobile Handheld Lowest Price for Item Prompt
If you are prompted for a serial number, enter the serial number and press Enter to continue.
|
Note: If you the item being returned is a kit that includes one or more serial numbers, you will be prompted for a serial number for each serialized item in the kit. |
If the return item is a Kit composed of multiple items, all items that make up the kit must be returned. You may be prompted with a list showing all items that make up the Kit.
Figure 5-20 Mobile Handheld Kit Return Screen
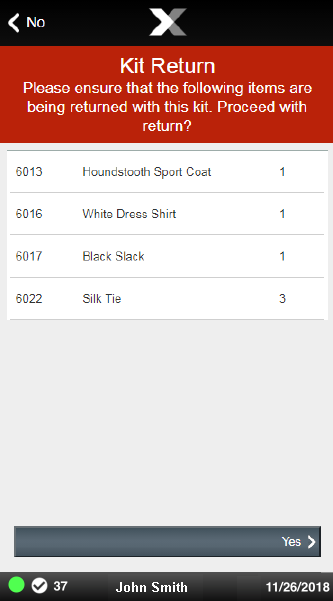
If prompted, choose No if all component items are not available. The current return item entry is cancelled and the system goes back to the return item prompt.
Choose Yes to continue with the return process to return all component items from the Kit.
When all return items have been entered, perform one of the following functions to complete the process:
Select Add Tenders or press Enter to tender the refund.
|
Note: Note: Your store may have a blind return threshold. If the amount of the return exceeds this threshold, a Blind Return Threshold Amount security prompt displays. A manager will need to enter an Employee ID and Password to override. If your store does not allow overrides, you will be unable to complete the return. |
Select Exit Return to return to the Sale screen to continue selling items.
Select Return Item if the customer would like to return additional items (for example, items that appear on an original receipt).
Select Change Item to modify an item. You may change quantity, change price, change tax, void line, modify discount (if the item was discounted), or change the commissioned associate. Refer to Modifying a Transaction for more information about these options.
Select Add Discount if the return item is on sale at the time it is returned. Then select a type of discount from a list, and select the specific item that is discounted. The discount you apply may be a percentage discount or a dollar amount discount. This ultimately reduces the amount due to the customer when the return is tendered.
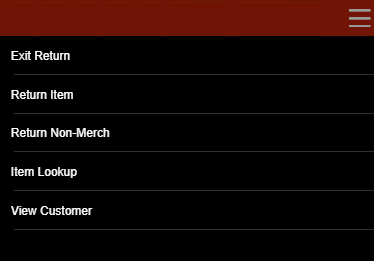
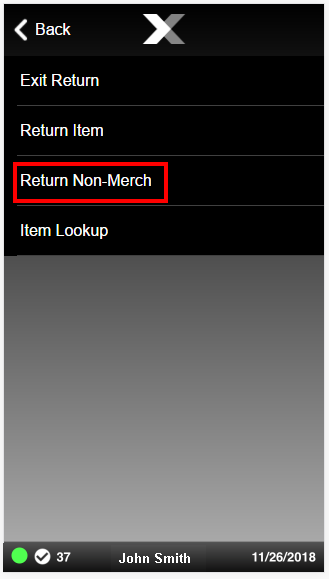
Select Return Non-Merch to return a non-merchandise item.
Select Item Lookup to find the Item ID for the return item. Refer to Searching for Items Using Item Lookup for more information about looking up item information.
Select Return Item from the Context Menu. The system prompts you to specify whether or not the customer has a receipt or serial number for the return item.
Respond to the prompt by selecting No. After confirming that the customer does not have the original receipt, select Return Non-Merch from the Context Menu.
Select the category of non-merchandise item to be returned from the list and press Enter to continue.
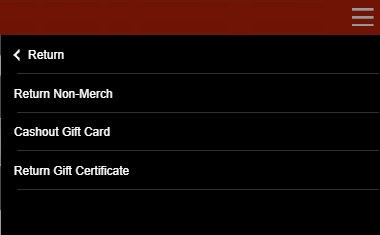
Figure 5-24 Mobile Handheld List of Non-Merchandise Categories
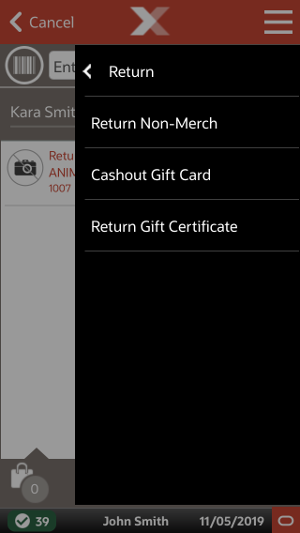
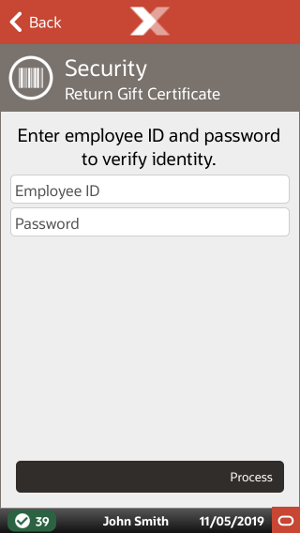
The options to return a gift card or a gift certificate may require a security login, depending on store policy. To perform those two options, you must have the required security level. Enter your login ID and password when prompted, and select Process.
Enter the appropriate information when prompted. For example the voucher ID for a Gift Certificate, the Gift Card number for a gift card, or the item price. The prompts vary, depending on the item selected.
You may be prompted to select a reason for returning the non-merchandise item. If so, select a reason from the list and select OK.
When all return items have been selected, choose one of the following functions to complete the process:
Select Add Tenders or press Enter to tender the refund. Return tenders are the tendering types used when money is owed to the customer. The tender types available for sales may be different than those available for refunds.
Select Exit Return to return to the Sale screen to continue selling items.
Select Return Item if the customer would like to return additional items (for example, items that appear on an original receipt).
Select Return Non-Merch if the customer would like to return additional non-merchandise items (for example, non-merchandise items that appear on an original receipt).
Select Change Item to modify an item: change quantity, change price, change tax, void line, modify discount (if item was discounted), or change the commissioned associate. Refer to Modifying a Transaction for more information about these options.
Select Add Discount if the non-merchandise return item is on sale at the time it is returned. You must select a type of discount from a list, and then select the specific item that to be discounted. The discount you apply may be a percentage discount or a dollar amount discount. This ultimately reduces the amount due to the customer when the return is tendered.
If a customer does not have the original receipt, or the receipt cannot be verified, the return item price may be determined from the customer's purchase history, when available.
If the return item(s) can be found in the customer's purchase history record, the transaction is processed like a verified return as described in With Original Receipt or Credit Card.
If the item(s) cannot be found in the customer's purchase history record, the transaction is processed like a blind return as described in Entering Returns without Original Receipt.
At the Sale screen, select Return Item from the Context Menu.
If a customer has not been associated with the current transaction, enter the customer's information when prompted and select Process.
When prompted if the customer has the original receipt or a gift receipt for the item, press No.
At the item prompt, scan or enter the return item ID:
Item Found:
If the item is found in the customer's purchase history, the system lists the customer's previous transaction(s) that include the return item.
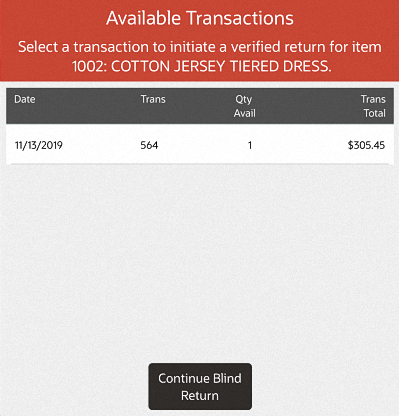
Figure 5-28 Mobile Handheld Available Transactions
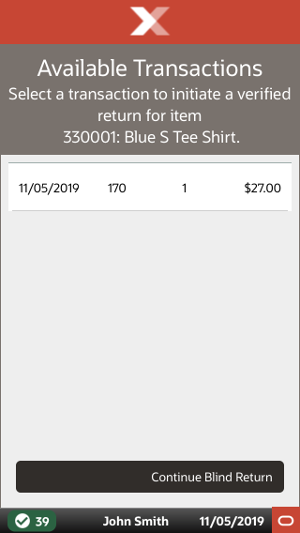
This Available Transaction list shows the following information for each transaction:
Date: The original transaction date.
Trans: The original transaction ID number.
Qty Avail: The item quantity available for return from the original transaction.
Trans Total: The original transaction total amount.
To use the customer's purchase history record for return pricing, select a transaction from the list and press Enter. Go to step 6 to complete the return.
To use Blind Return processing rather than selecting the item from the customer's purchase history record, select Continue Blind Return option and go to step 5 to complete the return.
Item Not Found:
If the item is not found in the customer's purchase history, the Item Not in Purchase History prompt displays. See Figure 5-15 and Figure 5-16.
Select Yes to continue with a blind return. Go to step 5. (This option may be controlled by security permissions. If so, you may be prompted for a manager override to continue).
Select No to cancel the return from customer's purchase history process. The system returns to the Scan or Enter the Return Item prompt in return mode.
In the event that connection to all mobile servers is lost, it is possible to enter in return transactions manually in Xstore Mobile, if your system is configured to do so.
Select Change Server from the Connectivity Problem screen.
Select Offline POS from the Change Server screen.
See Offline Transactions for more information.
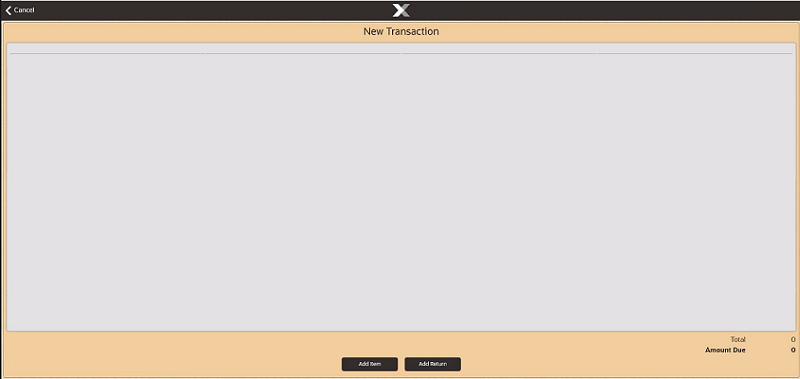
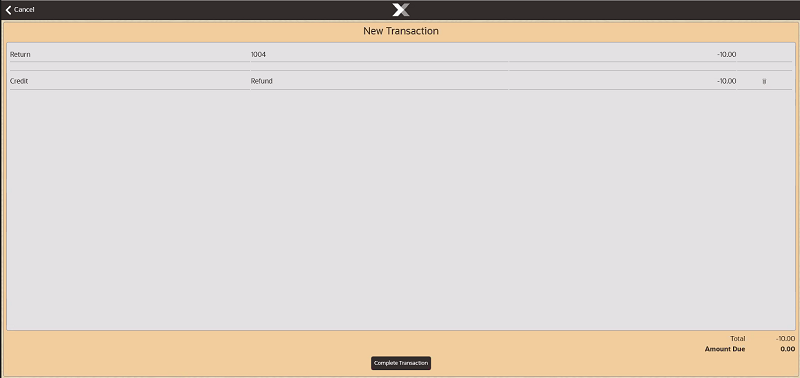
Select New Transaction from the Offline POS screen.
Two options are available:
Add Item - goes to the manual sales transaction entry screen. See Offline Sales Transactions for more information on performing sales in offline mode.
Add Return - goes to the manual return screen to prompt for receipt data.
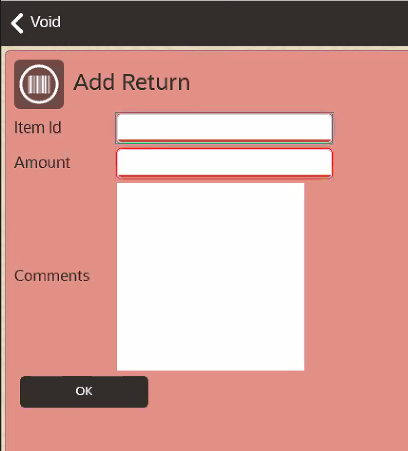
To perform a return transaction:
Select Add Return.
Select the barcode icon in the top left and scan a receipt, or manually enter the details.
Optionally, add a comment for the return item.
Select OK.
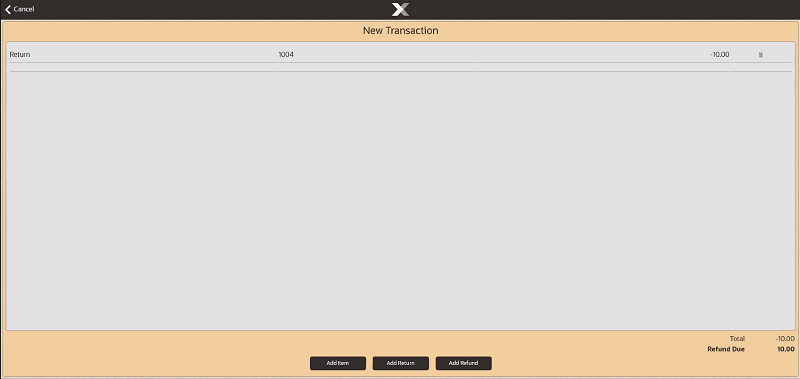
Repeat the steps above as needed to add each item.
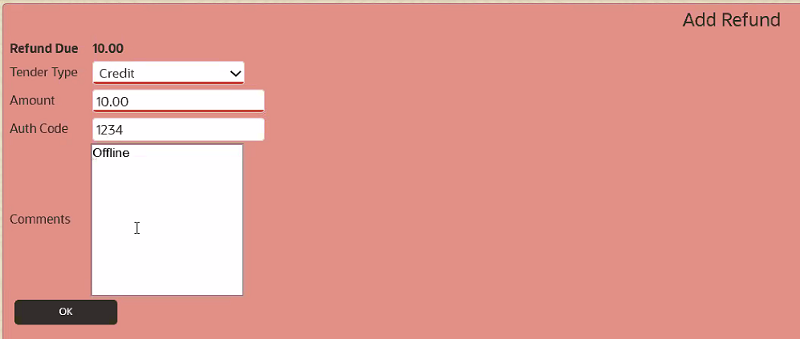
When done, select Add Refund.
Select a tender type from the dropdown list. Not all tender types are available.
Enter the amount and auth code.
Optionally, add a comment for the refund.
Select OK.
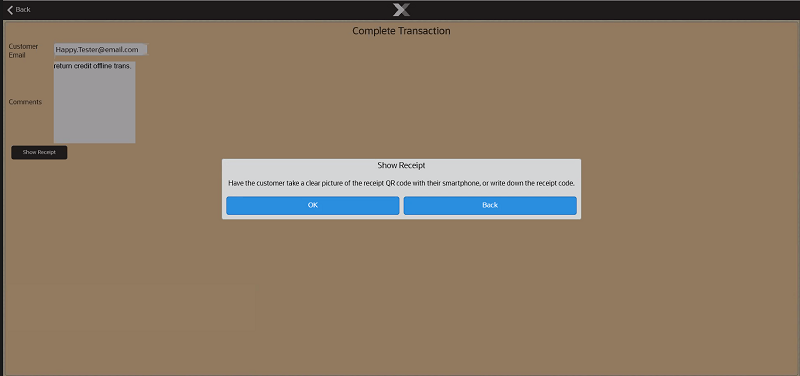
Select Complete Transaction and enter an email address for the receipt.
Enter email address for the receipt.
Select Save.
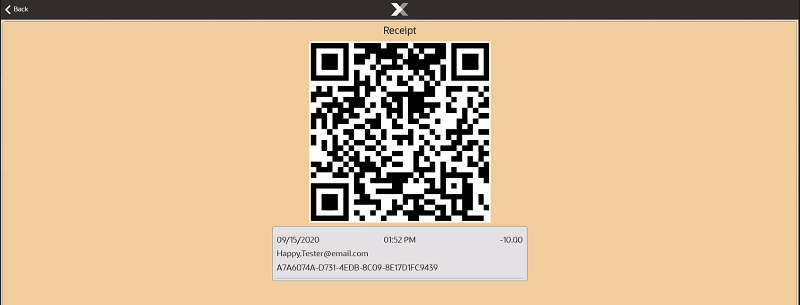
The UUID QR code is printed.
Ask the customer to take a picture of the code with their mobile phone.
This UUID QR code can be used to get a transaction receipt. See Printing a Transaction Receipt for more information.
Select OK. The UUID QR code is printed.
Ask the customer to take a picture of the code with their mobile phone or to write down the receipt code.
This UUID QR code can be used to get a transaction receipt when the store is back online. See Printing a Transaction Receipt for more information.
See Reviewing Offline Transactions when the mobile server is back online to approve or reject the transactions performed whilst offline.
|
Note: All offline transactions need approving/rejecting before store close. |
Taxes for return items are determined by the original store number entered in the original Receipt Information form.
|
Note: If an original store number is not entered (because the customer does not have the original receipt), the return store's tax rate is used. |
You can change the tax on the return item using the Change Item option on the menu. Refer to Changing Item Taxes for more information about changing taxes.
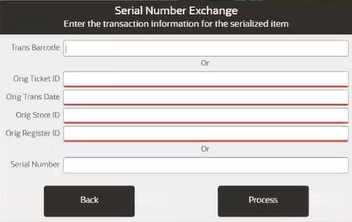
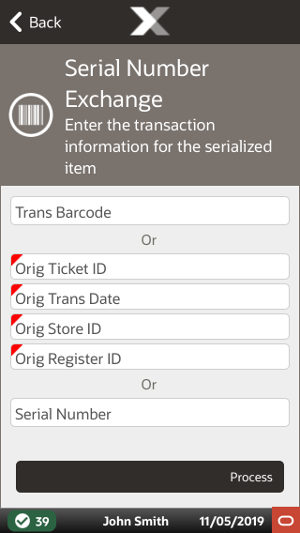
This option allows a serialized item to be exchanged and the new serial number to be linked with the old transaction. Blind or unverified returns are not supported.
Select Serial Number Exchange from the Inventory menu.
Enter the criteria to search for the customer.
Scan the receipt or manually enter the receipt information to bring up the transaction. When the receipt has one or more serialized items in the transaction only those serialized items will display as a list.
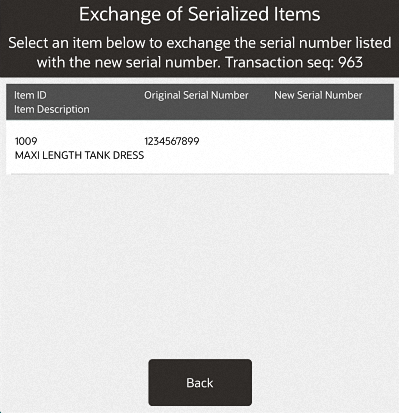
Select an item from the list to exchange the serial number listed with the new serial number.
Select a reason code from the list.
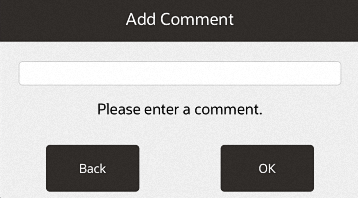
Enter a comment as to why the exchange is required and press OK.
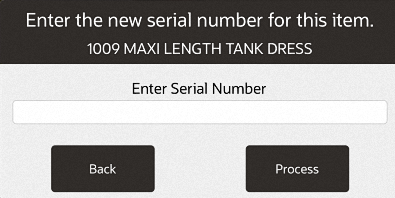
Scan or enter the new serial number.
When there is more than one item to exchange, select the option Enter More Items and repeat steps 4 to 7, otherwise select Continue.
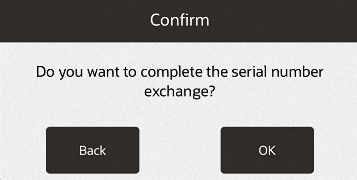
Select OK to complete the serial number exchange.
A receipt ticket prints listing each item exchanged and the new serial number for each item. Only the items that have new serialized numbers will print on the ticket.
|
Note: If a customer decides to return a serialized item, that had been exchanged, the system will have the latest serial number on file for that item. |