| Oracle® Retail Xstore Point of Service Mobile User Guide Release 20.0 F35714-03 |
|

 Previous |
 Next |
| Oracle® Retail Xstore Point of Service Mobile User Guide Release 20.0 F35714-03 |
|
Previous |
Next |
During a transaction you may need to search for a particular item.
To search your store inventory, see Searching for Items Using Item Lookup below.
To search other stores, see Locating Items: Inventory Lookup.
To print a Rain Check, see Print a Rain Check.
On the home screen for Mobile Tablet and Thin Client, we have Quick Action Buttons, one of them for Item Lookup. Select Item Lookup to search for an item and learn its stock availability, even when the register is closed.
Use the item lookup function to search for an item based on many criteria (SKU, style, department, and so on) and retrieve detailed information about the item. For kits, you can use item lookup to view the component items that make up the kit. If item lookup is initiated from a sale, you can add the item to the sale directly from the lookup screen if all eligibility parameters have been met.
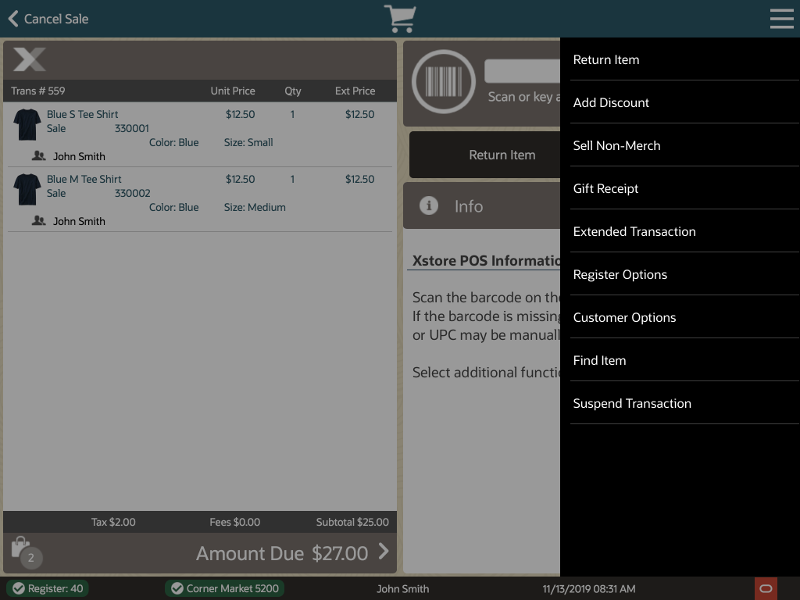
Select Find Item from the Context Menu:
Figure 7-2 Mobile Handheld Find Item Option
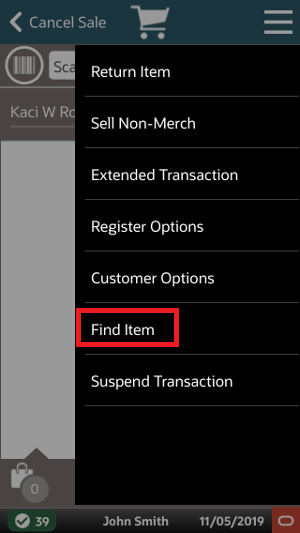
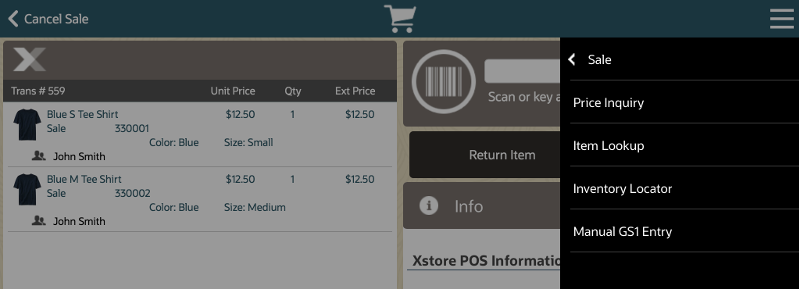
Select Item Lookup in the Find Item menu.
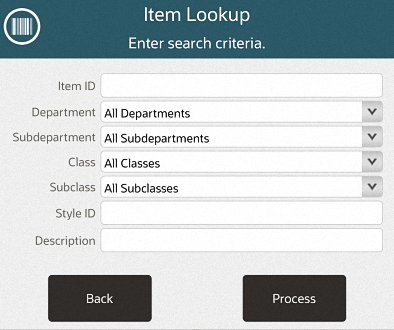
Scan an item to proceed directly to the item detail screen or enter the item search criteria:
Item ID: ID of the item.
Department: Department to which the item belongs.
Subdepartment: Subdepartment to which the item belongs.
Class: Class to which the item belongs.
Subclass: Subclass to which the item belongs.
Style ID: ID of the style assigned to the item.
Description: Content in the description of the item.
If advanced search options are configured on your Mobile POS system, use the advanced options to further refine the search such as specifying season, gender, material, line, and so on:
Select the value for any search criteria you are using.
Select Exclude for any unused search criteria.
After you have entered your search criteria, select Process to continue.
|
Note: If you enter only a few lookup criteria, the result will be a longer list of items. Entering more criteria narrows the scope of the search and results in fewer items being listed. You do not have to make an entry in every criteria field. |
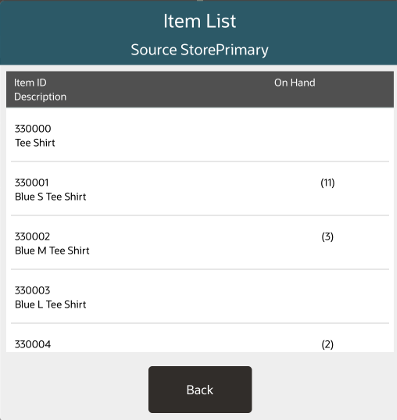
If several items match the criteria you entered, select an item in the list.
Xstore Mobile displays detailed information about the selected item in the Item Viewer.
Select Back to return to the sale screen.
<OR>
Select a tab to find more about the product information. See Item Viewer for detailed information.
<OR>
Continue with the appropriate procedure:
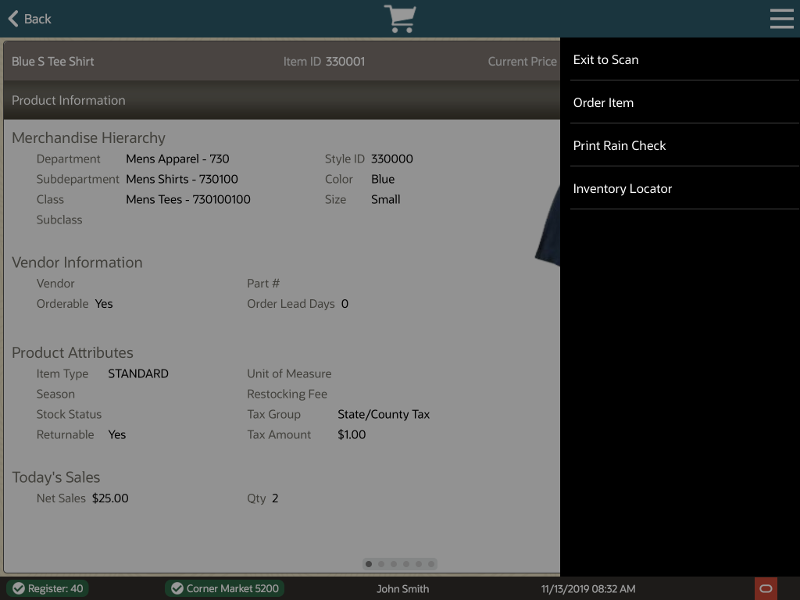
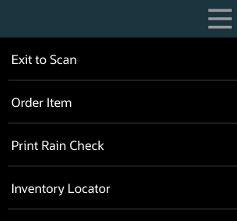
Add Item: You can add the displayed item to the current sale in progress. This option is only available if item lookup was accessed from a sale transaction and not in conjunction with Exit to Scan functionality. See Add Item to Transaction.
Exit to Scan: When selected you are taken to the sales screen to scan the item to add it to the transaction. This option is configurable (on by default) and is used as loss prevention method to make sure the item being added to the transaction is the item in front of the customer/sales associate. See Add Item to Transaction.
Order Item: You can place an order for the displayed item. This option is only available for items that can be ordered and if item lookup was accessed from a sale transaction. See Order Transactions Through Order Broker Cloud Service for more information.
Print Rain Check: If available, you can print a rain check to purchase out of stock items for the same price at a later date. See Print a Rain Check.
Special Order: You can place a special order for the displayed item. This option is only available for items that can be special ordered and if item lookup was accessed from a sale transaction.
Layaway Item: You can create a layaway account for the displayed item or place it on an existing account. This option is only available for items that are eligible for layaways and if item lookup was accessed from a sale transaction.
Inventory Locator: You can search for stores with the item in stock.
To add the searched-for item to a transaction:
Select the Context Menu in the Item Viewer screen.
Select Add Item or Exit to Scan in the Context Menu.
The item is either added to the transaction or scan the item to add it to the transaction. Return to the sale screen.
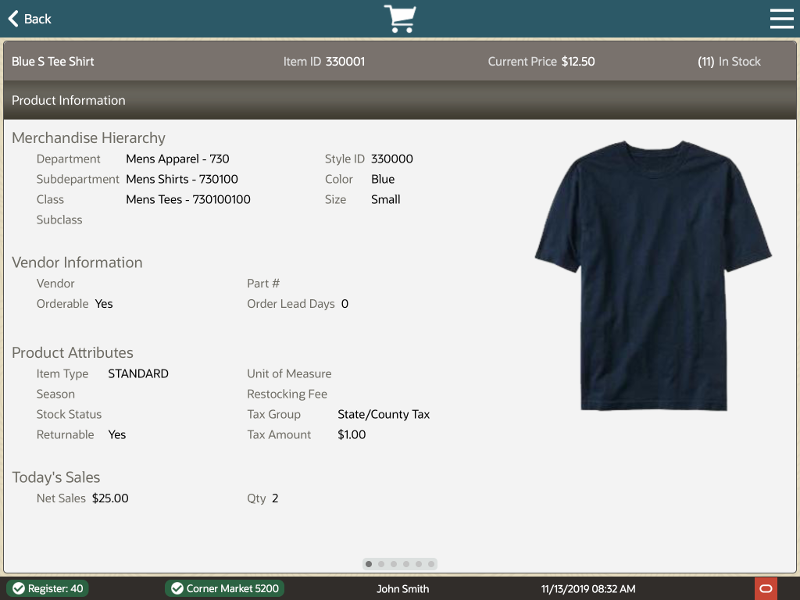
The Item Viewer provides information about an item. The Item Viewer displays the following information along the top of the screen:
Name of the item.
Item ID: ID of the item.
Current Price: Current price of the item.
Quantity of the item currently in stock.
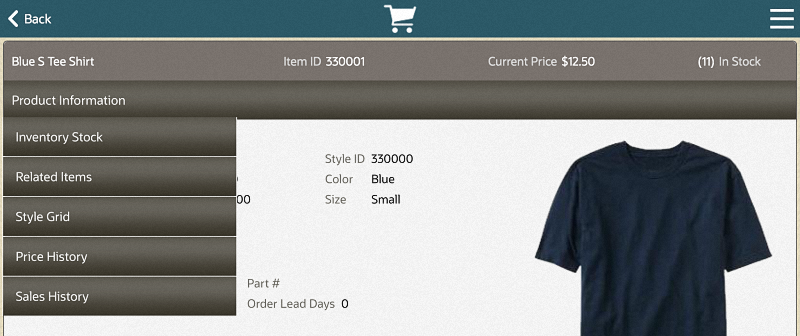
The Item Viewer has the following tabs:
Product Information: Information about the item.
Inventory Stock: Current inventory information for the item.
Related Items: Information about items related to the selected item.
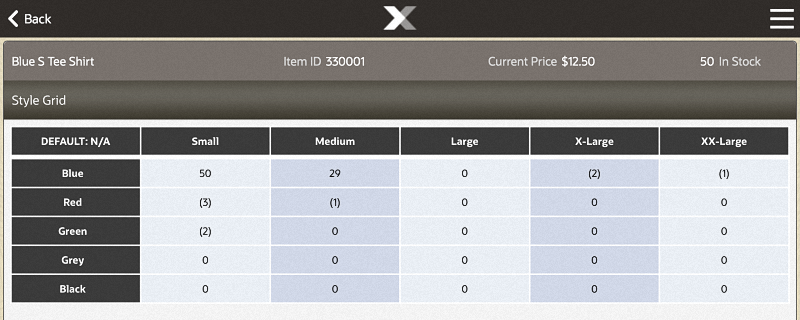
Style Grid: Grid showing on-hand quantities of the item with on dimension cross-referenced with another dimension.
Price History: Past prices for the item.
Sales History: Past sales data for the item.
You can also Print a Rain Check from the Item Viewer Context Menu or locate stock of the item via the Inventory Locator. See Locating Items: Inventory Lookup.
If available, you can print a rain check to purchase out of stock items for the same price at a later date. See Print a Rain Check.
The Product Information tab, (see Figure 7-6), displays the sections that display information about an item:
A picture of the item (if available).
Merchandise Hierarchy: Merchandise hierarchy to which the item is assigned.
Vendor Information: Vendor that provides the item.
Product Attributes: Attributes of the item.
Today's Sales: Sales information for the item on the current day.
The Merchandise Hierarchy section displays the following information:
Department: Item department.
Subdepartment: Item subdepartment.
Class: Item class.
Subclass: Item subclass.
Style ID: ID of the style for the item (if available).
Dimension information for the item.
The Vendor Information section displays the following information about the items:
Vendor: Name of the vendor.
Orderable: Indicates whether the item can be ordered.
Part #: Part number used by the vendor.
Order Lead Days: Number of lead days required when ordering the item.
The Product Attributes section displays the following information:
Item Type: Type of item.
Season: Season for the item.Inventory Stock
Stock Status: Current stock status.
Returnable: Indicates whether the item can be returned.
Unit of Measure: Unit used to measure the item (if applicable).
Restocking Fee: Restocking fee applied to the item when it is returned (if applicable).
Tax Group: Tax group for the item.
Tax Amount: Amount of tax applied to the item.
The Today's Sales section displays the following information:
Net Sales: Net amount of sales minus returns for the item on the current day.
Qty: Number of items sales of the item on the current day.
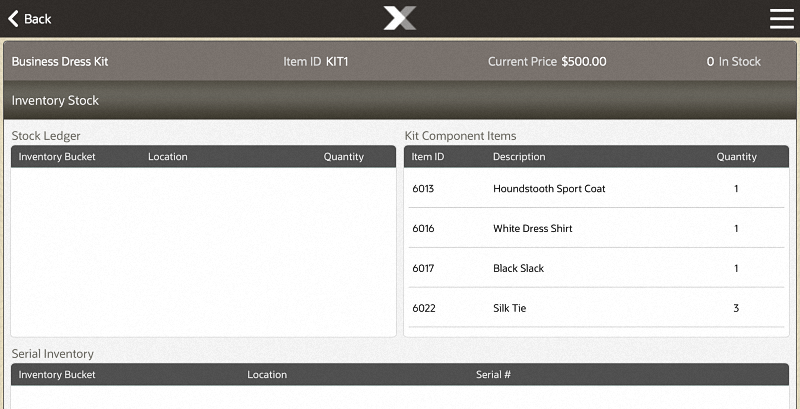
Figure 7-11 Item Viewer - Inventory Stock
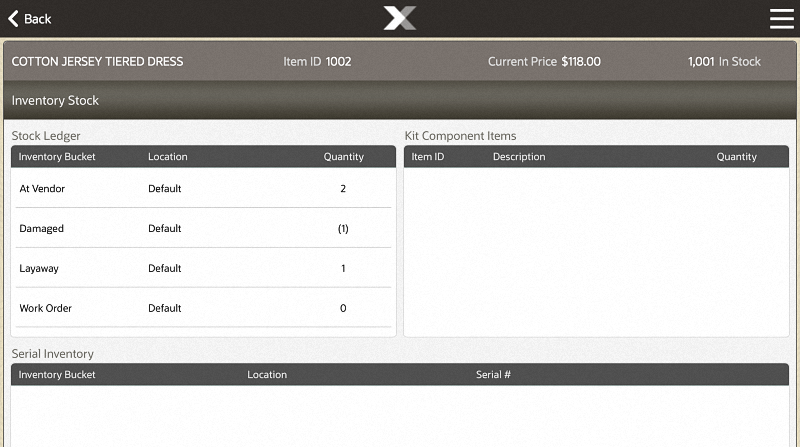
The Inventory Stock tab contains the following areas:
The Stock Ledger table displays the following information for each inventory bucket in which the item is located:
Inventory Bucket: Inventory bucket in which the item is located.
Location: Location of the item.
Quantity: Quantity of the item in the inventory bucket.
If the item is a kit, this table displays information about each item in the kit:
Item ID: ID of the kit item.
Description: Description of the kit item.
Quantity: Quantity of the item included in one kit.
If the item is a serialized item, the Serial Inventory table displays the following information about each serial number:
Inventory Bucket: Inventory bucket in which the serialized item is located.
Location: Location of the item.
Serial #: Serial number.
|
Note: No item quantity is displayed. For all items with one item ID, only one of those items will be assigned an individual serial number. |
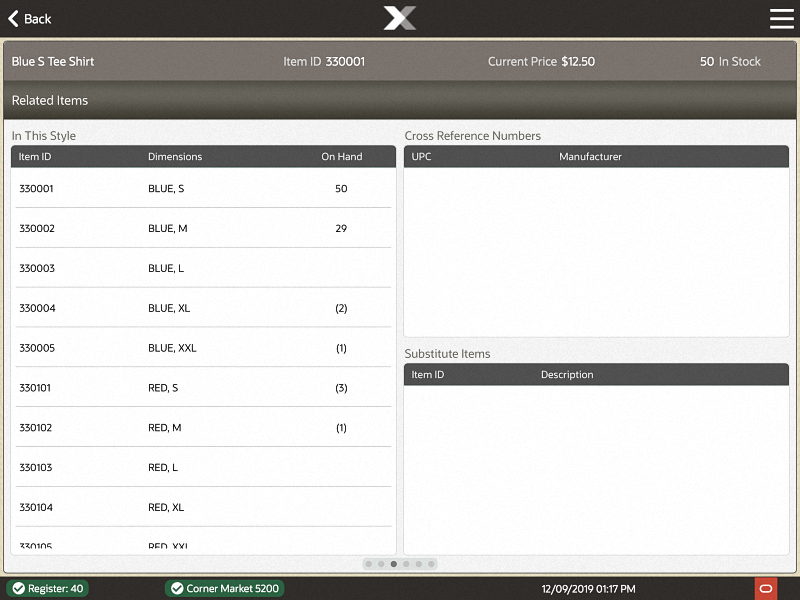
The Related Items tab includes information about items similar to the selected item.
The following tables display information about related items:
In This Style: Displays information about items assigned to the same style as the selected item.
Cross Reference Numbers: Displays information about items cross-referenced with the selected item.
Substitute Items: Displays information about items indicated to be substitutes for the selected item.
The In This Style table displays the following information about each item that has the same style ID as the selected item:
Item ID: ID of the item.
Dimensions: Values of the dimension attributes configured for the item.
On Hand: Count of the item on-hand.
The Cross Reference Numbers table displays the following information about items cross-referenced with the selected item.:
UPC: UPC for the item.
Manufacturer: Manufacturer that produces the item.
The Substitute Items table displays the following information about items that are indicated to be substitutes for the selected item:
Item ID: ID of the substitute item.
Description: Description of the item.
The Style Grid displays a grid showing the grid that shows the on-hand quantity of items with one dimension cross-referenced with another dimension.
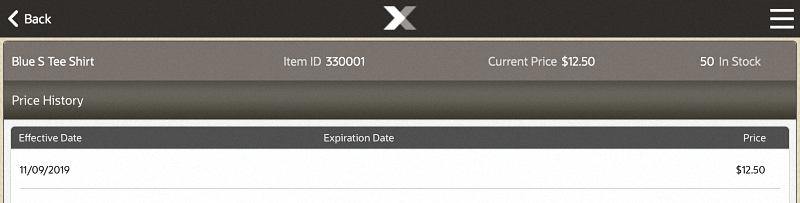
The Price History tab shows the past history of all prices that have been assigned to an item. The Price History shows the following information for each of the past prices:
Effective Date: Date on which the price first became effective.
Expiration Date: Date on which the price was not longer valid. This field will be blank for the current price.
Price: Price for the item from the Effective Date up to the Expiration Date.
The Sales History tab displays sales data for the item. The Sales History tab displays he following information:
Weekly Sales: Table of weekly sales data for the item.
Annual Sales: Table of annual sales data for the item.
12 Week Unit Sales Trend: Graph of weekly sales data over the past twelve weeks.
Displays sales data for the item by week. This table displays the following sales information for each week:
Week: Date range for the week.
Units: Net quantity of the item sold.
Net Sales: Net amount of all sales and returns of the item.
Displays sales data for the item by year. This table displays the following sales information for each year:
Year: Year of the data.
Units: Net quantity of the item sold.
Net Sales: Net amount of all sales and returns of the item.
Graph displaying week-by-week net sales data for the item over the past twelve weeks. This graph has the following axes:
Start date for the week.
Number of items sold.
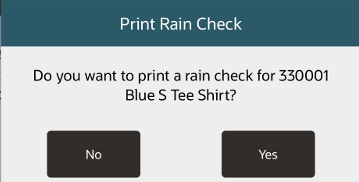
A Rain check is an optional feature that allows customers to purchase out of stock items for the same price at a later date. To print a rain check for the item:
Select the Context Menu button in the Item Viewer screen.
Select Print Rain Check in the Context Menu.
Select Yes to confirm the rain check.
The rain check prints and Xstore Mobile returns to the sale screen.
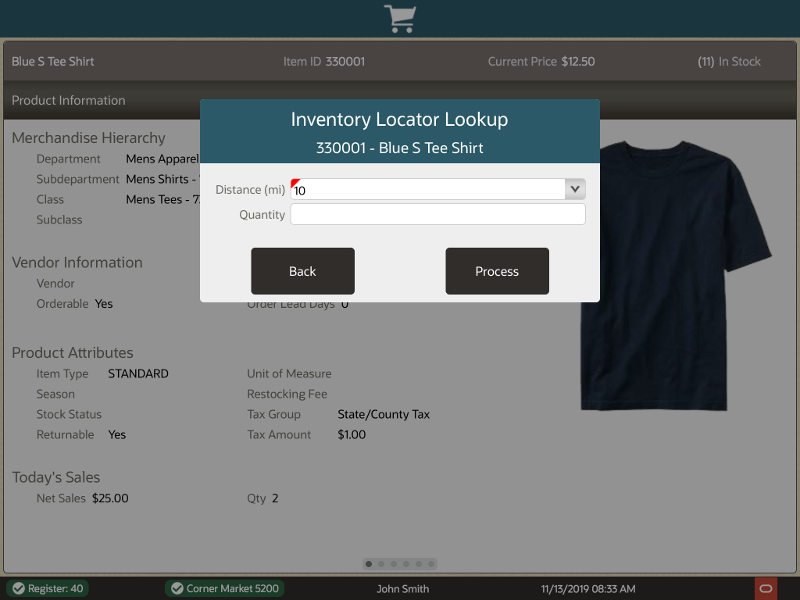
Occasionally an item may not be available in your store inventory, but the customer would like to see which stores in your chain have the item in stock. You can use the inventory lookup process to search a centralized database to locate these items within a set parameter range. For example, you could locate a specified item at a store within 25 miles of your location that has at least three of the specified item on hand.
At the Register Sale screen, select the Find Item button from the Register Sale menu (Figure 7-2).
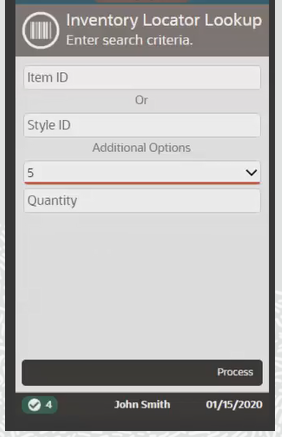
At the Item Finder menu, select Inventory Lookup (Figure 7-3). The system prompts for the Inventory Locator criteria.
Enter the information as needed and select Process to perform the inventory locator search:
REQUIRED Information:
Item ID or Style ID: You must enter either an item ID or a style ID.
OPTIONAL Information:
Distance: Select the distance from your store (for example, all locations with this item in stock within 25 miles of the current store).
Quantity: Enter the minimum quantity of the item that the target store has in stock. For example, you may use this option if the customer needs a specific quantity of this item.
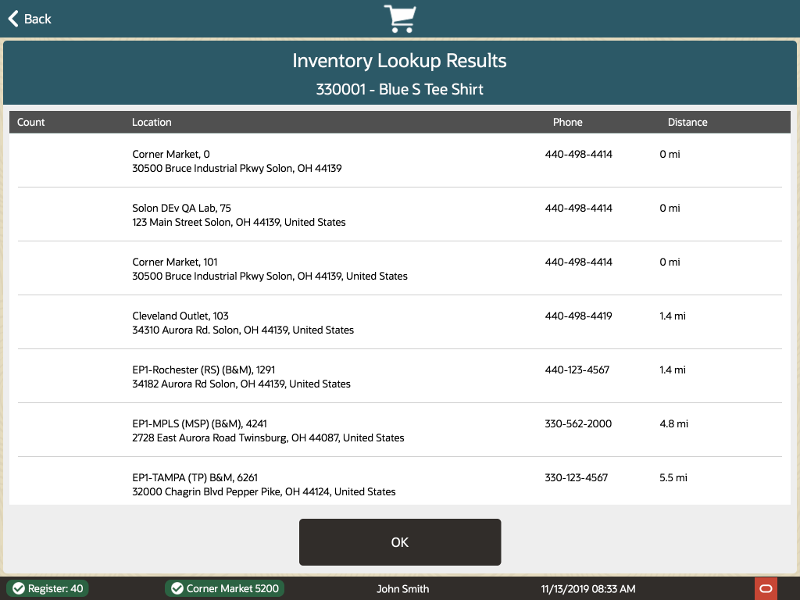
Xstore Mobile returns a list of locations matching the search criteria.
This list includes the quantity of this item in stock at each store, the address and telephone number for the store, and the distance from this store to each target location.
Select OK to close the Inventory Locator.