A Installing and Configuring Oracle Key Vault 12.2.0.4.0 and Earlier

Before installing Oracle Key Vault 12.2.0.4.0 and earlier, ensure that the server meets the recommended requirements. For more information about the Oracle Key Vault installation requirements, see Oracle Key Vault Installation Requirements.

A.1 Downloading the Oracle Key Vault Appliance Software

For a fresh installation, the Oracle Key Vault appliance software can be downloaded from Software Delivery Cloud. Note that this package cannot be used to upgrade Oracle Key Vault.

For an upgrade, the Oracle Key Vault appliance software can be downloaded from the Oracle Automated Release Updates (ARU) website.

To download the Oracle Key Vault Appliance Software:

  1. Use a web browser to access the Oracle Software Delivery Cloud portal:
  2. Click Sign In. Enter your User ID and Password, if required.
  3. In the Search By field, type Key Vault.
  4. From the list that is displayed, select one of the following:
    • Oracle Key Vault 12.2.0.4.0

    • Oracle Key Vault 12.2.0.3.0

    • Oracle Key Vault 12.2.0.2.0

    • Oracle Key Vault 12.2.0.1.0

    • Oracle Key Vault 12.2.0.0.0

  5. Click Continue.
  6. On the Download Queue page, verify the details of the installation package, and click Continue.
  7. The Oracle Standard Terms and Restrictions dialog box is displayed.
  8. Select I have reviewed and accept the terms of the Commercial License, Special Programs License, and/or Trial License, and click Continue.
  9. The File Download dialog box is displayed. Click View Digest Details.

    Oracle Key Vault 12.2.0.4.0 and earlier consists of a single ISO file <file_name>.iso.

  10. Copy the checksum displayed beside MD5 and store it for later reference.
  11. Click Download and select a location to save the ISO file. 
  12. Click Save.

    The size of the ISO file exceeds 4 GB, and will take time to download, depending on the network speed. The estimated download time and speed are displayed in the File Download dialog box.

  13. The ISO file is downloaded to the specified location. Verify the MD5 checksum of the downloaded file:
    md5sum <file_name>.iso
    

    Ensure that the checksum matches the value that you copied from the File Download dialog box in Step 10.

  14. Burn <file_name>.iso to a DVD-ROM disc.
You can now install Oracle Key Vault on the server.

A.2 Installing the Oracle Key Vault Appliance Software

The installation process installs all required software components onto a dedicated server. The installation process may take from 30 minutes to an hour to complete, depending on the server resources where you are installing Oracle Key Vault.

Caution:

The Oracle Key Vault installation wipes the server and installs a stripped-down version of Oracle Linux, thus erasing existing software and data on the server.

  • Ensure that the server meets the recommended requirements.

  • Request a fixed IP address, network mask, and gateway address from your network administrator for the dedicated server. You will need this information to configure the network in Step 10.

To install the Oracle Key Vault appliance:

  1. Insert the DVD-ROM disc containing okv-installer-12.2.0.x.0.iso into the CD/DVD drive and restart the computer.
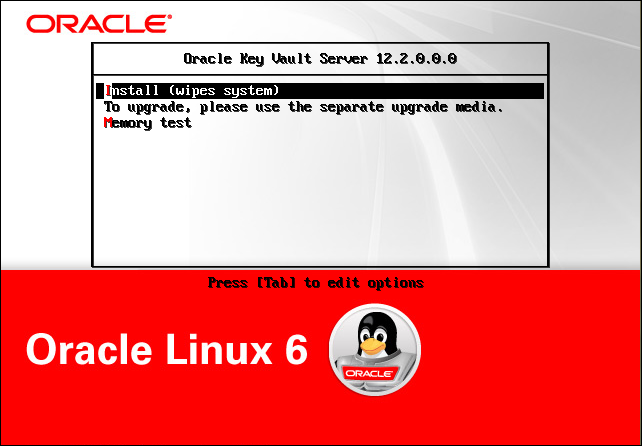
  2. The installation starts, and the initial splash screen is displayed.

    Figure A-1 Oracle Key Vault Install Screen

    Description of Figure A-1 follows
    Description of "Figure A-1 Oracle Key Vault Install Screen"
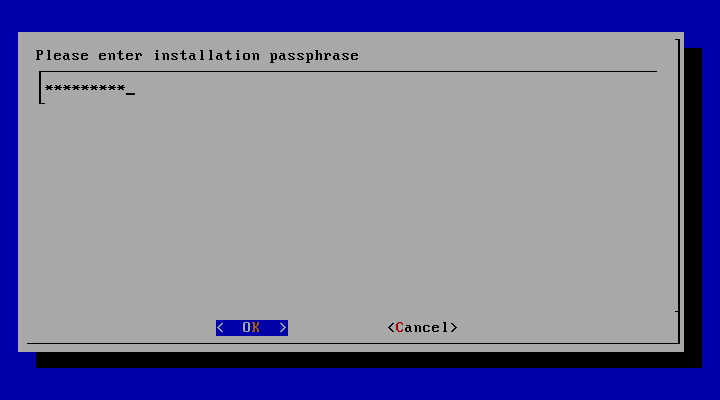
  3. The installation proceeds and after several minutes, the message Please enter installation passphrase is displayed.

    Figure A-2 Installation Passphrase Screen

    Description of Figure A-2 follows
    Description of "Figure A-2 Installation Passphrase Screen"

    The installation passphrase must have 8 or more characters and contain at least one of each of the following: an uppercase letter, a lowercase letter, number, and special character from the set: period (.), comma (,), underscore (_), plus sign (+), colon (:), space.

    It is important to store the installation passphrase securely. You will need it later to authenticate yourself at the Key Vault management console and complete the post-installation tasks.

  4. Enter the installation passphrase, and press Enter.
  5. Confirm the installation passphrase, and press Enter.
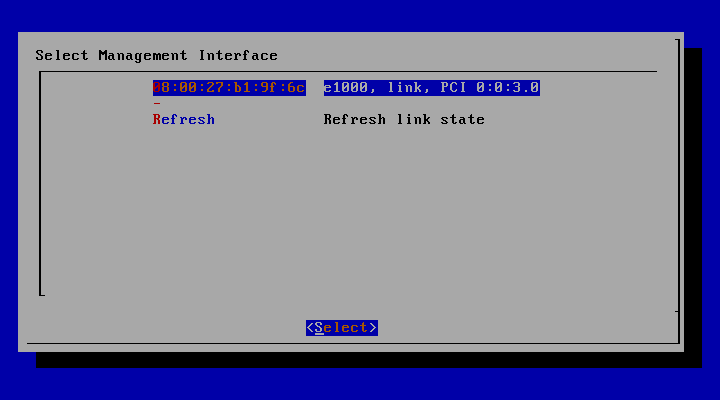
  6. The message Installation passphrase was successfully configured is displayed. Press Enter. The Select Management Interface screen is displayed.

    Figure A-3 Select Management Interface Screen

    Description of Figure A-3 follows
    Description of "Figure A-3 Select Management Interface Screen"
  7. Select the interface and press Enter. If more than one network interface is available, select the interface that you want to serve as the management interface, and to communicate with endpoints.
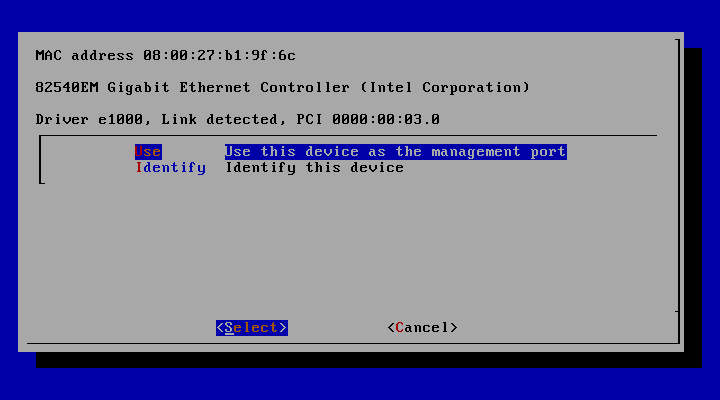
  8. The Identify Management Interface screen is displayed.

    Figure A-4 Identify Management Interface Screen

    Description of Figure A-4 follows
    Description of "Figure A-4 Identify Management Interface Screen"
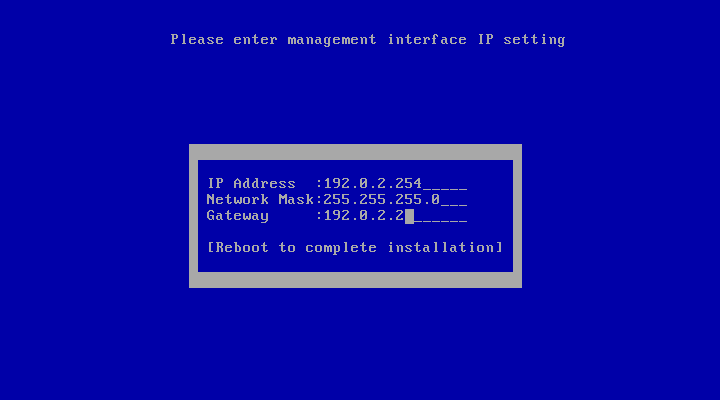
  9. Press Enter. The IP Address Setting for Management Interface Screen is displayed.

    Figure A-5 IP Address Setting for Management Interface Screen

    Description of Figure A-5 follows
    Description of "Figure A-5 IP Address Setting for Management Interface Screen"
  10. Enter the fixed IP address, network mask, and gateway address you received from your network administrator. Select Reboot to complete installation and press Enter.

    The installer installs and configures the operating system, database, and Oracle Key Vault on the server to make it a self-contained hardened appliance. The installation and configuration process can take between 30 minutes to an hour. Press the Shift key to check installation status.

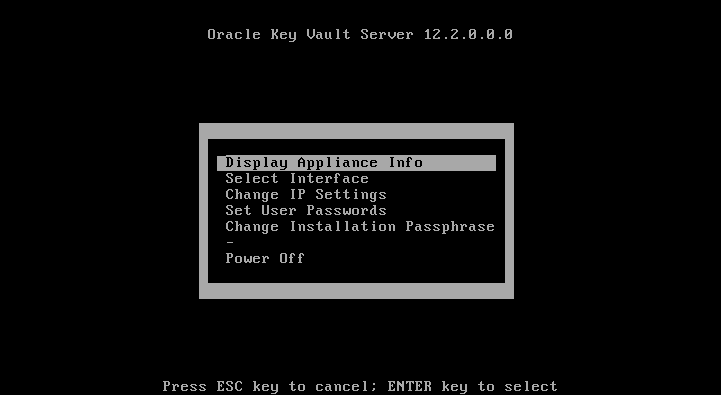
  11. If the installation completed successfully, the Oracle Key Vault Server <Release Number> screen appears.

    Figure A-6 Oracle Key Vault Server <Release Number> Screen

    Description of Figure A-6 follows
    Description of "Figure A-6 Oracle Key Vault Server <Release Number> Screen"

    Select Display Appliance Info and press Enter to see the IP address settings for the appliance. Make a note of the IP address of the appliance. You will need it to log into the browser-based management console of Oracle Key Vault.

    If you need to correct the IP Address, network mask, or the IP gateway for any reason, you can select Change IP Settings and enter the new IP settings.

    Select Set User Passwords to set the Root and Support User passwords. You can also set the Root and Support User passwords when performing Post-Installation Tasks.

    You have the option to change the installation passphrase by selecting Change Installation Passphrase. For more information about changing the installation passphrase, see Change the Installation Passphrase.

    Note:

    You will need to enter the old installation passphrase in order to update the installation passphrase.

    Make a note of the installation passphrase. You will need it to log into the management console for the first time, in order to complete the post-installation tasks.

A.3 Performing Post-Installation Tasks

After you install Oracle Key Vault, you must complete the following post-installation tasks: setting up the administrative user accounts, and passwords for recovery, root, and support.

To perform the post-installation tasks:
  1. Use a web browser to connect to the Oracle Key Vault server.

    To connect in to an Oracle Key Vault server whose IP address is 192.0.2.254, enter the following in the Address Bar:

    https://192.0.2.254

  2. If the web browser displays a security warning message stating that you are connecting to a website with an untrusted or self-signed security certificate, accept the security warning message and proceed to connect to the Oracle Key Vault server.

    Note:

    After completing the post-installation tasks, you can upload a custom certificate or certificate chain that is trusted by the browser, so that you can connect to the Oracle Key Vault server without encountering the security warning message. For more information about uploading a custom certificate, see Third Party Certificates.

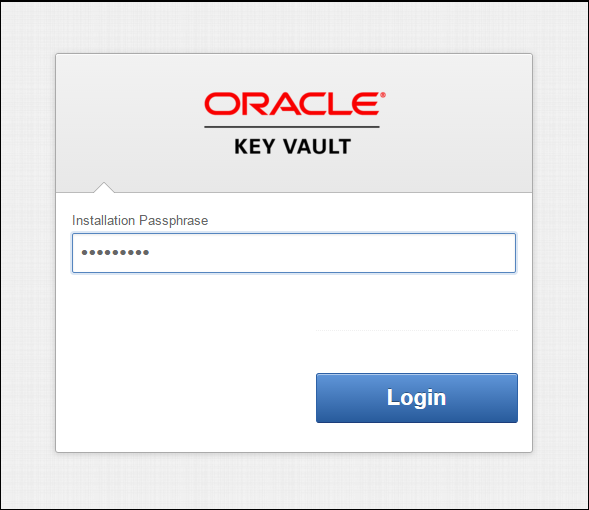
  3. The Installation Passphrase screen is displayed.

    Figure A-7 Installation Passphrase Screen

    Description of Figure A-7 follows
    Description of "Figure A-7 Installation Passphrase Screen"

    Note:

    The Installation Passphrase screen is displayed when you connect to the Oracle Key Vault server for the first time, in order to complete the post-installation tasks. After you complete the post-installation tasks, the Oracle Key Vault login screen is displayed when you access the Oracle Key Vault management console through the web browser.
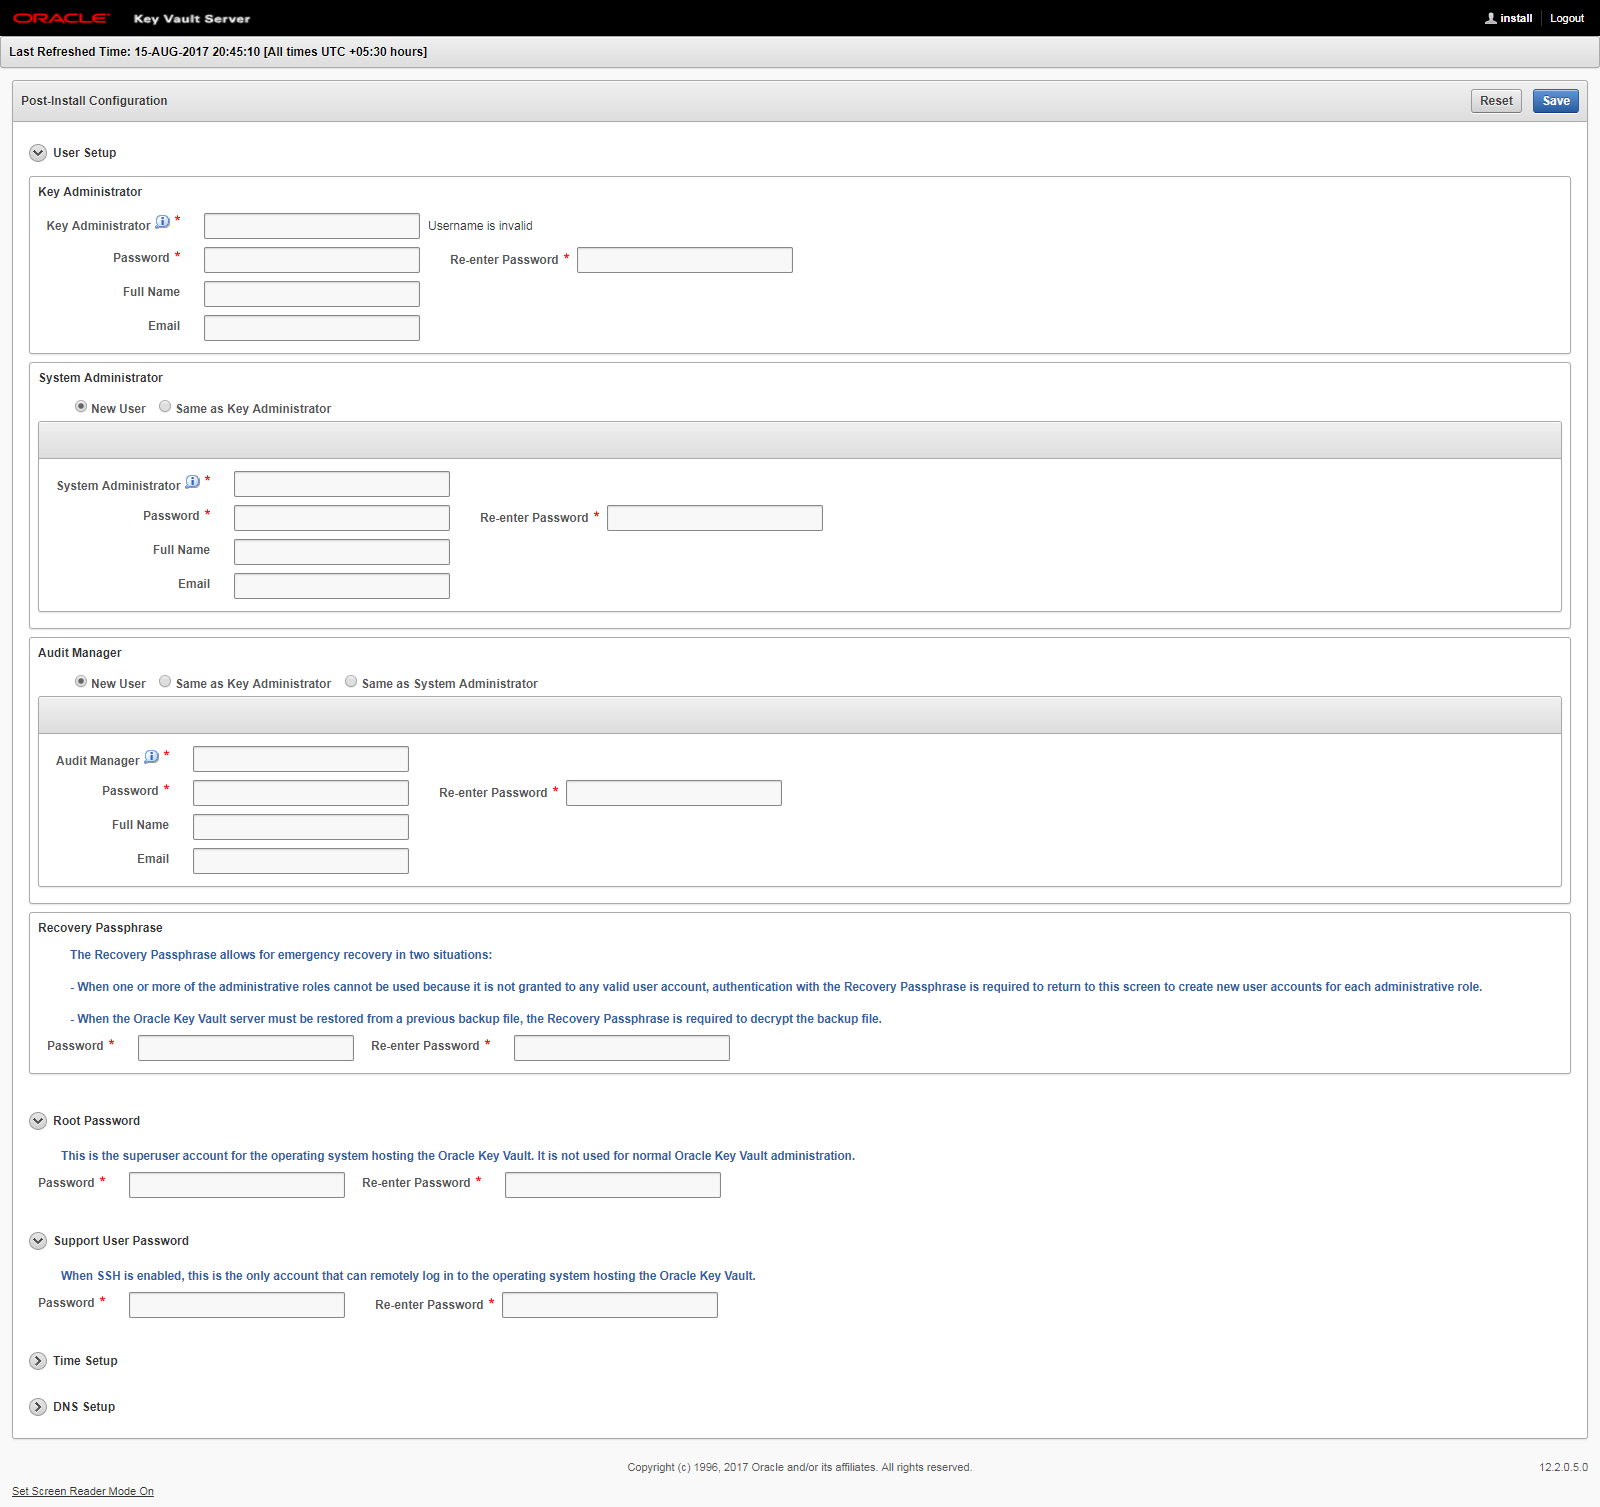
  4. Enter the installation passphrase. The Post-Install Configuration screen is displayed.

    Figure A-8 Post-Install Configuration Screen

    Description of Figure A-8 follows
    Description of "Figure A-8 Post-Install Configuration Screen"
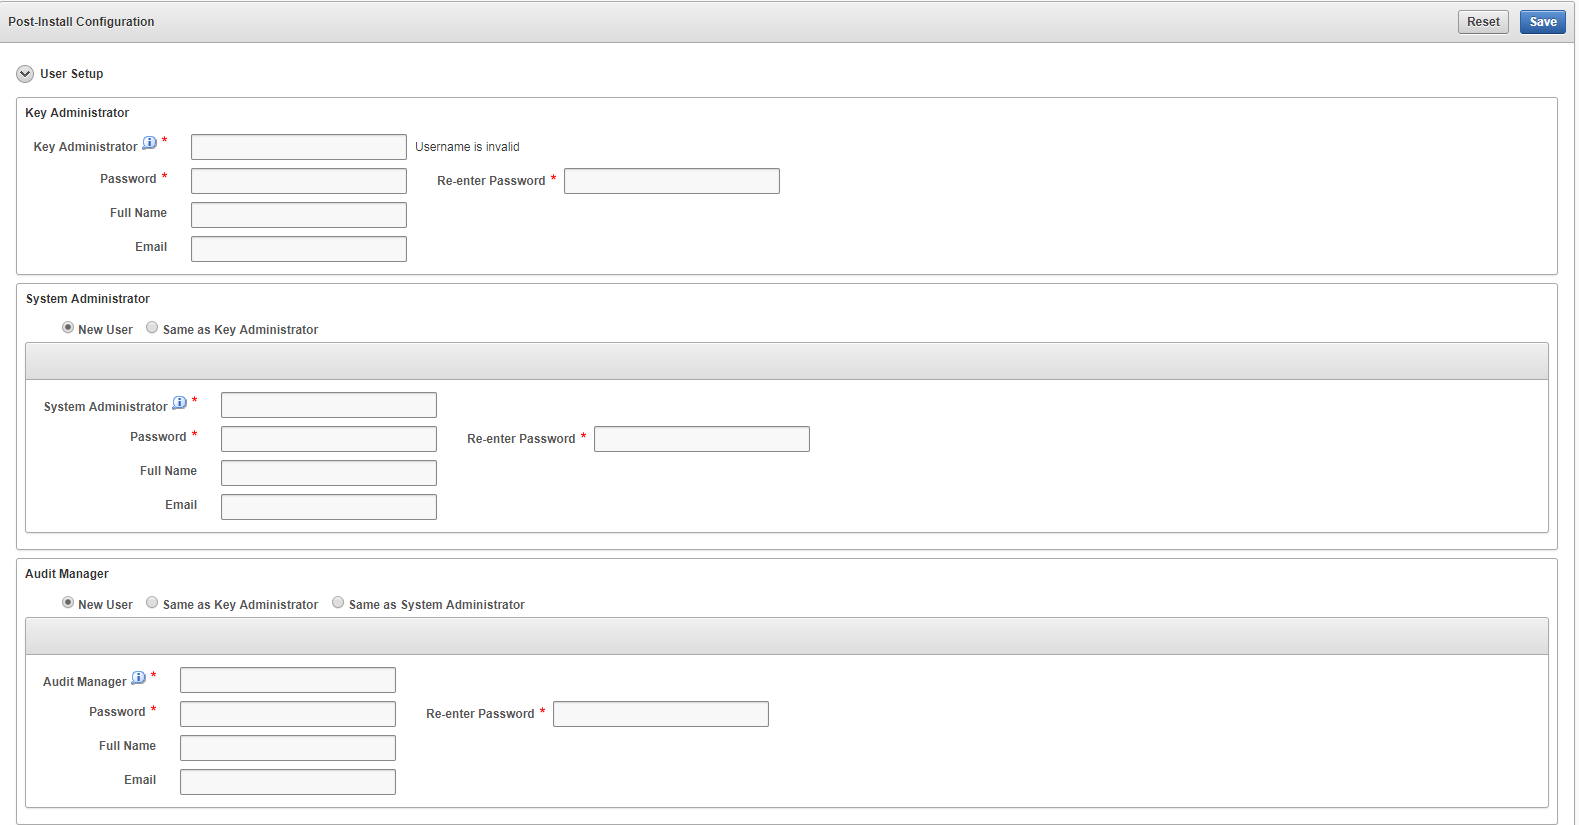
  5. In the User Setup section, create three administrative user accounts for the Key Administrator, System Administrator, and Audit Manager.

    Figure A-9 Post-Install Configuration — User Setup

    Description of Figure A-9 follows
    Description of "Figure A-9 Post-Install Configuration — User Setup"

    In the User Setup section:

    • Enter the user name and password, the full name (optional), and email (optional) for each administrative user account.

    • You can create a different user account for each of these administrative roles for a strict separation of duties, or combine roles as needed.

    • Passwords must have 8 or more characters and contain at least one of each of the following: an uppercase letter, a lowercase letter, number, and one special character from the set: period (.), comma (,), underscore (_), plus sign (+), colon (:), space.

  6. In the Recovery Passphrase section, set the recovery passphrase.

    Figure A-10 Post-Install Configuration — Recovery Passphrase

    Description of Figure A-10 follows
    Description of "Figure A-10 Post-Install Configuration — Recovery Passphrase"

    The recovery passphrase has the same minimum requirements as user passwords. For greater security, it is recommended that you make the recovery passphrase longer and more complex. You must keep the recovery passphrase safe and retrievable because it is required in the following situations:

    • In an emergency, when there are no administrative users available to access Key Vault.

    • To restore Key Vault data from a backup.

    • To reset the recovery passphrase.

    Caution:

    It is important to establish a secure process for the storage and retrieval of the recovery passphrase, including older recovery passphrases. The only way to recover from a lost recovery passphrase is to re-install Key Vault.
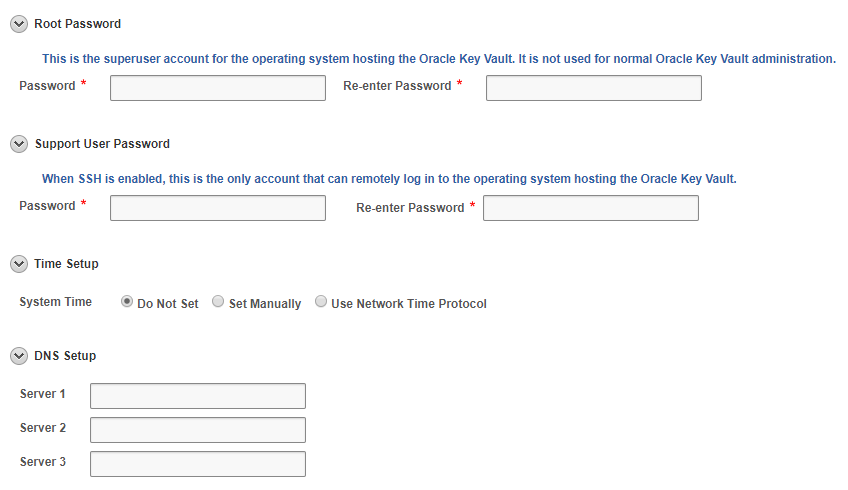
  7. In the next section, set the Root and Support User passwords, if you did not set the passwords using the Set User Passwords option on the Oracle Key Vault Server <Release Number> screen in the previous procedure, Installing the Oracle Key Vault Appliance Software.

    Figure A-11 Post-Install Configuration — Root and Support User Passwords

    Description of Figure A-11 follows
    Description of "Figure A-11 Post-Install Configuration — Root and Support User Passwords"

    The root password is the super user account for the operating system hosting Key Vault. You will need the support password to log into Key Vault remotely using the SSH protocol.

    Caution:

    Keep the root and support user passwords safe because these passwords are set during post-installation only. After post-installation you cannot change them from the Oracle Key Vault management console.

    The Time Setup and DNS Setup settings are optional at this stage, and can be set up later by a System Administrator.

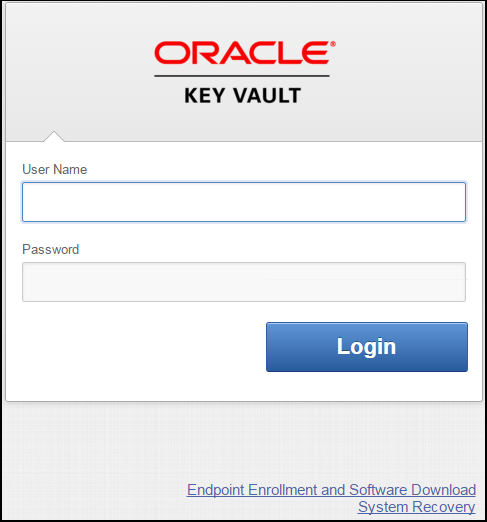
  8. Click Save in the upper right corner of the Post-Install Configuration screen. The Oracle Key Vault Management Console login screen is displayed.

    Figure A-12 Oracle Key Vault Management Console Login Screen

    Description of Figure A-12 follows
    Description of "Figure A-12 Oracle Key Vault Management Console Login Screen"
You can now login to the Oracle Key Vault management console with the credentials of any of the user accounts created during the post-installation process. For more information about the Oracle Key Vault management console, see Logging In to the Oracle Key Vault Management Console.