3 Oracle Key Vault Installation and Configuration

Oracle Key Vault is a software appliance that is delivered as an ISO image. Key Vault should be installed onto its own dedicated physical server.

The software appliance consists of a pre-configured operating system, an Oracle database, and the Oracle Key Vault application.

You can install the Oracle Key Vault appliance by meeting specific system requirements and completing a set of post-installation tasks.

3.1 Oracle Key Vault Installation Requirements

The Oracle Key Vault installation requirements cover system requirements like CPU, RAM, disk space, network interfaces, and supported endpoint platforms.

3.1.1 System Requirements

The Oracle Key Vault installation removes existing software on a server.

Deployment on virtual machines is not recommended for production systems. However, virtual machines are useful for testing and proof of concept purposes.

The minimum hardware requirements for deploying the Oracle Key Vault software appliance are:

  • CPU: Minimum: x86–64 2 cores, Recommended: 8–16 cores with cryptographic acceleration support (Intel AESNI)

  • Memory: Minimum 8 GB of RAM, Recommended: 32–64 GB

  • Disk: Minimum 500 GB, Recommended: 1 TB

  • Network interface: One network interface

  • Hardware Compatibility: Refer to the hardware compatibility list (HCL) for Oracle Linux Release 6 Update 9 at the link in the See Also section.

    Note:

    Ensure that the hardware supports booting in legacy BIOS mode. Hardware that supports Unified Extensible Firmware Interface (UEFI) only is currently unable to recognize the Oracle Key Vault ISO image. However, be aware that Oracle Key Vault does not support the QLogic QL4* family of network cards.

  • RESTful Services Client: If RESTful Services are enabled, then each endpoint that connects to the Oracle Key Vault management console must have at least Java 1.7.0_21 installed.

    The REST API requires the cURL utility. Ensure that cURL 7.43 or higher is installed on the endpoint system before using the REST API to provision endpoints.

Note:

For deployment with a large number of endpoints the hardware requirement may need to scale to meet the workload.

See Also:

The hardware certification list for Oracle Linux and Oracle VM may be found at the Oracle Linux website at:

http://linux.oracle.com/pls/apex/f?p=117:1

You can find the supported hardware by filtering results through All Operating Systems and choosing Oracle Linux 6.9.

3.1.2 Network Ports

Oracle Key Vault and its endpoints use a set of special ports for communication. Network administrators must ensure that these ports are open in the network firewall.

Table 3-1 lists the required network ports for Oracle Key Vault:

Table 3-1 Ports Required for Oracle Key Vault

Port Number Protocol Descriptions

22

SSH/SCP Port

Used by Oracle Key Vault administrators and support personnel to remotely administer Oracle Key Vault.

161

SNMP Port

Used by monitoring software to poll Oracle Key Vault for system information.

443

HTTPS Port

Used by web clients such as browsers and RESTful Services to communicate with Oracle Key Vault.

1522

Database TCPS Listener Port

Listener port used in a high availability configuration by Oracle Data Guard to communicate between the primary and standby server.

7443

Database TCPS Listener Port

Listener port used in a high availability configuration to run OS commands like synchronizing wallets and configuration files via HTTPS.

5696

KMIP Port

Used by Oracle Key Vault endpoints and third party KMIP clients to communicate with the Oracle Key Vault KMIP Server.

3.1.3 Supported Endpoint Platforms

Oracle supports both 32-bit and 64-bit Linux endpoints. However, only 64-bit endpoints are supported for Oracle databases that use Online Master Key, previously called TDE direct connections.

The supported endpoint platforms in this release are:

  • Oracle Linux (5.x, 6.x, and 7.x)

  • Oracle Solaris (10.x and 11.x)

  • Oracle Solaris Sparc (10.x and 11.x)

  • RHEL 5, 6, and 7

  • IBM AIX (5.3, 6.1 and 7.1)

  • HP-UX (IA) (11.31)

  • Windows Server 2008

  • Windows Server 2012

3.1.4 Endpoint Database Requirements

Endpoints that are Oracle Database 10 g Release 2 and later can use the okvutil upload command to upload Oracle wallets to Oracle Key Vault. Endpoints that are Oracle Database 11 g Release 2 and later can use the Online Master Key to manage TDE master keys.

Note, that the term Online Master Key replaces the term TDE direct connection.

Endpoints that are Oracle Database might need to set the COMPATIBLE initialization parameter.

For an endpoint that is Oracle Database 11.2 or 12.1, set the COMPATIBLE initialization parameter to 11.2.0.0 or higher. For example:

SQL> ALTER SYSTEM SET COMPATIBLE = '11.2.0.0' SCOPE=SPFILE;

This applies to an Oracle Database endpoint that is connected with Oracle Key Vault using an Online Master Key (formerly known as TDE direct connection). This compatibility mode setting is not required for Oracle wallet upload or download operations.

Also note that after setting the COMPATIBLE parameter to 11.2.0.0, you cannot set it to a lower value like 10.2. After setting the COMPATIBLE parameter you must restart the database.

See Also:

Oracle Database Administrator's Guide for more information about setting the COMPATIBLE parameter

3.2 Installing and Configuring Oracle Key Vault 12.2.0.5.0 and Later

This section explains how to install and configure Oracle Key Vault 12.2.0.5.0 and later. To install and configure Oracle Key Vault 12.2.0.4.0 and earlier, see Installing and Configuring Oracle Key Vault 12.2.0.4.0 and Earlier.

3.2.1 Downloading the Oracle Key Vault Appliance Software

For a fresh installation, the Oracle Key Vault appliance software can be downloaded from Software Delivery Cloud. Note that this package cannot be used to upgrade Oracle Key Vault.

For an upgrade, Oracle Key Vault can be downloaded from the Oracle Automated Release Updates (ARU) website.

To download the Oracle Key Vault Appliance Software:

  1. Use a web browser to access the Oracle Software Delivery Cloud portal:
  2. Click Sign In. Enter your User ID and Password, if required.
  3. In the first field, select Release. In the next field, type Key Vault and click Search.
  4. From the list that is displayed, select Oracle Key Vault 12.2.0.12.0.
    The download is added to your Cart.
  5. Click Selected Software.
  6. On the next page, verify the details of the installation package, and click Continue.
  7. The Oracle Standard Terms and Restrictions dialog box is displayed.
  8. Select I have reviewed and accept the terms of the Commercial License, Special Programs License, and/or Trial License, and click Continue.
  9. The File Download dialog box is displayed. Click View Digest Details.

    Oracle Key Vault 12.2.0.12.0 consists of the following ISO files:

    • Vxxxxxx-01.iso (Oracle Key Vault 12.2.0.12.0 (12.2 Bundle Patch 12) - Disc 1)

    • Vxxxxxx-02.iso (Oracle Key Vault 12.2.0.12.0 (12.2 Bundle Patch 12) - Disc 2)

  10. Copy both checksum values displayed beside SHA256 and store them for later reference.
  11. Click Download and select a location to save the ISO files. 
  12. Click Save.

    The combined size of both ISO files exceeds 4 GB, and will take time to download, depending on the network speed. The estimated download time and speed are displayed in the File Download dialog box.

  13. The ISO files are downloaded to the specified location. Verify the sha256 checksums of the downloaded files:
    sha256sum Vxxxxxx-01.iso
    

    Ensure that the checksums match the values that you copied from the File Download dialog box in Step 10.

  14. Burn the ISO files to two DVD-ROM discs and label the discs:
    • OKV BP12 Disc 1

    • OKV BP12 Disc 2

You can now install Oracle Key Vault on the server.

3.2.2 Installing the Oracle Key Vault Appliance Software

The installation process installs all required software components onto a dedicated server. The installation process may take from 30 minutes to an hour to complete, depending on the server resources where you are installing Oracle Key Vault.

Caution:

The Oracle Key Vault installation wipes the server and installs a stripped-down version of Oracle Linux 6.9, thus erasing existing software and data on the server.

  • Ensure that the server meets the recommended requirements.

  • Request a fixed IP address, network mask, and gateway address from your network administrator for the dedicated server. You will need this information to configure the network in Step 13.

To install the Oracle Key Vault appliance:

  1. Insert OKV BP12 Disc 1 into the CD/DVD drive and restart the computer.
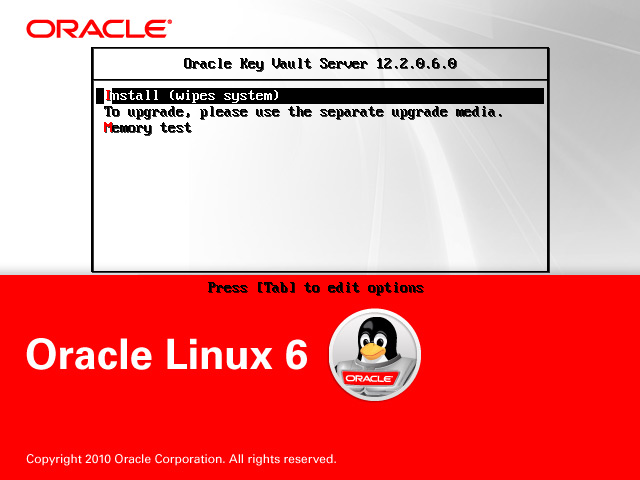
  2. The installation starts, and the initial splash screen is displayed.

    Figure 3-1 Oracle Key Vault Install Screen

    Description of Figure 3-1 follows
    Description of "Figure 3-1 Oracle Key Vault Install Screen"
  3. Using the up and down arrow keys, select Install (wipes system), and press Enter .

    The installation begins and after several minutes, the message Please insert disc 2 is displayed.

  4. Insert OKV BP12 Disc 2 into the CD/DVD drive, and press Enter.

    The installation proceeds and after several minutes, the message Please insert disc 1 is displayed.

  5. Insert OKV BP12 Disc 1 into the CD/DVD drive, and press Enter.
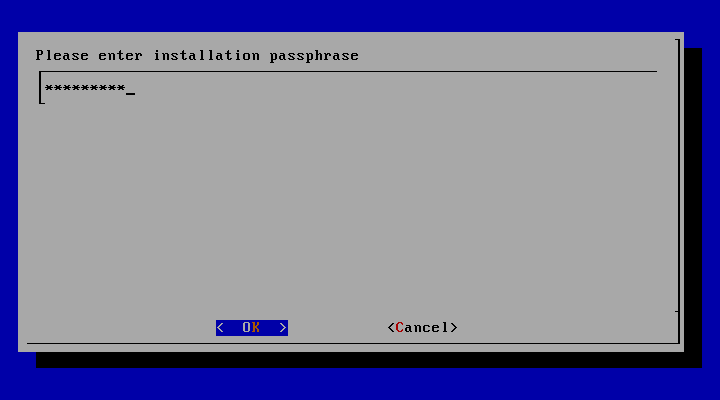
  6. The installation proceeds and after several minutes, the message Please enter installation passphrase is displayed.

    Figure 3-2 Installation Passphrase Screen

    Description of Figure 3-2 follows
    Description of "Figure 3-2 Installation Passphrase Screen"

    The installation passphrase must have 8 or more characters and contain at least one of each of the following: an uppercase letter, a lowercase letter, number, and special character from the set: period (.), comma (,), underscore (_), plus sign (+), colon (:), space.

    It is important to store the installation passphrase securely. You will need it later to authenticate yourself at the Key Vault management console and complete the post-installation tasks.

  7. Enter the installation passphrase, and press Enter.
  8. Confirm the installation passphrase, and press Enter.
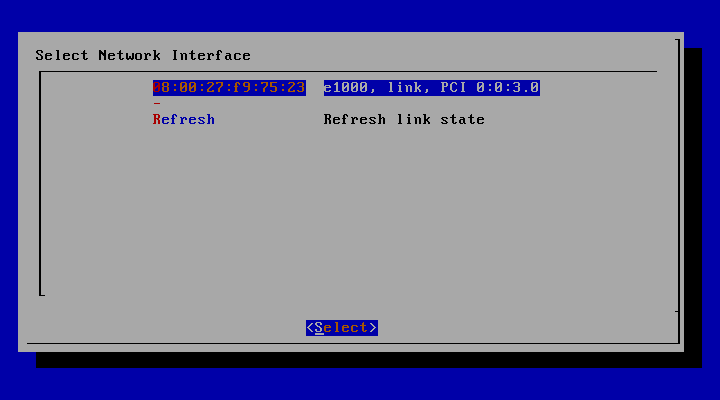
  9. The message Installation passphrase was successfully configured is displayed. Press Enter. The Select Network Interface screen is displayed.

    Figure 3-3 Select Network Interface Screen

    Description of Figure 3-3 follows
    Description of "Figure 3-3 Select Network Interface Screen"
  10. Select the interface and press Enter. If more than one network interface is available, select the interface that you want to serve as the management interface, and to communicate with endpoints.
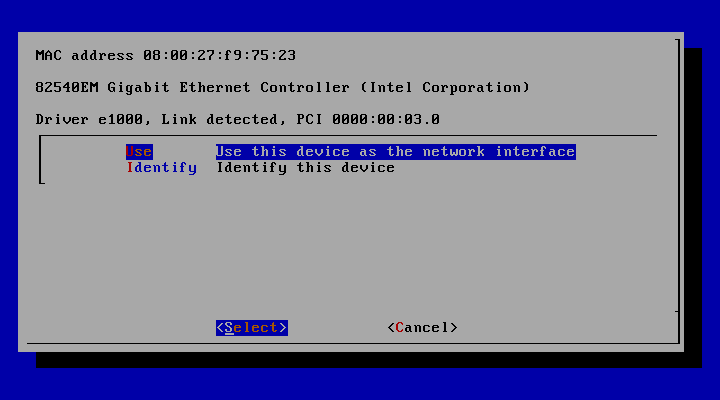
  11. The Identify Management Interface screen is displayed.

    Figure 3-4 Identify Management Interface Screen

    Description of Figure 3-4 follows
    Description of "Figure 3-4 Identify Management Interface Screen"
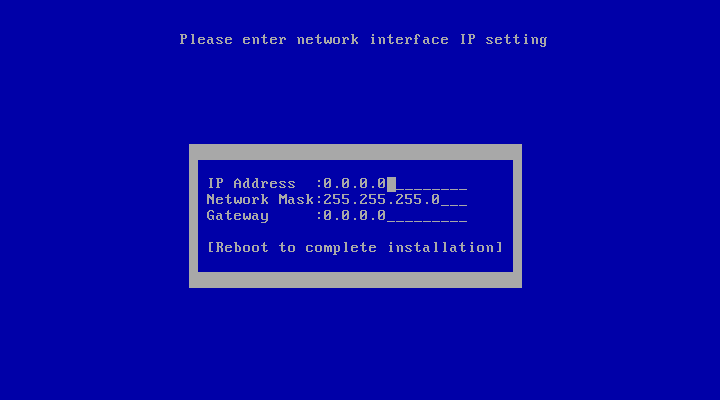
  12. Press Enter. The IP Address Setting for Management Interface Screen is displayed.

    Figure 3-5 IP Address Setting for Management Interface Screen

    Description of Figure 3-5 follows
    Description of "Figure 3-5 IP Address Setting for Management Interface Screen"
  13. Enter the fixed IP address, network mask, and gateway address you received from your network administrator. Select Reboot to complete installation and press Enter.

    The installer installs and configures the operating system, database, and Oracle Key Vault on the server to make it a self-contained hardened appliance. The installation and configuration process can take between 30 minutes to an hour. Press the Shift key to check installation status.

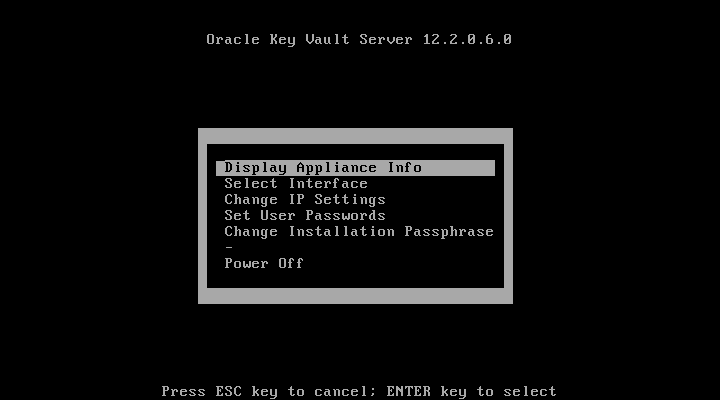
  14. If the installation completed successfully, the Oracle Key Vault Server <Release Number> screen appears.

    Figure 3-6 Oracle Key Vault Server <Release Number> Screen

    Description of Figure 3-6 follows
    Description of "Figure 3-6 Oracle Key Vault Server <Release Number> Screen"

    Select Display Appliance Info and press Enter to see the IP address settings for the appliance. Make a note of the IP address of the appliance. You will need it to log into the browser-based management console of Oracle Key Vault.

    If you need to correct the IP Address, network mask, or the IP gateway for any reason, you can select Change IP Settings and enter the new IP settings.

    Select Set User Passwords to set the Root and Support User passwords. You can also set the Root and Support User passwords when performing Post-Installation Tasks.

    You have the option to change the installation passphrase by selecting Change Installation Passphrase. For more information about changing the installation passphrase, see Change the Installation Passphrase.

    Note:

    You will need to enter the old installation passphrase in order to update the installation passphrase.

    Make a note of the installation passphrase. You will need it to log into the management console for the first time, in order to complete the post-installation tasks.

3.2.3 Performing Post-Installation Tasks

After you install Oracle Key Vault, you must complete the following post-installation tasks: setting up the administrative user accounts, and passwords for recovery, root, and support.

To perform the post-installation tasks:

  1. Use a web browser to connect to the Oracle Key Vault server.

    To connect in to an Oracle Key Vault server whose IP address is 192.0.2.254, enter the following in the Address Bar:

    https://192.0.2.254

  2. If the web browser displays a security warning message stating that you are connecting to a website with an untrusted or self-signed security certificate, accept the security warning message and proceed to connect to the Oracle Key Vault server.

    Note:

    After completing the post-installation tasks, you can upload a custom certificate or certificate chain that is trusted by the browser, so that you can connect to the Oracle Key Vault server without encountering the security warning message. For more information about uploading a custom certificate, see Third Party Certificates.

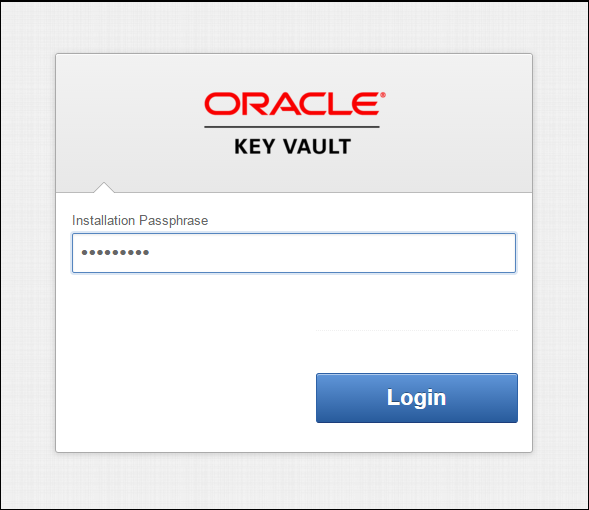
  3. The Installation Passphrase screen is displayed.

    Figure 3-7 Installation Passphrase Screen

    Description of Figure 3-7 follows
    Description of "Figure 3-7 Installation Passphrase Screen"

    Note:

    The Installation Passphrase screen is displayed when you connect to the Oracle Key Vault server for the first time, in order to complete the post-installation tasks. After you complete the post-installation tasks, the Oracle Key Vault login screen is displayed when you access the Oracle Key Vault management console through the web browser.
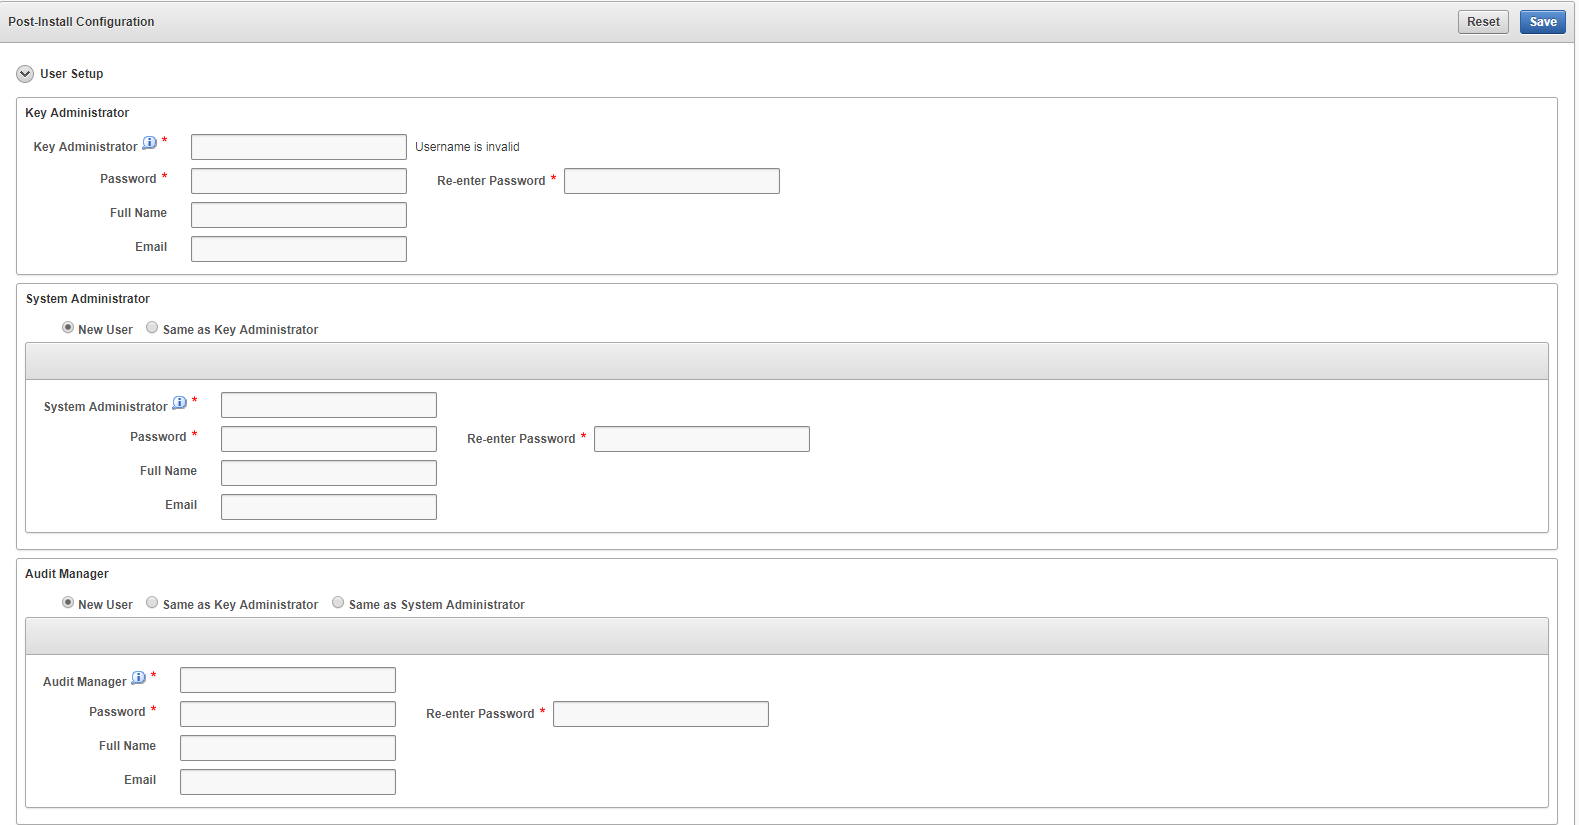
  4. Enter the installation passphrase. The Post-Install Configuration screen is displayed.

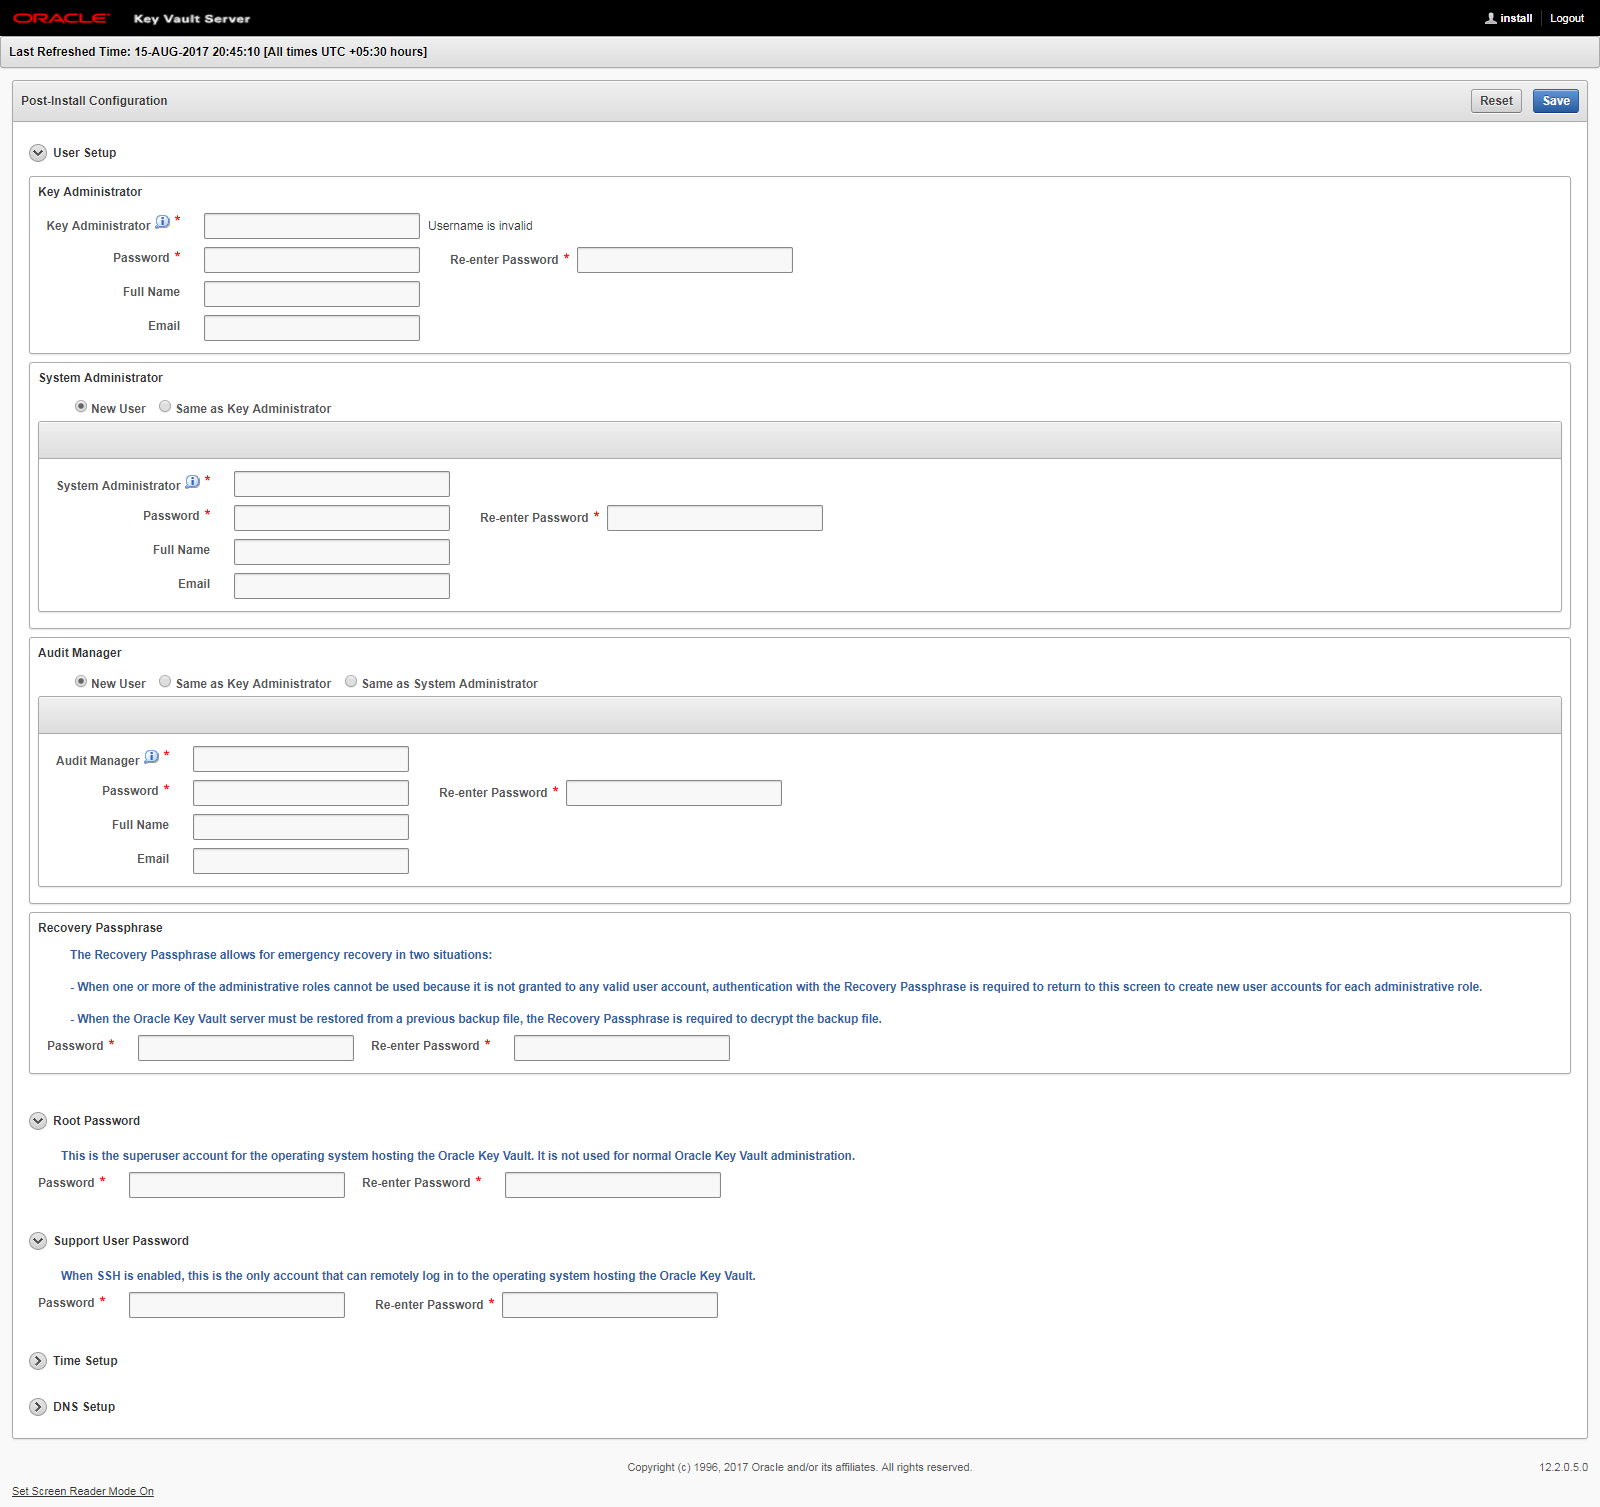
    Figure 3-8 Post-Install Configuration Screen

    Description of Figure 3-8 follows
    Description of "Figure 3-8 Post-Install Configuration Screen"
  5. In the User Setup section, create three administrative user accounts for the Key Administrator, System Administrator, and Audit Manager.

    Figure 3-9 Post-Install Configuration — User Setup

    Description of Figure 3-9 follows
    Description of "Figure 3-9 Post-Install Configuration — User Setup"

    In the User Setup section:

    • Enter the user name and password, the full name (optional), and email (optional) for each administrative user account.

    • You can create a different user account for each of these administrative roles for a strict separation of duties, or combine roles as needed.

    • Passwords must have 8 or more characters and contain at least one of each of the following: an uppercase letter, a lowercase letter, number, and one special character from the set: period (.), comma (,), underscore (_), plus sign (+), colon (:), space.

  6. In the Recovery Passphrase section, set the recovery passphrase.

    Figure 3-10 Post-Install Configuration — Recovery Passphrase

    Description of Figure 3-10 follows
    Description of "Figure 3-10 Post-Install Configuration — Recovery Passphrase"

    The recovery passphrase has the same minimum requirements as user passwords. For greater security, it is recommended that you make the recovery passphrase longer and more complex. You must keep the recovery passphrase safe and retrievable because it is required in the following situations:

    • In an emergency, when there are no administrative users available to access Key Vault.

    • To restore Key Vault data from a backup.

    • To reset the recovery passphrase.

    Caution:

    It is important to establish a secure process for the storage and retrieval of the recovery passphrase, including older recovery passphrases. The only way to recover from a lost recovery passphrase is to re-install Key Vault.
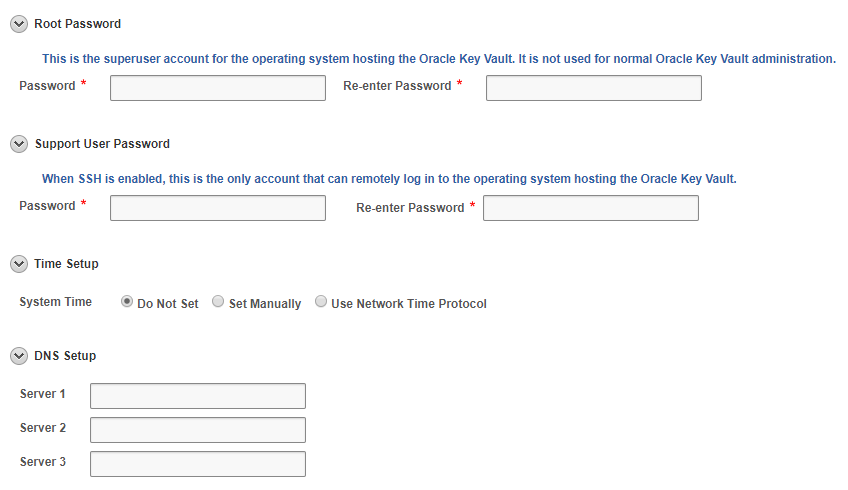
  7. In the next section, set the Root and Support User passwords, if you did not set the passwords using the Set User Passwords option on the Oracle Key Vault Server <Release Number> screen in the previous procedure, Installing the Oracle Key Vault Appliance Software.

    Figure 3-11 Post-Install Configuration — Root and Support User Passwords

    Description of Figure 3-11 follows
    Description of "Figure 3-11 Post-Install Configuration — Root and Support User Passwords"

    The root password is the super user account for the operating system hosting Key Vault. You will need the support password to log into Key Vault remotely using the SSH protocol.

    Caution:

    Keep the root and support user passwords safe because these passwords are set during post-installation only. After post-installation you cannot change them from the Oracle Key Vault management console.

    The Time Setup and DNS Setup settings are optional at this stage, and can be set up later by a System Administrator.

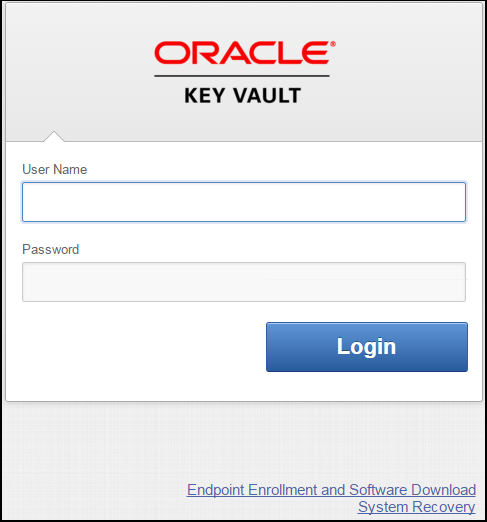
  8. Click Save in the upper right corner of the Post-Install Configuration screen. The Oracle Key Vault Management Console login screen is displayed.

    Figure 3-12 Oracle Key Vault Management Console Login Screen

    Description of Figure 3-12 follows
    Description of "Figure 3-12 Oracle Key Vault Management Console Login Screen"
You can now login to the Oracle Key Vault management console with the credentials of any of the user accounts created during the post-installation process.

3.3 Logging In to the Oracle Key Vault Management Console

To use Oracle Key Vault, users can log in to the Oracle Key Vault management console.

  1. Open a web browser.
  2. Connect using an HTTPS connection and the IP address of Oracle Key Vault.

    For example, to log in to a server whose IP address is 192.0.2.254, enter:

    https://192.0.2.254

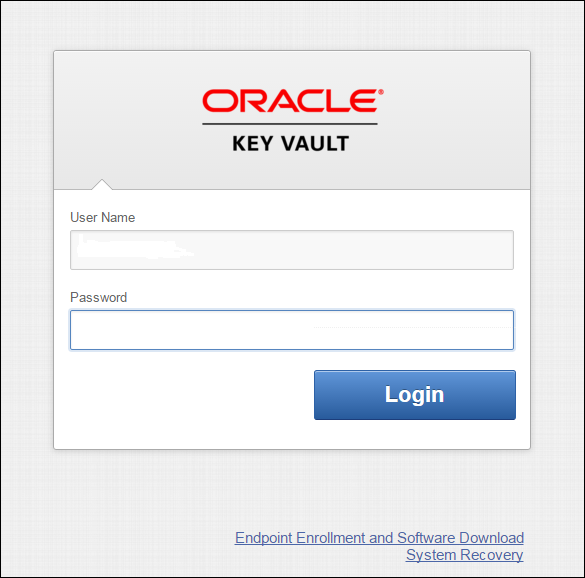
    The login screen appears.

    Figure 3-13 Oracle Key Vault Screen with Username and Password

    Description of Figure 3-13 follows
    Description of "Figure 3-13 Oracle Key Vault Screen with Username and Password"
  3. Enter your user name and password.
  4. Click Login.

3.4 Overview of the Management Console

The Oracle Key Vault management console is a browser-based console that connects to the appliance using the https secure communication channel. It provides the graphical user interface for Oracle Key Vault, where users can perform tasks like:

  • Creating and managing users, endpoints, and their respective groups

  • Creating and managing virtual wallets and security objects

  • Setting system settings, like network and other services

  • Setting up high availability and backup

3.5 Performing Actions and Searches
Many of the tab and menu pages contain an Actions menu or Search bars that allow you to search and perform actions on lists and the results of searches.

Note:

Detailed help for the Actions menus and Search bars is provided in the Help selection of the Actions drop-down list.

3.5.1 Actions Menus

The actions available from an Actions drop-down menu can vary but typically include a set of standard menu items.

These items are as follows:

  • Select Columns: Select which column should be displayed.

  • Filter: Filter by column or row and a user-defined expression.

  • Rows Per Page: Choose how many rows you want to view .

  • Format: Choose formatting such as Sort, Control Break, Highlight, Compute, Aggregate, Chart, and Group By.

  • Save Report: Save reports.

  • Reset: Reset the report settings, removing any customizations.

  • Help: Get information about these actions.

  • Download: Download the result set in CSV or HTML.

3.5.2 Search Bars

Along with Actions menus, many tabs contain search bars.

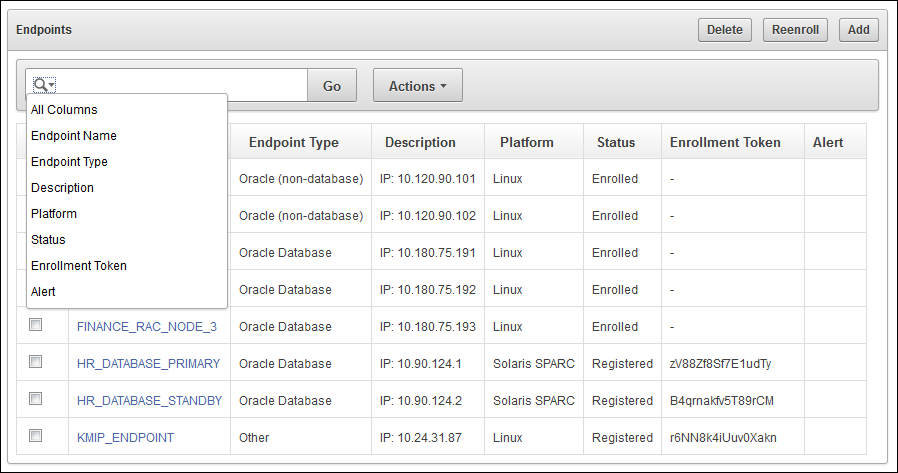
This demonstration searches for endpoints, but the process is the same for other searches, except that the column headings are different.

Wildcard characters are not supported, but the search does match any letter or phrase that you enter. You can use the Filter menu item under Actions to further fine-tune the search.

To perform a search:

  1. Enter a name or other identifier in the search field or (optionally) place your cursor on the magnifying icon in the Search bar to select one of the table headings (in this case, All Columns, Endpoint Name, Endpoint Type, Description, Platform, Status, Enrollment Token, and Alert) and then enter a search term.
  2. Click Go.

    A new endpoint list appears, displaying the endpoints that meet the search criteria. A filter icon (a funnel) indicates that a search has been performed and displays the search criteria.

  3. You can select or deselect the filter icon to disable search and view the entire list.