Power supplies, which exist in pairs, provide DC power to all of the Controller components. If one power supply fails, the other supply carries the full load. This situation creates a risk of Controller failure should the other power supply also fail.
A failed Controller can cause data paths to drop.
- Prerequisites:
Deploy any rack anti-tilt mechanism before releasing the release buttons and extending the Controller.
Before handling a component, touch a grounded surface to discharge any static electricity.
Attach an electrostatic discharge (ESD) wrist strap to your wrist, and stand on an ESD mat while replacing components.
Make sure you have a similar replacement power supply available before you start the replacement procedure.
Initiate Guided Maintenance only when you are able to replace the power supplies immediately.
Figure 1: Power supply location
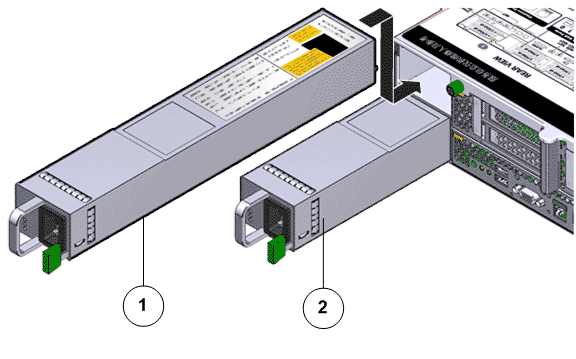
- Legend
-
1 Power supply-1 (PS-1) 2 Power supply-0 (PS-0)
- If the following fan fails
- Replace the following CRU
- Fan 0
- Power supply 0
- Fan 1
- Power supply 1
- Fans 2, 3
- Fan module 0
- Fans 4, 5
- Fan module 1
- Fans 6, 7
- Fan module 2
- Fans 8, 9
- Fan module 3
- Fans 10, 11
- Fan module 4