6 Customizing Region Maps
This chapter describes solutions for using the Mobile App Designer Region Maps when your data doesn't include the predefined region identifiers.
-
What To Do When Your Data Does Not Match the Region Identifiers
-
Using the CASE Statement to Map Your Data to the Map Region Identifiers
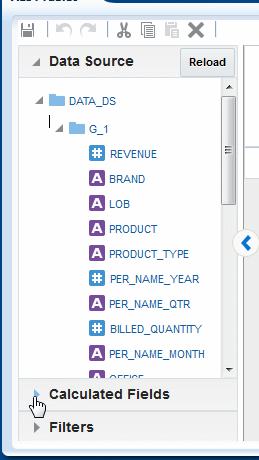
6.1 What To Do When Your Data Does Not Match the Region Identifiers
To use the maps as provided your data must identify regions using a set of predefined region identifiers. The Map Resources page lists the identifiers that are preset for each map here:
http://www.oracle.com/technetwork/middleware/bi-foundation/map-code-2408077.html
What do you do if your data doesn't match to the identifiers provided? You have two options to match alternative region identifiers to the maps in Mobile App Designer:
-
Update the map geoJSON and configuration files
Use this option when you have multiple apps that require the alternative identifiers or you want to share your custom mappings with other app designers using your environment.
-
Use a CASE statement within your app to rename the fields
This option is appropriate when only a few identifiers require update or when you won't be using the particular map with much frequency.
This example demonstrates both options.
Note:
To add your own custom map files rather than editing the provided files, see Section A.7, "Adding Custom Maps."Assume you have some data pertaining to Australian territories. The following table shows the Region Identifiers provided by Mobile App Designer and the values that you have instead:
| Default Region Identifier | Value in Your Data |
|---|---|
| Australian Capital Territory | ACT |
| State of New South Wales | NSW |
| Northern Territory | NT |
| State of Queensland | QLD |
| State of South Australia | SA |
| State of Tasmania | TAS |
| State of Victoria | VIC |
| State of Western Australia | WA |
Both options are described in the following sections:
6.2 Customizing Map Files to Map to Your Data
When you customize the map files, you provide a long term solution that all designers using your system can leverage. This consists of two procedures:
-
Create a Custom geoJSON File that includes the region identifiers you use in your data
-
Update the Map config file to recognize your customization
6.2.1 Create a Custom geoJSON File
To create the custom geoJSON file:
-
Go to the Map directory located at:
<DOMAIN_HOME>/config/bipublisher/repository/Admin -
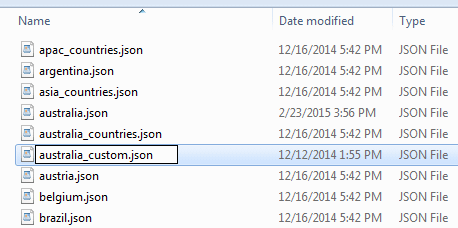
Make a copy of the australia.json file and rename it as your custom version. In this example call the copy australia_custom.json.
-
Open the austalia_custom.json file for editing using a text editor like Notepad or Wordpad.
-
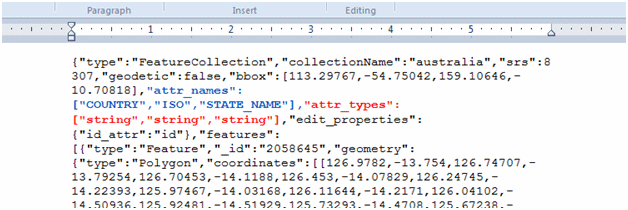
At the top of the file notice where the attribute names ("attri_names") and attribute types ("attri_types") are defined:
-
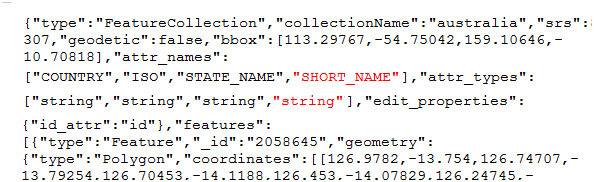
For your new identifier, specify its name and type.
For this example:
-
to the list of "attr_names" give your identifier the name "SHORT_NAME"
-
to the list of "attr_types" add the corresponding entry "STRING"
-
-
Next, go through the geoJSON file to add a value for "SHORT_NAME" for each territory. Look for the "properties" entry for each territory, and then add the identifier and appropriate value for that territory.
For example, for "State of Queensland" add
"SHORT_NAME":"QLD"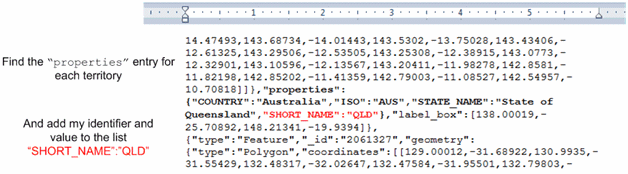
-
Repeat this for each of the seven other territories and then save the
australia_custom.jsonfile.
6.2.2 Update the Map config file
Now that you have created a custom geoJSON file, update the map-config file to recognize:
-
your custom file
-
your custom region identifier
To update the map config file:
-
In the same folder where the map json files are, make a backup of the map-config.xml. (Always make a backup.)
-
Open the original
map-config.xmlfor editing. -
Search the file to find the entry for
australia.json.
-
Update the file attribute of the
geojsonelement to point to your custom file,australia_custom.json: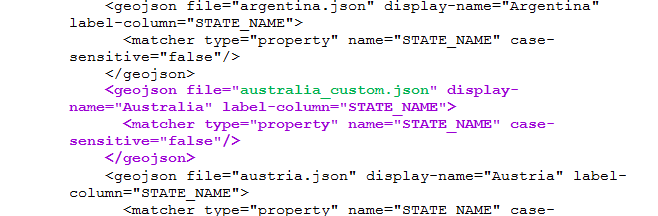
-
Add the
<matcher>element for the SHORT_NAME identifier: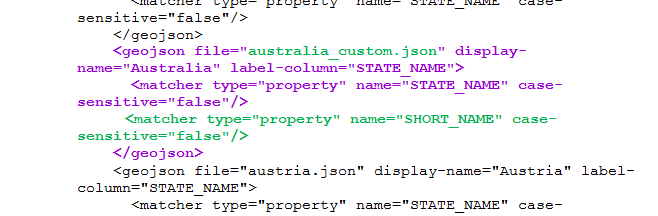
-
Save the map-config.xml file.
Your custom file is now available when you open the Mobile App Designer.
6.3 Using the CASE Statement to Map Your Data to the Map Region Identifiers
This example demonstrates how you can use the CASE statement to match data from your data source to the mapping identifiers. This procedure is most suitable when:
-
you have only a handful of values to match
-
you are not likely to perform this mapping frequently
If you must convert many values in your data or if the data conversion will likely need to be repeated in the future or shared with other users, then consider customizing the geoJSON file instead (see Customizing Map Files to Map to Your Data).
In this example your data includes the same values as shown previously for the Australian states and territories:
| Default Region Identifier | Value in Your Data |
|---|---|
| Australian Capital Territory | ACT |
| State of New South Wales | NSW |
| Northern Territory | NT |
| State of Queensland | QLD |
| State of South Australia | SA |
| State of Tasmania | TAS |
| State of Victoria | VIC |
| State of Western Australia | WA |
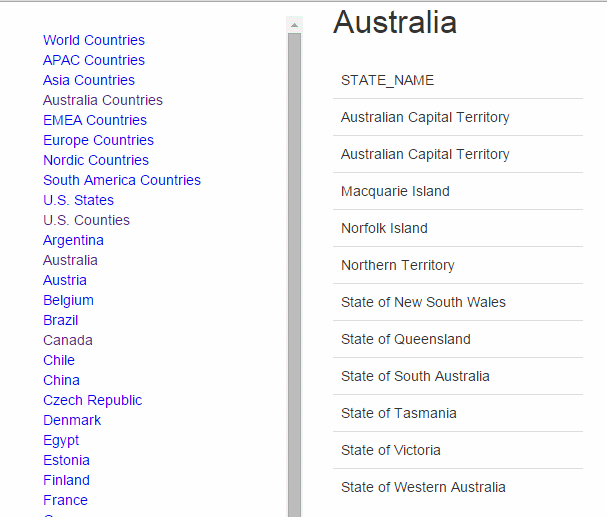
The map of Australia included with Mobile App Designer uses the full State and Territory names to identify each region as shown on the Maps web page available here: http://www.oracle.com/technetwork/middleware/bi-foundation/map-code-2408077.html
and shown here:
By creating a Calculated Field based on a CASE statement, you can translate your data values to the required STATE_NAME identifiers.
6.3.1 Creating the Calculated Field
Here's how you create the Calculated Field to translate your values:
-
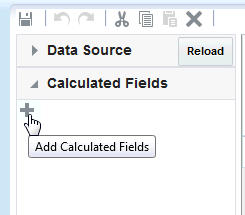
On the lower left pane of the Mobile App Designer, click Calculated Fields.
-
Click Add.
-
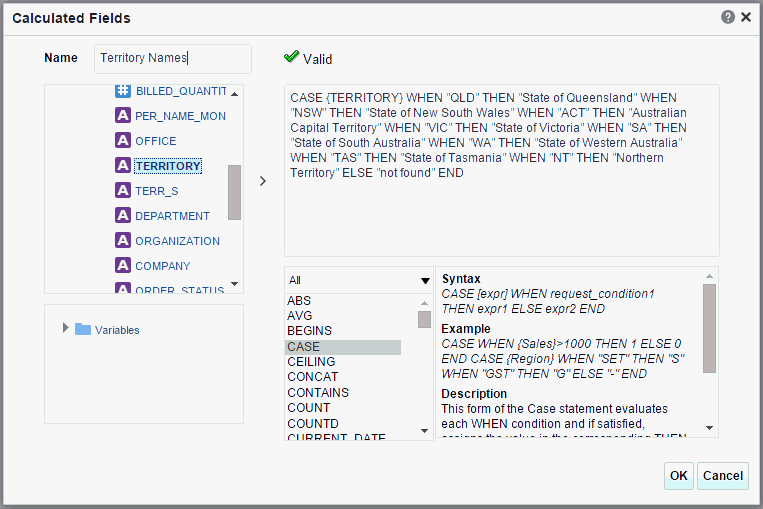
In the Calculated Fields dialog, enter a name for your calculated field, then from the list of functions, choose CASE.
In this example, to translate the TERRITORY field values from your data to match the default region identifiers, enter the CASE statement as:
CASE {TERRITORY} WHEN "QLD" THEN "State of Queensland" WHEN "NSW" THEN "State of New South Wales" WHEN "ACT" THEN "Australian Capital Territory" WHEN "VIC" THEN "State of Victoria" WHEN "SA" THEN "State of South Australia" WHEN "WA" THEN "State of Western Australia" WHEN "TAS" THEN "State of Tasmania" WHEN "NT" THEN "Northern Territory" ELSE "not found" END
-
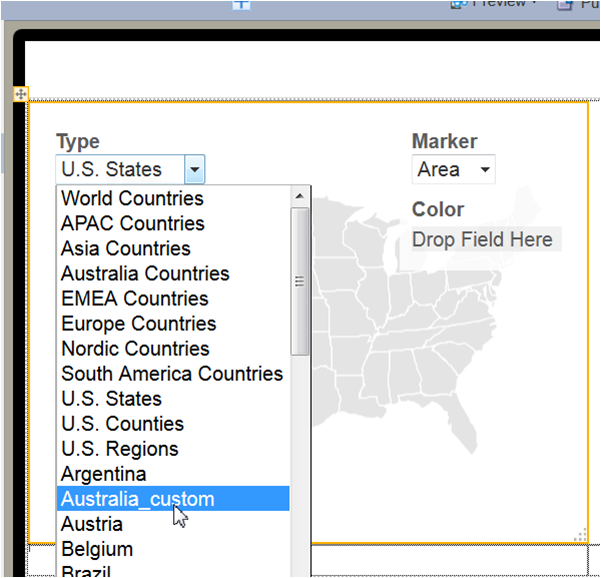
Now on your app page, insert the Region Map component and choose Australia from the list of maps.
-
Drag your Calculated Field to the Group field.
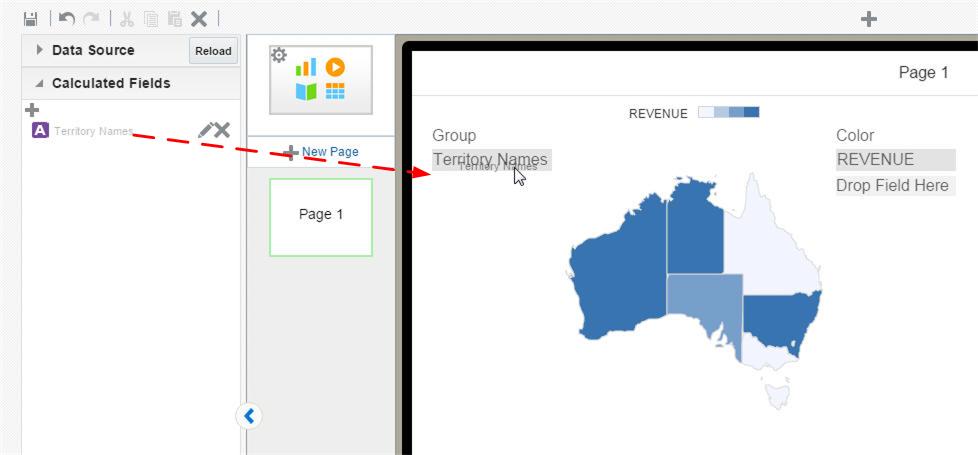
The Territory Names calculated field translates your data values to the required region identifiers so that you can now visualize your data on the map without needing to make changes to your underlying data source or to the map configuration files.