9 WebRTC Session Controller Media Engine Installation Overview
This chapter provides an overview of the Oracle WebRTC Session Controller Media Engine (ME) software's supported hardware, licensing, and system management.
Note:
If you are installing a patch set for the Media Engine, refer to the Release Notes and the ReadMe files that accompany the patch set for information on installing it.Supported WebRTC Session Controller Media Engine Third-Party Devices
This section lists the supported ME third-party servers.
The following platforms have been certified for use with the ME:
-
Sun Netra X5-2
-
Sun Server X5-2
-
Sun Netra X3-2
-
HP DL160 G9
-
NN2610
-
NN2620
The following VM platforms have been certified for use with the ME:
-
OVM 3.3.1
-
VMware ESXi 5.5
-
Xen 3.4.3
-
KVM on OL7
Information on Media Engine Software and Licensing
As part of each download, Oracle provides the USB Creation Utility with the ME software.
You must provide a USB stick with 4GB storage to handle Oracle software downloads. Oracle has tested a variety of USB sticks available from current suppliers and manufacturers. Most USB sticks manufactured today will work.
For complete information on accessing the Oracle download server, creating an installation USB stick, and commissioning ME systems, refer to "Creating and Commissioning USB Sticks".
Obtaining Your License
If you are not using royalty-bearing codecs, you should be using the ME's default shipping license.
The default license enables the maximum number of sessions for the system. In the past, the software would stop allowing new sessions once your licensed maximum was reached (i.e., 100). The system software no longer relies on the license to apply an upper limit. This can be problematic because, depending on the server hardware you are using, the system may not be capable of supporting a higher number of sessions. You may want to edit your config file and add the parameters for the maximum number of media sessions to ensure that you do not exceed the capabilities of your hardware. This applies to most deployments running a small number of sessions on smaller third-party hardware that could potentially have a problem if traffic increased to a number larger than the system is able to handle.
The following are royalty-bearing codecs supported by the ME:
-
AMRWB
-
AMRNB
-
G723
-
G729
License Expirations and Renewals
If your customer-specific license comes with an expiration date, the ME system generates an event when the license nears the expiration date. Contact your Oracle sales representative to complete the purchase of the features that you are testing. These expiring licenses should apply only to users testing royalty-bearing codecs for transcoding.
System Management
Before you install the system, you should decide on the management tool(s) that you want to use to configure and monitor the system. This will help you decide where you need to create connections based on your equipment and network resources.
System management capabilities include the following secure management interfaces:
-
The ME command line interface (CLI) from a local console, Telnet, or SSH connection
-
The ME Management System, a graphical user interface (GUI) that supports remote management using a Web browser
-
Simple Network Management Protocol (SNMP) using third party SNMP MIB compiler/browser applications
For information on configuring the management options, refer to the Oracle Communications WebRTC Session Controller Media Engine Object Reference.
Installing the Media Engine
Starting with release 7.2, the ME runs on Oracle Linux and uses yum to install and update RPM files. In prior releases, the media engine came with its own custom kernel.
Note:
While the ME operates under Oracle Linux, it is not certified to operate under other Linux environments.You must have Oracle Linux Release 7.0 or higher installed on your hardware prior to installing the ME.
To install the ME you must:
-
Install Oracle Linux version 7.0 or higher
-
Download and copy the ME file to a USB stick
-
Mount the ME software onto your hardware
-
Configure a yum repository on which to point Oracle Linux
-
Install the ME appliance
Installing Oracle Linux 7
Before you can install the ME, you must have Oracle Linux installed on your hardware. You can either install Oracle Linux via a USB stick or a DVD. This guide documents installing Oracle Linux via a USB.
Note:
When you install the ME, you must have Oracle Linux installed on your hardware. You can either install Oracle Linux via a USB stick or a DVD. This guide documents installing Oracle Linux via a USB.For a much more comprehensive and thorough description of installing Oracle Linux 7, see https://docs.oracle.com/cd/E52668_01/E54695/E54695.pdf.
To install Oracle Linux via a USB stick:
-
Download ”Oracle Linux 7.X for x86 64 bit ISO image” from
http://edelivery.oracle.com/linux -
Create a bootable USB stick that contains the full Oracle Linux 7 ISO image. The following example uses Rufus 2.8 software to create the bootable USB stick.
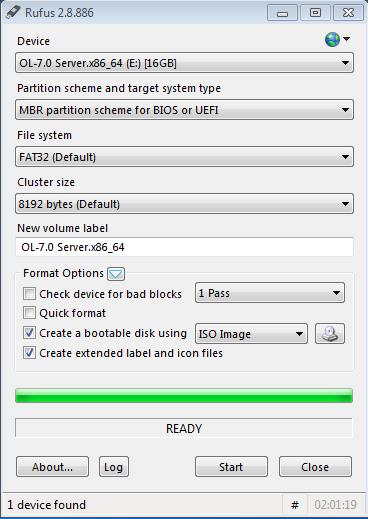
Note:
You can also install Oracle Linux via a DVD by downloading ”Oracle Linux 7.1 for x86 64 bit ISO image” fromhttp://edelivery.oracle.com/linuxand burning the *.iso image onto a DVD. -
Insert your bootable Oracle Linux 7 USB drive onto your hardware.
-
Boot the system from the boot image by selecting Boot from usb from the boot menu options.
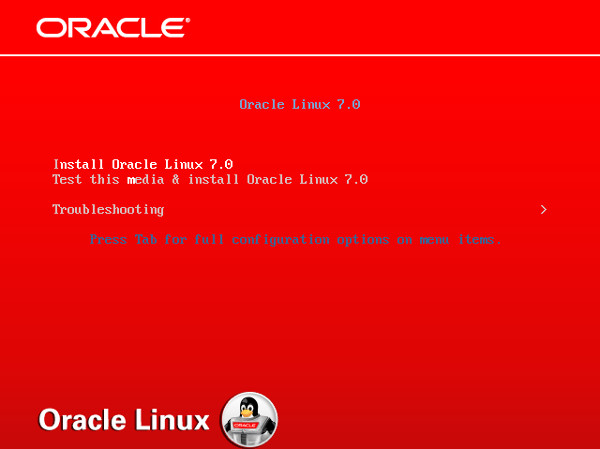
-
Select Install Oracle Linux 7.0 and hit <Enter>.
-
Select the appropriate language and select Set keyboard to default layout for selected language. Click Continue.
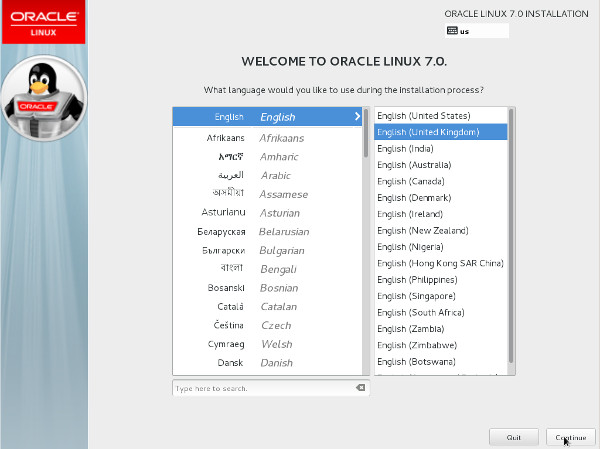
The "Installation Summary" screen appears.
-
Complete any marked items. Depending on your requirements, you may also need to alter the default settings by clicking on the relevant links.
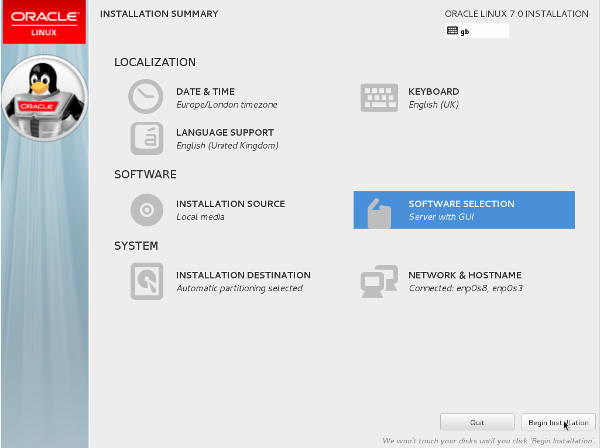
-
Click Installation Destination.
-
Select the local disks you want to use for the installation.

Note:
The installation program does not make any changes to any of the disks and storage until you click Begin Installation on the ”Installation Summary” screen.-
Choose the disks on which you want to install Oracle Linux from the ”Local Standard Disks” section. A tick icon displays next to the selected disks.
-
Ensure the Automatically configure partitioning option is selected (by default, this option is selected).
-
At the bottom of the screen, the system displays how much disk space you need for the software you have selected. With automatic partitioning, you may not have sufficient space to install the software if the disk is already partitioned. If you need to free some disk space, select I would like to make additional space available and click Done.
Note:
You must have disk size of at least 50 GB.The "Reclaim Disk Space" window appears.
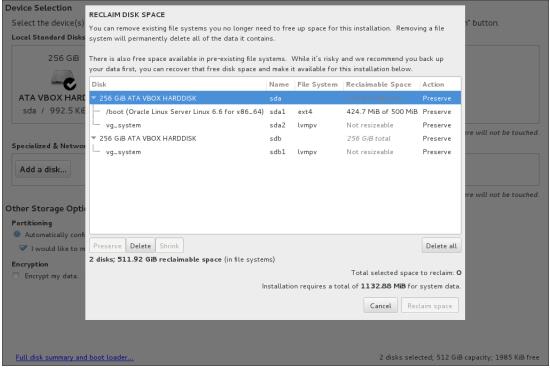
Note:
If there is still insufficient disk space when you click Done, the system prompts you to free disk space. -
Once you have selected the disks you want to use, click Delete all to free disk space and then click Reclaim Space.
For more information on configuring partitioning, see https://docs.oracle.com/cd/E52668_01/E54695/E54695.pdf.
-
-
Click Begin Installation once you have completed any necessary updates to the default configuration.
-
Click Root Password.
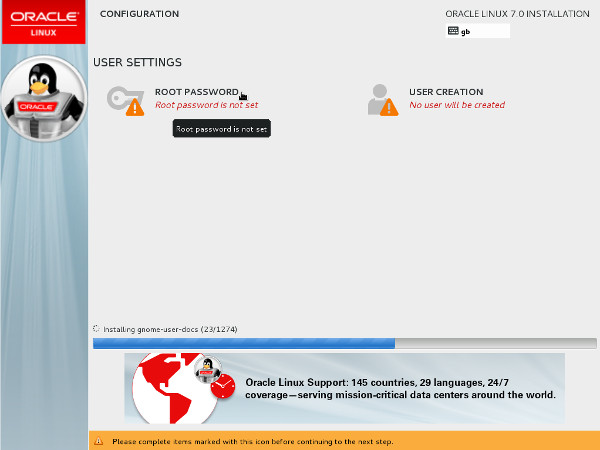
-
Enter the root password and click Done.
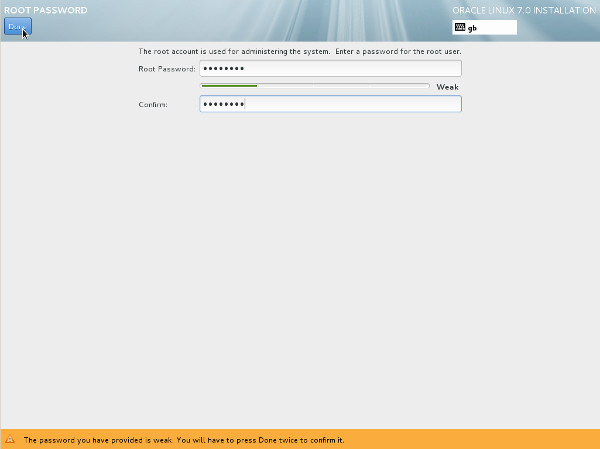
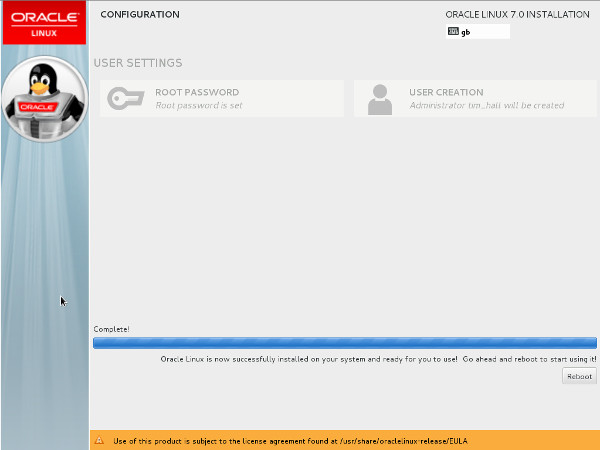
Linux installs.
-
Click Reboot when prompted.
-
Run the following command to rename the Ethernet devices according to your system BIOS once you successfully complete the installation.
grubby --args=net.ifnames=0 --update-kernel=ALL
-
Reboot the system.
Obtaining the Media Engine Installation File
Before you can install the ME, you must first download the ISO files you need and copy them to a USB stick.
Software can be downloaded from either the Oracle Software Delivery Cloud or the My Oracle Support Patches and Updates tab.
To access the Oracle Software Deliver Cloud:
-
Access the
https://edelivery.oracle.comlink. -
Select the Sign In/Register tab and enter your username and password.
Note:
If you are a new user, you must create an account. -
Click the checkbox to agree to the to the Oracle Trial License Agreement and Export Restrictions and click Continue.
-
Select the Oracle Communications product pack.
-
Select the Acme Packet OS platform and click Go.
-
Download the following file and click Download.
-
Oracle Communications WebRTC Session Controller 7.2 Installation Repository
-
-
Copy the file onto a USB stick.
To access the Oracle Support Software Patches and Updates:
-
Log into the My Oracle Support Portal.
-
Select the Patches and Updates tab.
-
Select the Search tab and click Product or Family (Advanced).
-
Product: Enter Oracle Communications Application Session Controller.
-
Release: Enter WebRTC Session Controller 7.2 Installation Repository.
-
Click Search. The available distribution formats appear and include the following information:
-
Patch Name
-
Description
-
Release
-
Platform (Language)
-
Classification
-
Product
-
Prerequisite Requirement
-
Size
-
Download Access
-
-
Select the distribution format that you require.
-
Click either Download to download the file or Read Me to view the Build Notes for this patch.
-
Copy the file onto a USB stick.
Mounting the Media Engine File
Once you have the installation file, you must install it on your hardware.
To mount the ME installation file:
-
Insert the USB stick onto your hardware and locate the USB stick partition to mount (for example, /dev/sdd1).
[root@localhost]# sudo <fdisk -l> -
Create a mount point and mount the installation file.
[root@localhost]# sudo mkdir /mnt/usb
[root@localhost]# sudo mount /dev/sdd1 /mnt/usb
-
Extract the files via "unzip".
Note:
The following is an example and uses example values only.[root@localhost]#cd /mnt/usb [root@localhost]# unzip 370m4p0-2016-03-24_22-51-16 Archive: 370m4p0-2016-03-24_22-51-16.zip inflating: 370m4p0/kernel-uekcov-debuginfo-3.8.13-118.4.1.370m4p0.69387.el7uekcov.x86_64.rpm inflating: 370m4p0/apache-commons-fileupload-1.3.1-4.el7.noarch.rpm inflating: 370m4p0/crtmpserver-690-3.el7.i686.rpm inflating: 370m4p0/slotmap-2.2.3-1.el7.i686.rpm inflating: 370m4p0/jre-8u65-fcs.1.el7.i686.rpm inflating: 370m4p0/asc-app-emblcrimport-E3.7.0.M4P0-69407.el7.i686.rpm inflating: 370m4p0/apache-commons-fileupload-javadoc-1.3.1-4.el7.noarch.rpm inflating: 370m4p0/portlet-2.0-api-1.0-9.el7.noarch.rpm inflating: 370m4p0/kernel-uekcov-debuginfo-common-3.8.13-118.4.1.370m4p0.69387.el7uekcov.x86_64.rpm inflating: 370m4p0/libipp-7.0-2.el7.i686.rpm inflating: 370m4p0/kernel-uekcov-covmodule-2.8.1-3.8.13.118.4.1.370m4p0.68883.el7uekcov.x86_64.rpm inflating: 370m4p0/postgresql-odbc-09.03.0100-2.el7.cov1.i686.rpm inflating: 370m4p0/asc-appliance-E3.7.0.M4P0-69407.el7.i686.rpm inflating: 370m4p0/kernel-uekcov-3.8.13-118.4.1.370m4p0.69387.el7uekcov.x86_64.rpm inflating: 370m4p0/libunwind-1.1-5.el7.2.i686.rpm inflating: 370m4p0/kernel-uekcov-firmware-3.8.13-118.4.1.370m4p0.69387.el7uekcov.x86_64.rpm inflating: 370m4p0/asc-selinux-policy-E3.7.0.M4P0-29.el7.noarch.rpm inflating: 370m4p0/asc-rescue-stick-E3.7.0.M4P0-29.el7.i686.rpm inflating: 370m4p0/asc-app-samples-E3.7.0.M4P0-69407.el7.i686.rpm inflating: 370m4p0/portlet-2.0-api-javadoc-1.0-9.el7.noarch.rpm inflating: 370m4p0/h264bitstream-0.1.6-1.el7.i686.rpm inflating: 370m4p0/rtmpdump-2.3-1.el7.i686.rpm inflating: 370m4p0/repodata/filelists.xml.gz inflating: 370m4p0/repodata/primary.xml.gz inflating: 370m4p0/repodata/repomd.xml inflating: 370m4p0/repodata/other.xml.gz
Note:
If your system does not have the ”unzip” package installed, execute the yum install unzip command.
Configuring a Yum Repository
Oracle Linux 7 uses ”yum” to install and update RPM files. Yum uses a URL to point at repositories. The URL must be pointed to the mounted USB directory you create when you mount the installation file, described in .
To configure a yum repository:
-
Create the repository entry using root permissions.
cat >/etc/yum.repos.d/asc.repo <<'!'
[asc-base]
name=Application Session Controller Base Repository
baseurl=file:///mnt/usb/370m4p0
gpgcheck=0
enabled=1
Configuring an Unconnected Network to a Yum Repository
If your system is not connected to a network, you must point the baseurl in the ”public-yum-ol7.repo” file to an Oracle Linux 7 ISO DVD image partition.
To configure an unconnected network to a yum repository:
-
Point the baseurl in the ”public-yum-ol7.repo” file to an Oracle Linux 7 ISO DVD image partition.
Note:
The following is an example and uses example values only.vi /etc/yum.repos.d/ public-yum-ol7.repo [ol7_latest] name=Oracle Linux $releasever Latest ($basearch) baseurl=http://servername/$basearch/ gpgkey=file:///etc/pki/rpm-gpg/RPM-GPG-KEY-oracle gpgcheck=1 enabled=0 [ol7_u2_base] name=Oracle Linux $releasever Update 2 installation media copy ($basearch) baseurl=file:///mnt/cdrom/Packages gpgkey=file:///etc/pki/rpm-gpg/RPM-GPG-KEY-oracle gpgcheck=1 enabled=1 [ol7_UEKR3] name=Latest Unbreakable Enterprise Kernel Release 3 for Oracle Linux $releasever ($basearch) baseurl=http://servername/$basearch/ gpgkey=file:///etc/pki/rpm-gpg/RPM-GPG-KEY-oracle gpgcheck=1 enabled=0
Installing the Media Engine Appliance
Once the yum repository is configured, you can install the ME appliance onto an Oracle Linux 7 system.
To install the ME appliance:
-
Enter the yum install command with root permissions.
[root@localhost]# yum install asc-appliance -
Reboot your Oracle Linux system so that it starts with the new ME appliance kernel required for the ME to operate properly.
-
Once you've successfully completed the installation, unmount the ME installation USB stick.
[root@localhost]# umount /dev/sdd1 /mnt/usb/