Installing the High Mount 7-Inch Customer Display for Workstation 6x5 Stand
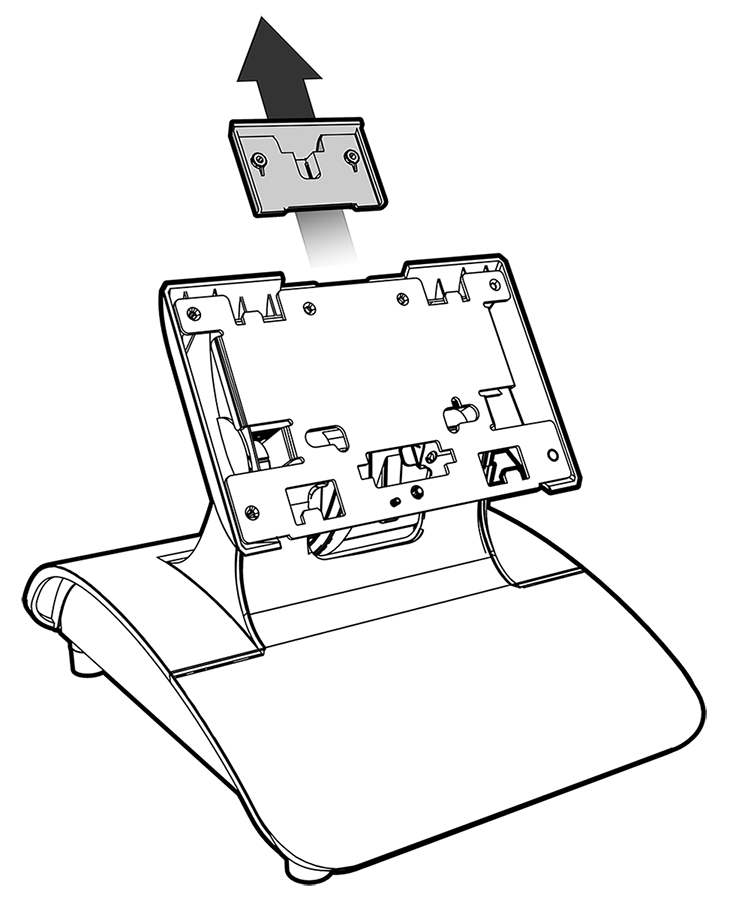
- Uninstall the display mount filler plate by pulling it away from the Workstation 6x5 stand. Removing the filler plate reveals an open slot for mounting a display.
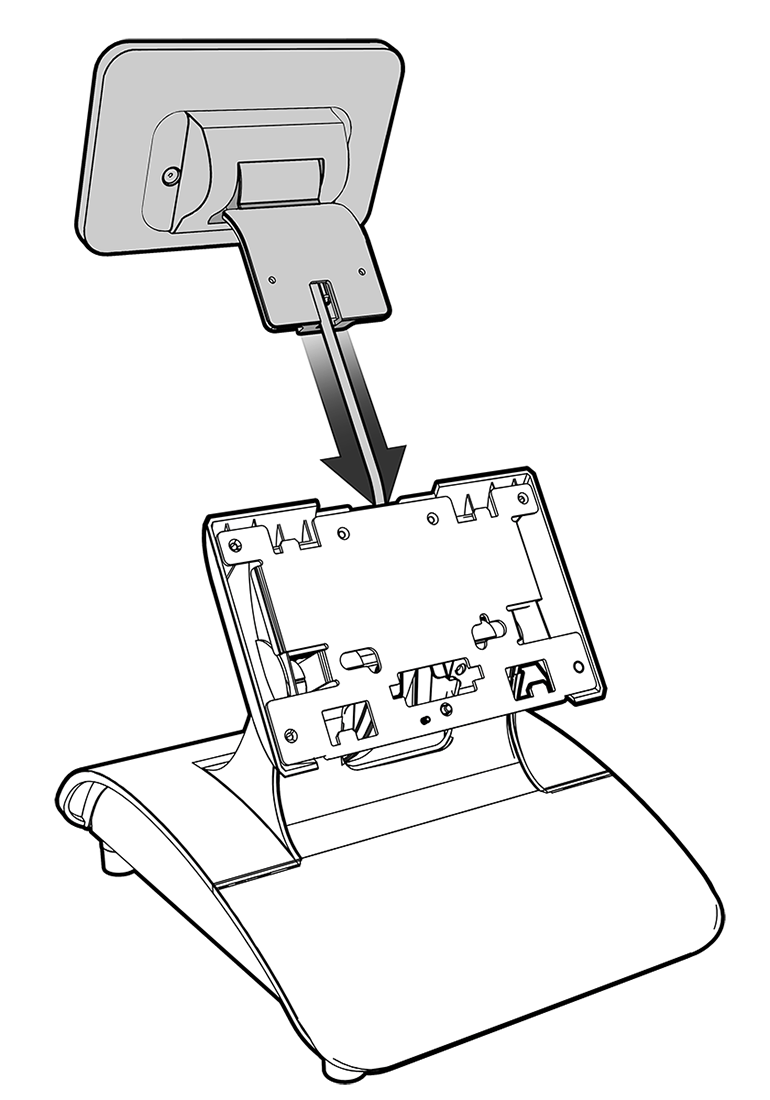
- Feed the High Mount 7-Inch Customer Display cable through the open slot and guide it through the opening in the stand neck, and then insert the High Mount 7-Inch Customer Display into the open slot.
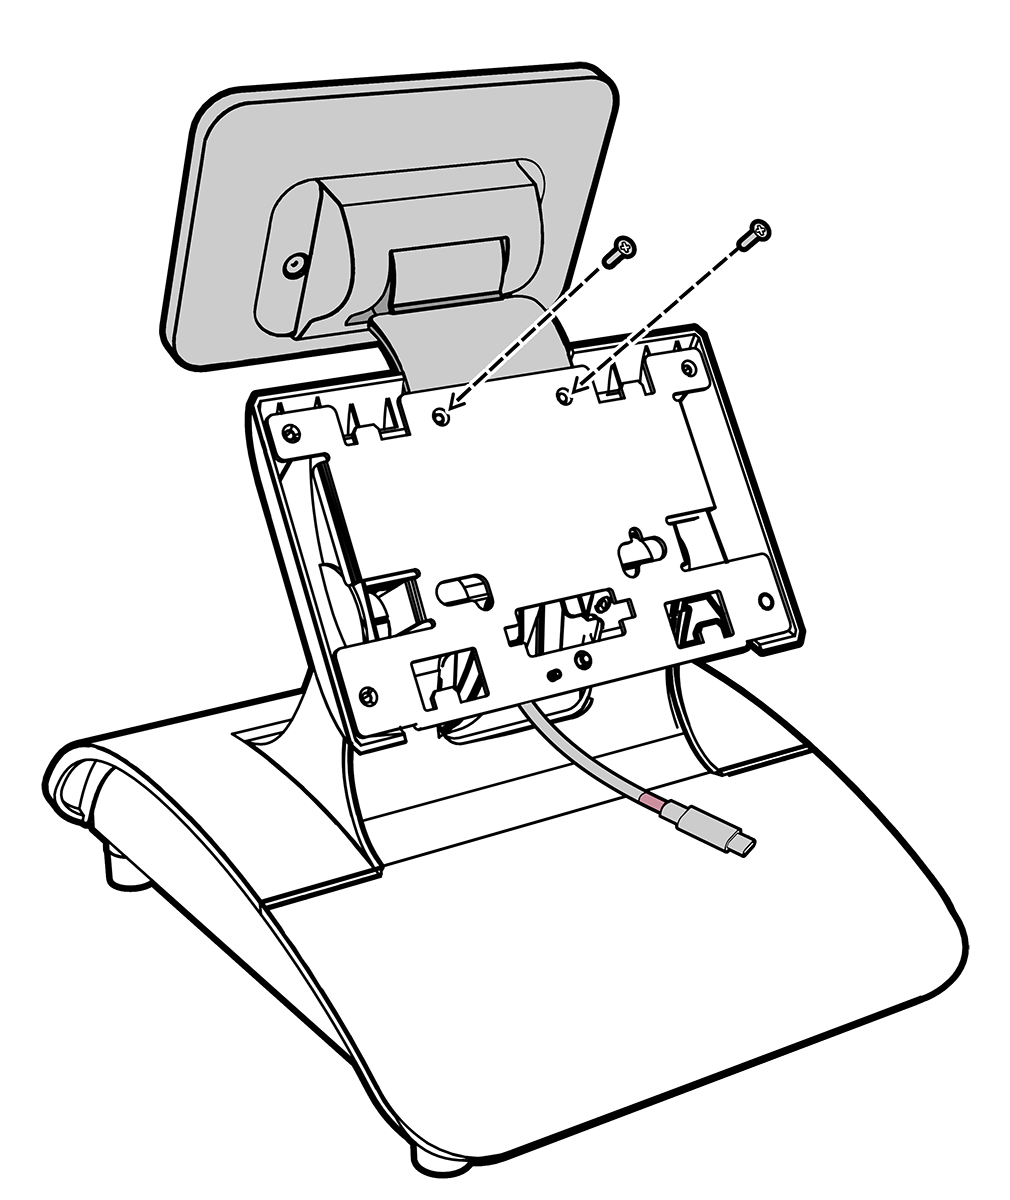
- Press firmly to ensure the High Mount 7-Inch Customer Display is properly installed in the slot, and then install the two included M3x10 screws in the two holes on the mounting plate using the included Phillips head tool or a Phillips head screwdriver.
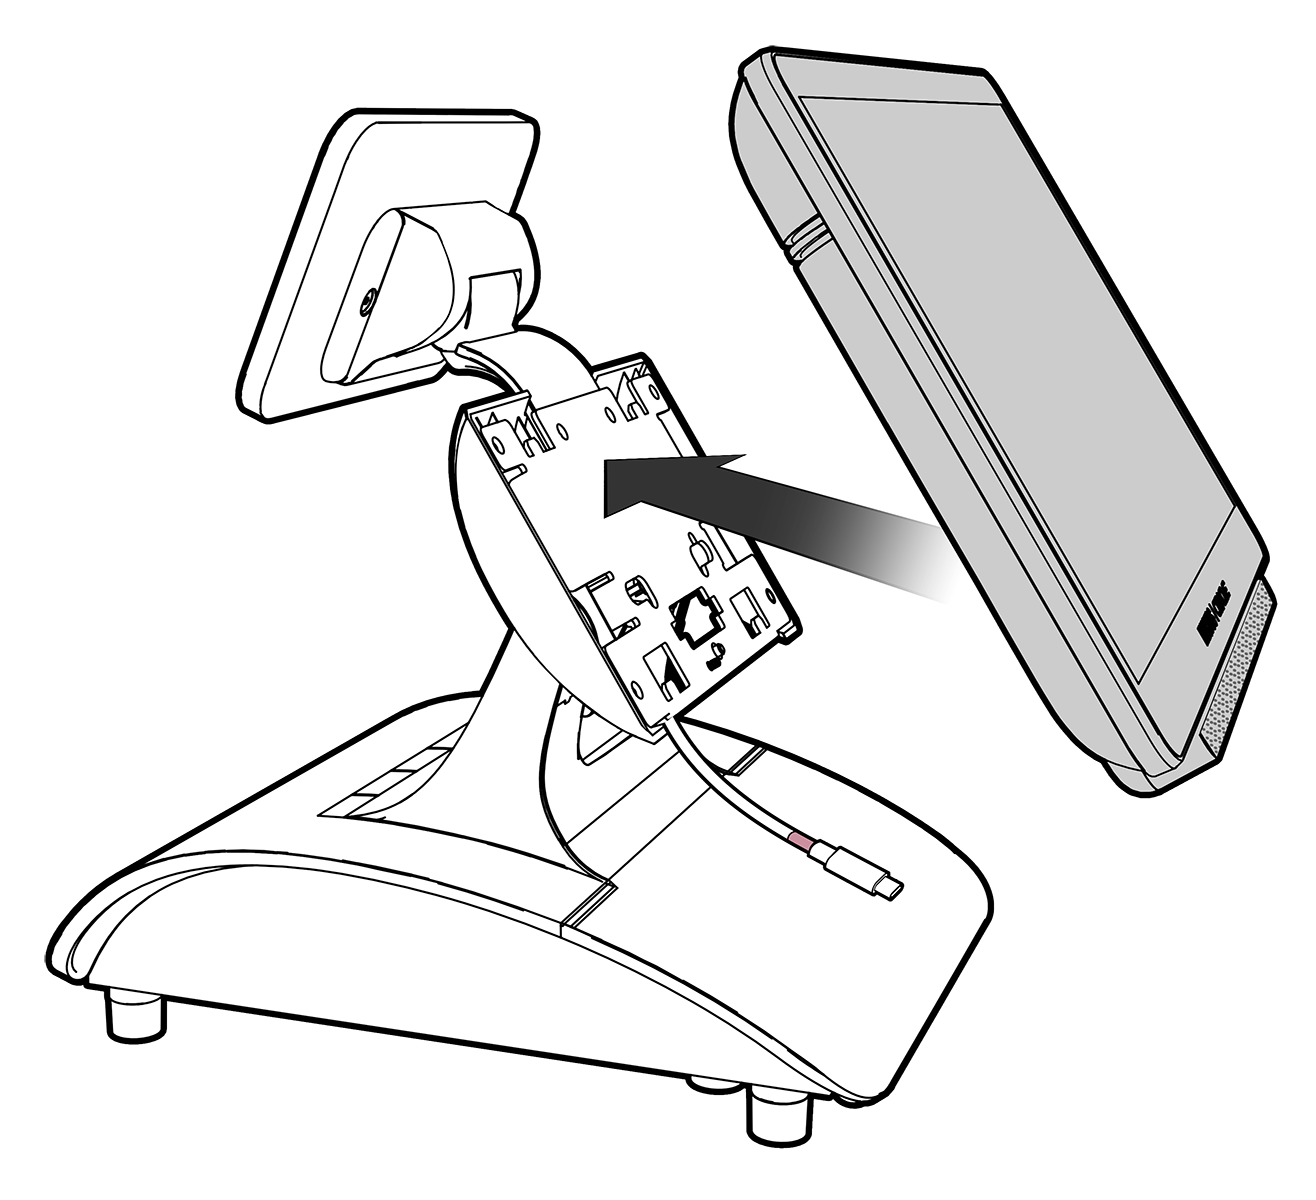
- Mount the Workstation 6x5 on the stand. See Mounting the Workstation on an Oracle MICROS Stand for more information.
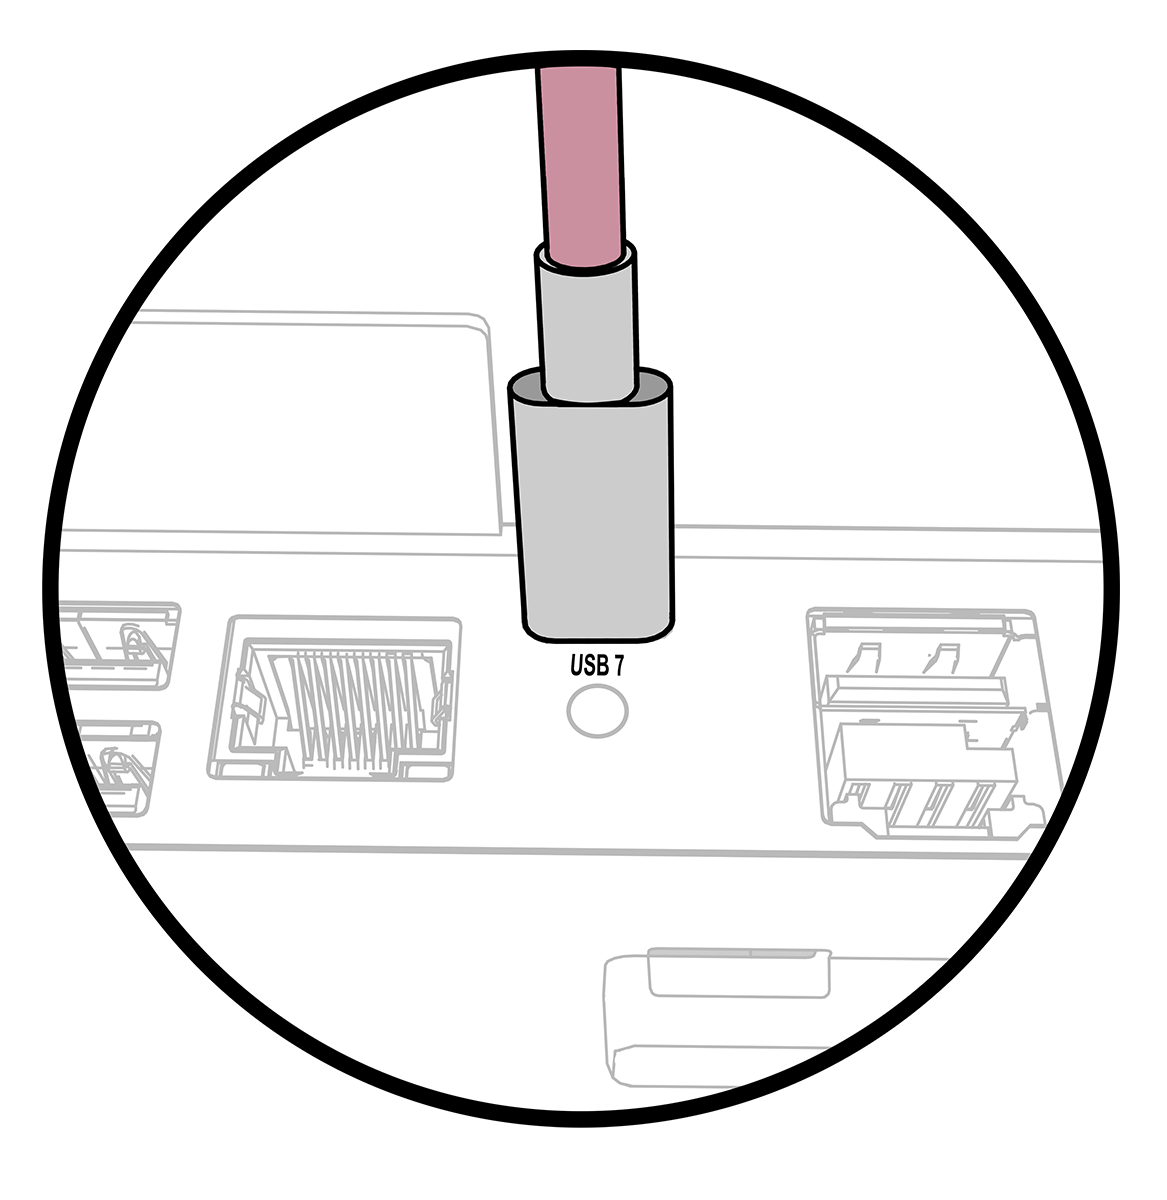
- Connect the High Mount 7-Inch Customer Display cable to the USB 7 port on the Workstation 6x5 IO panel. Use the included cable ties to secure the cable as needed.
- Enable the High Mount 7-Inch Customer Display in Oracle Simphony EMC:
- In the workstation record, click the Options tab, and then click the Display/Security subtab.
- Under Display Options, select Option 67 - Enable Customer Facing Display.