
User groups are used to define which part of the group of visitors to a site the experience will apply to. A user group specifies a set of rules or activities that a visitor must meet before they can qualify for the rest of the experience. Each user group has different information that needs to be set for it; the information set below will not match the information needed for any other user group.
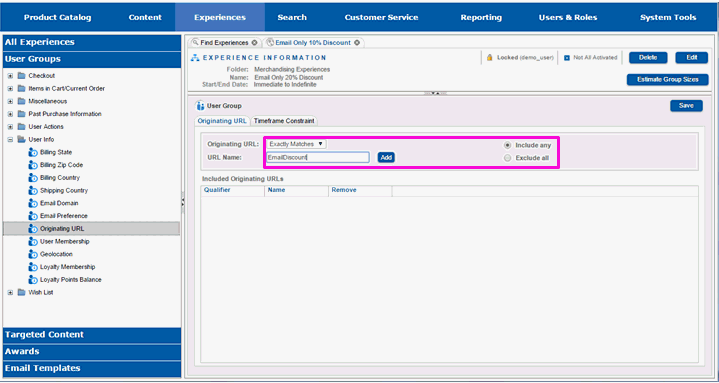
For this example, we will create a user group that segments visitors based on how they arrived at the site. If they arrived by clicking on the url included in their email or pasting into their browser, they will meet the requirements for the user group.
Select the User Groups pane in the left-hand menu.
You will see a list of all of the folders containing user groups.
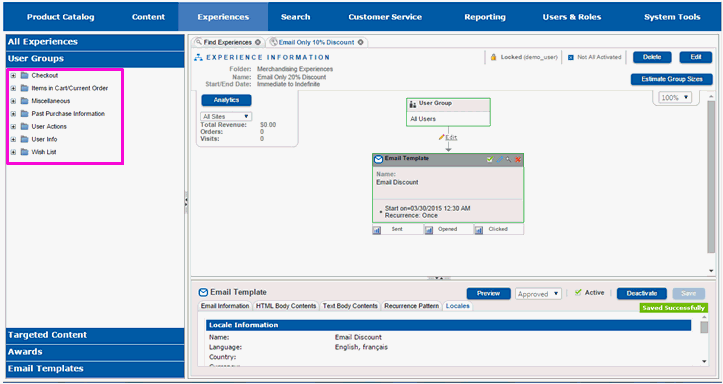
You will need to find the user group you want to use.
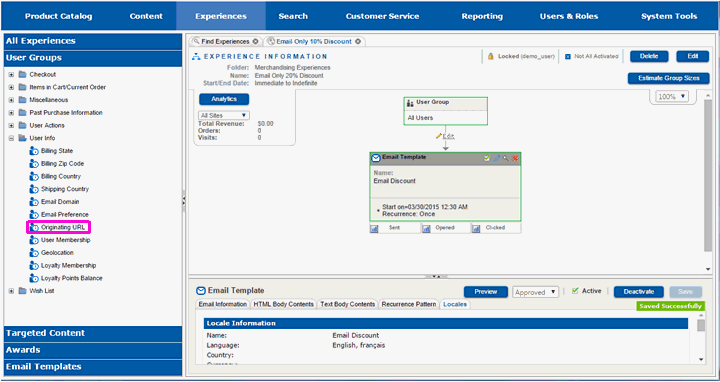
Select the plus (+) sign to the left of each group of user group, until you locate the user group you will use.
If necessary, move the divider so that there is space under the email template. You will need space to put the user group under it.
Select the user group and drag it into the right hand working pane. Do not lift the mouse key.
Lift the mouse key when the user group is on the Drop Here box under the Sent connector of the email group.
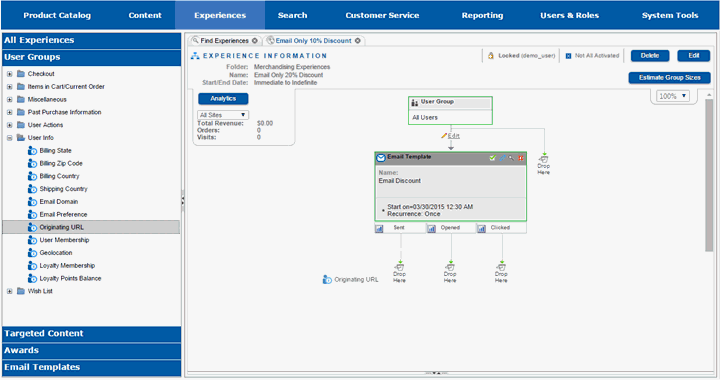
You will see a new box appear on the right hand work pane that represents the user group. The bottom of the right hand work pane will be filled in with the information that needs to be set for this user group.

Select the divider between the top and bottom panes and move it up so that you can see the entire bottom portion of the pane.
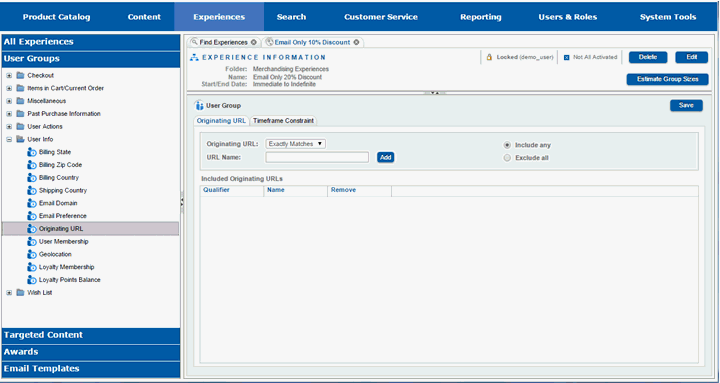
Enter the information needed to complete the user group. This will vary by user group.
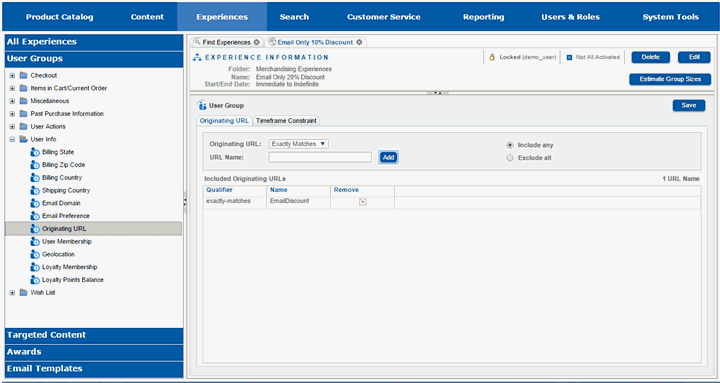
Select Save when you have entered all the information.
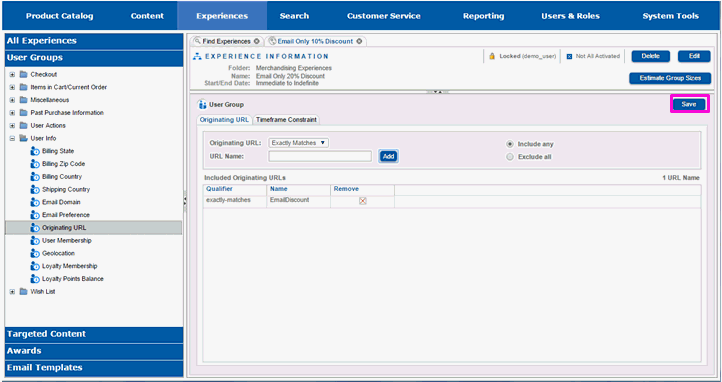
You will see a message that the save completed successfully.

Slide the divider back down so you can see the top portion of the right-hand work pane.
You will see that the outline of the user group box has turned green. That means the user group was successfully filled in with information and saved. This user group is now considered active in the experience.

Select the collapse icon in the upper right corner of the user group box to collapse the user group and create more space on the screen.
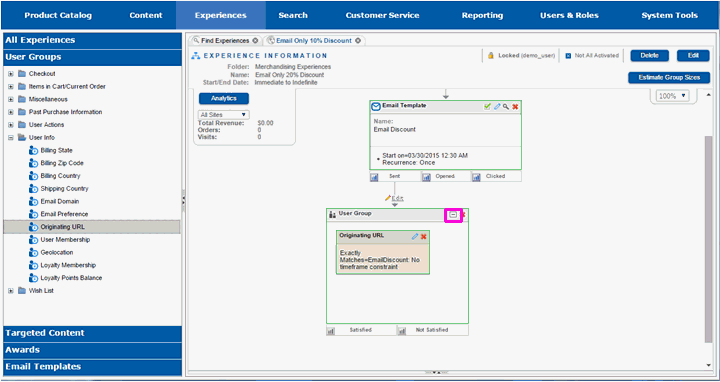
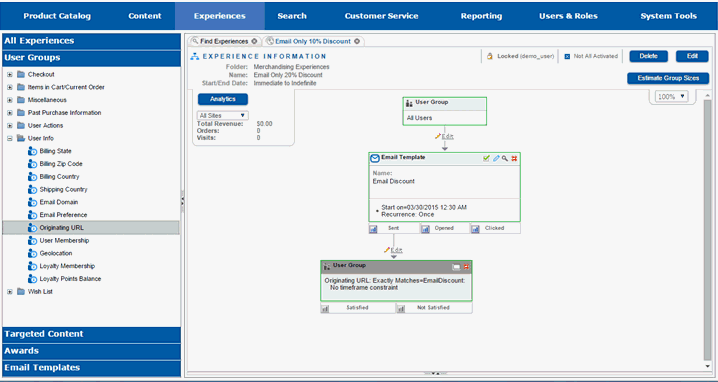
You will see two rectangles labeled Satisfied and Not Satisfied at the bottom of the user group box. These are connection points for additional components in the experience. If a visitor to the site fulfills the requirements of the user group, they will be eligible for whatever action is connected to the Satisfied connection. If they do not satisfy the requirements, they will be eligible for whatever action is connected to the Not Satisfied connection. It is not necessary to have components connected to each connection. If, for example, nothing should happen if the visitor does not meet the requirements of the user group, then nothing needs to be connected to the Not Satisfied connection.