| Siebel CRM Configuring Siebel Open UI Siebel Innovation Pack 2016, Rev. A E52417-01 |
|


 Previous |
 Next |
View PDF |
| Siebel CRM Configuring Siebel Open UI Siebel Innovation Pack 2016, Rev. A E52417-01 |
|
Previous |
Next |
View PDF |
This topic describes how to customize the logo, theme, background image, and style that Siebel Open UI displays in the client. It includes the following information:
You can make these modifications in the client at run time. You can then copy them into CSS files on the Siebel Server, and then deploy them to all users.
Starting with Siebel Innovation Pack 2014, Siebel Open UI defines the logo that it displays in the client in CSS files instead of coding the logo in a web template. It uses the following predefined code to display the logo in the Aurora theme for screen sizes larger than 1199 pixels:
#_sweclient #_sweappmenu .siebui-logo
   float: left;
height: 40px !important;
line-height: 40px;
background-image: url("../images/ebus.gif");
background-repeat: no-repeat;
background-origin: content-box;
background-position: 4px 12px;
width: 106px;
white-space: nowrap;
}
You can configure Siebel Open UI to override this code, or you can create your own custom theme so that you can display a custom logo. You can configure Siebel Open UI to display a separate logo in each theme. For more information about overriding an existing theme, or adding a new theme, see Open UI Deployment Guide (Article ID 1499842.1) on My Oracle Support.
To customize the logo
Create a JPG file that includes your custom logo.
For example, my-logo.jpg.
Copy the file you created in Step 1 to the following folders:
INSTALL_DIR\eappweb\PUBLIC\images\custom
Use an editor to open your custom CSS file that resides in the following folder:
INSTALL_DIR\eappweb\PUBLIC\files\custom
For example, open the my-style.css file.
Add the following code:
#_sweclient #_sweappmenu .siebui-logo {
  background-image: url('../../images/custom/my-logo.jpg')
}
(Optional) Modify the logo attributes, as necessary:
Use an editor to open your custom CSS file.
For example, open my-style.css.
Add your custom code.
Siebel Open UI uses the following predefined code to specify the logo attributes:
#_sweclient #_sweappmenu .siebui-logo {
  float: left;
  height: 40px !important;
  line-height: 40px;
  background-image: url("../images/ebus.gif");
  background-repeat: no-repeat;
  background-origin: content-box;
  background-position: 4px 12px;
  width: 106px;
  white-space: nowrap;
}
You can modify each of these attributes, as necessary. For example, you can modify the following width and height attributes to decrease the width and height of the logo to accommodate your custom logo image:
#_sweclient #_sweappmenu .siebui-logo {
  width: 25px;
  height: 25px;
}
Configure the manifest. For more information about how to do this step, see "Configuring Manifests":
Log in to a Siebel client with administrative privileges.
Navigate to the Administration - Application screen, and then the Manifest Files view.
Add the file that you modified in Step 4.
For this example, you add the following file:
custom/my-style.css
Navigate to the Manifest Expressions view.
In the Expressions list, add the following expression.
| Field | Value |
|---|---|
| Name | GRAY_TAB |
| Expression | LookupName (OUI_THEME_SELECTION, Preference ("Behavior","DefaultTheme")) = "GRAY_TAB"
where:
|
Navigate to the Manifest Administration view.
In the UI Objects list, specify the following object.
| Field | Value |
|---|---|
| Type | Application |
| Usage Type | Theme |
| Name | PLATFORM DEPENDENT |
In the Object Expression list, add the following subexpression.
| Field | Value |
|---|---|
| Group Name | Leave empty. |
| Expression | Desktop |
| Level | 1 |
| Operator | Leave empty. |
| Web Template Name | Leave empty. |
In the Object Expression list, add the following subexpression.
| Field | Value |
|---|---|
| Group Name | Leave empty. |
| Expression | Enter the value that you specified in e. |
| Level | 2 |
| Operator | Leave empty. |
| Web Template Name | Leave empty. |
Use the Move Up, Move Down, Indent, and Outdent buttons to rearrange the subexpressions, as necessary.
In the Files list, click Add.In the Files dialog box, click Query.
In the Name field, enter the following path and file name:
custom/my-style.css
Click Go.
Log out of the client, log back in to the client, and then verify that Siebel Open UI replaces the Oracle logo with your custom logo.
This topic includes an example that customizes the theme that Siebel Open UI displays in the client. It describes how to add a custom theme named Mobile Theme Gold that Siebel Open UI displays on a tablet.
The User Preferences - Behavior screen in the Siebel Mobile client allows the user to choose the theme that this client displays. Siebel Open UI comes predefined with one theme for the tablet and one theme for the phone, by default. It constrains the theme that the user can choose depending on whether the user uses a phone, tablet, or desktop computer.
To customize themes
Create a new style sheet named theme-gold.css. Save this new file in the following folder:
INSTALL_DIR\eappweb\PUBLIC\files\custom
You can use any .css file that includes your custom theme. You can also specify multiple .css files. For this example, use theme-gold.css.
Add the new theme to the OUI_THEME_SELECTION list of values:
Open Siebel Tools. Connect to the database that your Siebel Mobile application uses.
For more information, see Using Siebel Tools.
Click the Screens application-level menu, click System Administration, and then click List of Values.
Right-click in the List of Values list, and then click New Record.
Add the following value to the OUI_THEME_SELECTION list of values.
| Property | Value |
|---|---|
| Type | OUI_THEME_SELECTION |
| Display Value | Gold |
| Language-Independent Code | GOLD_THEME
The value that you specify must match the theme name that you define in Step 3 in the manifest. In this example, this name is GOLD_THEME. |
| Parent LIC | NAVIGATION_TAB
NAVIGATION_TREE NAVIGATION_SIDE |
Configure the manifest. For more information about how to do this step, see "Adding Custom Manifest Expressions":
Log in to a Siebel client with administrative privileges.
Navigate to the Administration - Application screen, and then the Manifest Files view.
Add the file that you created in Step 1.
For this example, add the following file:
files/custom/theme-gold.css
Navigate to the Manifest Expressions view.
In the Expressions list, add the following expression.
| Field | Value |
|---|---|
| Name | GOLD_THEME |
| Expression | LookupName (OUI_THEME_SELECTION, Preference ("Behavior","DefaultTheme")) = "GOLD_THEME"
where:
|
Navigate to the Manifest Administration view.
In the UI Objects list, specify the following object.
| Field | Value |
|---|---|
| Type | Application
This example configures Siebel Open UI to display your custom theme for the entire Siebel application. To specify this theme for a single object, see "Customizing Themes for Other Objects". |
| Usage Type | Theme |
| Name | PLATFORM DEPENDENT |
In the Object Expression list, add the following subexpression.
| Field | Value |
|---|---|
| Group Name | Leave empty. |
| Expression | Gold Theme
If you must add a theme to some other platform, such as a phone or desktop, then specify this other platform. For example, specify Phone instead of Tablet. |
| Level | 1 |
| Operator | Leave empty. |
| Web Template Name | Leave empty. |
In the Files list, add the file that you created in Step 1.
For this example, you add the following file:
files/custom/theme-gold.css
You can use the Sequence field to determine the sequence that Siebel Open UI uses when it downloads cascading style sheets.
Test your modifications:
Login to the Siebel Open UI client.
Click User Preferences, click Behavior, and then click Edit.
Verify that the Theme field includes the Gold value.
Click Gold, and then click Save.
Log out of the Siebel Open UI client, and then log back in.
Verify that the Siebel Open UI client displays Gold theme.
This topic describes how to customize themes other objects and portlet applications.
To customize themes for other objects and portlet applications
Do Step 1 through Step 4, except for Step 3g, and specify the object type and name of the object where Siebel Open UI must apply the style.
For example, to apply the style only for an applet, set the Type to Applet, and the Name to the applet name, such as Contact List Applet.
To specify the theme for another application, use the following expression:
GetProfileAttr("PortletId") = "PtId"
where:
PtId is the PtId argument of the URL to a Siebel portlet.
For example:
GetProfileAttr("PortletId") = "CRMOPTY1"
For more information about PtId, see "Configuring Siebel Open UI to Consume Siebel Portlets".
In Siebel Innovation Pack 2015, the Synergy theme was introduced. This topic describes elements of the Synergy theme that can be customized. For more information about the Synergy theme, see Fundamentals for Siebel Open UI.
By default, the landing page is enabled for all desktop applications. Follow the instructions in this topic to add a Synergy theme landing page for mobile applications.
To add landing page for mobile applications
Navigate to the Administration - Runtime Events screen, and then the Action Sets view.
Create an action set with a Name of your choosing and default field values.
Add a new action to the action set you created in step 2 with the following defined values:
| Field | Value |
|---|---|
| Name | Action Name
For example, Landing Page. |
| Sequence | 1 |
| Profile Attribute | Is Landing Page Enabled |
| Value | TRUE |
Navigate to the Administration - Runtime Events screen, and then the Action Sets view.
Create a run time event with the following values:
| Field | Value |
|---|---|
| Object Type | Application |
| Object Name | Name of application
For example, Siebel Universal Agent. |
| Event | Login |
| Action Set Name | Select the action set that was created in step 2. |
| Sequence | Sequence number |
Follow the instructions in this topic to configure Synergy theme landing page.
To configure content on landing pages
Navigate to the Administration - Personalization screen, and then the Applets view.
Query for the applet that you want to remove from the landing page.
Add the following expression:
GetProfileAttr("Is SUI_THEME Landing View") = 'FALSE'
|
Note: If there are any existing expressions, use the AND operator. |
By default, in Siebel Open UI, desktop applications are configured to have landing pages. Whereas mobile applications do not have default landing pages. Follow the instructions in this topic to skip the display of landing page entirely.
To remove landing pages
Navigate to the Administration - Runtime Events screen, and then the Action Sets view.
Create an action set with a Name of your choosing and default field values.
Add a new action to the action set you created in step 2 with the following defined values:
| Field | Value |
|---|---|
| Name | Action Name
For example, Remove Landing Page. |
| Sequence | 1 |
| Profile Attribute | Is Landing Page Enabled |
| Value | FALSE |
Navigate to the Administration - Runtime Events screen, and then the Action Sets view.
Create a run time event with the following values:
| Field | Value |
|---|---|
| Object Type | Application |
| Object Name | Name of application
For example, Siebel Universal Agent. |
| Event | Login |
| Action Set Name | Select the action set that was created in step 2. |
| Sequence | Sequence number |
Navigate to the Administration - Personalization screen, and then the Applets view.
Query for the Conditional Expression using containing the following string:
"*Is SUI_THEME Landing View*"
Select a record from the results of the search performed in step 7, then remove the following expression from the Conditional Expression string:
GetProfileAttr('Is SUI_THEME Landing View') = 'FALSE'
Repeat step 8 for every record returned in the search performed in step 7.
Select Reload Personalization Rules from the applet menu.
Siebel Open UI uses the view Title that you define in Siebel Tools to set the Browser tab label. If this Title is not defined, then Siebel Open UI displays the Id of the current record as the label. For example, it might display 2-HB474 as the Browser tab label:
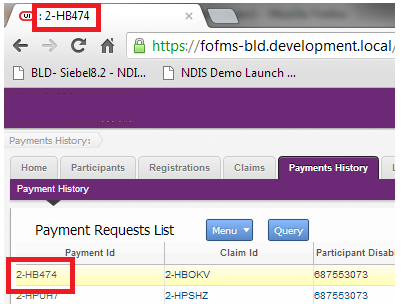
This topic describes how to customize Siebel Open UI so that it displays the view Title as the label.
To customize Browser tab labels
For more information, see Using Siebel Tools.
In the Object Explorer, click View.
In the Views list, query the Name property for the view that you must modify.
Enter a value in the Title property or the Title - String Override property.
For more information about setting these properties, see Configuring Siebel Business Applications.
Compile your modifications.
Test your modifications:
This topic describes how to use JavaScript instead of Siebel Tools to customize the browser tab label.
To use JavaScript to customize the browser tab label
Locate the following code:
SiebelApp.S_App.GetActiveView().GetTitle()
Siebel Open UI uses this code to get the browser tab label from the SRF. GetTitle returns the value of the Title property that you define in Siebel Tools. You can configure Siebel Open UI to override this value. For more information about GetTitle, see "Properties of the Presentation Model That Siebel Open UI Uses for Applets". For more information about GetActiveView, see "GetActiveView Method".
Override the value that Siebel Open UI gets from the SRF. Modify the code that you located in Step 1 with the following code:
SiebelApp.S_App.GetActiveView().GetTitle()
"label"
where:
label is a text string. Siebel Open UI displays this string as the Browser tab label.
For example, the following code displays Registration Details as the Browser tab label:
SiebelApp.S_App.GetActiveView().GetTitle()
"Registration Details"
Test your modifications.
The example in this topic describes how to modify the cascading style sheet. You move the Predefined Query (PDQ) to a different location and you modify the text color of the Predefined Query.
To use cascading style sheets to modify the position, dimension, and text attributes of an object
Add these CSS rules to the end of your custom style sheet, my-style.css:
#_sweclient #_sweappmenu .PDQToolbarContainer {
  position: absolute;
  top: 40px;
  left: 610px;
  width: 140px;
}
#_sweclient #_sweappmenu .PDQToolbarContainer select {
  color: red;
  width: 140px;
}
Save the my-style.css file.
Verify that the Predefined Query drop-down list appear to the right and below the Help menu.
This topic describes how to add custom fonts to Siebel Open UI. Although you can add custom fonts, it is recommended that your Siebel Open UI deployment use only Web-safe fonts because you might not be able to control font usage. For example, assume you deploy a custom font to all users in your company, and that you also add this font to Siebel Open UI. Assume that one of your Siebel Open UI users chooses this font in a text editor in Siebel Open UI, and then sends this text in an email message to an external customer who has not installed this custom font on their computer. In this situation, your Siebel Open UI user can read the font but the external customer cannot read it.
Using Web-safe fonts helps to make sure that any Browser or other client, such as a desktop computer or mobile device, can correctly render the text that your users provide, regardless of how each user configures font usage in their individual Browsers or clients, or the level of font customization that exists in your deployment environment. For more information about Web-safe fonts, see the topic that describes Web Safe Font Combinations at http://www.w3schools.com/cssref/css_websafe_fonts.asp.
To add fonts to Siebel Open UI
Create a JavaScript file that adds your custom font:
Create a new JavaScript file named ckeditorfontadditions.js, and then save this file in the custom folder.
For more information about this folder, see "Organizing Files That You Customize".
Add the following code to the file that you created in Step a. This code adds the fonts that Siebel Open UI displays in the Font picklists when the user edits text in the client:
if (typeof(SiebelAppFacade.CKEDITOREXTN) == "undefined") {
  Namespace('SiebelAppFacade.CKEDITOREXTN');
  (function() {
    SiebelApp.EventManager.addListner("postload", ckeditorextn, this);
    var updatedFont = "";
    function ckeditorextn() {
      try {
        if (CKEDITOR &&
          CKEDITOR.config.font_names !== updatedFont) {
          CKEDITOR.config.font_names = CKEDITOR.config.font_names +
            'font_families'
          updatedFont = CKEDITOR.config.font_names;
        }
      } catch (error) {
        // Nothing to do.
      }
    }
  }());
}
where:
CKEDITOR.config.font_names is a predefined function that Siebel Open UI uses to store the list of fonts that it uses.
font_families specifies one or more font families that Siebel Open UI uses to render the font.
catch (error) catches any error that might occur when Siebel Open UI attempts to render the fonts that you specify. If an error occurs, then Siebel Open UI uses a predefined font to display the control.
For this example, use the following code for font_families:
';Calibri/Calibri, Verdana, Geneva, sans-serif;'
For more information about how to specify the font family, see "Specifying Font Families".
Administer the manifest:
For more information about how to do this step, see "Configuring Manifests".
Log in to the client as an administrator.
Navigate to the Administration - Application screen, and then the Manifest Files view.
In the Files list, add the file that you created in Step 2.
You add the following record:
siebel/custom/ckeditorfontadditions.js
Navigate to the Administration - Application screen, and then the Manifest Administration view.
In the UI Objects list, add a new record. Use values from the following table.
| Type | Usage Type | Name |
|---|---|---|
| Application | Common | PLATFORM INDEPENDENT |
In the Object Expression list, add the following subexpression.
| Field | Value |
|---|---|
| Group Name | Leave empty. |
| Expression | Desktop |
| Level | 1 |
| Operator | Leave empty. |
| Web Template Name | Leave empty. |
In the Files list, add the file that you created in Step 2.
You add the following record:
siebel/custom/ckeditorfontadditions.js
Refresh the manifest. Log out of the client, and then log back in to the client.
Verify that Siebel Open UI added your custom fonts:
Navigate to the Administration Communications screen, and then the All Templates view.
In the Compose Template section, in the Text window, click the Font drop-down, and then make sure the Font list displays the font that you specified in Step 1b .
You can use the following code to specify the font family:
function ckeditorextn() {
  try {
    if (CKEDITOR &&
      CKEDITOR.config.font_names !== updatedFont) {
      CKEDITOR.config.font_names = CKEDITOR.config.font_names +
        'font_families'
      updatedFont = CKEDITOR.config.font_names;
    }
  } catch (error) {
    // Nothing to do.
where:
font_families specifies one or more font families that Siebel Open UI uses to render the font.
font_families can include one or more families. You must precede each font family with a semi-colon (;). For example:
;font_family_1;font_family_2;font_family_n
You must use the following format for each font family:
font_name/font_label,substitute_font_1,substitute_font_2, substitute_font_n, generic_font_family
where:
font_name specifies the name of the font, such as Calibri.
font_label specifies the text label. It displays this label in the Font picklists in the client.
substitute_font_1 specifies the font if the font that font_name specifies does not exist in the client computer.
substitute_font_2 specifies the font if the font that substitute_font_1 specifies does not exist in the client computer.
generic_font_family specifies the font family if the font that substitute_font_n specifies does not exist in the client computer. Siebel Open UI chooses a font from this generic font family.
It is recommended that you specify a substitution font that resembles the font that it substitutes. For example, Calibri is a sans-serif, proportionally spaced font. If you specify Calibri as the font_name, then it is recommended that you specify a close approximation to Calibri for substitute_font_1, such as Verdana, which is also a sans-serif, proportionally spaced font. It is recommended that you use this same approach when you specify the remaining substitution fonts. For example, specify Geneva for substitute_font_2.
Consider the following example:
';Calibri/My Font, Verdana, Geneva, sans-serif;'
This code configures Siebel Open UI to do the following:
Adds Calibri to the list of fonts that Siebel Open UI displays in Font picklists.
Uses My Font as the label for the Calibri font that Siebel Open UI displays in Font picklists.
If Calibri is not installed on the client computer, then Siebel Open UI uses the following sequence to determine the font that it displays:
Uses Verdana for My Font.
If Verdana is not installed on the client computer, then it uses Geneva for My Font.
If Geneva is not installed on the client computer, then it uses any sans-serif font that is installed on the client computer for My Font.
If you specify a font that includes a space character, then you must use double-quotes to enclose the entire font name. For example, you must use double quotes to enclose Times New Roman and Courier New:
';"Times New Roman"/My Font,Georgia,"Courier New",Serif;'
For more information about font families, see the topic that describes the CSS font family property at the W3 Schools website at http://www.w3schools.com/cssref/pr_font_font-family.asp.
